The fall baking exchange was in 48 hours and I’d completely forgotten. Everyone else would be bringing their signature masterpieces—elaborate layer cakes with mirror glazes, perfectly piped French macarons, and those intricate laminated dough pastries that take three days. I had a half-used block of butter in the fridge, some pumpkin puree from a random Tuesday night dinner experiment, and honestly, a mild panic setting in.
I mean, I love baking, but I’m not a show-off about it. Let’s face it, I’m the person who usually brings the “simple but good” thing to these events. But this time, I felt the pressure. My neighbor, Karen, was bringing her infamous bourbon pecan tart that people talk about for months. So there I was, staring at my pantry, wondering if I could just buy a store-bought pie and pretend.
But then, I remembered a trick I’d picked up from an old cooking magazine—browning butter. It sounded fancy but was actually just letting butter get a little nutty and toasty in a pan. And I thought, what if I mixed that with pumpkin and made snickerdoodles? Maybe you’ve been there, trying to combine two things you love into one desperate, last-minute creation. I didn’t have high hopes. I just needed something edible.
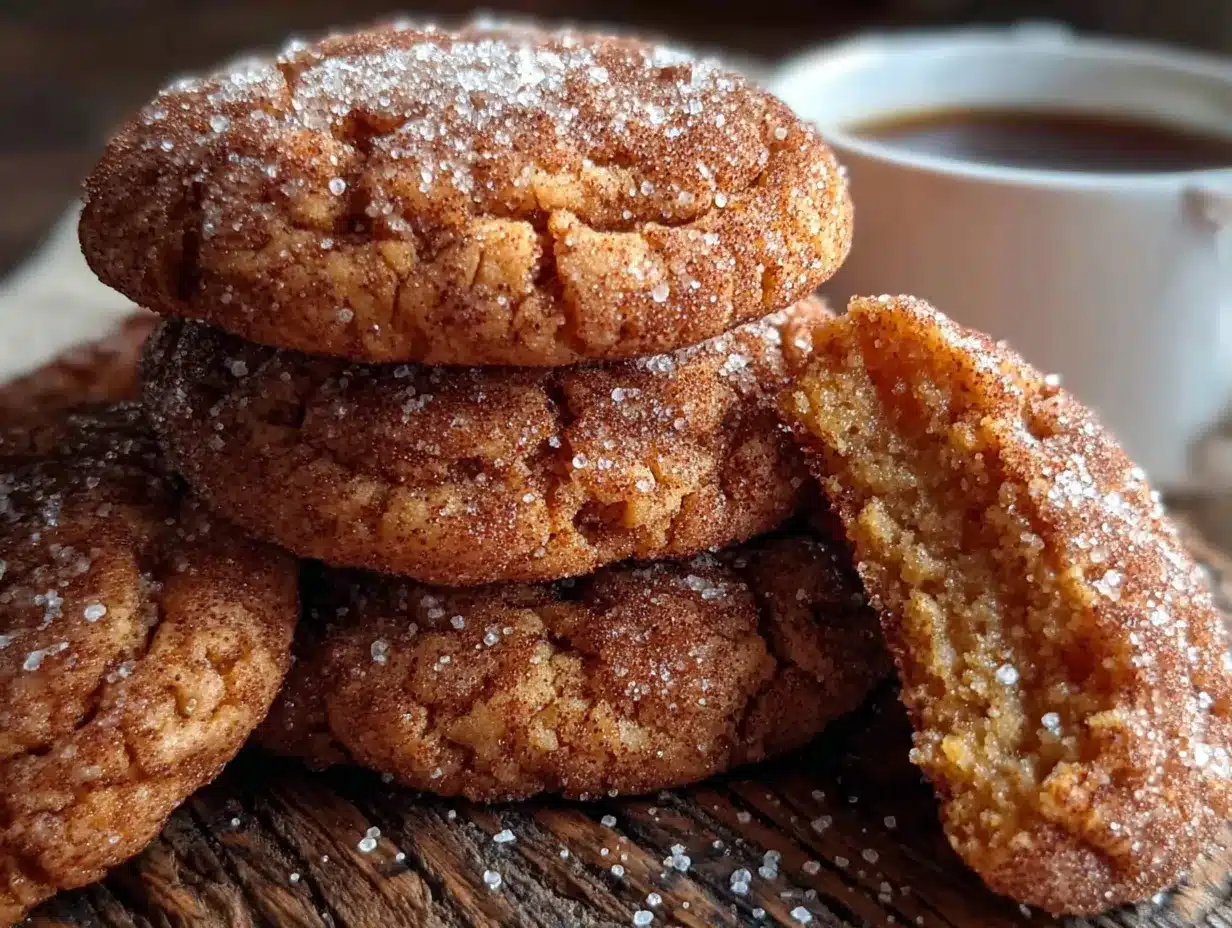
The result was, honestly, a little ridiculous. The cookies came out soft, chewy, with these crispy edges that had a deep, almost caramel flavor from the brown butter. The pumpkin made them tender, and the cinnamon-sugar coating gave them that classic snickerdoodle look. At the exchange, they were gone in twenty minutes. Karen even asked for the recipe. That’s when I knew this wasn’t just a happy accident—it was a recipe I’d keep making forever.
Why You’ll Love These Brown Butter Pumpkin Snickerdoodle Cookies
These aren’t your average snickerdoodles. The combination of nutty brown butter and earthy pumpkin creates a flavor that’s both familiar and surprising. It’s the kind of cookie that makes you close your eyes after the first bite.
- Quick & Easy: Ready in about 25 minutes from start to finish. Perfect for when you need a last-minute dessert or a weekend baking project without the fuss.
- Simple Ingredients: You probably have most of these in your pantry right now. No weird extracts or hard-to-find spices.
- Perfect for Fall Gatherings: Great for Thanksgiving, Halloween parties, or just a cozy afternoon with a cup of coffee.
- Crowd-Pleaser: Kids love the cinnamon-sugar coating, and adults appreciate the sophisticated brown butter flavor. It’s a win-win.
- Unbelievably Delicious: The texture is soft and chewy in the middle with slightly crisp edges. The pumpkin keeps them moist without making them cakey.
What makes this recipe different is the brown butter technique. It’s not just melted butter—it’s butter that’s been cooked until the milk solids turn golden and smell like toasted nuts. This adds a depth of flavor that regular snickerdoodles just don’t have. Plus, the pumpkin puree adds a subtle sweetness and a beautiful orange hue. This isn’t just another version of a classic cookie. It’s the best version.
What Ingredients You Will Need
This recipe uses simple, wholesome ingredients to deliver bold flavor and satisfying texture without the fuss. Most of these are pantry staples, which makes this a great go-to recipe when you’re craving something special.
For the Brown Butter
- 1/2 cup (1 stick or 113g) unsalted butter — I prefer using unsalted so I can control the salt level myself. If you only have salted, just reduce the added salt in the dough by a pinch.
For the Cookie Dough
- 1/2 cup (100g) granulated sugar — Adds sweetness and helps create those slightly crispy edges.
- 1/4 cup (50g) packed light brown sugar — Adds moisture and a hint of molasses flavor that pairs beautifully with the pumpkin.
- 1/3 cup (80g) pumpkin puree — Make sure you’re using pure pumpkin puree, not pumpkin pie filling. The pie filling has added sugar and spices that will throw off the recipe.
- 1 large egg yolk — The yolk adds richness and helps keep the cookies tender. Save the white for an omelet or a face mask!
- 1 teaspoon vanilla extract — Pure vanilla extract is best, but imitation will work in a pinch.
- 1 1/2 cups (188g) all-purpose flour — Spoon and level your flour for the most accurate measurement. Scooping directly from the bag can pack in too much flour, making the cookies dry.
- 1/2 teaspoon baking soda — Helps the cookies spread just the right amount.
- 1/2 teaspoon cream of tartar — This is the secret to that classic snickerdoodle tang and chewiness. Don’t skip it!
- 1/4 teaspoon salt — Balances the sweetness and enhances all the other flavors.
- 1 teaspoon ground cinnamon — Warm and aromatic, it’s a must for any snickerdoodle.
- 1/2 teaspoon ground ginger — Adds a little warmth and spice that complements the pumpkin.
- 1/4 teaspoon ground nutmeg — A classic fall spice that ties everything together.
For the Cinnamon-Sugar Coating
- 1/4 cup (50g) granulated sugar
- 1 tablespoon ground cinnamon
Ingredient Selection Tip: For the best pumpkin flavor, I recommend using Libby’s pumpkin puree. It’s consistently thick and not watery, which helps the cookies hold their shape. If you’re using a different brand, you might need to blot the puree with a paper towel to remove excess moisture.
Substitution Guidance: For a gluten-free option, you can substitute the all-purpose flour with a 1:1 gluten-free baking flour blend. For a dairy-free version, use a high-quality vegan butter stick (not margarine) for browning. Just keep in mind that the flavor and texture might vary slightly.
Equipment Needed
You don’t need a fancy kitchen to make these cookies. Here’s what you’ll need:
- Medium saucepan — For browning the butter. A light-colored pan is best so you can see the butter change color.
- Large mixing bowl — For combining the wet and dry ingredients.
- Medium mixing bowl — For whisking the dry ingredients.
- Whisk — To ensure everything is evenly combined.
- Rubber spatula — For folding the dry ingredients into the wet without overmixing.
- Baking sheet — A light-colored, rimmed baking sheet works best for even baking.
- Parchment paper or silicone baking mat — This prevents sticking and makes cleanup a breeze. I’ve used both, and honestly, I prefer parchment paper for the slightly crispier bottoms.
- Cookie scoop (about 1.5 tablespoons) — Not essential, but it helps you get evenly sized cookies that bake at the same rate.
- Cooling rack — Allows air to circulate around the cookies so they cool evenly without getting soggy.
If you don’t have a cookie scoop, you can use two spoons to drop the dough. And if you don’t have a cooling rack, you can just let the cookies cool on the baking sheet for a few minutes before carefully transferring them to a plate. It’s not ideal, but it works!
Preparation Method
Follow these steps carefully, and you’ll have perfect brown butter pumpkin snickerdoodle cookies in no time.
- Brown the butter: Place the 1/2 cup of unsalted butter in a medium saucepan over medium heat. Let it melt completely, then continue cooking, swirling the pan occasionally. The butter will start to foam, then the foam will subside, and you’ll see golden brown specks forming at the bottom. This takes about 5-7 minutes. Once it smells nutty and toasty, remove it from the heat immediately and pour it into a heatproof bowl to stop the cooking process. Let it cool for 10 minutes. Don’t skip this cooling step—if the butter is too hot, it will cook the egg yolk later.
- Preheat and prep: While the butter is cooling, preheat your oven to 350°F (175°C). Line your baking sheet with parchment paper or a silicone mat.
- Mix the wet ingredients: In a large mixing bowl, whisk together the cooled brown butter, 1/2 cup granulated sugar, and 1/4 cup packed light brown sugar until smooth and well combined. It should look like a thick paste. Add the 1/3 cup pumpkin puree, 1 large egg yolk, and 1 teaspoon vanilla extract. Whisk again until everything is fully incorporated and the mixture is smooth. It might look a little separated at first, but keep whisking—it will come together.
- Combine the dry ingredients: In a separate medium mixing bowl, whisk together the 1 1/2 cups all-purpose flour, 1/2 teaspoon baking soda, 1/2 teaspoon cream of tartar, 1/4 teaspoon salt, 1 teaspoon ground cinnamon, 1/2 teaspoon ground ginger, and 1/4 teaspoon ground nutmeg. Make sure there are no lumps, especially with the baking soda and cream of tartar.
- Combine wet and dry: Gradually add the dry ingredients to the wet ingredients, mixing with a rubber spatula just until no streaks of flour remain. Do not overmix! Overmixing can develop the gluten too much, making the cookies tough. The dough will be soft and slightly sticky—that’s exactly what you want.
- Make the coating: In a small bowl, stir together the 1/4 cup granulated sugar and 1 tablespoon ground cinnamon.
- Shape the cookies: Using a cookie scoop or a tablespoon, scoop out about 1.5 tablespoons of dough. Roll it into a ball between your palms. The dough will be a bit sticky, so if needed, lightly dampen your hands with water. Drop the dough ball into the cinnamon-sugar mixture and roll it around to coat completely. Place the coated dough balls on the prepared baking sheet, spacing them about 2 inches apart. They will spread a little, so don’t crowd them.
- Bake: Bake for 10-12 minutes, or until the edges are set and lightly golden. The centers will still look soft and slightly underdone—that’s okay! They will continue to set as they cool. For softer, chewier cookies, bake for 10 minutes. For slightly crispier cookies, go for 12 minutes. My sweet spot is 11 minutes.
- Cool: Let the cookies cool on the baking sheet for 5 minutes. This allows them to firm up enough to be moved. Then, transfer them to a wire cooling rack to cool completely. If you try to move them too soon, they might fall apart. Trust me, I’ve learned this the hard way!
Sensory Cue: When the cookies are done, your kitchen will smell like a cozy autumn bakery—warm cinnamon, nutty brown butter, and sweet pumpkin. The edges will be a light golden brown, and the tops will have that classic crackled look from the cinnamon-sugar coating.
Cooking Tips & Techniques
Here are some pro tips I’ve picked up from my many batches of these cookies:
- Don’t rush the brown butter: This is the most important step. If you undercook it, you won’t get that nutty flavor. If you overcook it, it can burn and become bitter. Watch for the color change and that amazing nutty aroma. Once you see the brown specks and smell the toastiness, pull it off the heat.
- Use room temperature ingredients: The pumpkin puree and egg yolk should be at room temperature so they blend smoothly into the brown butter. If you forgot to take them out of the fridge, you can place the egg yolk in a bowl of warm water for 5 minutes and microwave the pumpkin puree for 10 seconds.
- Chill the dough if needed: If your kitchen is very warm or the dough feels too soft and sticky to roll, pop it in the refrigerator for 15-20 minutes. This will make it easier to handle and prevent the cookies from spreading too much in the oven.
- Use a light-colored baking sheet: Dark baking sheets absorb more heat and can cause the bottoms of the cookies to burn before the centers are done. If you only have dark sheets, reduce the oven temperature by 25°F and check the cookies a minute or two earlier.
- My biggest failure: The first time I made these, I forgot the cream of tartar. The cookies were flat and didn’t have that signature snickerdoodle tang. They still tasted okay, but they weren’t snickerdoodles. Don’t be like me—double-check your ingredients before you start!
Variations & Adaptations
One of the best things about this recipe is how easy it is to adapt. Here are some variations I’ve tried and loved:
- Chocolate Chip Pumpkin Snickerdoodles: After mixing the dough, fold in 1/2 cup of semi-sweet chocolate chips. The chocolate pairs beautifully with the pumpkin and brown butter flavors. My kids beg for this version.
- Vegan Brown Butter Pumpkin Snickerdoodles: Use a high-quality vegan butter stick for the brown butter, substitute the egg yolk with 1 tablespoon of flaxseed meal mixed with 3 tablespoons of water (let it sit for 5 minutes to thicken), and use a dairy-free 1:1 gluten-free flour blend. The texture will be slightly different, but still delicious!
- Spiced-Up Version: Add 1/4 teaspoon of ground cloves and a pinch of cardamom to the dry ingredients for an even more complex spice profile. This is perfect for the holidays.
- Gluten-Free Pumpkin Snickerdoodles: Substitute the all-purpose flour with a good quality 1:1 gluten-free baking flour blend that contains xanthan gum. I’ve used Bob’s Red Mill 1:1 Baking Flour with great results. The cookies might be a little more delicate, so handle them gently.
- Pumpkin Snickerdoodle Sandwich Cookies: Make the cookies slightly larger (use 2 tablespoons of dough per cookie) and bake for 12-13 minutes. Once cooled, sandwich them with a cream cheese frosting or a brown butter buttercream. It’s a showstopper dessert.
Serving & Storage Suggestions
These cookies are best enjoyed slightly warm, when the edges are still a little crisp and the center is soft and gooey. Serve them with a cold glass of milk, a warm cup of coffee, or a chai latte for the ultimate fall treat.
Storage: Store the completely cooled cookies in an airtight container at room temperature. They will stay fresh for up to 5 days. I like to place a slice of plain bread in the container—it absorbs excess moisture and keeps the cookies soft. Just replace the bread slice every day or two.
Freezing Instructions: These cookies freeze beautifully. You can freeze the baked cookies in a freezer-safe bag or container for up to 3 months. To thaw, just leave them at room temperature for about 30 minutes. You can also freeze the unbaked dough balls. Roll them, coat them in the cinnamon-sugar mixture, and place them on a parchment-lined baking sheet. Freeze until solid, then transfer to a freezer bag. When you’re ready to bake, just place the frozen dough balls on a baking sheet and add 2-3 minutes to the baking time. No need to thaw!
Flavor Development: Honestly, these cookies taste even better the next day. The flavors have time to meld together, and the texture becomes even more tender. If you can resist eating them all on day one, you’re in for a treat on day two.
Nutritional Information & Benefits
Here’s the estimated nutritional information for one cookie (based on a batch of 18 cookies):
| Nutrient | Amount per Cookie |
|---|---|
| Calories | 145 |
| Total Fat | 7g |
| Saturated Fat | 4g |
| Cholesterol | 25mg |
| Sodium | 85mg |
| Total Carbohydrates | 20g |
| Dietary Fiber | 1g |
| Sugars | 12g |
| Protein | 2g |
While these are definitely a treat, the pumpkin puree adds a good amount of vitamin A, which is great for eye health and immune function. The brown butter provides a small amount of calcium and healthy fats. Plus, the cinnamon has anti-inflammatory properties. So, you can feel a little bit good about indulging in one (or two)!
Dietary Considerations: This recipe contains gluten, dairy, and eggs. For gluten-free and dairy-free options, see the variations section above.
Frequently Asked Questions
Can I use pumpkin pie filling instead of pumpkin puree?
No, I wouldn’t recommend it. Pumpkin pie filling has added sugar, spices, and sometimes other thickeners. It will make your cookies too sweet and throw off the texture. Stick with 100% pure pumpkin puree for the best results.
Why did my cookies turn out flat?
Flat cookies are usually caused by one of two things: either the butter was too warm when you mixed the dough, or the dough wasn’t chilled before baking. If your kitchen is warm, try chilling the dough for 15-20 minutes before rolling and baking. Also, make sure your baking soda and cream of tartar are fresh—they lose their potency over time.
Can I make these cookies without cream of tartar?
You can, but the texture and flavor won’t be the same. Cream of tartar gives snickerdoodles their characteristic tangy flavor and chewy texture. If you don’t have it, you can substitute it with 1 teaspoon of lemon juice or white vinegar, but the results will be different. I’d recommend just getting some cream of tartar—it’s cheap and lasts forever!
How do I know when the brown butter is done?
Look for the visual cues. The butter will go through several stages: it will melt, then foam, then the foam will subside. At that point, you’ll start to see little brown specks forming at the bottom of the pan. The color will change from yellow to a golden amber. And most importantly, it will smell nutty and toasty. As soon as you see those brown specks and smell that nutty aroma, remove it from the heat immediately.
Can I double this recipe?
Absolutely! This recipe doubles beautifully. Just make sure you have a large enough bowl to mix everything. When browning the butter for a double batch, use a larger saucepan and keep a close eye on it—it might brown a little faster since there’s more butter in the pan.
Conclusion
These brown butter pumpkin snickerdoodle cookies are more than just a recipe—they’re a little piece of fall magic. They’re the cookie that saves you when you’ve forgotten about the bake sale, the treat that makes your house smell like a holiday, and the dessert that gets you asked for the recipe. The combination of nutty brown butter, warm pumpkin, and classic cinnamon-sugar coating is just unbeatable.
I really hope you give these a try. Don’t be afraid to make them your own—add some chocolate chips, spice them up a little, or just follow the recipe exactly as written. Either way, you’re in for a treat. And if you do make them, please come back and let me know how they turned out! Leave a comment below, share a photo on Pinterest, or tag me in your baking adventures. I absolutely love seeing your creations.
Happy baking, and remember—sometimes the best recipes come from a little bit of panic and a whole lot of love.
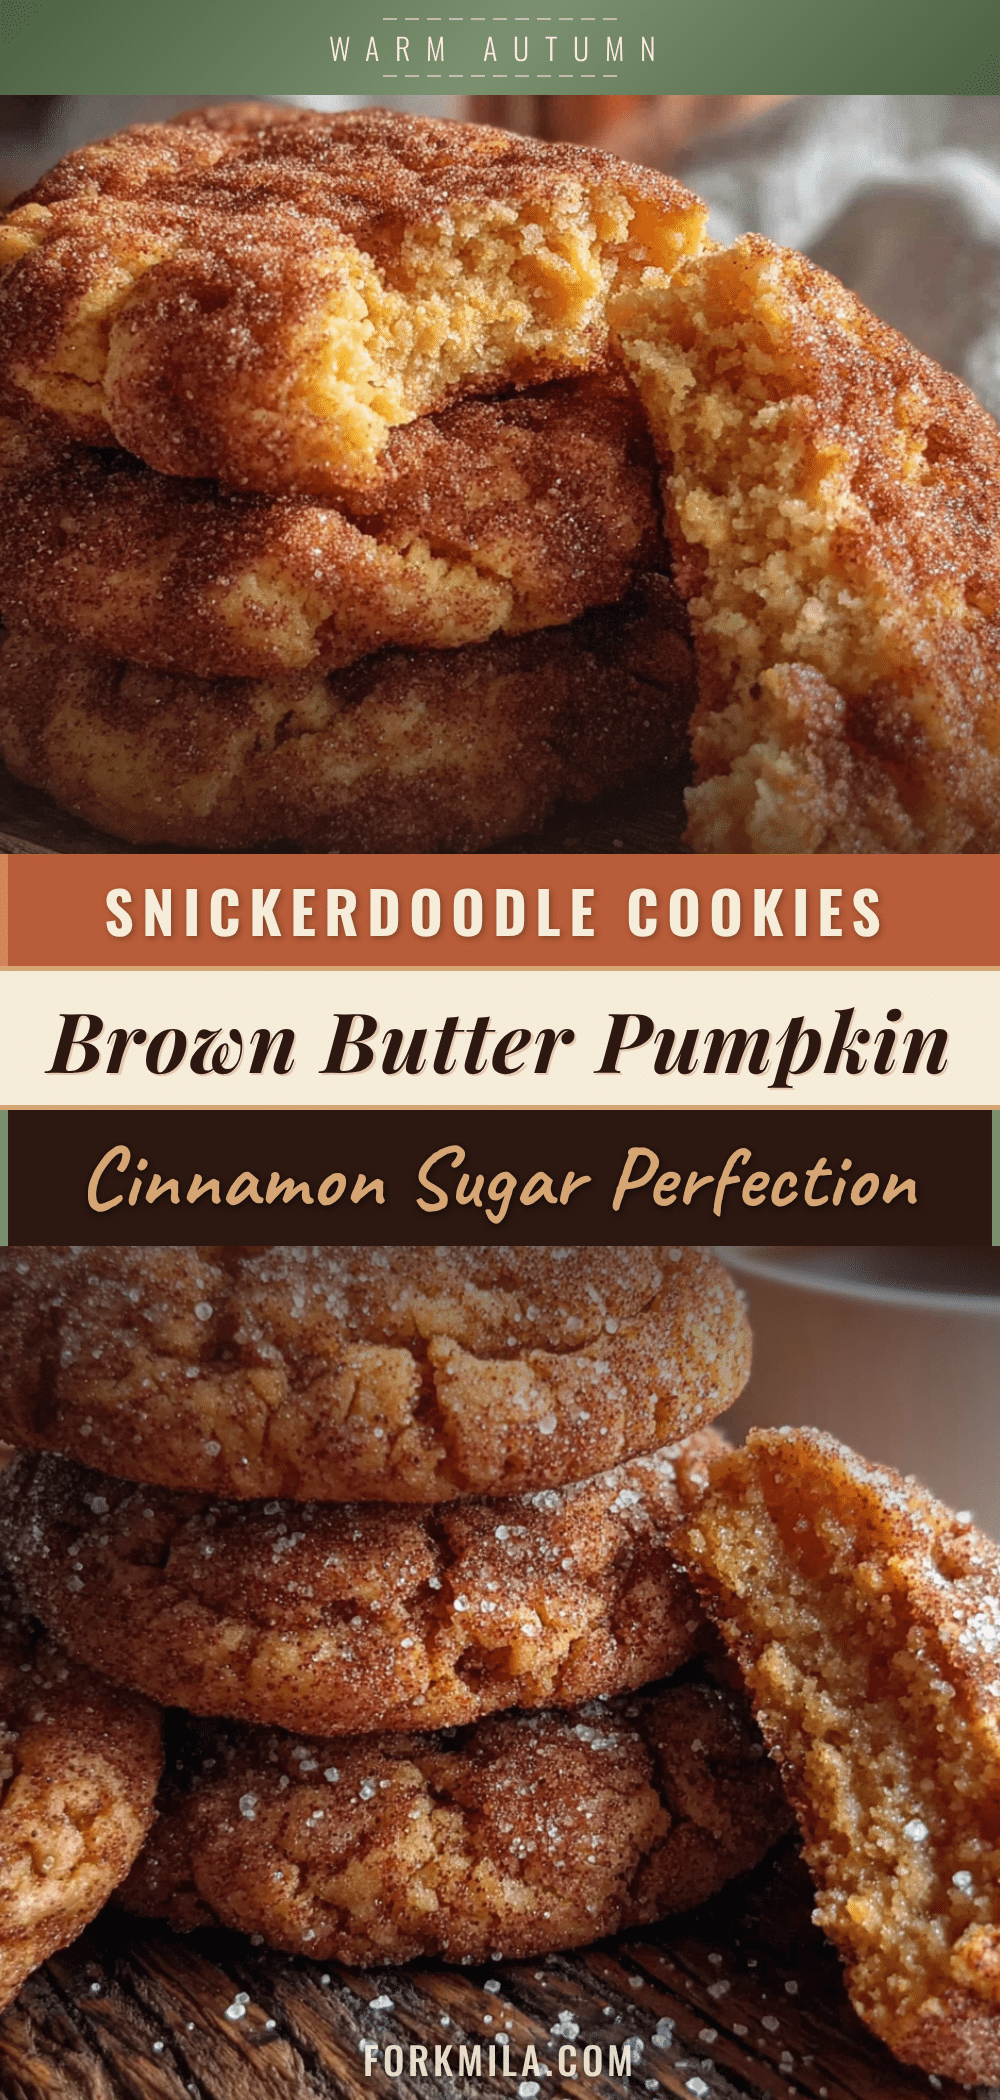
Pin This Recipe!
Brown Butter Pumpkin Snickerdoodle Cookies
Soft, chewy snickerdoodle cookies with nutty brown butter and pumpkin, coated in cinnamon sugar. Ready in 25 minutes, they’re a perfect fall treat that’s both quick and impressive.
- Prep Time: 15 minutes
- Cook Time: 10-12 minutes
- Total Time: 25 minutes
- Yield: 18 cookies 1x
- Category: Dessert
- Cuisine: American
Ingredients
- 1/2 cup (1 stick or 113g) unsalted butter
- 1/2 cup (100g) granulated sugar
- 1/4 cup (50g) packed light brown sugar
- 1/3 cup (80g) pumpkin puree
- 1 large egg yolk
- 1 teaspoon vanilla extract
- 1 1/2 cups (188g) all-purpose flour
- 1/2 teaspoon baking soda
- 1/2 teaspoon cream of tartar
- 1/4 teaspoon salt
- 1 teaspoon ground cinnamon
- 1/2 teaspoon ground ginger
- 1/4 teaspoon ground nutmeg
- 1/4 cup (50g) granulated sugar (for coating)
- 1 tablespoon ground cinnamon (for coating)
Instructions
- Brown the butter: Place the 1/2 cup of unsalted butter in a medium saucepan over medium heat. Let it melt completely, then continue cooking, swirling the pan occasionally. The butter will start to foam, then the foam will subside, and you’ll see golden brown specks forming at the bottom. This takes about 5-7 minutes. Once it smells nutty and toasty, remove it from the heat immediately and pour it into a heatproof bowl to stop the cooking process. Let it cool for 10 minutes.
- Preheat and prep: While the butter is cooling, preheat your oven to 350°F (175°C). Line your baking sheet with parchment paper or a silicone mat.
- Mix the wet ingredients: In a large mixing bowl, whisk together the cooled brown butter, 1/2 cup granulated sugar, and 1/4 cup packed light brown sugar until smooth and well combined. Add the 1/3 cup pumpkin puree, 1 large egg yolk, and 1 teaspoon vanilla extract. Whisk again until everything is fully incorporated and the mixture is smooth.
- Combine the dry ingredients: In a separate medium mixing bowl, whisk together the 1 1/2 cups all-purpose flour, 1/2 teaspoon baking soda, 1/2 teaspoon cream of tartar, 1/4 teaspoon salt, 1 teaspoon ground cinnamon, 1/2 teaspoon ground ginger, and 1/4 teaspoon ground nutmeg.
- Combine wet and dry: Gradually add the dry ingredients to the wet ingredients, mixing with a rubber spatula just until no streaks of flour remain. Do not overmix! The dough will be soft and slightly sticky.
- Make the coating: In a small bowl, stir together the 1/4 cup granulated sugar and 1 tablespoon ground cinnamon.
- Shape the cookies: Using a cookie scoop or a tablespoon, scoop out about 1.5 tablespoons of dough. Roll it into a ball between your palms. Drop the dough ball into the cinnamon-sugar mixture and roll it around to coat completely. Place the coated dough balls on the prepared baking sheet, spacing them about 2 inches apart.
- Bake: Bake for 10-12 minutes, or until the edges are set and lightly golden. The centers will still look soft and slightly underdone. For softer, chewier cookies, bake for 10 minutes. For slightly crispier cookies, go for 12 minutes.
- Cool: Let the cookies cool on the baking sheet for 5 minutes. Then, transfer them to a wire cooling rack to cool completely.
Notes
Don’t rush the brown butter; watch for the color change and nutty aroma. Use room temperature ingredients for best results. If dough is too sticky, chill for 15-20 minutes. Use a light-colored baking sheet to prevent burning. For gluten-free, use a 1:1 gluten-free flour blend. For dairy-free, use high-quality vegan butter. Cookies taste even better the next day.
Nutrition
- Serving Size: 1 cookie
- Calories: 145
- Sugar: 12
- Sodium: 85
- Fat: 7
- Saturated Fat: 4
- Carbohydrates: 20
- Fiber: 1
- Protein: 2
Keywords: brown butter, pumpkin, snickerdoodle, cookies, fall, easy, 25-minute recipe


