Perfect Halloween Sugar Cookies with Royal Icing
Introduction
My friend Jenna swore she hated sugar cookies for fifteen years. Fifteen years! She’d turn up her nose at every birthday party cookie, every holiday platter, every soft, frosted square I tried to push her way. “Too sweet,” she’d say. “Boring.” Then last October, I made a batch of these Halloween sugar cookies just for myself—I needed test subjects for a new royal icing recipe I was working on, honestly. I left them cooling on the counter while I ran to grab more sprinkles, and when I came back, there she was. Caught in the act. Hand halfway to the cookie jar, powdered sugar on her chin, looking like a kid who’d raided the Halloween candy stash a week early. She froze. I laughed. And then she took a bite, and her eyes went wide in that way that says oh no, I have to admit I was wrong.
That was the moment this recipe became my go-to. Not just because it finally converted a self-proclaimed cookie hater, but because these cookies are genuinely that good. The edges are crisp enough to hold their shape—crucial when you’re cutting out tiny ghosts and pumpkins—while the centers stay soft and buttery. And the royal icing? It dries to a perfect, glossy finish that doesn’t smear when you stack them for a party platter. Maybe you’ve been there, spending hours on decorated cookies only to have them stick together or crack the next day. Let me tell you, this recipe fixes all of that. I’ve been making these every Halloween for three years now, tweaking the ratios and testing different icing consistencies until I got it exactly right. This is the version I keep coming back to, and honestly, I think it might change your mind about sugar cookies too.
Why You’ll Love This Recipe
What makes these Halloween sugar cookies different from every other recipe you’ve tried? Let me break it down for you.
- No Spread, Perfect Shapes : The dough is engineered to hold its edges. Your ghost cookies will look like ghosts, not blobs. This is non-negotiable for decorated cookies, and this recipe delivers every single time.
- Butter Flavor That Actually Comes Through : So many sugar cookie recipes taste like sweet flour. This one uses a specific ratio of butter to sugar that lets the real flavor shine, with just a hint of vanilla and almond extract for depth.
- Royal Icing That Sets Rock-Solid : No more sticky cookies that ruin your storage container. This icing dries hard enough to stack within a few hours, but it’s still pleasant to bite into—not like eating a candy shell.
- Simple Ingredients, No Fancy Tools : You probably have everything in your pantry right now. No specialty flours, no obscure extracts, no ingredients that require a special trip to the store.
- Perfect for Halloween Parties : These cookies are total showstoppers on a dessert table. Kids love decorating them, adults appreciate the taste, and everyone fights over the spiderweb designs.
- Freezes Beautifully : You can make the dough weeks ahead, or freeze the baked undecorated cookies for up to three months. That means less stress when Halloween sneaks up on you.
I’ve tested this recipe with beginner bakers and experienced cookie decorators alike, and the feedback is always the same: this is the one. The dough is forgiving enough for kids to help roll and cut, but the results look professional enough to gift. It’s comfort food with a spooky twist, and it has become my most-requested recipe every October.
What Ingredients You Will Need
This recipe uses simple, wholesome ingredients to deliver that perfect balance of buttery flavor and sturdy structure. Most of these are pantry staples, which makes this an easy last-minute baking project.
For the Sugar Cookie Dough

- Unsalted butter, softened (1 cup / 226g) — I prefer Kerrygold for its rich flavor, but any good-quality unsalted butter works. Make sure it’s truly softened to room temperature, not melted. Cold butter won’t cream properly, and melted butter will make your cookies spread.
- Granulated sugar (1 cup / 200g) — Regular white sugar is perfect here. Don’t substitute with powdered sugar or brown sugar, as they’ll change the texture and spread.
- Large egg (1, room temperature) — Cold eggs can seize the butter mixture. Let yours sit on the counter for 30 minutes before starting.
- Vanilla extract (1 teaspoon) — Use pure vanilla extract if you can. The flavor difference is noticeable in a simple cookie like this.
- Almond extract (½ teaspoon) — This is my secret weapon. It adds a subtle, nutty depth that makes people ask, “What’s in these?” without being able to pinpoint it. Leave it out if you have a nut allergy concern, but I really recommend trying it.
- All-purpose flour (2 ½ cups / 312g) — Spoon and level your flour for accuracy. Scooping directly from the bag packs in too much flour and leads to dry, crumbly dough.
- Baking powder (½ teaspoon) — Just enough to give a slight lift without causing the cookies to puff up and lose their sharp edges.
- Salt (¼ teaspoon) — Fine sea salt is best. It balances the sweetness and enhances the butter flavor.
For the Royal Icing
- Powdered sugar (4 cups / 480g) — Sift it first to avoid lumps. Trust me on this one. Lumpy icing is a nightmare to pipe.
- Meringue powder (3 tablespoons) — This is what gives royal icing its structure and glossy finish. I use Wilton brand, but any brand works. Do not skip this ingredient—it’s what makes the icing harden properly.
- Warm water (5-6 tablespoons) — Add gradually. The humidity in your kitchen affects how much water you’ll need, so go slow to avoid making the icing too thin.
- Vanilla extract (½ teaspoon) — Optional, but it adds a nice background flavor.
- Gel food coloring — I recommend gel over liquid colors because they don’t thin out the icing. For Halloween, I use orange, black, purple, and green from the Americolor brand.
Equipment Needed
You don’t need a professional bakery setup for these Halloween sugar cookies, but a few specific tools make the process much smoother.
- Stand mixer or hand mixer — A stand mixer with the paddle attachment is ideal for creaming butter and sugar, but a hand mixer works perfectly too. I’ve made this dough with both, and the results are identical.
- Rolling pin with thickness rings — This is my number one recommendation for consistent cookies. Adjustable rings that click onto your rolling pin ensure your dough is exactly ¼-inch thick every time. No more uneven cookies that bake at different rates.
- Halloween cookie cutters — Look for a set that includes ghosts, pumpkins, bats, and cats. I bought a basic metal set on Amazon for under $10, and they’ve lasted for years.
- Piping bags and tips — For the royal icing, you’ll want small round tips (size 2 or 3) for outlining and flooding. Disposable piping bags are easier to clean, but reusable ones work fine too.
- Baking sheets and parchment paper — Heavy-duty baking sheets prevent burning on the bottom. Parchment paper is non-negotiable for easy cleanup and preventing spread.
- Cooling racks — Cookies need to cool completely before icing, and cooling racks speed up the process significantly.
- Toothpicks or scribe tool — For popping air bubbles in the icing and spreading it into tight corners.
Preparation Method
Let’s walk through this step by step. I’ve included all the little details I wish someone had told me when I first started making decorated cookies.
Step 1: Make the Dough
In a large mixing bowl, cream the softened butter and granulated sugar together on medium speed for 2-3 minutes until light and fluffy. Scrape down the sides of the bowl halfway through. You want the mixture to look pale and airy—this is where the tenderness of your cookies starts.
Add the egg, vanilla extract, and almond extract, and beat on low until just combined. Don’t overmix here; you just want everything incorporated.
In a separate bowl, whisk together the flour, baking powder, and salt. Gradually add the dry ingredients to the wet mixture, mixing on low speed until a soft dough forms. The dough should come together cleanly and not be sticky. If it feels too sticky, add a tablespoon more flour. If it’s crumbly, add a teaspoon of cold water.
Step 2: Chill the Dough
Divide the dough into two discs, wrap each tightly in plastic wrap, and refrigerate for at least 1 hour. This is crucial. Chilling solidifies the butter, which prevents the cookies from spreading in the oven. I’ve made the mistake of skipping this step exactly once, and my ghost cookies came out looking like puddles. Don’t be like me.
You can refrigerate the dough for up to 3 days at this point, or freeze it for up to 3 months. Just thaw it in the fridge overnight before rolling.
Step 3: Roll and Cut
Preheat your oven to 350°F (175°C). Line your baking sheets with parchment paper.
Lightly flour your work surface and rolling pin. Roll one disc of dough to ¼-inch thickness. If you don’t have thickness rings, use two stacked popsicle sticks as guides on either side of your dough—it’s a cheap trick that works surprisingly well.
Cut out your Halloween shapes and transfer them to the prepared baking sheets, spacing them about 1 inch apart. Gather the scraps, re-roll, and cut again. You can re-roll the dough up to three times before it gets tough.
Step 4: Bake
Bake for 8-10 minutes, rotating the pan halfway through. The cookies are done when the edges are just barely golden. The centers should look set but not browned. They will continue to firm up as they cool on the pan.
Let the cookies cool on the baking sheet for 5 minutes, then transfer to a wire rack to cool completely. Do not attempt to ice warm cookies—the royal icing will melt and slide right off.
Step 5: Make the Royal Icing
In a clean mixing bowl, combine the powdered sugar and meringue powder. Add 5 tablespoons of warm water and the vanilla extract. Beat on low speed for 1 minute, then increase to medium-high and beat for 4-5 minutes until the icing is thick, glossy, and forms stiff peaks.
Test the consistency: lift the beater—the icing should drizzle down and form a ribbon that stays on the surface for a few seconds before sinking back in. If it’s too thick, add water a teaspoon at a time. If it’s too thin, add more sifted powdered sugar a tablespoon at a time.
Divide the icing into separate bowls and color with gel food coloring. Cover each bowl with a damp paper towel to prevent drying while you work.
Step 6: Decorate
Fill piping bags fitted with small round tips. Outline each cookie first, then flood the inside by piping in a back-and-forth motion. Use a toothpick to spread the icing into corners and pop any air bubbles.
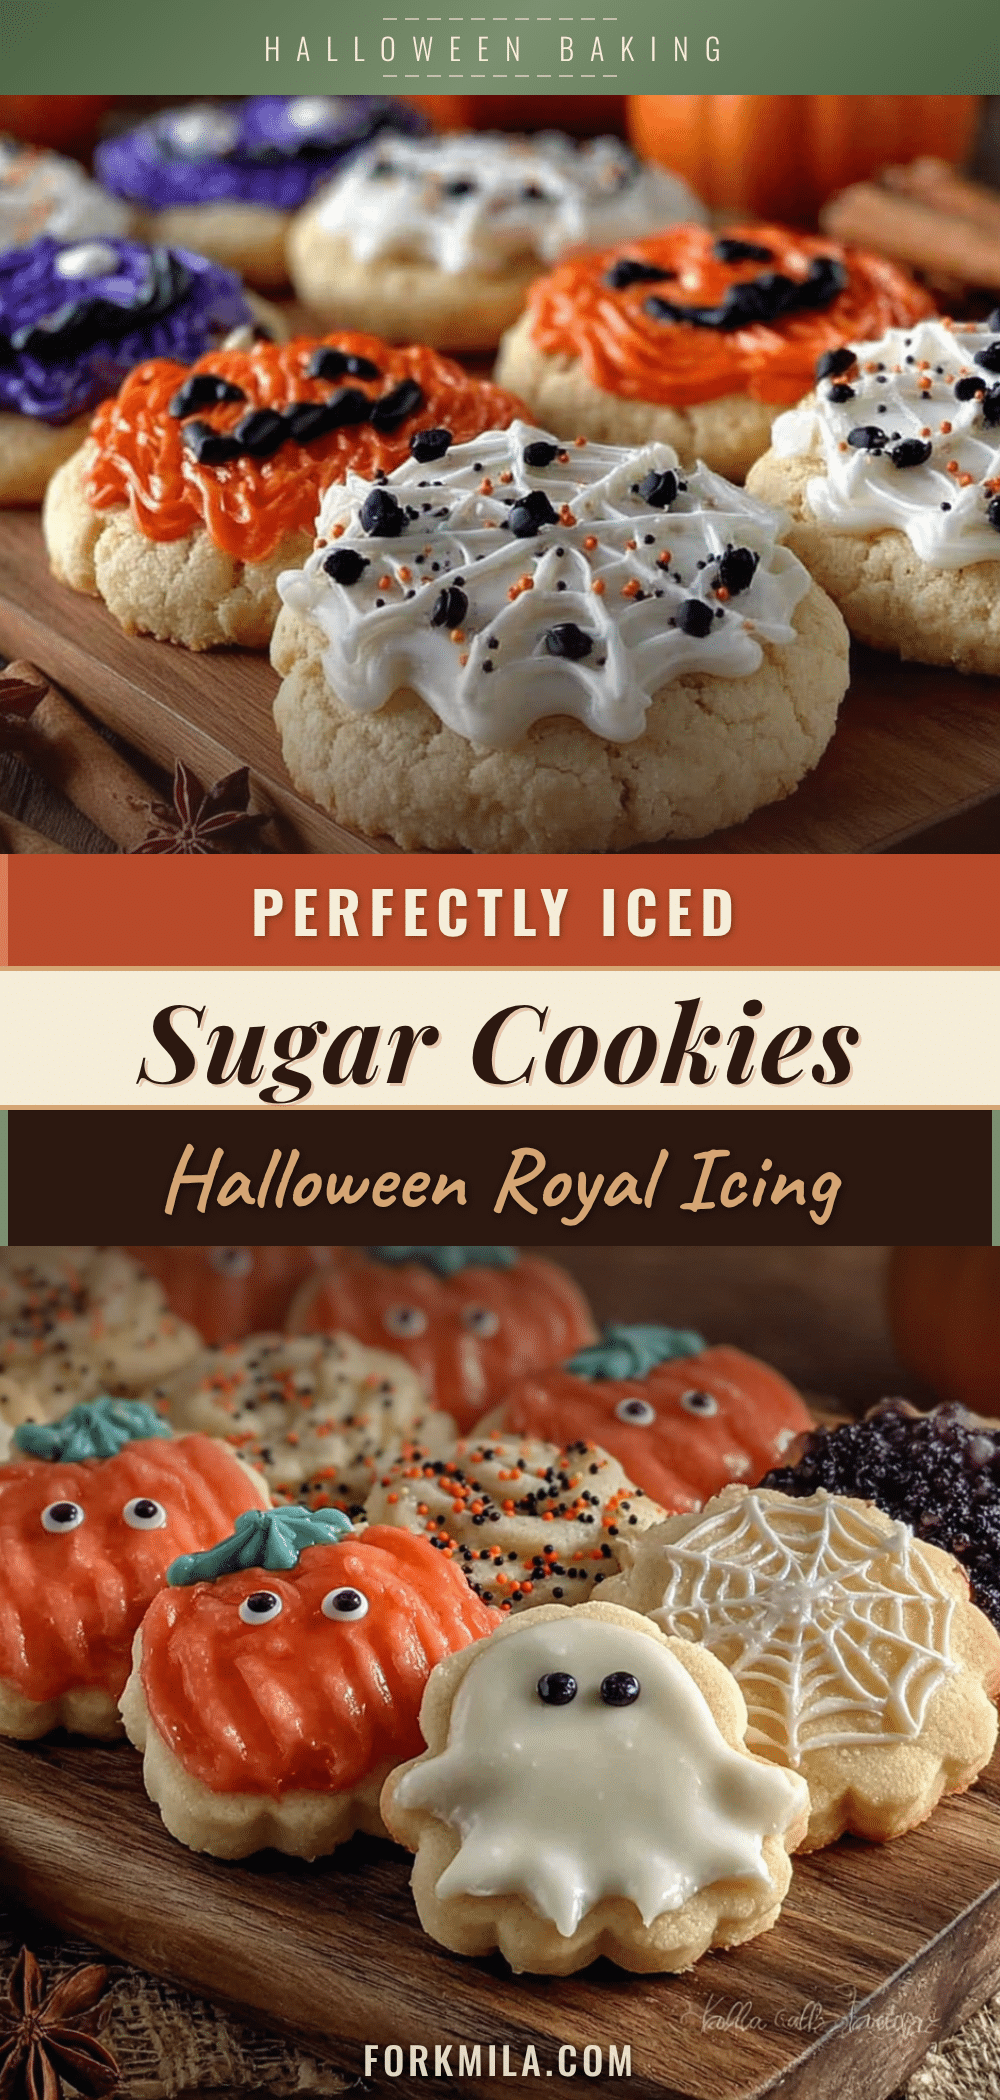
For Halloween designs, try a simple spiderweb: flood a round cookie with orange icing, then pipe concentric circles in black icing while the orange is still wet. Drag a toothpick from the center outward to create the web effect. For ghosts, flood with white icing and add black dots for eyes while the white is still wet.
Let the decorated cookies dry completely, uncovered, for 6-8 hours or overnight. The icing should be hard to the touch before you stack them.
Cooking Tips & Techniques
I’ve learned a few hard lessons over the years, and I’m sharing them so you don’t have to repeat my mistakes.
Don’t overwork the dough. The more you handle it, the more gluten develops, and the tougher your cookies will be. Mix just until the flour disappears, and when you re-roll scraps, handle them as little as possible. I once tried to re-roll my scraps four times because I was being stubborn, and those cookies came out like hockey pucks. Learn from my stubbornness.
Chill your cut cookies before baking. If you have time, pop the baking sheet with the cut-out cookies into the fridge for 15 minutes before they go in the oven. This extra chill time guarantees sharp edges. I do this when I’m making really intricate shapes like bats with tiny wings.
Royal icing consistency is everything. For outlining, you want a stiff icing that holds its shape when piped. For flooding (filling in the outlines), you want a thinner consistency that spreads smoothly. To thin your flooding icing, add water one drop at a time until a spoonful drizzled back into the bowl disappears into the surface within 10 seconds. This is called the “10-second rule,” and it’s the golden standard for cookie decorators.
Work in an assembly line. Decorate all your cookies of one color at the same time. Outline all the ghosts, then flood all the ghosts, then add faces to all the ghosts. This is much faster than finishing one cookie completely before moving to the next.
Variations & Adaptations
One of the best things about this recipe is how flexible it is. Here are some ways to make it your own.
Gluten-Free Version: Substitute the all-purpose flour with a 1:1 gluten-free baking flour blend that contains xanthan gum. I’ve tested this with Bob’s Red Mill 1:1 Baking Flour, and the cookies hold their shape beautifully. Add an extra tablespoon of butter to compensate for the drier texture of gluten-free flour.
Vegan Adaptation: Use vegan butter sticks (not spreadable margarine) and replace the egg with a flax egg (1 tablespoon ground flaxseed mixed with 3 tablespoons water, let sit for 5 minutes). For the royal icing, use aquafaba (the liquid from a can of chickpeas) instead of meringue powder. Whip it just like egg whites—it works surprisingly well.
Flavor Twists: Add 1 teaspoon of cocoa powder to half the dough for chocolate Halloween cookies. Or swap the almond extract for peppermint extract for a wintery vibe (though I save that for Christmas cookies). For a citrusy note, add 1 tablespoon of orange zest to the dough—it pairs beautifully with the vanilla.
Different Occasions: The cookie dough itself is neutral enough to work for any holiday. Use the same recipe with different cookie cutters and icing colors for Christmas, Valentine’s Day, Easter, or birthday parties. I’ve made these as snowflakes, hearts, and even dinosaur shapes for my nephew’s party.
Serving & Storage Suggestions
These Halloween sugar cookies are best served at room temperature. The royal icing should be fully set and hard to the touch, which takes about 6-8 hours at room temperature. Don’t rush this—sticky icing will ruin your beautiful designs.
For a Halloween party, arrange the cookies on a large platter or tiered stand. Mix up the shapes and colors for maximum visual impact. I like to group them by color: all the orange pumpkins together, all the purple bats together, and so on. It looks more intentional than scattering them randomly.
Storage: Store decorated cookies in a single layer in an airtight container at room temperature for up to 2 weeks. Yes, two weeks! The royal icing actually helps preserve the cookies by sealing out moisture. If you need to stack them, place a piece of parchment paper between each layer. Do not refrigerate—the humidity in the fridge can make the icing tacky.
Freezing: You can freeze undecorated baked cookies for up to 3 months. Wrap them tightly in plastic wrap and then foil. Thaw at room temperature before decorating. I often bake a triple batch in early October, freeze the cookies, and decorate them throughout the month as I have time. It makes Halloween prep so much less stressful.
Flavor Development: Here’s a secret: these cookies actually taste better the day after baking. The flavors meld together, and the texture softens slightly. So don’t stress about making them fresh on the day of your party—baking them a day or two ahead actually improves the results.
Nutritional Information & Benefits
Let’s be real: these are decorated sugar cookies, not health food. But here’s what you should know if you’re keeping track.
Per cookie (based on a medium-sized ghost cutter, with royal icing): approximately 150-180 calories, 7g fat, 22g carbohydrates, 1g protein, and 12g sugar. These numbers vary based on the size of your cookie cutters and how much icing you use.
Dietary Considerations: This recipe contains dairy (butter), eggs, and gluten (flour). The royal icing contains meringue powder, which is made from dried egg whites. If you have egg allergies, use the aquafaba version mentioned in the variations section. For dairy-free, use vegan butter. For gluten-free, use the 1:1 flour blend as directed.
Healthier Swaps: If you want to cut back on sugar, you can reduce the sugar in the cookie dough to ¾ cup without affecting the structure too much. The royal icing needs the full amount of powdered sugar to set properly—unfortunately, there’s no good substitute there. But honestly, these are a treat. I don’t worry about the sugar content when I’m making them for a special occasion. Balance is everything, right?
Conclusion
These Halloween sugar cookies with royal icing have become my signature October recipe for good reason. They’re reliable—the dough never fails me, the icing always sets, and the designs always impress. But more than that, they’ve become a tradition. I make them with my niece and nephew every year, watching them carefully pipe lopsided ghosts and proudly present their creations to anyone who will look. It’s messy, it’s chaotic, and the kitchen ends up covered in powdered sugar, but it’s worth every speck.
I hope you give this recipe a try, whether you’re a seasoned cookie decorator or a first-timer. Start simple—maybe just outline and flood a few pumpkins in one color. See how it feels. And if your first batch isn’t perfect, that’s okay. My first batch looked like a haunted mess, and I still ate every single one. The taste is always worth it.
I’d love to hear how yours turn out! Drop a comment below with your Halloween cookie creations, or tag me in your photos. What shapes are you making? What color combinations are you using? Let’s make this Halloween the most delicious one yet.
Frequently Asked Questions
Can I make the dough ahead of time?
Absolutely. You can refrigerate the dough for up to 3 days or freeze it for up to 3 months. Just wrap it tightly in plastic wrap and thaw in the fridge overnight before rolling.
Why did my cookies spread in the oven?
This usually happens for one of three reasons: the dough wasn’t chilled long enough, the butter was too soft or melted, or the baking sheet was too warm when you placed the cookies on it. Make sure to chill the dough for at least 1 hour, and let your baking sheets cool completely between batches.
Can I use liquid food coloring instead of gel?
You can, but liquid food coloring will thin out your royal icing, which can make it harder to work with. You’ll need to add more powdered sugar to compensate, which throws off the consistency. Gel colors are much more concentrated and don’t affect the texture as much.
How do I fix royal icing that’s too thick or too thin?
If it’s too thick, add water one drop at a time and stir until it reaches the right consistency. If it’s too thin, add sifted powdered sugar a tablespoon at a time. Always make small adjustments—you can add more, but you can’t take it away.
Can I skip the meringue powder in the royal icing?
Meringue powder is what gives royal icing its structure and glossy finish. Without it, the icing won’t set properly and will remain sticky. If you don’t have meringue powder, you can use fresh egg whites (about 2 large egg whites for this recipe), but be aware that raw egg whites carry a salmonella risk. Meringue powder is pasteurized and much safer for this purpose.
Pin This Recipe!
Perfect Halloween Sugar Cookies with Royal Icing

These Halloween sugar cookies have crisp edges that hold their shape and soft, buttery centers. The royal icing dries to a perfect, glossy finish that doesn’t smear when stacked, making them ideal for Halloween parties and gifting.
- Prep Time: 30 minutes
- Cook Time: 10 minutes
- Total Time: 1 hour 40 minutes (includes 1 hour chilling)
- Yield: 24 cookies 1x
- Category: Dessert
- Cuisine: American
Ingredients
- 1 cup (226g) unsalted butter, softened
- 1 cup (200g) granulated sugar
- 1 large egg, room temperature
- 1 teaspoon vanilla extract
- ½ teaspoon almond extract
- 2 ½ cups (312g) all-purpose flour
- ½ teaspoon baking powder
- ¼ teaspoon fine sea salt
- 4 cups (480g) powdered sugar, sifted
- 3 tablespoons meringue powder
- 5–6 tablespoons warm water
- ½ teaspoon vanilla extract (optional, for icing)
- Gel food coloring (orange, black, purple, green)
Instructions
- In a large mixing bowl, cream the softened butter and granulated sugar together on medium speed for 2-3 minutes until light and fluffy. Scrape down the sides of the bowl halfway through.
- Add the egg, vanilla extract, and almond extract, and beat on low until just combined.
- In a separate bowl, whisk together the flour, baking powder, and salt. Gradually add the dry ingredients to the wet mixture, mixing on low speed until a soft dough forms.
- Divide the dough into two discs, wrap each tightly in plastic wrap, and refrigerate for at least 1 hour (up to 3 days).
- Preheat oven to 350°F (175°C). Line baking sheets with parchment paper.
- Lightly flour your work surface and rolling pin. Roll one disc of dough to ¼-inch thickness.
- Cut out Halloween shapes and transfer to prepared baking sheets, spacing about 1 inch apart. Gather scraps, re-roll, and cut again (up to 3 times).
- Bake for 8-10 minutes, rotating the pan halfway through. Cookies are done when edges are just barely golden.
- Let cookies cool on baking sheet for 5 minutes, then transfer to a wire rack to cool completely.
- For royal icing: In a clean mixing bowl, combine powdered sugar and meringue powder. Add 5 tablespoons warm water and vanilla extract. Beat on low for 1 minute, then increase to medium-high and beat for 4-5 minutes until thick, glossy, and forms stiff peaks.
- Test consistency: lift the beater—icing should drizzle down and form a ribbon that stays on surface for a few seconds. Adjust with water or powdered sugar as needed.
- Divide icing into separate bowls and color with gel food coloring. Cover each bowl with a damp paper towel.
- Fill piping bags with small round tips. Outline each cookie, then flood inside by piping in a back-and-forth motion. Use a toothpick to spread icing and pop air bubbles.
- Let decorated cookies dry completely, uncovered, for 6-8 hours or overnight until icing is hard to the touch.
Notes
Chill dough for at least 1 hour to prevent spreading. For best results, chill cut cookies on baking sheet for 15 minutes before baking. Royal icing should follow the ’10-second rule’ for flooding consistency. Cookies taste even better the day after baking. Store in airtight container at room temperature for up to 2 weeks. Freeze undecorated baked cookies for up to 3 months.
Nutrition
- Serving Size: 1 medium cookie with
- Calories: 165
- Sugar: 12
- Sodium: 45
- Fat: 7
- Saturated Fat: 4
- Carbohydrates: 22
- Protein: 1
Keywords: Halloween sugar cookies, royal icing, decorated cookies, ghost cookies, pumpkin cookies, Halloween baking, sugar cookie recipe