My brother-in-law, Mark, asked why I couldn’t just set out all the toppings in bowls and let people build their own nachos at our family cookout. I started to explain why that wouldn’t work — soggy chips, cold cheese, a messy disaster waiting to happen. Then I stopped. Honestly, I had no good reason. I just liked the control of plating everything myself.
The summer I turned thirty-two, I finally let go of that control. Mark showed up with five bags of tortilla chips and a cooler full of toppings. I was skeptical, I mean, really skeptical. The first batch of chips got a little soft from the warm queso, and someone dropped a spoonful of salsa on the grass. But you know what? Everyone was happy. Kids were piling on their own combinations, adults were going back for seconds, and there was zero stress in the kitchen.
That moment changed how I think about cookout food forever. This ultimate loaded nacho bar isn’t just about the ingredients — it’s about giving people the freedom to make their perfect bite. Maybe you’ve been there, standing over a hot stove while everyone else is having fun. This recipe fixes that.
I keep coming back to this nacho bar because it solves the real problem of feeding a crowd. No more timing everything to be ready at the exact same moment. No more worrying about picky eaters. Just a big spread of delicious options and a bunch of happy people. Let me tell you, it’s the best decision I ever made for a cookout.
Why You’ll Love This Recipe
After testing this setup at six different cookouts last summer, I can tell you with confidence — this is the way to go. I’ve refined the timing, the toppings, and the best way to keep everything warm. Here is why this nacho bar works so well:
- Quick & Easy: The entire setup takes about 30 minutes of active prep time. Most of the work is just opening containers and chopping a few vegetables.
- Simple Ingredients: You likely have most of these items in your pantry and fridge already. No exotic grocery store trips required.
- Perfect for Cookouts: This setup keeps the cook away from the grill and lets everyone eat at their own pace. It’s ideal for backyard gatherings, pool parties, or game day.
- Crowd-Pleaser: I have watched picky kids pile on black olives and adults go back for fourth helpings. It somehow pleases everyone.
- Unbelievably Delicious: The combination of warm, melty cheese with crunchy chips and fresh toppings is pure comfort food magic.
What makes this different from other nacho bars is the layering strategy I developed after a few soggy-chip disasters. I keep the warm ingredients separate from the chips until the very last minute. This means every bite stays crunchy, and the cheese stays perfectly melted. It’s not just another version — it is the best version I have found after years of trial and error.
This recipe makes you close your eyes after the first bite. It’s cookout food reimagined — faster, easier, but with the same soul-soothing satisfaction. Perfect for impressing your guests without spending the whole party in the kitchen.
What Ingredients You Will Need
This recipe uses simple, crowd-friendly ingredients to deliver bold flavor and satisfying crunch without the fuss. Most items are pantry staples or easy to find at any grocery store.
For the Base
- Tortilla chips: 2 large bags (16-18 ounces each) of sturdy restaurant-style chips. I prefer Tostitos or On the Border for their thickness. Avoid thin chips that break easily.
- Shredded Mexican blend cheese: 3 cups (about 12 ounces). Pre-shredded works fine, but freshly shredded melts smoother. Look for a blend with Monterey Jack, cheddar, and asadero.
- Queso dip: 2 cups, store-bought or homemade. I use Velveeta blended with a can of Rotel for that classic creamy texture (adds richness).
- Refried beans: 1 can (16 ounces), warmed. Rosarita brand has the best flavor in my opinion. Stir in a little water if it seems too thick.
For the Protein
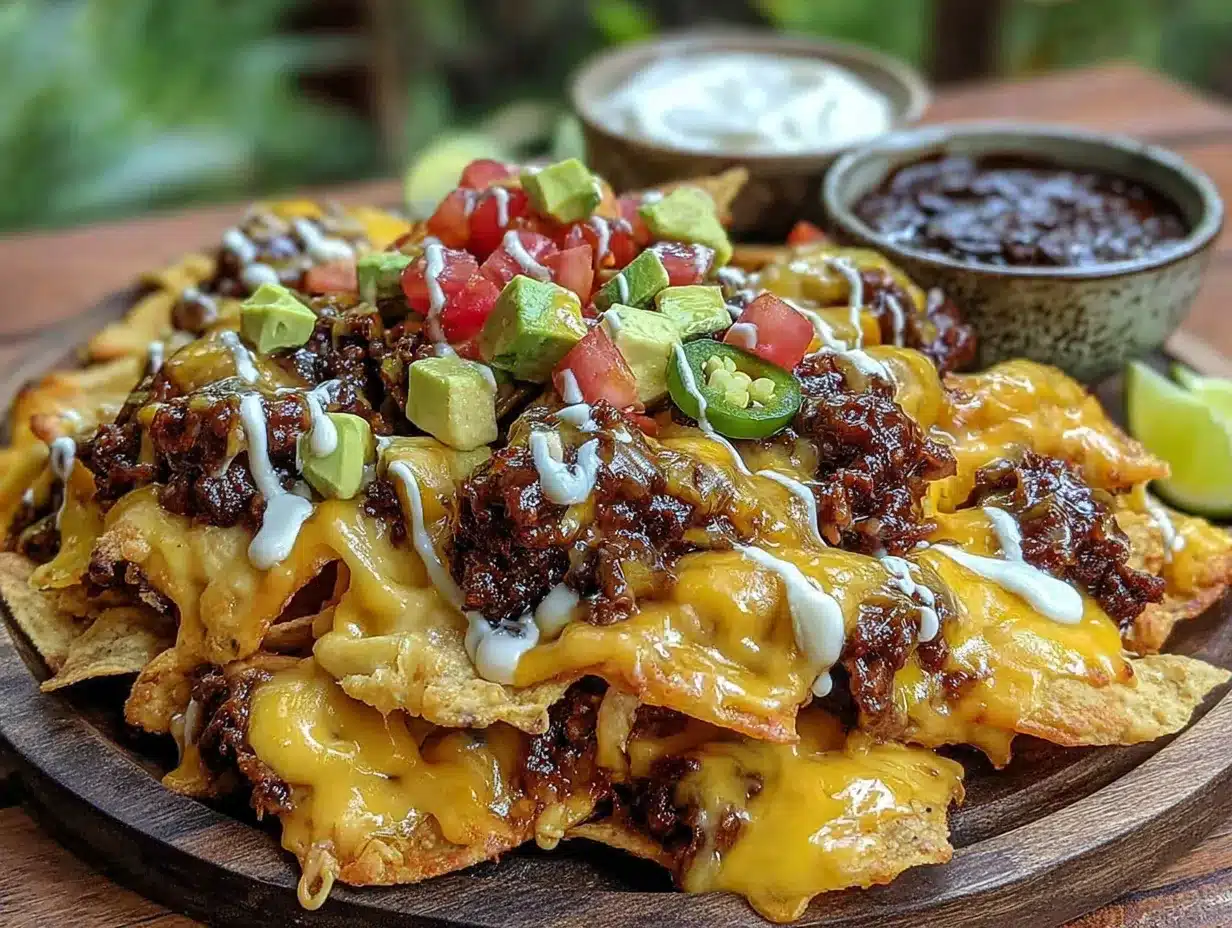
- Ground beef: 1 pound, 80/20 blend for best flavor. You can also use ground turkey or shredded chicken.
- Taco seasoning: 1 packet (1 ounce) or 3 tablespoons homemade blend. I use McCormick mild variety for a balanced flavor.
- Water: ⅔ cup, for the seasoning.
For the Toppings
- Roma tomatoes: 3 medium, diced. Remove the seeds to prevent the salsa from being too watery.
- Lettuce: 2 cups shredded iceberg or romaine. Iceberg stays crunchier longer.
- Black olives: 1 can (6 ounces), drained and sliced.
- Jalapeños: ½ cup pickled sliced jalapeños, drained. Use fresh if you prefer more heat.
- Red onion: ½ medium, finely diced.
- Sour cream: 1 cup. Full-fat works best, but Greek yogurt is a good substitute.
- Guacamole: 1½ cups store-bought or homemade. Wholly Guacamole minis are perfect for parties (use dairy-free milk if needed).
- Salsa: 1½ cups, your favorite variety. I recommend a restaurant-style salsa for its thinner consistency.
- Fresh cilantro: ½ cup chopped, for garnish.
- Lime wedges: 2 limes, cut into wedges, for squeezing over the top.
Substitution Guidance
Use ground turkey or plant-based crumbles for a lighter protein option. For a gluten-free setup, double-check your taco seasoning and chips. Swap the queso with a dairy-free cheese sauce if needed. In summer, add fresh corn kernels or diced mango for a seasonal twist.
Equipment Needed
You do not need fancy equipment for this nacho bar. Here is what I use:
- Large skillet: 12-inch nonstick or cast iron for browning the meat. Cast iron gives better browning.
- Small saucepan: For warming the queso and refried beans.
- Serving bowls: At least 8 small bowls or ramekins for the toppings. I use a mix of ceramic and plastic — whatever I have on hand.
- Sheet pan: 13×18-inch rimmed baking sheet for the loaded nacho tray. A rimmed edge is crucial to catch any spills.
- Small slow cooker: Optional but amazing for keeping queso warm. A 2-quart Crock-Pot works perfectly.
- Spoons and tongs: Small serving spoons for each bowl and a pair of tongs for the chips.
- Cutting board and knife: A sharp chef’s knife makes dicing tomatoes and onions much easier.
If you do not have a sheet pan, use a large oven-safe platter or even a disposable aluminum pan. I have used a clean pizza pan in a pinch — it worked fine. For the slow cooker, any small pot on low heat will keep the queso warm if you stir occasionally. Budget-friendly tip: dollar store ramekins are perfect for toppings and cost almost nothing.
Preparation Method
Follow these steps for a perfectly organized nacho bar that stays crunchy and delicious.
- Prep the toppings first (10 minutes): Dice the tomatoes, shred the lettuce, slice the olives, chop the onion, and pick the cilantro leaves. Place each topping in a separate small bowl. Cover with plastic wrap and refrigerate until serving. This makes the final assembly much faster.
- Cook the ground beef (15 minutes): Heat your large skillet over medium-high heat. Add the ground beef and break it apart with a wooden spoon. Cook until browned, about 6-8 minutes. Drain off any excess fat. Add the taco seasoning and ⅔ cup water. Stir and let it simmer for 5 minutes until the sauce thickens. The meat should look glossy and smell deeply spiced.
- Warm the queso and beans (5 minutes): In a small saucepan over low heat, warm the queso dip, stirring occasionally. In another small pan, warm the refried beans with a splash of water to thin them out. If using a slow cooker for the queso, transfer it now and set to warm.
- Preheat the oven (5 minutes): Set your oven to 375°F (190°C). This is for the final loaded nacho tray, so do this step while the meat cooks.
- Assemble the loaded nacho tray (5 minutes): Spread half the tortilla chips in an even layer on your rimmed sheet pan. Sprinkle half the shredded cheese over the chips. Add half the cooked ground beef in small clumps. Repeat with the remaining chips, cheese, and meat. Do not add wet toppings yet — that comes later.
- Bake the nacho tray (8-10 minutes): Place the sheet pan in the preheated oven. Bake until the cheese is fully melted and bubbly, about 8-10 minutes. Keep an eye on it — you want melted cheese, not burnt chips. The edges should be golden and the cheese should be stretchy when you lift a chip.
- Set up the bar (5 minutes): While the nacho tray bakes, arrange all your topping bowls on a large table or counter. Place the warm queso and refried beans in their own spots. Add the sour cream, guacamole, salsa, and all the fresh toppings. Put out small plates and napkins.
- Finish and serve: Remove the baked nacho tray from the oven. Let it cool for 2 minutes — the cheese will set slightly. Place the tray at the center of your bar. Let everyone build their own plates by scooping from the tray and adding their favorite toppings from the bowls. Squeeze lime wedges over the top for brightness.
Sensory cue: The chips should make a satisfying crunch when you bite into them, and the cheese should pull into long, stretchy strands. If the chips feel soft, you baked them too long or added too much wet topping.
Cooking Tips & Techniques
I have made this nacho bar more times than I can count, and I have definitely made my share of mistakes. Here is what I have learned:
Keep the chips separate until the end. My biggest failure happened when I tried to pre-assemble everything on the sheet pan and let it sit for 20 minutes. The chips turned into a sad, soggy mess. Now I bake the loaded tray right before serving and keep the wet toppings in separate bowls. This one change made all the difference.
Layer the cheese carefully. I used to just dump all the cheese on top. Half of it would melt into a puddle, and the chips underneath would stay bare. Now I layer chips, cheese, meat, then more chips, more cheese, more meat. Every chip gets some cheesy goodness. Trust me on this one.
Warm the queso slowly. I once rushed this step and ended up with grainy, separated cheese. Low and slow is the way to go. Stir every minute or so, and add a splash of milk if it gets too thick. The texture should be smooth and pourable, not glue-like.
Multitask smartly. While the meat simmers, dice the tomatoes and onions. While the nacho tray bakes, arrange the serving bowls. This keeps your total active time under 30 minutes. I set a timer for everything — it keeps me from burning the cheese or forgetting the olives.
Use room temperature sour cream. Cold sour cream straight from the fridge can make the warm chips turn cold quickly. Let it sit out for 15 minutes before serving. Same goes for the guacamole — cold guac is fine, but room temperature has better flavor.
Variations & Adaptations
This nacho bar is endlessly customizable. Here are some variations I have tried and loved:
Vegetarian version: Skip the ground beef and use black beans or pinto beans instead. I add a can of drained black beans to the refried beans for extra texture. You can also add sautéed bell peppers and onions for more substance. My sister-in-law makes this version every time, and nobody misses the meat.
Spicy fiesta: Add chorizo instead of ground beef for a smoky, spicy kick. Use hot jalapeños and add a bowl of sliced serrano peppers. I once added a drizzle of hot honey over the top, and it was incredible. Just be prepared for some sweating guests.
Breakfast nachos: This is my personal favorite variation. Swap the taco meat for scrambled eggs and crispy bacon. Add a bowl of warm sausage gravy. Top with the same fresh toppings and a dollop of sour cream. I made this for a brunch cookout, and people still talk about it.
Seafood twist: Use grilled shrimp or blackened fish instead of ground beef. Add a mango salsa and a creamy cilantro-lime dressing. This version feels lighter and fresher for summer cookouts. My neighbor brought this to a pool party, and it was a hit.
Low-carb option: Skip the tortilla chips and use large bell pepper halves or cucumber rounds as the base. Load them with cheese and meat, then bake until the peppers soften. It is not quite the same experience, but it satisfies the craving without the carbs.
Serving & Storage Suggestions
Serve the nacho bar immediately after baking the loaded tray. The ideal temperature is warm — the cheese should be melted but not burning hot. Let the tray cool for 2 minutes before serving so nobody burns their mouth.
For presentation, I arrange the topping bowls in a logical order around the tray: proteins first, then cheeses, then vegetables, then sauces. This creates a natural flow for guests building their plates. I put the chips at the very beginning so people can start there.
Complementary dishes include a simple side of Mexican street corn salad or a light cucumber-lime agua fresca. For drinks, cold beer or margaritas pair perfectly. I also set out a bowl of fresh fruit to balance the richness.
Storage instructions: Store any leftover components separately. The baked nacho tray does not reheat well — the chips get soft. Instead, keep the leftover chips in their bag and store the meat, cheese, and toppings in separate airtight containers in the refrigerator. They will keep for 3-4 days.
Reheating tips: Reheat the meat in a skillet over medium heat with a splash of water. Warm the queso in a saucepan over low heat. The fresh toppings like lettuce and tomatoes should be eaten cold. Do not try to re-assemble the nacho tray — just make individual plates and microwave for 30 seconds.
Flavors actually improve overnight for the meat and queso. The spices meld together and become more complex. I sometimes make the meat a day ahead just for this reason.
Nutritional Information & Benefits
Here are estimated nutritional values per serving (about 1 cup of loaded nachos, not including custom toppings):
- Calories: 380-450
- Protein: 18-22 grams
- Fat: 22-28 grams
- Carbohydrates: 30-35 grams
- Fiber: 4-6 grams
- Sodium: 800-1000 mg
The ground beef provides a good source of iron and B vitamins. The cheese adds calcium for bone health. Tomatoes and lettuce contribute vitamins A and C, plus antioxidants. Black olives offer healthy monounsaturated fats. The beans add extra fiber and plant-based protein.
Dietary considerations: This recipe contains dairy and gluten (check your chips and seasoning). For a gluten-free version, use certified gluten-free chips and seasoning. For a lower-sodium option, use homemade taco seasoning and low-sodium cheese. The guacamole adds heart-healthy fats that can help balance the meal.
From a wellness perspective, I see this as a treat meal — not an everyday thing, but a satisfying indulgence that brings people together. The portion control is built in because everyone builds their own plate.
Conclusion
This ultimate loaded nacho bar has become my go-to for every cookout, and I honestly cannot imagine going back to the old way of doing things. It solves the real problems of feeding a crowd — timing, variety, and picky eaters — while keeping the host out of the kitchen and in the fun.
I love how this recipe lets everyone be their own chef. Kids get to pile on their favorite toppings, adults can experiment with combinations, and nobody feels stuck with something they do not like. It turns a simple meal into an interactive experience that brings people together.
Customize it however you want. Swap the protein, change the toppings, make it spicy or mild. The structure is flexible enough to work for any crowd. I have made this for family reunions, game days, and casual backyard dinners, and it always delivers.
I would love to hear how your nacho bar turns out. Drop a comment below with your favorite topping combination or any creative variations you tried. Share this post with a friend who loves hosting cookouts — they will thank you later. Happy cooking, and remember: the best nacho is the one you build yourself!
Frequently Asked Questions
Can I make the nacho bar ahead of time?
You can prep all the toppings and cook the meat up to a day in advance. Store everything separately in the refrigerator. Bake the loaded nacho tray right before serving for the best texture. The queso can be kept warm in a slow cooker for up to 2 hours.
How do I keep the chips from getting soggy?
Bake the loaded tray right before serving and keep wet toppings like salsa, sour cream, and guacamole in separate bowls. Let guests add these toppings to their own plates instead of dumping them over the whole tray. This keeps every chip crunchy.
What is the best cheese for nachos?
A Mexican blend with Monterey Jack, cheddar, and asadero works best. Monterey Jack melts smoothly, cheddar adds sharpness, and asadero gives that stretchy texture. Pre-shredded cheese works, but freshly shredded melts more evenly because it does not have anti-caking agents.
Can I use a slow cooker for the whole setup?
Yes! Use a large slow cooker for the queso and a smaller one for the refried beans. Keep the cooked ground beef warm in a third slow cooker or a covered dish. Set out the chips and toppings separately, and let guests build their own plates. This works great for potlucks.
How many people does this recipe serve?
This recipe serves 8-10 people as a main dish or 12-15 as an appetizer. If you are serving a crowd of heavy eaters, double the chips, meat, and queso. The toppings usually have plenty of leftovers, so you do not need to double those.
Pin This Recipe!
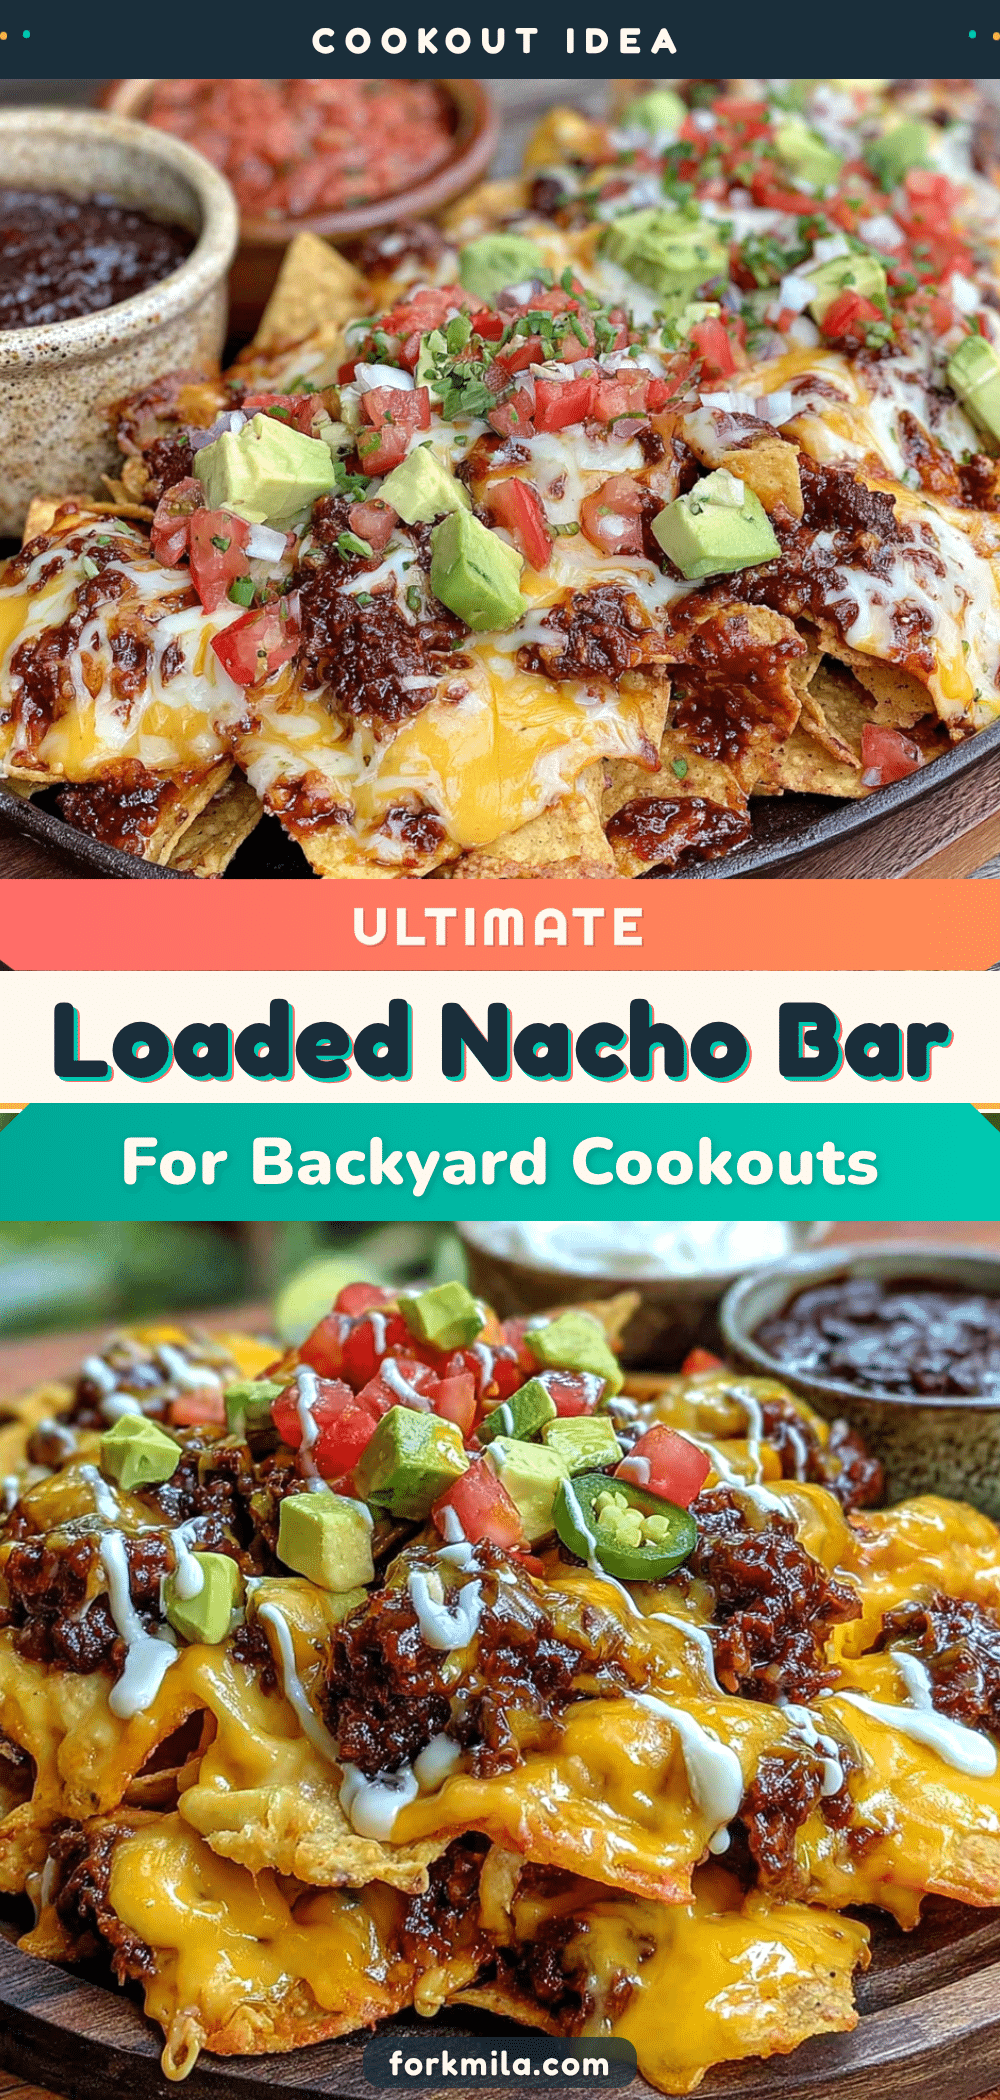
Ultimate Loaded Nacho Bar for Easy Cookouts
This ultimate loaded nacho bar lets everyone build their own perfect bite with warm, melty cheese, seasoned ground beef, and a variety of fresh toppings. It’s the perfect crowd-pleasing cookout solution that keeps the host out of the kitchen and in the fun.
- Prep Time: 30 minutes
- Cook Time: 20 minutes
- Total Time: 50 minutes
- Yield: 8-10 servings as main dish, 12-15 as appetizer 1x
- Category: Main Course
- Cuisine: Mexican-American
Ingredients
- 2 large bags (16–18 ounces each) sturdy restaurant-style tortilla chips (e.g., Tostitos or On the Border)
- 3 cups (about 12 ounces) shredded Mexican blend cheese (Monterey Jack, cheddar, asadero)
- 2 cups queso dip (store-bought or homemade, e.g., Velveeta with Rotel)
- 1 can (16 ounces) refried beans (e.g., Rosarita), warmed
- 1 pound ground beef (80/20 blend)
- 1 packet (1 ounce) taco seasoning (e.g., McCormick mild) or 3 tablespoons homemade blend
- ⅔ cup water
- 3 medium Roma tomatoes, diced and seeded
- 2 cups shredded iceberg or romaine lettuce
- 1 can (6 ounces) black olives, drained and sliced
- ½ cup pickled sliced jalapeños, drained
- ½ medium red onion, finely diced
- 1 cup sour cream (full-fat recommended)
- 1½ cups guacamole (store-bought or homemade)
- 1½ cups salsa (restaurant-style recommended)
- ½ cup fresh cilantro, chopped
- 2 limes, cut into wedges
Instructions
- Prep the toppings first (10 minutes): Dice the tomatoes, shred the lettuce, slice the olives, chop the onion, and pick the cilantro leaves. Place each topping in a separate small bowl. Cover with plastic wrap and refrigerate until serving.
- Cook the ground beef (15 minutes): Heat a large skillet over medium-high heat. Add the ground beef and break it apart with a wooden spoon. Cook until browned, about 6-8 minutes. Drain off any excess fat. Add the taco seasoning and ⅔ cup water. Stir and let it simmer for 5 minutes until the sauce thickens.
- Warm the queso and beans (5 minutes): In a small saucepan over low heat, warm the queso dip, stirring occasionally. In another small pan, warm the refried beans with a splash of water to thin them out. If using a slow cooker for the queso, transfer it now and set to warm.
- Preheat the oven (5 minutes): Set your oven to 375°F (190°C).
- Assemble the loaded nacho tray (5 minutes): Spread half the tortilla chips in an even layer on a rimmed sheet pan. Sprinkle half the shredded cheese over the chips. Add half the cooked ground beef in small clumps. Repeat with the remaining chips, cheese, and meat.
- Bake the nacho tray (8-10 minutes): Place the sheet pan in the preheated oven. Bake until the cheese is fully melted and bubbly, about 8-10 minutes.
- Set up the bar (5 minutes): While the nacho tray bakes, arrange all your topping bowls on a large table or counter. Place the warm queso and refried beans in their own spots. Add the sour cream, guacamole, salsa, and all the fresh toppings. Put out small plates and napkins.
- Finish and serve: Remove the baked nacho tray from the oven. Let it cool for 2 minutes. Place the tray at the center of your bar. Let everyone build their own plates by scooping from the tray and adding their favorite toppings from the bowls. Squeeze lime wedges over the top.
Notes
Keep chips separate from wet toppings until serving to prevent sogginess. Layer cheese carefully between chips for even coverage. Warm queso slowly to avoid graininess. Use room temperature sour cream for better flavor. Prep toppings and meat up to a day in advance. Store leftovers separately; the baked tray does not reheat well.
Nutrition
- Serving Size: 1 cup of loaded nach
- Calories: 380450
- Sodium: 8001000
- Fat: 2228
- Carbohydrates: 3035
- Fiber: 46
- Protein: 1822
Keywords: nacho bar, loaded nachos, cookout recipe, party food, easy appetizer, crowd-pleaser, game day food


