The Super Bowl party was in six hours and I’d completely forgotten I was supposed to bring something for the snack table. Everyone else would be showing up with those elaborate seven-layer dips and slow-cooker meatballs they’d been planning for weeks. I had a box of cereal, a bag of marshmallows, and honestly, a growing sense of panic. I stared into my pantry like it owed me an answer, and then it hit me—those little football-shaped treats my aunt used to make for tailgates. Maybe you’ve been there, standing in your kitchen with the clock ticking and nothing that feels “party-worthy” on hand. I almost gave up and grabbed a bag of chips from the gas station, but something made me pull out that butter instead. Let me tell you, I was not expecting what happened next.
I melted the marshmallows with a bit of extra butter—because when in doubt, add more butter, right?—and shaped them into tiny footballs by hand. It was messy, but the good kind of messy where you know you’re onto something. I even used kitchen shears to cut little white frosting laces on top, though my first attempt looked more like a confused spider than a football. Honestly, I almost scrapped the whole thing right there. But I kept going, and by the time I walked into that party with a tray of these little guys, I felt like I was carrying a secret weapon.
They were gone in fifteen minutes. A guy named Dave actually asked me for the recipe before he even said hello to the host. That moment, standing there with butter still under my fingernails and marshmallow stuck to my sleeve, I realized something simple can sometimes steal the whole show. These mini football-shaped Rice Krispie treats aren’t fancy, they aren’t complicated, and they definitely aren’t something you need to stress about. But they are the kind of snack that makes people stop mid-conversation and ask, “Wait, where did you get these?” That’s why I keep making them, and that’s why you’re going to love having this recipe in your back pocket.
Why You’ll Love This Recipe
I’ve tested this recipe about seven times now—yes, seven—because I wanted to make sure it was absolutely foolproof before sharing it with you. The first batch was too sticky, the second batch was too hard, and the third batch? Well, let’s just say I learned that you really do need to butter your hands generously. But by batch number four, I had it dialed in. These mini football treats are the kind of recipe that makes you look like a kitchen hero without actually having to work for it.
- Quick & Easy: From start to finish, you’re looking at about 20 minutes of active time. That’s it. No complicated steps, no fancy equipment, and definitely no stress.
- Simple Ingredients: You probably already have everything you need. Butter, marshmallows, Rice Krispies cereal, and a little white frosting for the laces. That’s the whole list.
- Perfect for Game Day: Whether it’s the Super Bowl, a college tailgate, or just a regular Sunday with the game on, these little footballs fit right in. They’re portable, they’re fun, and they don’t require plates or forks.
- Crowd-Pleaser: I’ve brought these to parties, potlucks, and even a backyard barbecue. Kids love them, adults love them, and people who swear they don’t like Rice Krispie treats? They love them too.
- Unbelievably Delicious: There’s something about the ratio of marshmallow to cereal in this version that makes them extra soft and chewy. Not too dense, not too airy—just right.
What makes this recipe different from the dozens of other football-shaped treats out there? It’s the technique. Most recipes tell you to press the mixture into a pan and cut out shapes, which leaves you with wasted edges and uneven pieces. My method uses your hands to shape each football individually, which means zero waste and a more authentic, handcrafted look. Plus, the slightly higher butter-to-marshmallow ratio keeps them softer longer, so they don’t turn into jaw-breakers by the second quarter.
This recipe isn’t just good—it’s the kind that makes you close your eyes after the first bite. It’s comfort food reimagined for the big game, faster and easier than anything else on the snack table, but with the same soul-soothing satisfaction that only a Rice Krispie treat can deliver. Perfect for impressing guests without stress, or turning a simple snack into something memorable.
What Ingredients You Will Need
This recipe uses simple, everyday ingredients to deliver that classic Rice Krispie treat texture and flavor, with a fun football twist. You don’t need anything fancy—just a few pantry staples and a little bit of patience for shaping.
- 6 tablespoons unsalted butter (plus extra for greasing your hands and the bowl) — I prefer using unsalted butter so I can control the salt level. If you only have salted butter on hand, just skip the pinch of salt later. The butter adds richness and helps keep the treats soft.
- 1 package (10 ounces) regular marshmallows (about 40 large marshmallows or 4 cups mini marshmallows) — Regular marshmallows work best for this recipe. Avoid using mini marshmallows that are labeled “jet-puffed” or “extra fluffy” because they can throw off the ratio and make the mixture too sticky. I’ve tried both, and the standard size gives the most consistent results.
- 6 cups Rice Krispies cereal (or any crispy rice cereal) — Make sure your cereal is fresh. Stale cereal will result in treats that are chewy in a bad way. If you’re unsure, give the box a shake—if it sounds dusty, get a new box.
- ¼ teaspoon salt — This is optional but highly recommended. A tiny pinch of salt balances the sweetness and makes the marshmallow flavor pop. Trust me on this one.
- 1 can (16 ounces) white frosting (or homemade buttercream) — You’ll use this for the football laces. I usually buy a can of store-bought vanilla frosting because it’s easy, but if you want to make your own, a simple buttercream works beautifully. Just make sure it’s thick enough to pipe without running.
- 1 teaspoon vegetable oil or shortening (optional, for thinning frosting) — If your frosting is too thick to pipe easily, a tiny bit of oil or shortening will loosen it up without changing the flavor.
For the best results, I recommend using name-brand Rice Krispies cereal. I’ve tried generic versions, and they don’t hold their crunch as well in the finished treats. The name-brand cereal has a slightly different texture that stays crispier longer. Also, look for marshmallows that feel soft and fresh when you squeeze the bag—hard, stale marshmallows won’t melt as smoothly.
If you’re dairy-free, you can substitute the butter with a plant-based butter stick (not the spreadable kind in a tub). I’ve used Earth Balance with good results. The texture will be slightly different—a little less firm—but the flavor is still fantastic. For a gluten-free version, just make sure your crispy rice cereal is labeled gluten-free, as some brands contain malt flavoring that isn’t gluten-free.
Equipment Needed
You don’t need much for this recipe, which is part of the beauty of it. Here’s what you’ll want to have on hand:
- Large saucepan or pot — You need something big enough to hold all the marshmallows and cereal without spilling over. A 4-quart pot works perfectly.
- Wooden spoon or silicone spatula — A wooden spoon is my go-to because it doesn’t scratch the pot and it handles the thick mixture well. A silicone spatula works too, but make sure it’s heat-resistant.
- 9×13-inch baking dish or large rimmed baking sheet — You’ll use this to hold the finished treats while they set. A baking sheet gives you more surface area for cooling, which speeds things up.
- Parchment paper or wax paper — This is essential for keeping the treats from sticking to the pan and for shaping them without a mess.
- Kitchen shears or scissors — For cutting the tip of the frosting bag and trimming the laces if needed. A sharp pair makes all the difference.
- Piping bag or small zip-top bag — For applying the frosting laces. A zip-top bag with a tiny corner cut off works just as well as a fancy piping bag, and it’s way easier to clean.
- Small bowl of water — Keep this nearby for wetting your fingers while shaping the footballs. It helps prevent the mixture from sticking to your hands.
- Butter knife or offset spatula — For spreading the mixture if you decide to press it into a pan instead of shaping by hand.
I’ve made these treats with nothing more than a microwave-safe bowl and a spoon when I was in a pinch, and they turned out fine. The microwave method works—just heat the butter and marshmallows in 30-second intervals, stirring between each, until smooth. But I find the stovetop method gives a more consistent texture because you can control the heat better. If you’re using the microwave, be careful not to overcook the marshmallows, or they’ll turn tough and rubbery.
Preparation Method
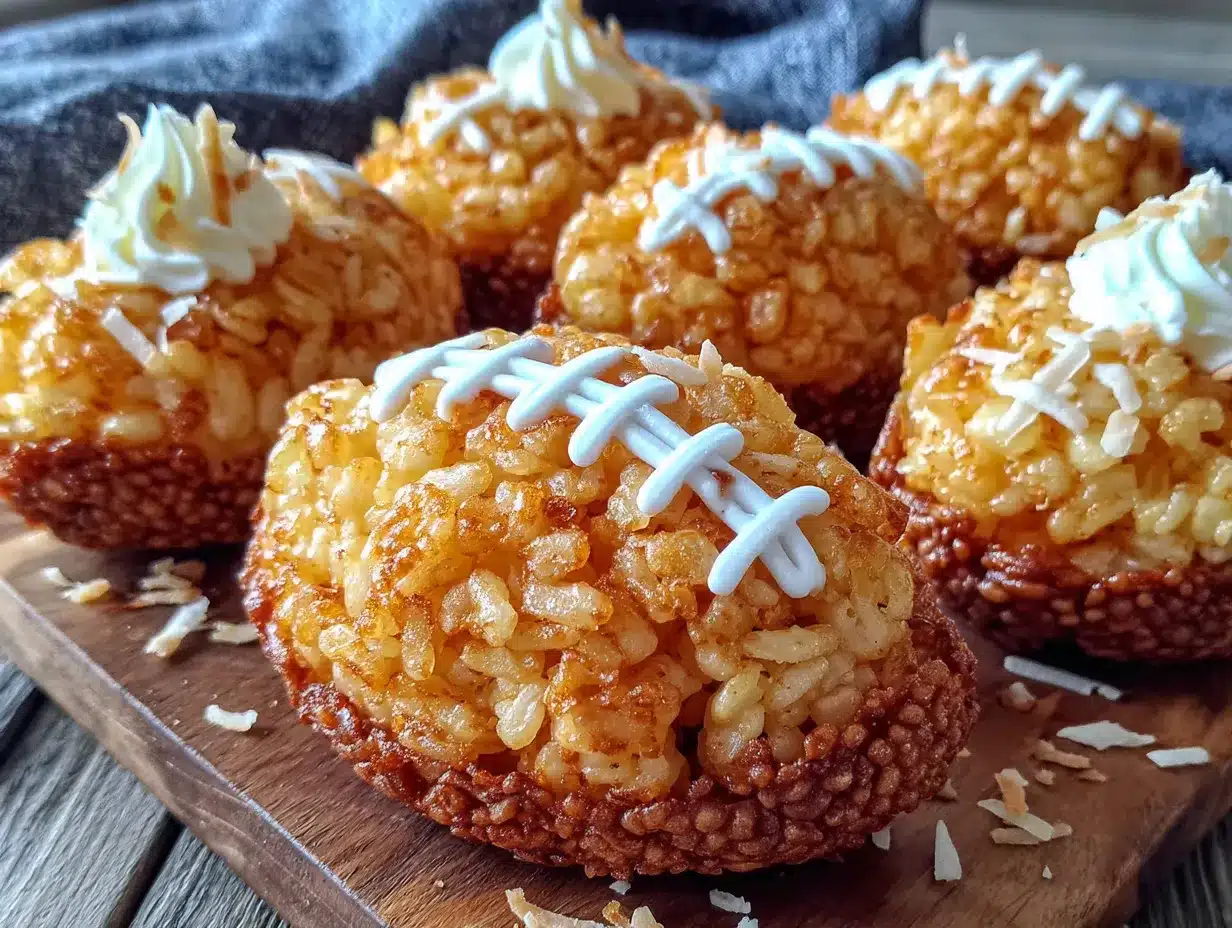
Alright, let’s get to the fun part. Here’s how to make these little footballs step by step. I’ll walk you through it like we’re in the kitchen together, so don’t worry if you’ve never made Rice Krispie treats before—you’ve got this.
- Prepare your workspace. Line a 9×13-inch baking dish or a large rimmed baking sheet with parchment paper. Leave some overhang on the sides so you can lift the treats out later. Lightly grease the parchment paper with a little butter or nonstick spray. Also, grease a large mixing bowl and set it aside—you’ll use it later to hold the shaped footballs.
- Melt the butter. Place the 6 tablespoons of unsalted butter in a large saucepan over medium-low heat. Let it melt slowly, swirling the pan occasionally. Don’t rush this step—if the butter gets too hot, it can brown, which will change the flavor of your treats. You want it just melted, not sizzling. This takes about 2-3 minutes.
- Add the marshmallows. Once the butter is fully melted, pour in the entire package of marshmallows. Stir constantly with your wooden spoon or silicone spatula until the marshmallows are completely melted and the mixture is smooth. This usually takes about 4-5 minutes. Keep the heat on medium-low—if you turn it up too high, the marshmallows can scorch. You’ll know it’s ready when the mixture is glossy and flows off the spoon like thick honey.
- Season and combine. Remove the saucepan from the heat. Stir in the ¼ teaspoon of salt if you’re using it. Now, add the 6 cups of Rice Krispies cereal all at once. Fold the cereal into the marshmallow mixture gently but thoroughly. Use a folding motion—lift the mixture from the bottom and turn it over, scraping the sides as you go. It should take about 2 minutes to get everything evenly coated. Don’t overmix, or the cereal will start to break down and your treats will be dense instead of light and crispy.
- Let it cool slightly. Pour the mixture onto the prepared parchment paper. Spread it out into an even layer using your spatula or a butter knife. Let it sit for about 5 minutes—just until it’s cool enough to handle but still warm and pliable. If it cools too much, it will become difficult to shape. You want it warm, not hot.
- Shape the footballs. Lightly butter your hands (this is crucial—don’t skip this step). Take about 2 tablespoons of the mixture and roll it into a ball, then gently shape it into an oval football shape. It doesn’t have to be perfect—actually, a slightly irregular shape looks more authentic. Place each shaped football on the greased baking sheet or in the greased bowl. Repeat until all the mixture is used. You should get about 20-24 footballs, depending on how big you make them. If the mixture starts sticking to your hands again, re-butter them or dip your fingers in the small bowl of water.
- Let them set. Once all the footballs are shaped, let them sit at room temperature for about 15-20 minutes to firm up. Don’t refrigerate them—this can make them too hard and brittle. Room temperature is perfect.
- Add the laces. While the footballs are setting, prepare your frosting. If you’re using canned frosting, give it a good stir. If it seems too thick to pipe, stir in 1 teaspoon of vegetable oil or shortening to thin it out. Spoon the frosting into a piping bag or a small zip-top bag. If using a zip-top bag, snip off a tiny corner—like, really tiny, about 1/8 inch. Pipe two short parallel lines down the center of each football, then pipe two or three short crosswise lines to create the lace pattern. Don’t overthink this—football laces are simple, and even a messy version looks cute.
- Final set. Let the frosting set for about 10 minutes before serving or storing. This keeps the laces from smudging when you stack the footballs or pack them for a party.
A few things I’ve learned the hard way: If your hands are too sticky, you didn’t use enough butter. If the mixture is too hard to shape, you let it cool too long—just pop it in the microwave for 10 seconds to warm it up. And if your footballs look more like potatoes, don’t worry. Once you add the laces, nobody will know the difference. Seriously.
Cooking Tips & Techniques
I’ve made more batches of these than I care to admit, and I’ve picked up a few tricks along the way that make the process smoother and the results better. Here are the things I wish someone had told me before my first attempt:
Keep your heat low and slow. This is the number one mistake people make with Rice Krispie treats. High heat makes the marshmallows seize up and turn tough. Medium-low is your friend. If you see any steam coming off the marshmallow mixture, you’re running too hot. Back it off immediately. The marshmallows should melt into a silky puddle, not a bubbling mess.
Butter everything. Your hands, the bowl, the spatula, the parchment paper—butter it all. I keep a stick of butter at room temperature just for this purpose. Every time something starts sticking, I run the butter across it. This is not the time to be shy with fat. The butter also adds a subtle richness that makes the treats taste homemade rather than factory-made.
Work in batches if needed. If you’re making a double batch, don’t try to shape all the footballs at once. The mixture cools down quickly, and by the time you’re halfway through, the remaining mixture will be too stiff to shape. Instead, keep the unmixed portion in the saucepan over very low heat (stirring occasionally) while you shape the first batch. Or just work fast—I can shape a full batch in about 8 minutes now, but it took practice.
Use wet fingers for the final shaping. Even with buttered hands, the mixture can get sticky. Dipping your fingers in a bowl of water between each football helps smooth out the surface and prevents sticking. Just shake off the excess water before touching the mixture, or you’ll end up with sog spots. It’s a fine balance, but you’ll get the feel for it after a few tries.
Don’t press too hard. When shaping the footballs, you want them to hold together but still feel light. If you squeeze too firmly, you’ll compress the cereal and end up with dense, hard treats. Gentle pressure is the key. Think of it like shaping a snowball—you want it to stay together, not turn into ice.
Let the frosting set before stacking. I learned this one the hard way at a party when I stacked the footballs in a container and the laces smeared into a white mess. Give the frosting at least 10 minutes to set at room temperature. If you’re in a hurry, pop them in the fridge for 5 minutes, but no longer—cold treats lose their softness.
Make extra frosting. One can of frosting is usually enough, but if you’re generous with the laces (and why wouldn’t you be?), you might run short. I always buy two cans just in case. Leftover frosting can be stored in the fridge for up to two weeks and used for other baking projects.
Variations & Adaptations
One of the best things about this recipe is how easy it is to customize. Here are some variations I’ve tried and loved:
Chocolate Footballs: Add 2 tablespoons of unsweetened cocoa powder to the marshmallow mixture before adding the cereal. Stir it in until fully combined. The chocolate flavor is subtle but delicious, and it makes the footballs look even more authentic—like little chocolate footballs. I made these for a Super Bowl party and they were the first thing to disappear. Just be careful not to add too much cocoa powder, or the mixture will become dry and crumbly.
Peanut Butter Footballs: Stir in ¼ cup of creamy peanut butter along with the marshmallows. Melt it together with the butter and marshmallows until smooth. The peanut butter adds richness and a savory note that balances the sweetness perfectly. If you’re using natural peanut butter (the kind that separates), stir it well before adding. This variation is especially popular with kids, and honestly, I can’t stop eating them myself.
Gluten-Free Version: Make sure your crispy rice cereal is labeled gluten-free. Most name-brand Rice Krispies contain malt flavoring that isn’t gluten-free, so you’ll need to look for a certified gluten-free alternative. I’ve used the generic store brand from Whole Foods and it worked great. The texture is slightly different—a little more delicate—but the taste is identical.
Vegan Version: Use vegan marshmallows (Dandies is a good brand) and plant-based butter. The texture will be a bit softer, so you may need to refrigerate the shaped footballs for 10 minutes before adding the laces to help them firm up. Also, check that your frosting is vegan—most canned frostings are, but it’s worth reading the label.
Colorful Footballs for Holidays: Add a few drops of food coloring to the marshmallow mixture before adding the cereal. Green for St. Patrick’s Day, red and pink for Valentine’s Day, or orange for Halloween. The laces can stay white, or you can color those too. I made red footballs for a Valentine’s Day party once, and people thought they were little hearts until they saw the laces. It was a fun surprise.
Bite-Size Footballs: If you’re serving a crowd and want smaller portions, shape the footballs using about 1 tablespoon of mixture instead of 2. You’ll get double the amount, and they’re perfect for kids or for snacking without committing to a full-size treat. Just reduce the frosting time slightly—the smaller footballs need less detail.
Serving & Storage Suggestions
These mini football treats are best served at room temperature, which is convenient because that’s exactly how they’ll be after you make them. Arrange them on a platter or tray, laces facing up, and watch them disappear. They’re perfect for game day spreads, potlucks, birthday parties, or even just a fun weekend snack with the family.
For a game-day presentation, try serving them on a platter lined with green-dyed coconut flakes to look like grass. Or arrange them on a wooden board alongside other finger foods like popcorn, pretzels, and veggie sticks. They also look great piled in a bowl or arranged in rows on a baking sheet for a casual, buffet-style setup.
If you’re pairing them with drinks, these treats go well with cold milk, hot chocolate, or even a beer for the adults. The sweetness of the marshmallow balances nicely with the bitterness of an IPA or the crispness of a lager. For a kid-friendly party, serve them with fruit punch or lemonade.
Storage: Store the finished footballs in an airtight container at room temperature for up to 5 days. Layer them between sheets of parchment paper or wax paper to prevent sticking. Do not refrigerate them—the cold temperature will make them hard and stale much faster. If you live in a humid climate, add a silica gel packet to the container to keep them from getting sticky.
Freezing: These treats freeze surprisingly well. Place them in a single layer on a baking sheet and freeze for 1 hour, then transfer to a freezer-safe bag or container. They’ll keep for up to 3 months. To thaw, let them sit at room temperature for about 30 minutes. The texture will be slightly softer than fresh, but still delicious. I’ve frozen batches for Super Bowl parties and they’ve held up beautifully.
Reheating: Honestly, these are best eaten at room temperature straight from the container. But if you want to revive them after a day or two, pop one in the microwave for 5-8 seconds. Don’t overdo it, or the marshmallow will become too soft and the football will lose its shape. A quick blast is all you need.
One note about how flavors develop: These treats are actually at their best the day after you make them. The marshmallow and cereal have time to meld together, and the texture becomes perfectly chewy. So if you’re planning for a party, making them a day ahead is actually a smart move. Just add the laces the morning of the event to keep them looking fresh.
Nutritional Information & Benefits
Let’s be real—these are a treat, not a health food. But that doesn’t mean they can’t fit into a balanced diet. Here’s the nutritional breakdown for one mini football (based on a batch of 22 footballs):
| Nutrient | Amount per serving |
|---|---|
| Calories | 145 |
| Total Fat | 5g |
| Saturated Fat | 3g |
| Cholesterol | 12mg |
| Sodium | 115mg |
| Total Carbohydrates | 25g |
| Dietary Fiber | 0g |
| Sugars | 14g |
| Protein | 1g |
While these aren’t packed with nutrients, the Rice Krispies cereal does provide a small amount of iron and B vitamins (since it’s fortified). The butter adds a touch of vitamin A, and the marshmallows? Well, they make people happy, and that counts for something. If you’re looking to lighten them up, you can use a reduced-fat butter substitute, but honestly, the full-fat version tastes so much better that I don’t bother.
For those with dietary restrictions: These treats contain dairy (butter) and gluten (unless you use gluten-free cereal). They are nut-free, egg-free, and soy-free (check your specific brands to be sure). If you’re serving a crowd with allergies, I recommend making a separate batch with vegan butter and gluten-free cereal to be safe.
From a wellness perspective, I think of these as a “sometimes food”—the kind of thing you make for special occasions when you want something fun and nostalgic. They’re not everyday snacks, but they’re also not worth stressing over. One or two footballs with a glass of milk is a perfectly reasonable indulgence. Life’s too short to count marshmallows, you know?
Conclusion
These mini football-shaped Rice Krispie treats are proof that you don’t need complicated recipes or fancy ingredients to make something memorable. They’re simple, they’re fun, and they have a way of bringing people together—whether it’s around a TV for the big game or just around the kitchen counter on a lazy Sunday afternoon.
I love this recipe because it reminds me that cooking doesn’t have to be stressful to be special. Some of the best things come from moments of panic and a little bit of creativity. That day I showed up to the party with nothing but a tray of marshmallow footballs, I learned something important: people don’t care if your food is perfect. They care if it’s made with love. And these little guys are made with exactly that.
So go ahead and give them a try. Make them your own—add chocolate, peanut butter, or food coloring. Shape them bigger or smaller. Mess up the laces a few times. It’s all part of the fun. And when someone at your party asks where you got the recipe, just smile and say you made it up. Because honestly, that’s the best kind of cooking.
I’d love to hear how yours turn out! Drop a comment below and let me know if you tried any variations, or share a photo of your footballs on Pinterest. Tag me so I can see your creations—there’s nothing better than seeing someone else fall in love with a recipe you love. Happy cooking, and here’s to winning the snack table, one mini football at a time!
Frequently Asked Questions
Can I use a different cereal instead of Rice Krispies?
Absolutely! Cocoa Pebbles, Fruity Pebbles, or even crushed cornflakes can work in place of Rice Krispies. Just keep in mind that different cereals have different textures and sweetness levels, so the final result might be slightly different. Cocoa Pebbles make a great chocolate version that kids love.
Why did my Rice Krispie treats turn out hard?
This usually happens when the marshmallow mixture is overheated or cooked too long. Keep the heat on medium-low and remove the pan from the stove as soon as the marshmallows are melted and smooth. Also, pressing the mixture too firmly when shaping can make them dense and hard. Use gentle pressure.
How do I keep the marshmallow mixture from sticking to my hands?
Butter your hands generously before shaping, and keep a small bowl of water nearby to dip your fingers in between footballs. The water creates a barrier that prevents sticking. If the mixture starts sticking again, re-butter your hands or dip them in the water again.
Can I make these ahead of time for a party?
Yes! These treats are actually best made a day ahead. The texture improves as the marshmallow and cereal meld together. Just wait to add the frosting laces until the morning of your event so they look fresh. Store them in an airtight container at room temperature.
How do I get the football shape to look right?
Don’t stress about perfection. Roll the mixture into a ball first, then gently pinch the ends to create an oval shape. Slightly flatten the top and bottom so it sits evenly. Once you add the laces, any imperfections will disappear. Think of them as rustic, handcrafted footballs—that’s part of their charm.
Pin This Recipe!
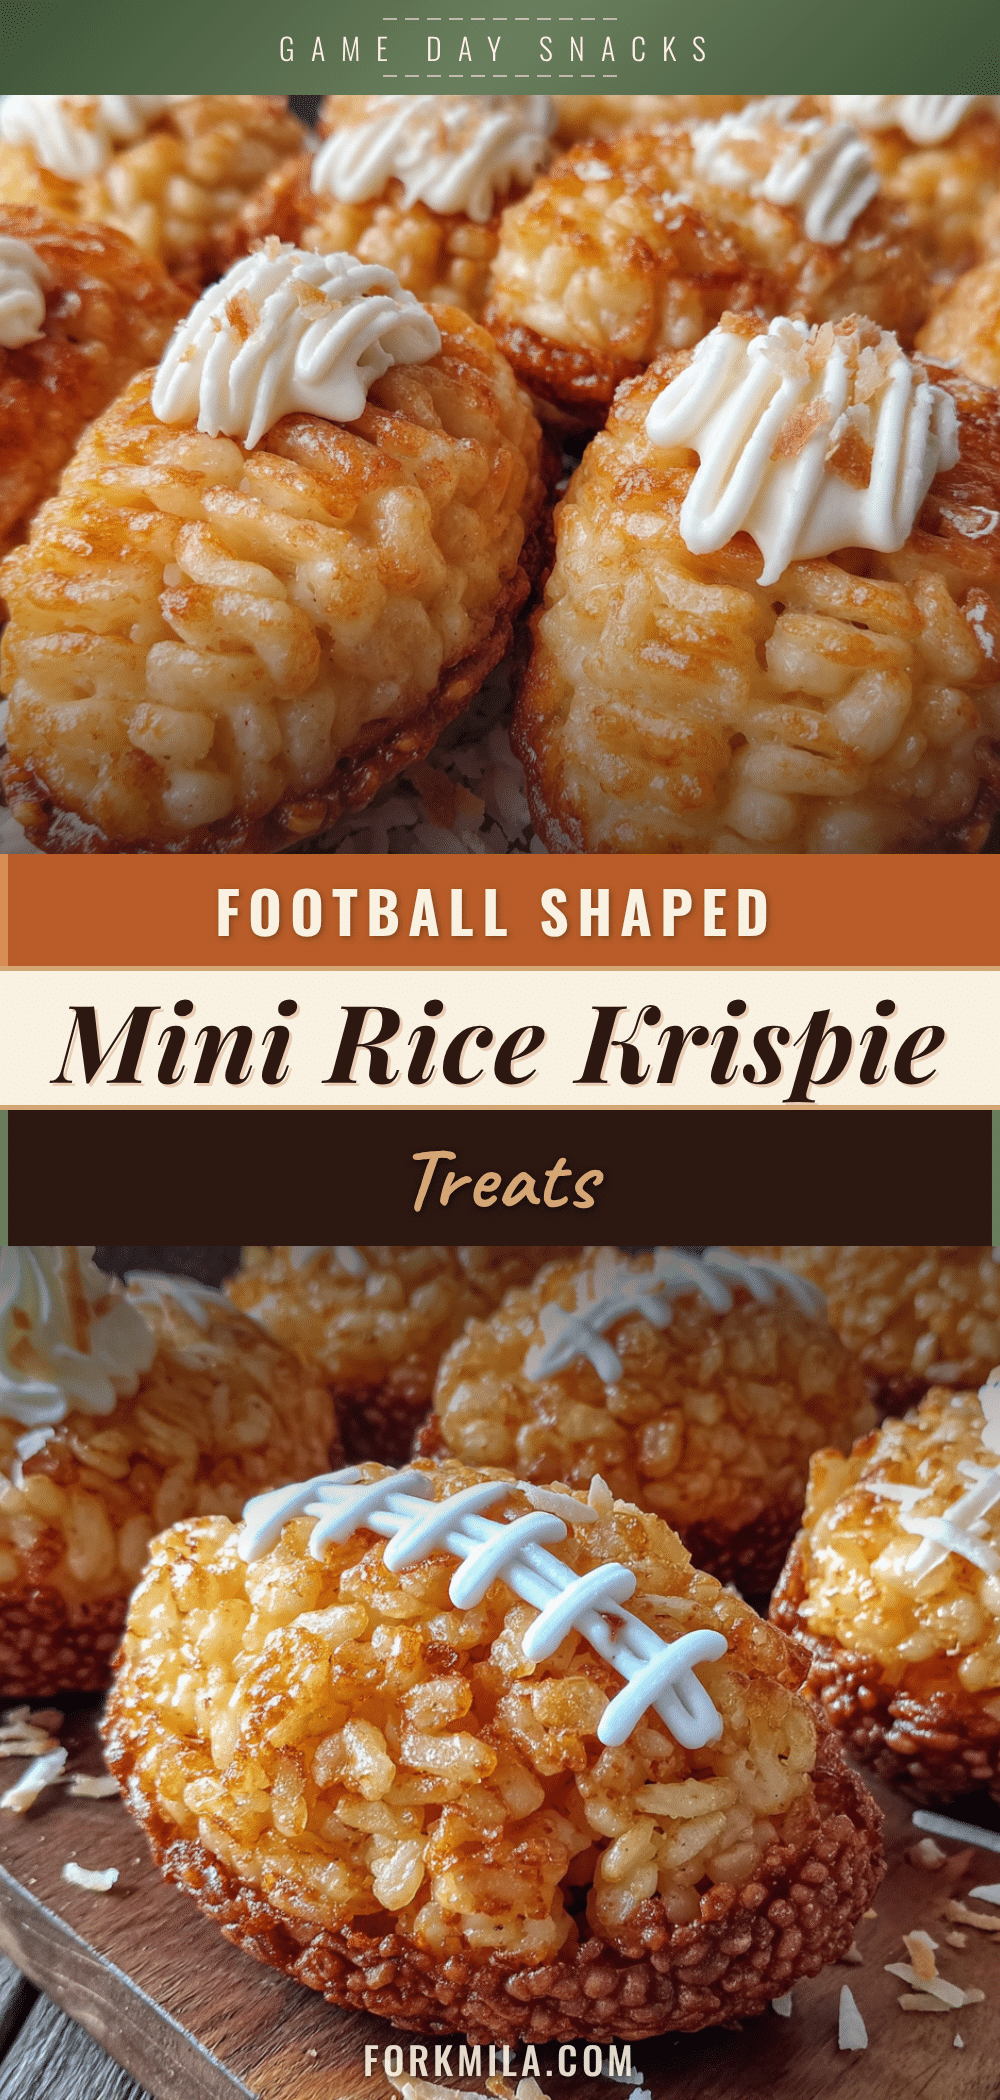
Easy Mini Football Rice Krispie Treats | Best Game Day Snack

These mini football-shaped Rice Krispie treats are the perfect game day snack. Quick, easy, and made with simple ingredients, they’re a crowd-pleaser that will disappear in minutes.
- Prep Time: 20 minutes
- Cook Time: 10 minutes
- Total Time: 30 minutes
- Yield: 20-24 footballs 1x
- Category: Snack
- Cuisine: American
Ingredients
- 6 tablespoons unsalted butter (plus extra for greasing)
- 1 package (10 ounces) regular marshmallows (about 40 large or 4 cups mini)
- 6 cups Rice Krispies cereal
- ¼ teaspoon salt (optional)
- 1 can (16 ounces) white frosting (or homemade buttercream)
- 1 teaspoon vegetable oil or shortening (optional, for thinning frosting)
Instructions
- Prepare your workspace. Line a 9×13-inch baking dish or a large rimmed baking sheet with parchment paper. Leave some overhang on the sides so you can lift the treats out later. Lightly grease the parchment paper with a little butter or nonstick spray. Also, grease a large mixing bowl and set it aside.
- Melt the butter. Place the 6 tablespoons of unsalted butter in a large saucepan over medium-low heat. Let it melt slowly, swirling the pan occasionally. Don’t rush this step—if the butter gets too hot, it can brown, which will change the flavor of your treats. You want it just melted, not sizzling. This takes about 2-3 minutes.
- Add the marshmallows. Once the butter is fully melted, pour in the entire package of marshmallows. Stir constantly with your wooden spoon or silicone spatula until the marshmallows are completely melted and the mixture is smooth. This usually takes about 4-5 minutes. Keep the heat on medium-low—if you turn it up too high, the marshmallows can scorch. You’ll know it’s ready when the mixture is glossy and flows off the spoon like thick honey.
- Season and combine. Remove the saucepan from the heat. Stir in the ¼ teaspoon of salt if you’re using it. Now, add the 6 cups of Rice Krispies cereal all at once. Fold the cereal into the marshmallow mixture gently but thoroughly. Use a folding motion—lift the mixture from the bottom and turn it over, scraping the sides as you go. It should take about 2 minutes to get everything evenly coated. Don’t overmix, or the cereal will start to break down and your treats will be dense instead of light an…
- Let it cool slightly. Pour the mixture onto the prepared parchment paper. Spread it out into an even layer using your spatula or a butter knife. Let it sit for about 5 minutes—just until it’s cool enough to handle but still warm and pliable. If it cools too much, it will become difficult to shape. You want it warm, not hot.
- Shape the footballs. Lightly butter your hands (this is crucial—don’t skip this step). Take about 2 tablespoons of the mixture and roll it into a ball, then gently shape it into an oval football shape. It doesn’t have to be perfect—actually, a slightly irregular shape looks more authentic. Place each shaped football on the greased baking sheet or in the greased bowl. Repeat until all the mixture is used. You should get about 20-24 footballs, depending on how big you make them. If the mixture sta…
- Let them set. Once all the footballs are shaped, let them sit at room temperature for about 15-20 minutes to firm up. Don’t refrigerate them—this can make them too hard and brittle. Room temperature is perfect.
- Add the laces. While the footballs are setting, prepare your frosting. If you’re using canned frosting, give it a good stir. If it seems too thick to pipe, stir in 1 teaspoon of vegetable oil or shortening to thin it out. Spoon the frosting into a piping bag or a small zip-top bag. If using a zip-top bag, snip off a tiny corner—like, really tiny, about 1/8 inch. Pipe two short parallel lines down the center of each football, then pipe two or three short crosswise lines to create the lace pattern…
- Final set. Let the frosting set for about 10 minutes before serving or storing. This keeps the laces from smudging when you stack the footballs or pack them for a party.
Notes
Butter your hands generously before shaping to prevent sticking. If the mixture cools too much and becomes hard to shape, microwave it for 10 seconds to warm it up. The treats are best made a day ahead; add the frosting laces the morning of the event for a fresh look. Store in an airtight container at room temperature for up to 5 days. Do not refrigerate.
Nutrition
- Serving Size: 1 football
- Calories: 145
- Sugar: 14
- Sodium: 115
- Fat: 5
- Saturated Fat: 3
- Carbohydrates: 25
- Protein: 1
Keywords: mini football rice krispie treats, game day snack, super bowl snack, rice krispie treats, football shaped treats, easy snack, party snack


