It was 10:47 PM on a random Wednesday in early October, and I was staring into my pantry like it held the secrets to the universe. The craving was specific—I wanted something that felt like a party, but I had zero energy for a party’s worth of work. Halloween was creeping up, and I’d promised my niece I’d bring dessert to her class party. I didn’t have a fancy cake pan or piping bags. But I had pudding mix, Oreos, and a bag of gummy worms that I’d bought on a whim (because honestly, who can resist those things?). That’s when the idea hit me—dirt cups. Not just any dirt cups, but the spookiest, easiest, most ridiculously fun version I could whip up without breaking a sweat.
The first batch came together in my pajamas, with my cat judging me from the counter. I crushed the Oreos in a Ziploc bag with a rolling pin—probably waking up the neighbors—and layered everything in those little clear plastic cups I’d saved from a party last summer. The gummy worms poking out of the “dirt” made me laugh out loud. It was silly, a little messy, and completely perfect. I mean, isn’t that what Halloween is all about? Let me tell you, when I brought these to that classroom, the kids went absolutely nuts. And the parents? They were just as excited because they could see how simple they were.
These Easy Spooky Halloween Dirt Cups with Gummy Worms have become my go-to for every October gathering. They’re the kind of recipe that makes you look like a hero with almost zero effort. Maybe you’ve been there—scrambling for a last-minute treat that doesn’t scream “store-bought.” This is your answer. They’re creepy, cute, and seriously delicious. And the best part? You can make them in under 15 minutes. No oven required. No fancy skills. Just a little bit of chocolate, a lot of gummy worms, and a whole lot of Halloween spirit.
Why You’ll Love This Recipe
I’ve tested this recipe more times than I care to admit—tweaking the pudding-to-worm ratio, trying different Oreo brands, even experimenting with sugar-free options. After all that trial and error (and a few stomachaches from quality control), I can confidently say this version is the best. Here’s why you’re going to love it:
- Quick & Easy: This comes together in about 15 minutes. Seriously. No baking, no waiting for things to cool, no complicated steps. It’s perfect for those “I need a dessert NOW” moments.
- Simple Ingredients: You probably already have most of these in your pantry. Oreos, instant pudding mix, milk, cool whip, and gummy worms. That’s it. No fancy grocery store runs.
- Perfect for Halloween Parties: Whether it’s a classroom celebration, a spooky movie night, or a Halloween potluck, these dirt cups are always the star. Kids and adults alike can’t resist them.
- Crowd-Pleaser: I’ve never met a person who didn’t smile when handed a dirt cup with a gummy worm peeking out. It’s pure joy in a cup.
- Unbelievably Delicious: The creamy chocolate pudding, the crunchy Oreo “dirt,” and the chewy gummy worms create a texture combo that’s next-level comfort food. It’s like a deconstructed Oreo cheesecake, but way easier.
What makes this recipe different from the rest? It’s all in the layering technique and the secret to keeping your gummy worms from sinking. I figured out that if you let the pudding set for just a few minutes before adding the worms, they stay perfectly in place—like they’re crawling out of the dirt. It’s a small trick that makes a huge visual impact. Plus, I use a specific ratio of crushed Oreos to pudding that gives you the perfect “dirt” texture without being too dry or too soggy. This isn’t just another version—it’s the best version, tested and approved by dozens of picky little monsters.
Honestly, this recipe is the kind that makes you close your eyes after the first bite. It’s comfort food reimagined—faster, simpler, but with the same soul-soothing satisfaction. Perfect for impressing guests without stress, or turning a simple Tuesday into something memorable.
What Ingredients You Will Need
This recipe uses simple, everyday ingredients to create something that looks like you spent hours in the kitchen. The magic is in how they come together. Here’s what you’ll need:
For the Pudding Base
- 1 box (3.9 oz) instant chocolate pudding mix – I prefer Jell-O brand for its smooth texture, but any brand works. The instant kind is key—no cooking required.
- 2 cups cold milk – Whole milk gives the richest, creamiest pudding. But 2% or even oat milk work great too. Just make sure it’s cold so the pudding sets properly.
- 1 cup cool whip, thawed – This is my secret for making the pudding extra fluffy and mousse-like. You can use homemade whipped cream if you’re feeling fancy, but Cool Whip is perfectly fine and saves time.
For the “Dirt”
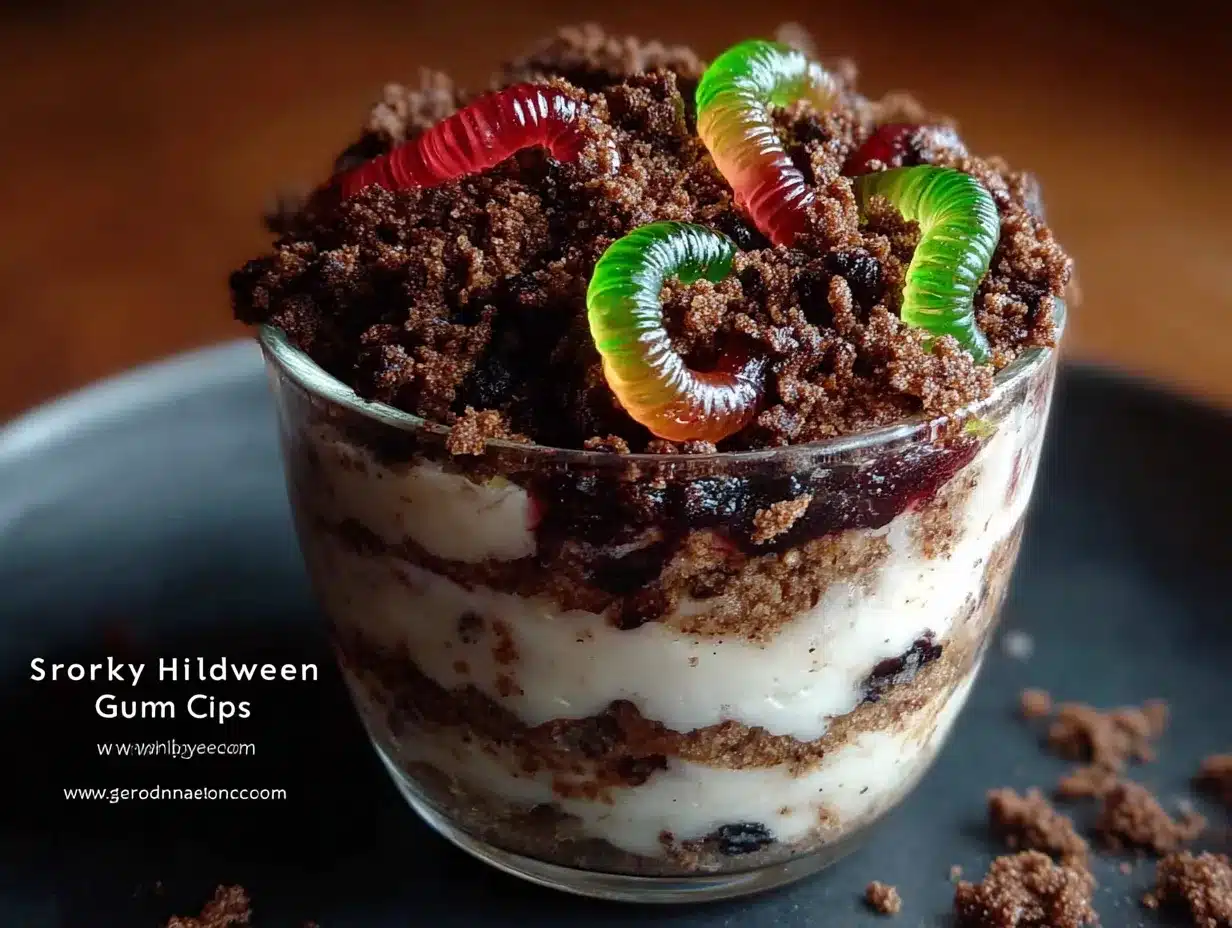
- 1 package (14.3 oz) Oreo cookies – You’ll need about 20 cookies. I’ve tried generic chocolate sandwich cookies, and they work in a pinch, but Oreos have that perfect crunch and dark color that looks most like real dirt. (Pro tip: don’t remove the cream filling—it adds to the texture.)
For the Spooky Decorations
- 1 bag (5 oz) gummy worms – The classic Halloween candy. Look for the bright, colorful ones for the best visual effect. I like the ones that are a mix of red, green, and yellow for maximum creepiness.
- Optional: Halloween sprinkles, candy eyeballs, or small plastic spiders – These are totally optional but add a fun, extra spooky touch. My niece loves when I add a few candy eyeballs peeking out of the dirt.
Substitution Guidance
Need to make this dairy-free? Use almond or oat milk and a dairy-free Cool Whip alternative. The pudding will still set, though it might be slightly less thick. For a gluten-free version, use gluten-free chocolate sandwich cookies (like Glutino brand) and double-check your pudding mix is certified gluten-free. And if you’re not a fan of gummy worms (weird, but okay), you can use gummy spiders, gummy bats, or even candy corn for a different Halloween vibe.
Equipment Needed
You don’t need a fancy kitchen to make these dirt cups. Here’s what you’ll need:
- Mixing bowls: One large bowl for the pudding, one medium bowl for crushing the Oreos. I use glass bowls because they’re easy to clean, but any bowl works.
- Whisk or electric mixer: A whisk works fine, but an electric mixer makes the pudding come together in seconds. I’ve done it both ways, and honestly, the arm workout from whisking isn’t worth it—use a mixer if you have one.
- Ziploc bag and rolling pin (or food processor): For crushing the Oreos. The Ziploc bag method is my favorite because it’s satisfying and requires no cleanup. Just put the cookies in a bag, seal it, and go to town with a rolling pin. If you have a food processor, it takes about 10 seconds—just don’t over-process or you’ll get Oreo dust.
- Clear plastic cups or small jars: This is crucial for the visual effect. You want people to see the layers of pudding and dirt. I use 7-ounce clear plastic cups from the party supply store. You can also use small mason jars or even wine glasses for a fancy adult version.
- Spatula or spoon: For layering. A small spatula helps get clean layers, but a spoon works just fine.
One tip I learned the hard way: don’t use paper cups. They get soggy, and you can’t see the awesome layers. Trust me on this one.
Preparation Method
Alright, let’s make some spooky dirt cups! This is so easy, you’ll wonder why you ever bought pre-made desserts. Follow these steps, and you’ll have a Halloween hit in no time.
Step 1: Make the Pudding
In a large mixing bowl, whisk together the instant chocolate pudding mix and 2 cups of cold milk. Whisk for about 2 minutes, until the pudding starts to thicken. It should be smooth and lump-free. If you’re using an electric mixer, do it on low speed for about 1 minute. The mixture will be quite thin at first—don’t panic, that’s normal. It will thicken as it sits.
Personal tip: Make sure your milk is really cold. I put mine in the freezer for about 5 minutes before starting. Cold milk helps the pudding set faster and gives a better texture.
Step 2: Fold in the Cool Whip
Once the pudding has thickened slightly (after about 3-4 minutes), gently fold in 1 cup of thawed Cool Whip. Use a spatula and a gentle hand—you want to combine them without deflating all the air. The result should be a light, mousse-like mixture. This is what makes our dirt cups extra creamy and dreamy.
Sensory cue: The pudding should look like a thick, glossy chocolate mousse at this point. It should hold its shape slightly when you lift the spatula. If it’s still runny, give it another minute or two to set.
Step 3: Crush the Oreos
While the pudding is setting, make your “dirt.” Place about 20 Oreo cookies in a large Ziploc bag. Seal it tightly (push out the air first), and use a rolling pin to crush them into fine crumbs. You want a mix of fine powder and small chunks—this gives the most realistic dirt texture. If you’re using a food processor, pulse about 10-15 times until you get the desired consistency.
Warning: Don’t over-crush! If you turn them into powder, it looks less like dirt and more like cocoa powder. You want some texture. Also, don’t open the bag too quickly after crushing—there’s a fine dust that will puff out and coat your kitchen. Learn from my mistakes, folks.
Step 4: Layer the Cups
Now for the fun part. Take your clear cups and start layering. Spoon about 2 tablespoons of crushed Oreos into the bottom of each cup. This is your first layer of “dirt.” Then, spoon or pipe the pudding mixture on top, filling the cup about halfway. Add another layer of crushed Oreos on top of the pudding, leaving about half an inch of space at the top.
Pro tip: For the cleanest layers, use a piping bag for the pudding. But if you don’t have one (I rarely do), just spoon it in gently and tap the cup on the counter to settle it.
Step 5: Add the Gummy Worms
Here’s the trick: after you’ve added the top layer of Oreos, let the cups sit for about 5 minutes. This allows the pudding to firm up slightly. Then, gently poke 2-3 gummy worms into the top of each cup, letting them dangle over the edge like they’re crawling out of the dirt. If you add them too early, they’ll sink into the pudding and disappear. If you wait too long, the pudding will be too firm to push them in. The 5-minute window is the sweet spot.
Personal anecdote: The first time I made these, I added the worms immediately, and they all sank to the bottom like they were drowning. My niece called them “dead worms.” Not the look I was going for! Now I always set a timer.
Step 6: Chill and Serve
Place the assembled cups in the refrigerator for at least 30 minutes before serving. This allows the pudding to fully set and the flavors to meld together. When you’re ready to serve, you can add extra decorations like candy eyeballs or plastic spiders for an extra spooky touch.
Time estimate: Total active time is about 15 minutes. Chilling time is 30 minutes. So in under an hour, you have a Halloween dessert that looks like it took all day.
Cooking Tips & Techniques
After making these dirt cups for countless Halloween parties, I’ve picked up a few tricks that make a big difference. Here are my best tips:
The Perfect Oreo Crumb
The key to realistic-looking dirt is texture. You want a mix of fine crumbs and small chunks. I’ve found that crushing the Oreos in a Ziploc bag with a rolling pin gives the best control. If you use a food processor, pulse it—don’t just let it run. And whatever you do, don’t use a blender. I tried that once, and it turned into Oreo butter. Weird and not useful.
Preventing Soggy Dirt
Nobody wants soggy dirt. The trick is to add a thin layer of crushed Oreos at the bottom of the cup before adding the pudding. This creates a barrier that prevents the pudding from seeping into the top layer. I also recommend not assembling these more than 24 hours in advance. The Oreos will start to soften over time, and you’ll lose that satisfying crunch.
Making Ahead of Time
You can absolutely make these a day ahead. Just follow all the steps, but wait to add the gummy worms until right before serving. Store the assembled cups (without worms) in the fridge, covered with plastic wrap. When you’re ready to serve, add the worms and any other decorations. This keeps the worms from getting too soft and the Oreos from getting too soggy.
Multitasking Strategy
Here’s how I streamline the process: While the pudding is setting (those 3-4 minutes), I crush the Oreos. Then while the pudding and Cool Whip are being folded together, I set out my cups. This way, everything is ready at the same time, and I’m not waiting around.
Consistency is Key
For the best results, make sure your pudding is fully set before adding the top layer of Oreos. If the pudding is too runny, the Oreos will just sink and mix in. You want distinct layers for that wow factor. If you’re in a hurry, you can speed up the setting process by placing the pudding bowl in the freezer for 10 minutes.
Variations & Adaptations
One of the best things about this recipe is how easy it is to customize. Here are some of my favorite variations:
Peanut Butter Dirt Cups
Add 2 tablespoons of creamy peanut butter to the pudding mixture before folding in the Cool Whip. It gives a Reese’s-like flavor that pairs perfectly with the chocolate. My husband says this version is “dangerously good.” Just make sure your peanut butter is room temperature so it blends smoothly.
Mint Chocolate Dirt Cups
Use chocolate mint pudding mix instead of regular chocolate. Add a drop of green food coloring to the pudding for an extra spooky green tint. Top with crushed chocolate mint cookies instead of Oreos. It’s like a Thin Mint in a cup, and it’s absolutely addictive.
Vegan-Friendly Version
Use almond or oat milk, a dairy-free Cool Whip alternative, and vegan chocolate sandwich cookies. The texture will be slightly different—a bit less creamy—but it’s still delicious. I’ve made this for a friend who’s vegan, and she said it was the best dessert she’d had in months.
Individual Trifles
For a fancier presentation, layer the pudding and Oreos in small mason jars or wine glasses. Top with a dollop of whipped cream and a gummy worm. This is perfect for adult Halloween parties where you want something a little more elegant (but still fun).
Sugar-Free Option
Use sugar-free pudding mix, sugar-free Cool Whip, and sugar-free chocolate sandwich cookies. The taste is surprisingly close to the original. I’ve tested this for a friend with diabetes, and she was thrilled to have a Halloween treat she could actually enjoy.
Serving & Storage Suggestions
These dirt cups are best served cold, straight from the fridge. The contrast between the cold, creamy pudding and the crunchy Oreos is what makes them so satisfying. Here are my tips for serving and storing:
Serving Temperature and Presentation
Serve them chilled, but not ice-cold. If they’ve been in the fridge for more than a few hours, let them sit at room temperature for about 5 minutes before serving. This takes the chill off and lets the flavors shine. For presentation, arrange them on a platter or tray and scatter a few extra gummy worms and candy eyeballs around for a spooky effect.
Complementary Dishes and Beverages
These dirt cups pair perfectly with other Halloween treats like pumpkin-shaped sugar cookies or caramel apples. For drinks, I love serving them with a warm mug of apple cider or a cold glass of milk (for the kids) or a spiked hot chocolate (for the adults). The combination of chocolate and apple is surprisingly good.
Storage Instructions
Store assembled dirt cups in the refrigerator, covered with plastic wrap or a lid, for up to 3 days. After that, the Oreos start to get too soft, and the pudding can develop a watery texture. I don’t recommend freezing them—the texture of the pudding and Oreos will be ruined. Trust me, I tried it once. It was not pretty.
Reheating Methods
These are meant to be served cold, so no reheating needed. But if you’ve stored them and the Oreos have softened a bit, you can add a fresh sprinkle of crushed Oreos on top right before serving to restore some crunch.
How Flavors Develop Over Time
Interestingly, these dirt cups actually taste better after a few hours in the fridge. The flavors meld together, and the pudding becomes even creamier. I often make them the night before a party, and they’re always a hit. Just wait to add the gummy worms until the morning of the party so they stay firm and chewy.
Nutritional Information & Benefits
Let’s be real—these are a treat, not a health food. But that doesn’t mean they can’t fit into a balanced diet. Here’s the nutritional breakdown for one serving (based on 8 servings per recipe):
| Nutrient | Amount per Serving |
|---|---|
| Calories | 320 |
| Total Fat | 14g |
| Saturated Fat | 6g |
| Cholesterol | 5mg |
| Sodium | 380mg |
| Total Carbohydrates | 48g |
| Dietary Fiber | 2g |
| Sugars | 35g |
| Protein | 4g |
While these aren’t exactly a superfood, there are a few redeeming qualities. The milk provides calcium and vitamin D, and the Oreos (believe it or not) contain a small amount of iron. The Cool Whip adds a bit of air and lightness, so you’re not eating a brick of pure chocolate. And honestly? Sometimes you need a treat that’s just for fun. Halloween is about indulgence and joy, and these dirt cups deliver on both fronts.
For those with dietary restrictions: this recipe contains dairy, gluten, and soy (from the Oreos). It can be adapted for vegan, gluten-free, and sugar-free diets using the substitutions I mentioned earlier. Always check labels if you’re serving someone with severe allergies.
Conclusion
These Easy Spooky Halloween Dirt Cups with Gummy Worms are more than just a dessert—they’re a memory in the making. They’re the treat that makes kids giggle and adults feel like kids again. They’re the recipe you’ll pull out year after year, the one that saves you when you need a last-minute Halloween contribution that looks like you actually tried. And honestly? They taste amazing. The creamy pudding, the crunchy Oreos, the chewy gummy worms—it’s a texture party in your mouth.
I love this recipe because it’s proof that you don’t need fancy ingredients or complicated techniques to create something special. You just need a little creativity, a few pantry staples, and a willingness to have fun. So go ahead—make a mess, crush some Oreos, and poke some worms into the dirt. Your Halloween will be all the better for it.
I’d love to hear how your dirt cups turn out! Did you add any fun decorations? Did your kids help make them? Drop a comment below and share your spooky creations. And if you loved this recipe, don’t forget to pin it on Pinterest for later and share it with your fellow Halloween enthusiasts. Happy haunting, and happy eating!
Frequently Asked Questions
Can I make these dirt cups ahead of time?
Yes! You can assemble them up to 24 hours in advance. Just wait to add the gummy worms until right before serving to keep them from getting too soft. Store the cups covered in the refrigerator.
Can I use homemade pudding instead of instant?
You can, but the texture will be different. Instant pudding sets quickly and gives that mousse-like consistency when mixed with Cool Whip. Cook-and-serve pudding will be thinner and won’t hold its shape as well in layers. If you use homemade, make sure it’s fully chilled and very thick before layering.
How do I keep the gummy worms from sinking?
The key is timing. Let the assembled cups sit for about 5 minutes after adding the top layer of Oreos. This allows the pudding to firm up slightly. Then gently poke the worms into the top. If you add them too early, they’ll sink. Too late, and they won’t go in.
Can I use a different type of cookie for the dirt?
Absolutely! Chocolate graham crackers, chocolate wafer cookies, or even crushed chocolate cereal work well. Keep in mind that different cookies have different textures and sweetness levels, so the final taste might vary. Oreos are my favorite for their dark color and perfect crunch.
How many servings does this recipe make?
This recipe makes about 8 servings using 7-ounce cups. If you’re using smaller cups or serving them as a bite-sized treat at a party, you can easily get 12-15 servings. Just adjust the layering amounts accordingly.
Pin This Recipe!
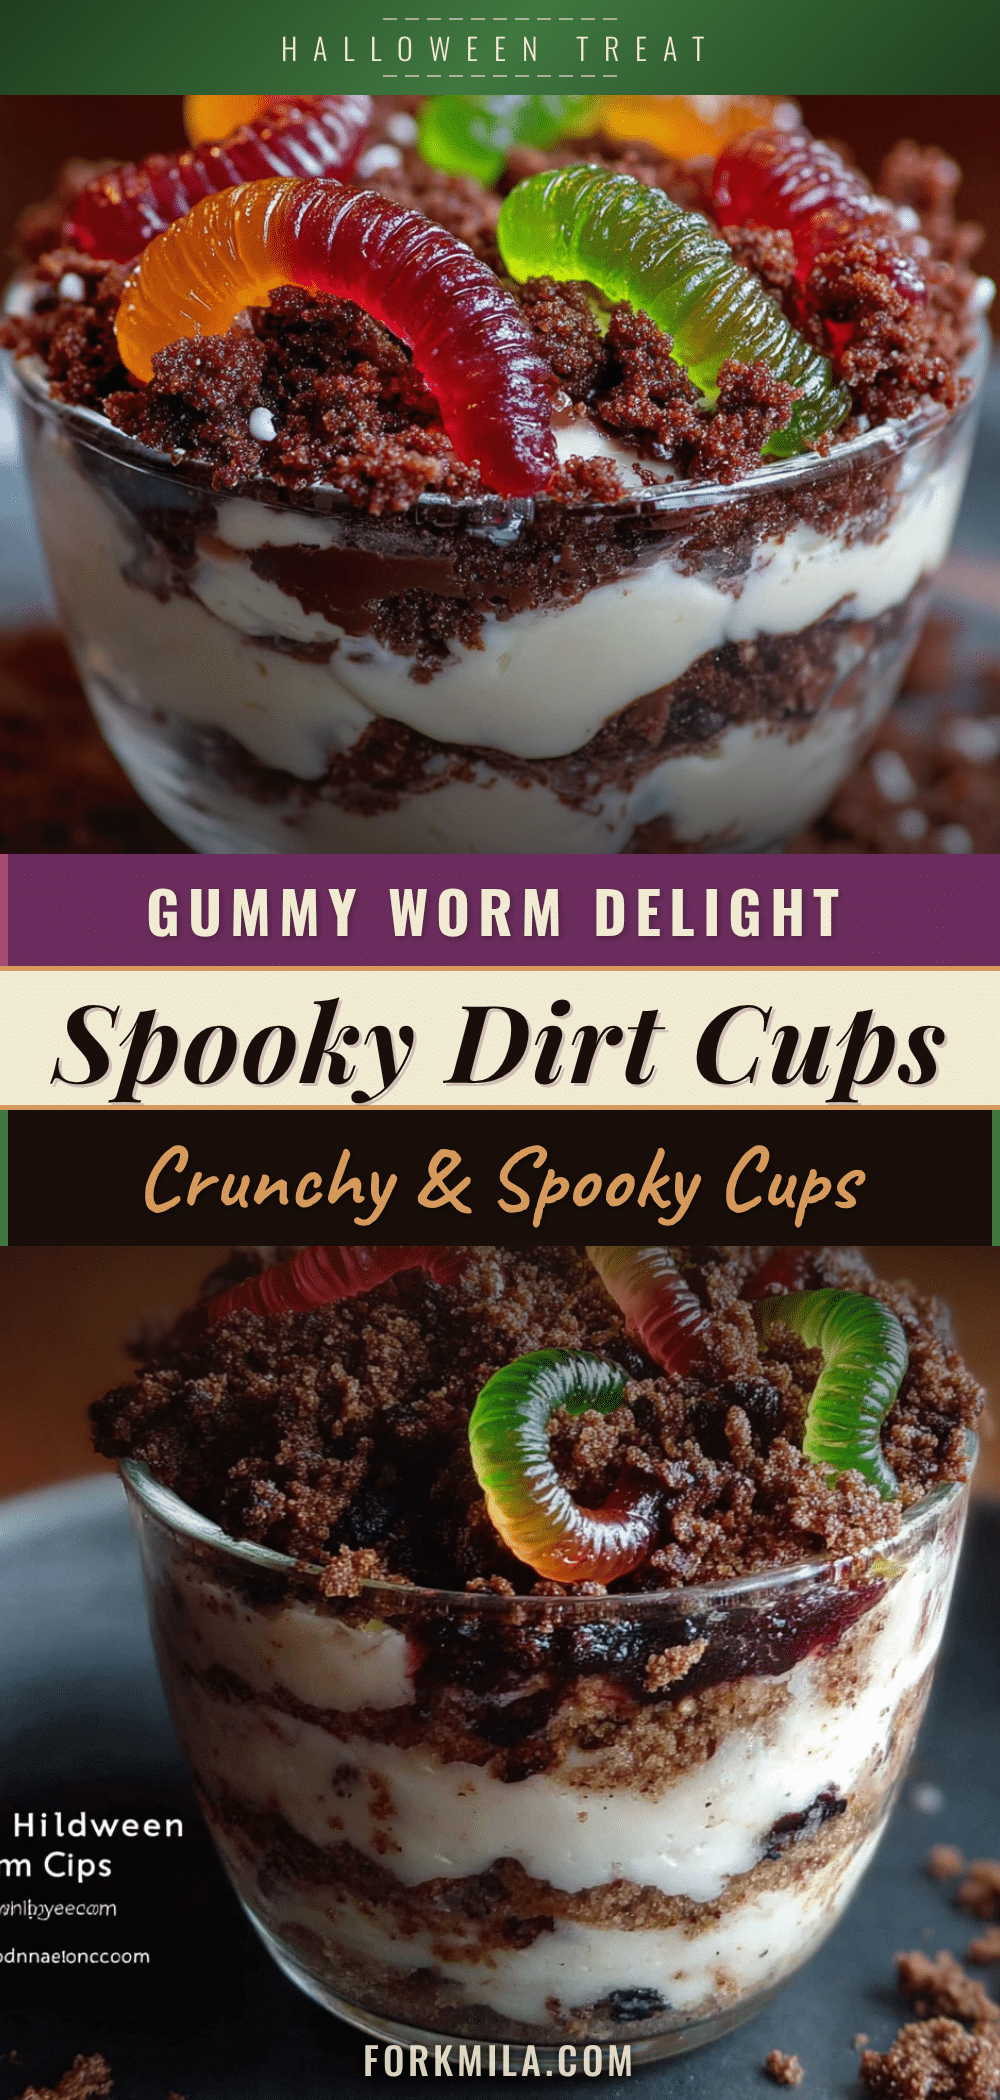
Easy Spooky Dirt Cups: Best Halloween Dessert with Gummy Worms
These Easy Spooky Halloween Dirt Cups with Gummy Worms are a quick, no-bake dessert that combines creamy chocolate pudding, crunchy Oreo ‘dirt,’ and chewy gummy worms for a fun and festive Halloween treat. Perfect for parties, they come together in under 15 minutes with simple ingredients.
- Prep Time: 15 minutes
- Cook Time: 0 minutes
- Total Time: 45 minutes
- Yield: 8 servings 1x
- Category: Dessert
- Cuisine: American
Ingredients
- 1 box (3.9 oz) instant chocolate pudding mix
- 2 cups cold milk
- 1 cup Cool Whip, thawed
- 1 package (14.3 oz) Oreo cookies (about 20 cookies)
- 1 bag (5 oz) gummy worms
- Optional: Halloween sprinkles, candy eyeballs, or small plastic spiders
Instructions
- In a large mixing bowl, whisk together the instant chocolate pudding mix and 2 cups of cold milk for about 2 minutes until it starts to thicken. It will be thin at first but will thicken as it sits.
- After the pudding has thickened slightly (about 3-4 minutes), gently fold in 1 cup of thawed Cool Whip with a spatula until combined and mousse-like.
- While the pudding sets, crush about 20 Oreo cookies in a large Ziploc bag using a rolling pin until you have a mix of fine crumbs and small chunks. Alternatively, pulse in a food processor 10-15 times.
- Spoon about 2 tablespoons of crushed Oreos into the bottom of each clear cup. Then spoon or pipe the pudding mixture on top, filling the cup about halfway. Add another layer of crushed Oreos on top, leaving about half an inch of space.
- Let the cups sit for about 5 minutes to allow the pudding to firm up slightly. Then gently poke 2-3 gummy worms into the top of each cup, letting them dangle over the edge.
- Refrigerate the assembled cups for at least 30 minutes before serving. Add extra decorations like candy eyeballs or plastic spiders if desired.
Notes
For best results, use cold milk to help the pudding set faster. Let the cups sit for 5 minutes after adding the top Oreo layer before inserting gummy worms to prevent them from sinking. Assemble up to 24 hours in advance, but add gummy worms just before serving to keep them firm. Store covered in the refrigerator for up to 3 days.
Nutrition
- Serving Size: 1 cup (7 oz)
- Calories: 320
- Sugar: 35
- Sodium: 380
- Fat: 14
- Saturated Fat: 6
- Carbohydrates: 48
- Fiber: 2
- Protein: 4
Keywords: Halloween dessert, dirt cups, gummy worms, no-bake, easy dessert, chocolate pudding, Oreo, spooky, kids treat


