I wasn’t expecting baking advice from the accountant who does my taxes, but there I was, sitting in his cluttered office last October, listening to him describe exactly how to make Pan de Muerto. I’d gone in to drop off some receipts, and somehow we got talking about Día de los Muertos. He reached into his desk drawer—a drawer I’d assumed held calculators and tax forms—and pulled out a faded, flour-dusted index card. “My abuela’s recipe,” he said, handing it over. “She’d want you to have it.” Honestly, I almost teared up right there. The card was stained with vanilla extract and years of November mornings. It wasn’t just a recipe; it was a story written in butter and sugar.
That first weekend, I made the dough three times. The first batch was too dry—I forgot the orange blossom water completely. The second batch was stickier than I expected, and I may have cursed a little while kneading. But the third batch? That one felt right. The dough was soft, almost silky, and it smelled like a memory I didn’t even know I had. You know that feeling when something tastes familiar even though you’ve never had it before? That’s this bread.
This easy traditional Pan de Muerto with Orange Blossom Glaze isn’t just a holiday bread. It’s the kind of recipe that makes you slow down, get flour under your fingernails, and remember why baking from scratch is worth the mess. Maybe you’ve been looking for a way to connect with a tradition that isn’t your own, or maybe you just want bread that tastes like sunshine and celebration. Either way, this one stays with you.
Why You’ll Love This Recipe
Let me tell you why this Pan de Muerto has earned a permanent spot in my fall baking rotation. I’ve tested it with different flours, adjusted the hydration, and even tried a dairy-free version for a friend. This version is the one that works every single time.
- Perfectly Tender Texture: The dough is enriched with butter and eggs, giving it a soft, brioche-like crumb that stays moist for days. No dry, crumbly bread here.
- Authentic Orange Blossom Flavor: The glaze isn’t just for looks. It soaks into the warm bread, adding a floral sweetness that makes this loaf unforgettable. It’s the same technique my accountant’s abuela used, and it works beautifully.
- Beginner-Friendly Dough: If you’ve been scared of yeast breads, this one is forgiving. The dough is sticky at first, but it comes together with a little patience. I promise you can do this.
- Perfect for Día de los Muertos: Whether you’re celebrating the holiday or just want a beautiful, meaningful bread for a fall gathering, this recipe delivers. The bone-shaped decorations on top are easier than they look.
- Make-Ahead Friendly: You can prepare the dough the night before and let it rise slowly in the fridge. The flavor actually gets better overnight.
This isn’t just another sweet bread recipe. The orange blossom glaze sets it apart—it’s not overly sweet, and it adds a layer of complexity that store-bought versions just can’t match. Every time I make this, someone asks for the recipe. It’s that good.
What Ingredients You Will Need
This recipe uses simple, pantry-friendly ingredients to create a bread that tastes anything but ordinary. The magic is in how they come together, not in fancy shopping lists.
- All-purpose flour (4 cups / 500g) – Provides structure. I recommend King Arthur Flour for consistent results, but any unbleached all-purpose flour works well.
- Active dry yeast (2 ¼ teaspoons / 7g, or one packet) – Makes the bread rise. Check the expiration date before starting—old yeast is the number one reason breads fail.
- Warm milk (½ cup / 120ml, heated to 110°F) – Activates the yeast and adds richness. Whole milk gives the best texture, but 2% works too.
- Granulated sugar (½ cup / 100g) – Sweetens the dough and helps feed the yeast. Don’t reduce it—this bread is meant to be slightly sweet.
- Unsalted butter (½ cup / 113g, softened) – Adds tenderness and flavor. Make sure it’s truly softened to room temperature, not melted.
- Large eggs (3, room temperature) – Enrich the dough and give it structure. Cold eggs can shock the yeast, so let them sit out for 30 minutes first.
- Orange zest (2 tablespoons, from about 2 oranges) – Provides bright citrus notes. Use a microplane for the best texture.
- Orange blossom water (1 tablespoon) – The star ingredient for that floral aroma. Look for it in the international section or a Middle Eastern grocery store.
- Salt (1 teaspoon) – Balances the sweetness and strengthens the gluten. Don’t skip it.
For the Orange Blossom Glaze:
- Powdered sugar (1 ½ cups / 180g) – Creates the base for the glaze. Sift it first to avoid lumps.
- Orange blossom water (2 tablespoons) – Adds intense floral flavor.
- Fresh orange juice (2-3 tablespoons) – Thins the glaze and adds natural citrus sweetness.
- Orange zest (1 teaspoon, for garnish) – Adds a pop of color and fresh flavor on top.
For Decoration:
- Extra flour (for dusting the work surface)
- Sanding sugar or sparkling sugar (optional, for sprinkling on the glaze)
Equipment Needed
You don’t need a professional bakery setup for this bread. Here’s what I use every time I make it:
- Stand mixer with dough hook (optional, but makes kneading much easier). If you don’t have one, you can knead by hand—it just takes about 10 minutes of arm work.
- Large mixing bowl (glass or stainless steel works best for the dough to rise)
- Baking sheet (lined with parchment paper)
- Plastic wrap or a clean kitchen towel (for covering the dough while it rises)
- Microplane or fine grater (for zesting oranges)
- Small saucepan (for warming the milk)
- Pastry brush (for applying the glaze)
- Sharp knife or bench scraper (for shaping the bone decorations)
- Cooling rack (so the bottom of the bread doesn’t get soggy)
I bought my first microplane after ruining two batches of zest with a box grater. Trust me, the $12 investment is worth it. If you’re on a budget, a clean vegetable peeler can remove the zest in strips, then just chop it finely with a knife.
Preparation Method
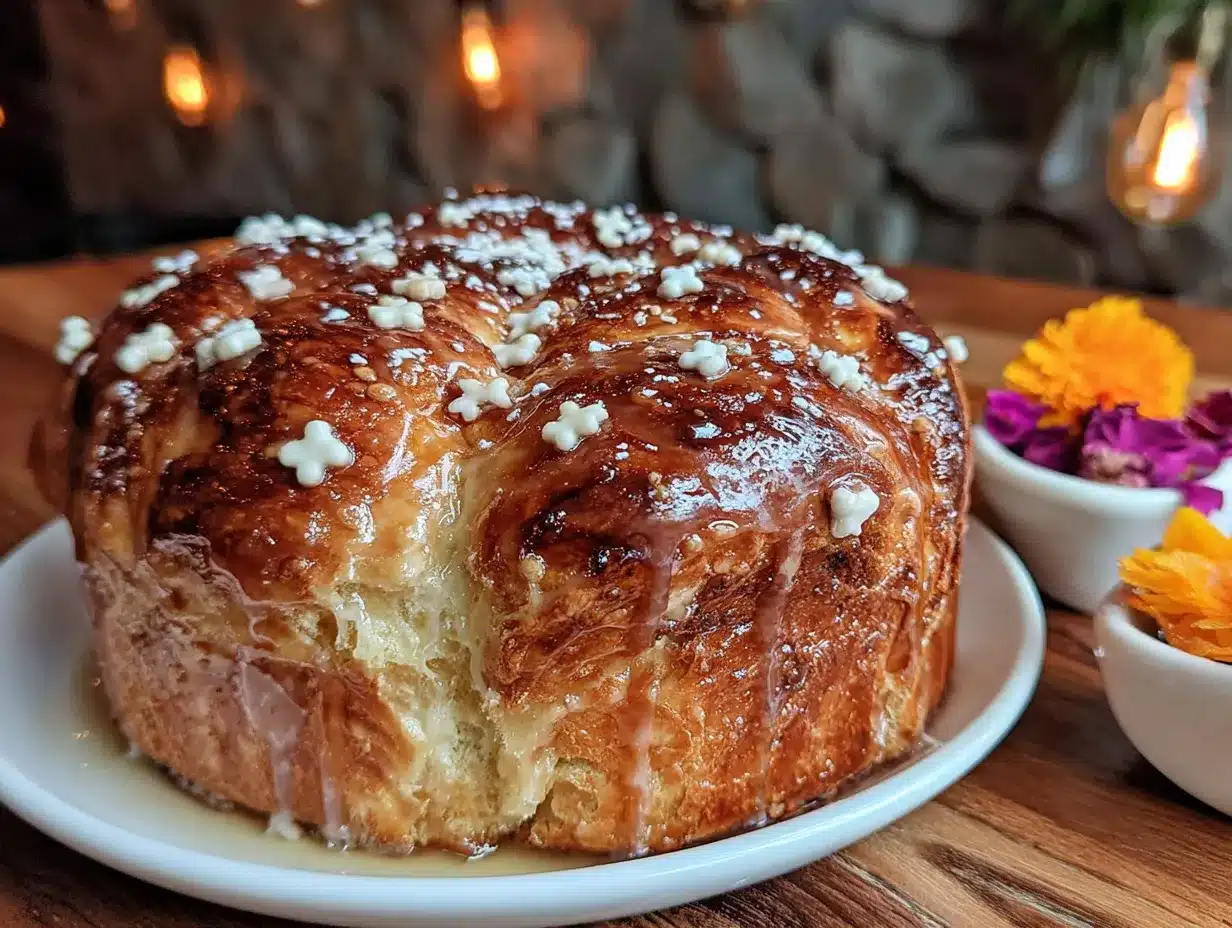
This process takes about 3 hours total, including rising time. Most of that is hands-off, so you can clean the kitchen or just sit down with a cup of coffee.
Step 1: Activate the Yeast
In a small bowl, combine the warm milk (110°F is ideal—warm but not hot to the touch) with 1 tablespoon of the sugar. Sprinkle the yeast on top and let it sit for 5-10 minutes. It should become foamy and smell like toasted bread. If it doesn’t foam, your yeast is dead. Start over with fresh yeast.
Step 2: Mix the Dough
In the bowl of a stand mixer (or a large bowl if mixing by hand), whisk together the flour, remaining sugar, salt, and orange zest. Make a well in the center and add the foamy yeast mixture, softened butter, eggs, and orange blossom water. Mix on low speed with the dough hook until a shaggy dough forms, about 2 minutes.
Step 3: Knead the Dough
Increase the speed to medium and knead for 6-8 minutes. The dough will look sticky at first—don’t be tempted to add more flour. It should eventually pull away from the sides of the bowl but still feel tacky to the touch. If kneading by hand, turn the dough out onto a lightly floured surface and knead for 10-12 minutes, until smooth and elastic. You’ll know it’s ready when you can stretch a small piece thin enough to see light through it (the windowpane test).
Step 4: First Rise
Shape the dough into a ball and place it in a lightly greased bowl, turning once to coat the surface. Cover tightly with plastic wrap and let it rise in a warm, draft-free spot for 1 ½ to 2 hours, until doubled in size. I set my oven to “proof” mode or just place the bowl near a sunny window. If your kitchen is cold, it may take longer—be patient.
Step 5: Shape the Loaves
Punch down the dough gently to release the air. Turn it out onto a lightly floured surface. Divide the dough into two pieces: one large piece (about ⅔ of the dough) for the base, and one smaller piece (about ⅓) for the decorations.
For the base: Shape the large piece into a smooth round ball. Place it on the prepared baking sheet and flatten it slightly into a dome shape, about 6 inches wide.
For the decorations: Divide the smaller piece into 3 parts. Roll two parts into long ropes, about 8 inches each. Cut each rope into 2-inch pieces to create the “bones.” Roll the remaining piece into a small ball for the top knob.
Step 6: Assemble the Bread
Arrange the bone-shaped pieces on top of the dough in a cross pattern (think of a plus sign). Place the small ball in the center where the bones meet. Gently press everything into place—it doesn’t need to be perfect. The dough will puff up and smooth out during the second rise.
Step 7: Second Rise
Cover the shaped loaf loosely with plastic wrap and let it rise for 45-60 minutes, until noticeably puffy but not doubled. It should feel soft and pillowy when gently poked.
Step 8: Bake
Preheat your oven to 350°F (175°C). Bake the bread for 25-30 minutes, until the top is deep golden brown and the loaf sounds hollow when tapped on the bottom. If the top is browning too quickly, tent it loosely with foil after 15 minutes.
Step 9: Make the Glaze
While the bread bakes, whisk together the powdered sugar, orange blossom water, and 2 tablespoons of orange juice in a small bowl. Add more juice, 1 teaspoon at a time, until the glaze is thick but pourable. It should coat the back of a spoon.
Step 10: Glaze and Serve
Let the bread cool on the baking sheet for 10 minutes, then transfer it to a cooling rack. While it’s still warm, brush the glaze generously over the top. Sprinkle with orange zest and sanding sugar if using. Let the glaze set for at least 15 minutes before slicing. Serve warm or at room temperature.
Cooking Tips & Techniques
I’ve made this bread at least a dozen times, and I’ve messed up more than a few batches. Here’s what I’ve learned:
Don’t Overthink the Dough Stickiness
The first time I made this, I kept adding flour because the dough felt too sticky. The result was a dense, dry loaf. Enriched doughs with butter and eggs are supposed to be tacky. Trust the process—once it’s kneaded properly, it will become smooth without extra flour.
Temperature Matters More Than You Think
Cold ingredients can kill your yeast’s enthusiasm. I learned this the hard way when I used cold eggs straight from the fridge. The dough barely rose in 3 hours. Now I always warm my milk to 110°F and let my eggs sit out for at least 30 minutes. If you forget, place the eggs in a bowl of warm water for 5 minutes.
The Bone Decorations Are Forgiving
Don’t stress about making the bones look perfect. I’ve made them too thin, too thick, and once I dropped one on the floor (I picked it up and used it anyway). The bread always looks beautiful after baking because the dough puffs up and softens the shapes. Just make sure the pieces are secure so they don’t fall off during the second rise.
Test for Doneness Properly
Ovens vary wildly. My old oven would brown the top but leave the center undercooked. Now I always check the internal temperature with an instant-read thermometer—it should read 190°F to 200°F in the center. If you don’t have a thermometer, tap the bottom of the loaf. A hollow sound means it’s done.
Glaze While Warm
The warm bread absorbs the glaze better, giving you that soft, slightly sticky top that makes this bread so special. If you wait until the bread is completely cool, the glaze will just sit on top and can slide off. Brush it on while the bread is still warm to the touch.
Variations & Adaptations
This recipe is flexible, and I’ve tried several variations depending on what I have in the pantry:
Dairy-Free Version
Substitute the butter with vegan butter (I like Miyoko’s) and use oat milk instead of whole milk. The texture will be slightly less rich, but it’s still delicious. I made this for a friend with a dairy allergy, and she couldn’t tell the difference.
Citrus Twist
Swap half the orange zest for lemon or grapefruit zest. The glaze can also be made with lemon juice and a splash of vanilla extract instead of orange blossom water. This version is brighter and less floral—perfect for spring celebrations.
Chocolate Pan de Muerto
Replace ¼ cup of the flour with unsweetened cocoa powder. Add ½ cup of dark chocolate chips to the dough before the first rise. The chocolate version is a hit with kids, and the orange blossom glaze still works beautifully with it.
Spiced Variation
Add 1 teaspoon of ground cinnamon, ½ teaspoon of ground anise, and a pinch of cloves to the flour mixture. This gives the bread a warm, holiday-spiced flavor that pairs perfectly with the orange blossom glaze. I make this version for Christmas brunch.
Gluten-Free Option
Use a 1:1 gluten-free baking flour blend that contains xanthan gum. The dough will be stickier and harder to shape, so wet your hands with water to work with it. The texture won’t be as light as the original, but it’s still a lovely bread. I’ve tested this with King Arthur Measure for Measure flour with good results.
Serving & Storage Suggestions
Pan de Muerto is best served warm, when the glaze is still slightly soft and the bread is tender. I like to slice it into thick wedges and serve it alongside a cup of Mexican hot chocolate or café de olla. The spiced, slightly bitter coffee balances the sweetness of the bread perfectly.
For a Día de los Muertos altar, place the whole loaf on a plate with marigolds and a photo of a loved one. It’s a beautiful tradition that honors those who have passed. If you’re serving it at a gathering, arrange the slices on a wooden board with fresh orange slices and a bowl of whipped cream or cajeta (goat’s milk caramel) for dipping.
Storage Instructions:
Store leftover bread in an airtight container at room temperature for up to 3 days. The glaze may soften slightly, but the bread stays moist. Do not refrigerate—it will dry out the bread faster.
Freezing Instructions:
Wrap the unglazed, fully cooled loaf tightly in plastic wrap, then in aluminum foil. Freeze for up to 2 months. To serve, thaw overnight in the refrigerator, then warm in a 300°F oven for 10 minutes. Glaze after warming. I always bake an extra loaf to freeze for unexpected guests.
Reheating Tips:
For the best texture, reheat slices in a toaster oven or regular oven at 300°F for 5-7 minutes. The microwave will make it rubbery, so avoid it if you can. If you’re in a hurry, wrap a slice in a damp paper towel and microwave for 15 seconds—it’s not perfect, but it works.
Flavor Development:
Honestly, this bread tastes even better on the second day. The orange blossom flavor mellows and melds with the bread, creating a more complex, well-rounded taste. If you can resist eating it all on day one, you’re in for a treat.
Nutritional Information & Benefits
This is an indulgent bread, and I’m not here to pretend otherwise. But it does have some redeeming qualities:
- Estimated per serving (1/12 of the loaf): 320 calories, 12g fat, 48g carbohydrates, 7g protein, 2g fiber, 18g sugar.
- Oranges are packed with vitamin C and antioxidants. The zest adds flavor without extra sugar.
- Eggs provide high-quality protein and essential amino acids.
- Butter contains fat-soluble vitamins A, D, E, and K, though it should be enjoyed in moderation.
This bread is not gluten-free, low-carb, or vegan, but it can be adapted (see variations above). If you have celiac disease or a dairy allergy, please use the substitutions I’ve suggested. For everyone else, this is a celebration bread meant to be shared and enjoyed without guilt. Life is short—eat the bread.
Conclusion
This easy traditional Pan de Muerto with Orange Blossom Glaze is more than just a recipe. It’s a connection to a beautiful tradition, a way to slow down and bake something meaningful, and honestly, it’s just really, really good bread. The soft, buttery crumb, the floral glaze, the pride you feel when you pull that gorgeous loaf out of the oven—it’s all worth the effort.
I hope you’ll try this recipe and make it your own. Add extra orange zest if you love citrus. Shape the bones differently if you want. Share it with people you love, or keep it all for yourself—I won’t judge. The most important thing is that you bake it with intention and enjoy every single bite.
If you make this Pan de Muerto, I’d love to hear about it. Leave a comment below and tell me how it turned out, or share a photo of your loaf on Pinterest. Tag me so I can see your beautiful creation! And if you have questions, don’t hesitate to ask. Happy baking, friends.
Frequently Asked Questions
Can I make this bread without a stand mixer?
Absolutely. You can knead the dough by hand on a lightly floured surface for 10-12 minutes. It takes a bit more effort, but the results are the same. I actually prefer hand-kneading sometimes—it’s meditative.
Why didn’t my dough rise?
The most common reason is old or expired yeast. Check the expiration date and make sure your milk was warm enough (110°F) but not too hot. If the milk is over 130°F, it will kill the yeast. Also, make sure your kitchen isn’t too cold. Try placing the bowl in a turned-off oven with the light on.
Can I use orange extract instead of orange blossom water?
You can, but the flavor will be different. Orange blossom water has a delicate floral note that extract doesn’t have. If you can’t find orange blossom water, use fresh orange juice and a splash of vanilla extract as a substitute.
How do I store leftover Pan de Muerto?
Store it in an airtight container at room temperature for up to 3 days. Do not refrigerate—it will dry out. You can also freeze the unglazed loaf for up to 2 months. Thaw and reheat before glazing and serving.
Can I make this bread vegan?
Yes, with some adjustments. Use vegan butter, plant-based milk, and a flax egg (1 tablespoon ground flaxseed mixed with 3 tablespoons water per egg). The texture will be denser, but it’s still a lovely bread. I’ve tested it with oat milk and flax eggs, and it works.
Pin This Recipe!
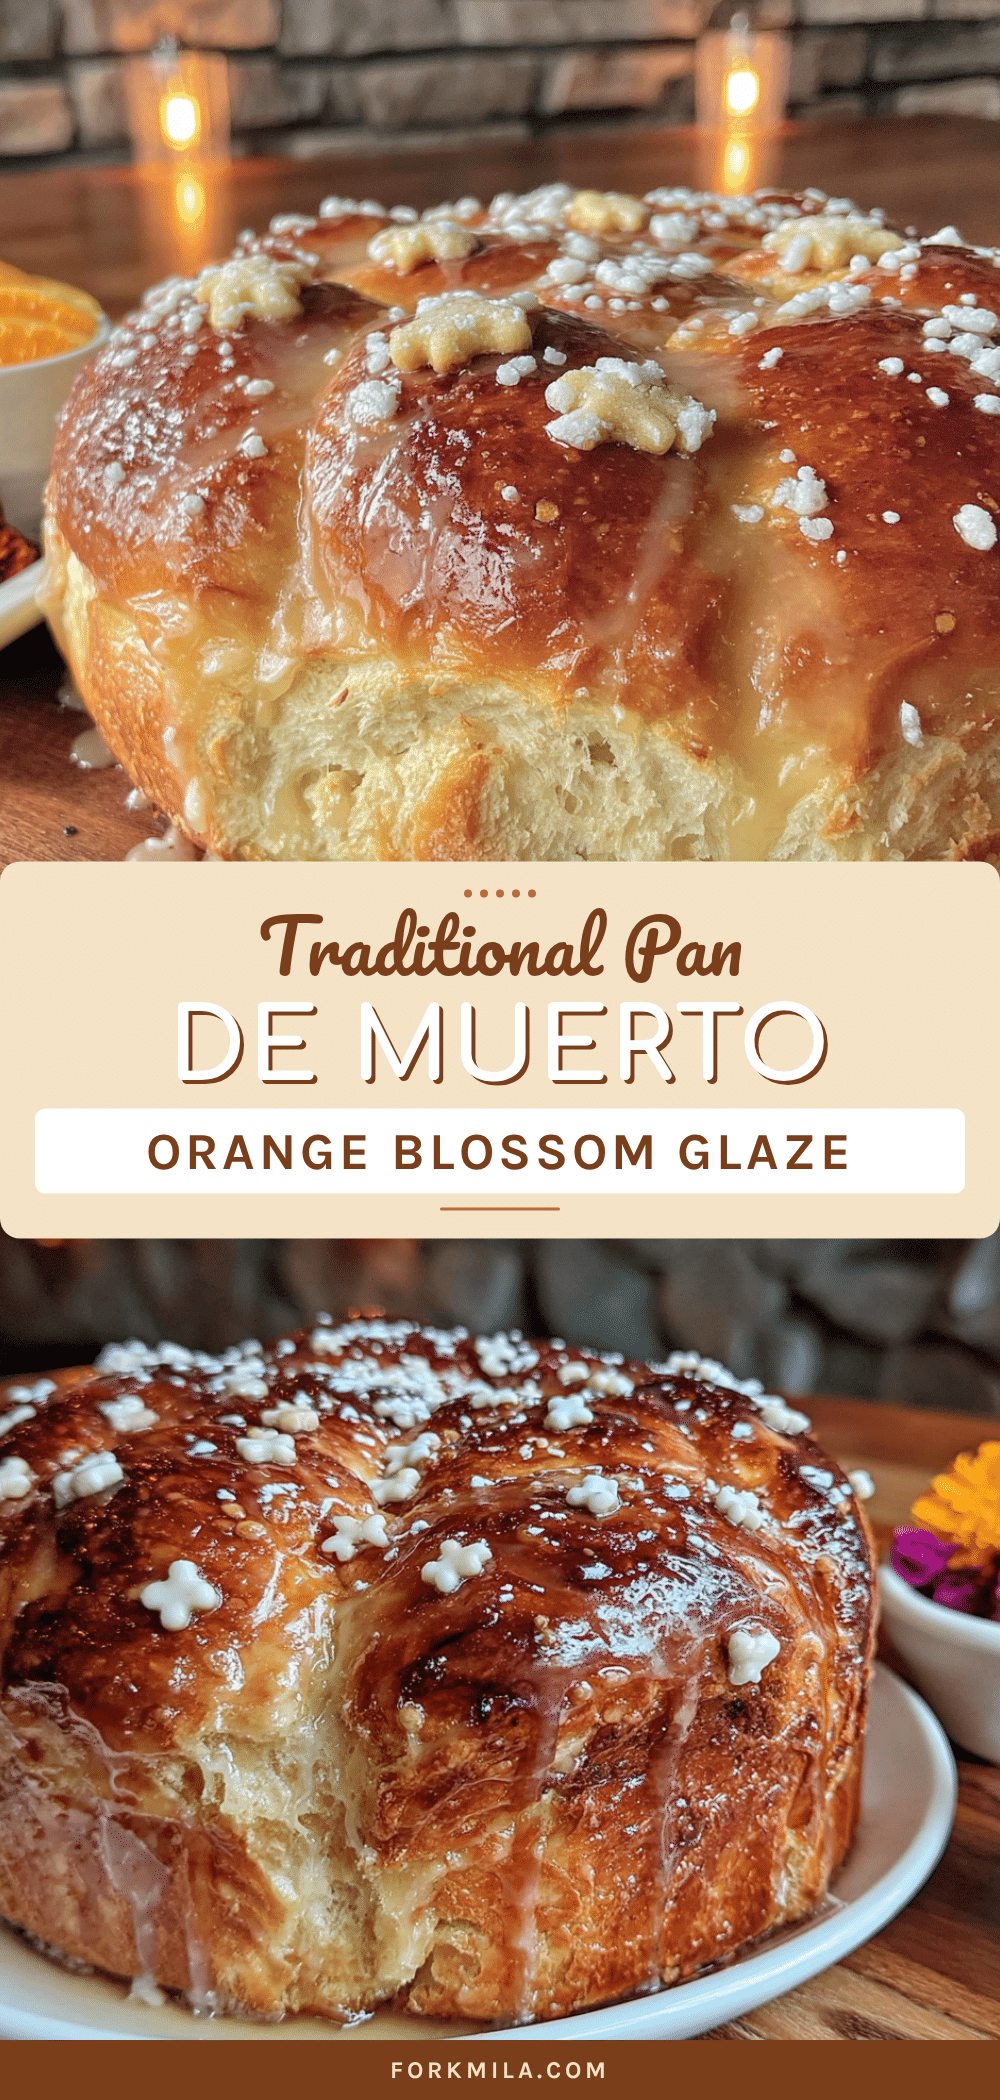
Easy Traditional Pan de Muerto with Orange Blossom Glaze
This easy traditional Pan de Muerto with Orange Blossom Glaze is a soft, brioche-like bread enriched with butter and eggs, featuring a floral orange blossom glaze that soaks into the warm loaf. Perfect for Día de los Muertos or any fall gathering, this beginner-friendly recipe yields a tender, flavorful bread that stays moist for days.
- Prep Time: 30 minutes
- Cook Time: 30 minutes
- Total Time: 3 hours (including rising time)
- Yield: 12 servings 1x
- Category: Bread
- Cuisine: Mexican
Ingredients
- 4 cups (500g) all-purpose flour
- 2 ¼ teaspoons (7g) active dry yeast (one packet)
- ½ cup (120ml) warm milk (heated to 110°F)
- ½ cup (100g) granulated sugar
- ½ cup (113g) unsalted butter, softened
- 3 large eggs, room temperature
- 2 tablespoons orange zest (from about 2 oranges)
- 1 tablespoon orange blossom water
- 1 teaspoon salt
- 1 ½ cups (180g) powdered sugar (for glaze)
- 2 tablespoons orange blossom water (for glaze)
- 2–3 tablespoons fresh orange juice (for glaze)
- 1 teaspoon orange zest (for garnish)
- Extra flour for dusting
- Sanding sugar or sparkling sugar (optional, for sprinkling)
Instructions
- Activate the yeast: In a small bowl, combine warm milk (110°F) with 1 tablespoon of the sugar. Sprinkle yeast on top and let sit for 5-10 minutes until foamy.
- Mix the dough: In a stand mixer bowl, whisk together flour, remaining sugar, salt, and orange zest. Make a well and add foamy yeast mixture, softened butter, eggs, and orange blossom water. Mix on low speed with dough hook until a shaggy dough forms, about 2 minutes.
- Knead the dough: Increase speed to medium and knead for 6-8 minutes until dough is smooth and elastic (or knead by hand for 10-12 minutes). Dough should pass the windowpane test.
- First rise: Shape dough into a ball, place in a lightly greased bowl, cover with plastic wrap, and let rise in a warm spot for 1 ½ to 2 hours until doubled in size.
- Shape the loaves: Punch down dough and turn onto a lightly floured surface. Divide into two pieces: ⅔ for the base, ⅓ for decorations. Shape the large piece into a smooth round ball, place on a parchment-lined baking sheet, and flatten into a 6-inch dome.
- Make decorations: Divide the smaller piece into 3 parts. Roll two parts into 8-inch ropes, cut into 2-inch pieces for ‘bones.’ Roll the remaining piece into a small ball for the top knob.
- Assemble the bread: Arrange bone pieces on top of dough in a cross pattern, place the small ball in the center. Gently press into place.
- Second rise: Cover shaped loaf loosely with plastic wrap and let rise for 45-60 minutes until puffy.
- Bake: Preheat oven to 350°F (175°C). Bake for 25-30 minutes until deep golden brown and hollow-sounding when tapped. Tent with foil after 15 minutes if browning too quickly.
- Make the glaze: Whisk together powdered sugar, orange blossom water, and 2 tablespoons orange juice. Add more juice 1 teaspoon at a time until thick but pourable.
- Glaze and serve: Let bread cool on baking sheet for 10 minutes, then transfer to a cooling rack. Brush glaze generously over warm bread. Sprinkle with orange zest and sanding sugar if using. Let set for 15 minutes before slicing.
Notes
Don’t overthink dough stickiness; enriched doughs are supposed to be tacky. Use room temperature ingredients for best yeast activity. The bone decorations are forgiving—they puff up during baking. Glaze while bread is still warm for better absorption. Bread tastes even better on the second day.
Nutrition
- Serving Size: 1 slice (1/12 of loa
- Calories: 320
- Sugar: 18
- Sodium: 200
- Fat: 12
- Saturated Fat: 7
- Carbohydrates: 48
- Fiber: 2
- Protein: 7
Keywords: Pan de Muerto, Day of the Dead bread, orange blossom bread, Mexican sweet bread, holiday bread, brioche, yeast bread


