The neighborhood cookie exchange was in six hours and I’d completely forgotten. Everyone else would be bringing their grandmother’s heirloom recipes, those perfectly piped French macarons, and the kind of elaborate gingerbread houses that belong on magazine covers. I had a pack of chicken thighs, some jasmine rice that was gathering dust, and a stick of butter. Honestly, I almost just showed up with a store-bought pie and called it a day. But the panic made me creative, you know? That frantic energy where you just start pulling things out of the fridge and hoping for the best.
I grabbed my trusty cast iron skillet, the one with the slightly chipped handle, and started improvising. The garlic was getting minced before I even had a plan. The butter hit the pan and that smell—that rich, nutty, garlicky aroma—filled the kitchen and calmed me down a little. I figured, worst case, I’d have a decent dinner for myself if the exchange was a total bust. I threw the chicken in, let it get all golden and crispy on one side, then tossed in the rice and some broth. I covered it, crossed my fingers, and prayed to the kitchen gods.
When I lifted that lid an hour later, the smell that hit me was something else. The rice was fluffy, each grain separate and glistening. The chicken was fall-apart tender, practically begging to be shredded. I brought it to the exchange, still warm in the skillet, feeling a little sheepish next to the fancy platters. And you know what happened? It was the first thing to disappear. People kept coming back for “just one more spoonful.” Someone asked for the recipe, then someone else. I just stood there, a little stunned, holding my empty skillet. That’s how this one-pan garlic butter chicken and rice was born—out of total panic and a desperate hope. And honestly, it’s become my go-to for those nights when I need something cozy, comforting, and ridiculously easy, but I still want it to feel special. Maybe you’ve been there, staring into your pantry, wondering what magic you can make with next to nothing. This is that magic.
Why You’ll Love This Recipe
This isn’t just another chicken and rice recipe. I’ve tested this one-pan garlic butter chicken and rice more times than I can count, tweaking the liquid ratio, the cooking time, the garlic amount—because I wanted it to be absolutely foolproof. It’s the kind of recipe that makes you look like a hero with almost no effort.
- Quick & Easy: From fridge to table in about an hour, with only about 15 minutes of active prep. Perfect for those weeknights when you’re short on time but craving something hearty.
- Simple Ingredients: You probably have 90% of these items in your kitchen right now. No trips to specialty stores or hunting down obscure spices.
- Perfect for Cozy Nights: This is the ultimate comfort food for chilly evenings, lazy Sundays, or when you just need a warm hug in a bowl.
- Crowd-Pleaser: I’ve served this to picky kids, discerning in-laws, and hungry neighbors. It gets rave reviews every single time. There’s something about that garlic butter sauce that everyone loves.
- Unbelievably Delicious: The chicken gets perfectly golden and crispy on the outside while staying juicy inside. The rice soaks up all that garlic butter goodness and becomes something truly special. It’s simple food, elevated.
What makes this version different? It’s the technique. I don’t just dump everything in and hope for the best. I take the time to sear the chicken first, building that deep, browned flavor. I toast the rice in the garlic butter before adding the liquid, which gives it a nutty, almost risotto-like quality. And I use just the right amount of broth so the rice cooks perfectly—not mushy, not crunchy. It’s comfort food that’s been tested and perfected, so you can nail it on your first try.
This recipe is the kind that makes you close your eyes after the first bite. It’s soul-soothing satisfaction in a single pan. Perfect for impressing guests without any stress, or turning a simple Tuesday night into something memorable.
What Ingredients You Will Need
This recipe uses simple, wholesome ingredients to build layers of flavor. Most of these are pantry staples, which makes this dish perfect for those “I need dinner now” moments.
For the Chicken
- 4 bone-in, skin-on chicken thighs (about 1.5 lbs) – The skin gets beautifully crispy and adds so much flavor to the dish. You can use boneless thighs, but reduce cooking time by about 10 minutes.
- 1 teaspoon salt – I prefer kosher salt for its clean flavor. Diamond Crystal is my go-to brand.
- ½ teaspoon black pepper – Freshly ground is always better.
- 1 teaspoon garlic powder – Adds an extra layer of garlic flavor that complements the fresh garlic.
- 1 tablespoon olive oil – For searing the chicken. Helps get that golden crust.
For the Garlic Butter Rice
- 2 tablespoons unsalted butter – The star of the show. Use a good quality butter for the best flavor.
- 1 medium yellow onion, finely diced – Adds sweetness and depth to the dish.
- 5 cloves garlic, minced – Don’t skimp here! This is garlic butter chicken and rice, after all. Fresh garlic is non-negotiable.
- 1 ½ cups long-grain white rice – I use jasmine rice for its fragrant, slightly floral aroma. Basmati works well too. Avoid short-grain rice as it can become too sticky.
- 2 ½ cups low-sodium chicken broth – Low-sodium is key so you can control the salt level. Homemade broth would be incredible here.
- ½ teaspoon dried thyme – Adds a subtle, earthy note that pairs beautifully with garlic and butter.
- ¼ teaspoon red pepper flakes (optional) – For a tiny hint of heat. I almost always add this.
- 2 tablespoons fresh parsley, chopped – For garnish and a pop of freshness.
- Salt and pepper to taste – Adjust at the end, after the rice has absorbed the broth.
Ingredient Selection Tips: For the best texture, look for chicken thighs that are plump and have a good amount of fat. The fat renders during cooking and keeps the meat incredibly moist. When buying garlic, choose firm, heavy bulbs with tight skins. Avoid any that feel soft or have sprouted. For the rice, I really recommend jasmine rice from a brand like Lundberg or Three Ladies—they consistently produce fluffy, separate grains.
Substitution Guidance: If you want to make this dairy-free, use a high-quality vegan butter or ghee (which is lactose-free). For a gluten-free version, this recipe is naturally gluten-free as long as you use a certified gluten-free broth. You can swap the chicken thighs for drumsticks or even a whole cut-up chicken, just adjust cooking times accordingly. If you don’t have fresh parsley, dried parsley or even chives would work for the garnish.
Equipment Needed
One of the best things about this recipe is how little equipment it requires. It’s truly a one-pan wonder.
- Large, heavy-bottomed skillet or Dutch oven (12-inch or larger) – This is non-negotiable. A cast iron skillet is my absolute favorite for this recipe. It holds heat beautifully and gives the chicken that incredible crust. My go-to is a 12-inch Lodge cast iron skillet. If you don’t have cast iron, a heavy stainless steel pan or a Dutch oven works wonderfully. Avoid non-stick pans for the best sear on the chicken.
- Sharp chef’s knife – For mincing garlic and dicing the onion. A dull knife makes prep frustrating and dangerous.
- Cutting board – Preferably a large wooden or plastic board.
- Measuring cups and spoons – For accuracy, especially with the rice and liquid.
- Wooden spoon or spatula – For stirring the rice and scraping up those delicious browned bits from the bottom of the pan.
- Tongs – For flipping the chicken easily without piercing the skin and losing juices.
- Lid for your skillet – This is crucial for steaming the rice. If your skillet doesn’t have a lid, you can use a large piece of aluminum foil tightly sealed.
Budget-Friendly Options: You don’t need fancy equipment. A good, heavy skillet is an investment, but it will last a lifetime. Check thrift stores for cast iron—you can often find vintage pieces for a steal. A little rust is easy to scrub off and re-season.
Preparation Method
Let’s get cooking! This one-pan garlic butter chicken and rice comes together in a few simple steps. Take your time with the searing—it’s where all the flavor starts.
- Prep the chicken (5 minutes): Pat the chicken thighs completely dry with paper towels. This is the most important step for crispy skin. Season generously on all sides with salt, pepper, and garlic powder. Let them sit at room temperature for about 10-15 minutes while you prep the other ingredients.
- Sear the chicken (10 minutes): Heat the olive oil in your large skillet over medium-high heat. When the oil is shimmering (not smoking), carefully place the chicken thighs skin-side down. Listen for that satisfying sizzle! Cook without moving them for 5-7 minutes, until the skin is deep golden brown and crispy. Flip using your tongs and cook for another 3-4 minutes on the other side. Transfer the chicken to a plate and set aside. Don’t worry if it’s not cooked through yet—it will finish in the oven.
- Build the garlic butter base (5 minutes): Reduce the heat to medium. Add the 2 tablespoons of butter to the skillet. As it melts, use your wooden spoon to scrape up all those browned bits from the bottom of the pan—that’s pure flavor. Add the diced onion and cook for 2-3 minutes, until softened and translucent. Add the minced garlic and cook for just 30 seconds, until fragrant. Be careful not to burn the garlic!
- Toast the rice (3 minutes): Add the rice to the skillet and stir to coat it in the garlic butter mixture. Cook, stirring constantly, for about 2 minutes. The rice will start to smell nutty and some grains might turn slightly opaque. This step is crucial for preventing mushy rice.
- Add the liquid and aromatics (2 minutes): Pour in the chicken broth, dried thyme, and red pepper flakes (if using). Stir everything together, making sure the rice is evenly distributed in the pan. Scrape the bottom one more time to get any last bits of flavor into the liquid. Season with a pinch of salt and pepper.
- Nestle the chicken and cook (35-40 minutes): Bring the liquid to a gentle boil. Carefully place the seared chicken thighs back into the skillet, nestling them into the rice. The skin should be facing up so it stays crispy. Put the lid on the skillet and reduce the heat to low. Let it cook undisturbed for 35-40 minutes. Don’t peek! Every time you lift the lid, you let out steam that the rice needs to cook properly.
- Rest and fluff (10 minutes): After 35-40 minutes, turn off the heat. Let the skillet sit, still covered, for another 10 minutes. This allows the rice to finish absorbing the liquid and the chicken to relax. After resting, remove the lid carefully (the steam is hot!). Fluff the rice gently with a fork. Taste and adjust seasoning with more salt and pepper if needed.
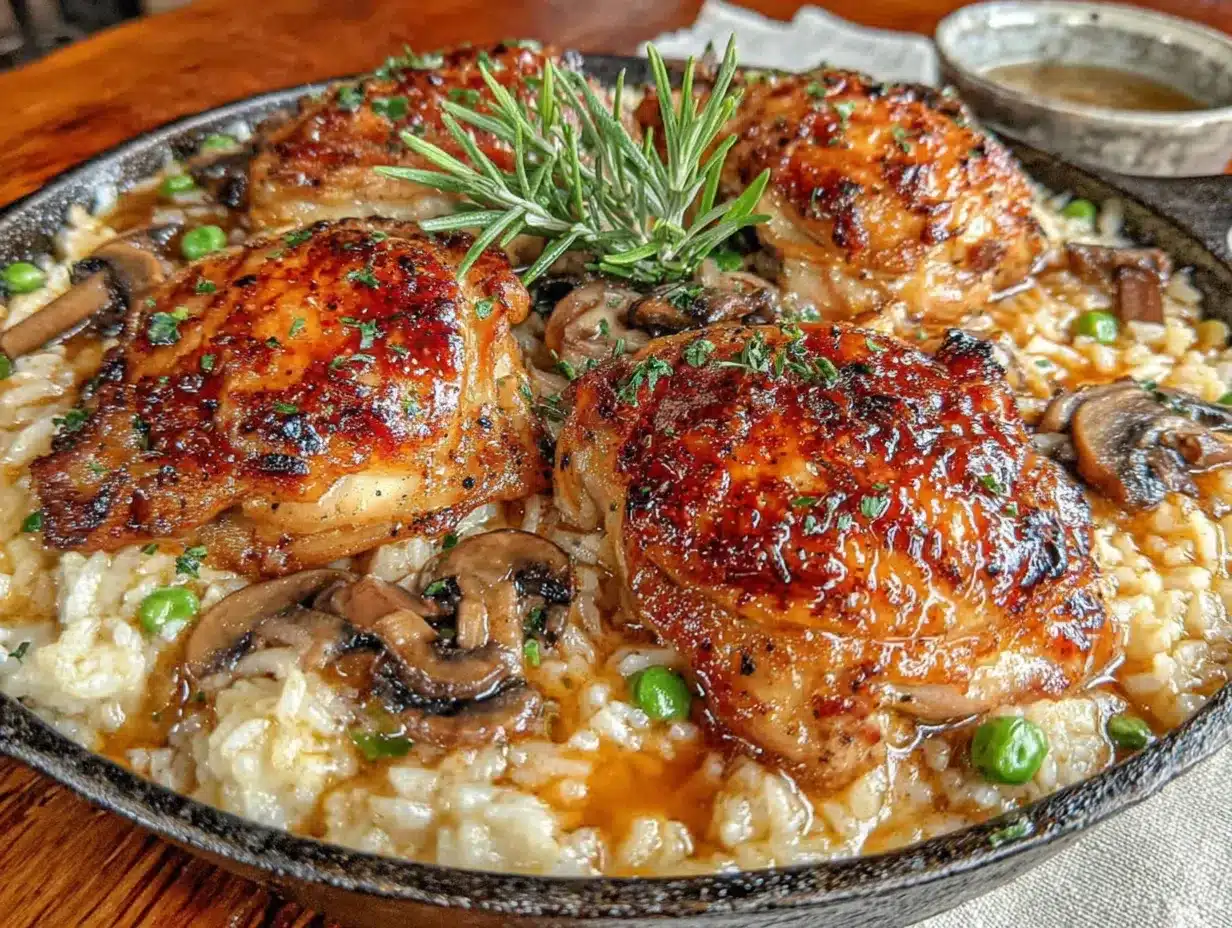
- Garnish and serve (2 minutes): Sprinkle the fresh parsley all over the top. Serve directly from the skillet for a beautiful, rustic presentation. The chicken should be incredibly tender, and the rice perfectly fluffy.
Visual Cue: The rice should look fluffy and separate, not clumpy or wet. The chicken skin should be crispy and deep golden brown. If you insert a thermometer into the thickest part of a thigh, it should read 165°F (74°C).
Cooking Tips & Techniques
Over the years, I’ve learned a few things the hard way so you don’t have to. Here are my best tips for perfect one-pan garlic butter chicken and rice every time.
Don’t skip the sear. I know it’s tempting to just throw everything in the pan and save time. But that golden, crispy skin isn’t just for looks. The Maillard reaction—that browning process—creates hundreds of flavor compounds that infuse the entire dish as it cooks. It’s the difference between good chicken and unforgettable chicken.
Resist the urge to peek. I cannot stress this enough. Every time you lift that lid, you release steam and lower the temperature inside the pan. The rice needs that consistent steam environment to cook evenly. Set a timer and walk away. Trust the process.
My biggest failure: The first time I made this, I used a non-stick pan and got absolutely no sear on the chicken. The skin was pale and rubbery. The whole dish felt flat. I learned that day that a good, heavy pan is worth its weight in gold. Don’t make my mistake—use cast iron or stainless steel.
Timing is everything: While the chicken is searing, I get my onion and garlic prepped. While the rice is cooking, I clean up the kitchen and set the table. This multitasking makes the whole process feel effortless. You can also chop the parsley while the dish rests.
For consistent results: Use a kitchen scale for the rice if you have one. 1 ½ cups of rice can vary in weight depending on the type and how tightly it’s packed. 300 grams is the sweet spot for this recipe. Also, always use low-sodium broth. Regular broth can make the dish overly salty, especially as the liquid reduces.
Variations & Adaptations
This recipe is a fantastic base for experimentation. Here are a few of my favorite twists.
- Lemon Herb Version: Add the zest of one lemon and 2 tablespoons of lemon juice along with the broth. Swap the thyme for a teaspoon of dried oregano or rosemary. The brightness of the lemon cuts through the richness of the butter beautifully.
- Vegetable-Packed Version: After removing the chicken, add 1 cup of sliced mushrooms and 1 cup of diced carrots along with the onion. Sauté until softened before adding the garlic. You could also stir in a cup of frozen peas during the last 5 minutes of cooking for a pop of green.
- Creamy Garlic Butter Version: For an even richer dish, stir in ¼ cup of heavy cream or full-fat coconut milk after the rice has cooked. Let it warm through for a few minutes before serving. This turns it into a risotto-like comfort bomb.
- Spicy Cajun Version: Replace the dried thyme with 1-2 teaspoons of Cajun seasoning. Add a diced andouille sausage along with the onion for an extra layer of smoky, spicy flavor. This is fantastic if you’re craving something with a kick.
- Dietary Adaptation (Dairy-Free): Use a good quality vegan butter or ghee. Ghee is clarified butter and has the lactose removed, but it still has that rich, buttery flavor. I’ve used Miyoko’s vegan butter with great results.
I once tried a version with sun-dried tomatoes and a splash of balsamic vinegar. It was a happy accident—I was out of fresh tomatoes and just grabbed what I had. The tangy, sweet notes from the sun-dried tomatoes paired incredibly well with the garlic butter. Don’t be afraid to experiment!
Serving & Storage Suggestions
This dish is a meal in itself, but a few simple sides can turn it into a feast.
Serving: Serve the one-pan garlic butter chicken and rice directly from the skillet for a cozy, rustic presentation. Garnish with extra fresh parsley and a sprinkle of flaky sea salt right before serving. A squeeze of lemon juice over the top adds a wonderful brightness. For sides, a simple green salad with a lemon vinaigrette is perfect. Steamed green beans or roasted asparagus also complement the richness of the dish wonderfully. A glass of crisp white wine, like a Sauvignon Blanc or a dry Riesling, is a lovely pairing.
Storage: Let any leftovers cool completely to room temperature. Transfer the chicken and rice to an airtight container. It will keep in the refrigerator for up to 4 days. The flavors actually meld and deepen overnight, making leftovers even more delicious.
Freezing: This recipe freezes surprisingly well. Place the cooled dish in a freezer-safe container or zip-top bag. It will keep for up to 3 months. Thaw overnight in the refrigerator before reheating.
Reheating: The best way to reheat is in a covered skillet over low heat, with a splash of chicken broth or water to add moisture back to the rice. Stir gently until heated through. You can also use the microwave, but the rice might be a little less fluffy. Reheat in 30-second intervals, stirring between each, until hot.
Nutritional Information & Benefits
While this is definitely a comfort food dish, it also has some nutritional merits. Here’s an approximate breakdown per serving (based on 4 servings):
- Calories: ~650 kcal
- Protein: ~35g
- Fat: ~28g
- Carbohydrates: ~60g
- Fiber: ~2g
Health Benefits: Chicken thighs are a great source of high-quality protein, which is essential for muscle repair and satiety. They also provide B vitamins, particularly niacin and B6, which support energy metabolism. Garlic is known for its immune-supporting properties and contains compounds like allicin that have anti-inflammatory effects. The onions add prebiotic fiber, which is great for gut health.
Dietary Considerations: This recipe is naturally gluten-free. For a lower-carb version, you can swap the rice for cauliflower rice, but the cooking method will change significantly. It’s not a one-to-one swap. This dish is higher in fat and calories, but it’s meant to be a satisfying, nourishing meal. I believe in balance—enjoy it as part of a varied diet.
Conclusion
This one-pan garlic butter chicken and rice is more than just a recipe—it’s a solution. It’s for those nights when you need dinner to be easy but you still want it to feel like a warm hug. It’s for the moments when you’re short on time but not willing to compromise on flavor. It’s proof that you don’t need a dozen exotic ingredients or hours in the kitchen to create something truly memorable.
I love this recipe because it’s forgiving. It works with what you have. It makes your kitchen smell incredible. And it brings people together around the table, scraping the last bits of garlic butter rice from the pan. I genuinely hope you make it your own—add your favorite herbs, swap in whatever vegetables are in your fridge, or turn up the heat with extra chili flakes. The best recipes are the ones you adapt to your own taste.
So go ahead, grab that skillet, and give it a try. I’d love to hear how it turns out! Drop a comment below and let me know if you added your own twist, or share a photo of your creation on Pinterest. Happy cooking, friends!
Frequently Asked Questions
Can I use boneless, skinless chicken thighs or breasts?
Absolutely! Boneless, skinless chicken thighs will work perfectly. Reduce the initial searing time to 3-4 minutes per side, and reduce the covered cooking time to about 25-30 minutes. For boneless, skinless chicken breasts, I recommend using a meat thermometer to ensure they reach 165°F without overcooking. They may cook faster, so start checking at 20 minutes.
Why did my rice turn out mushy?
Mushy rice is usually a result of too much liquid or cooking it too long. Make sure you’re using exactly 2 ½ cups of broth for 1 ½ cups of long-grain rice. Also, ensure your heat is on low once you cover the pan. A vigorous simmer can break down the rice grains. Finally, don’t lift the lid during cooking—the steam needs to stay trapped.
Can I make this recipe in a slow cooker or Instant Pot?
This recipe is designed specifically for the stovetop/oven method to achieve the crispy skin and perfect rice texture. For a slow cooker, you would need to adjust the liquid ratio significantly (rice needs less liquid in a slow cooker) and you’d lose the crispy skin. For an Instant Pot, you could sauté the chicken and aromatics using the sauté function, then pressure cook on high for 6 minutes with a natural release, but the rice texture will be different.
How can I make this recipe spicier?
There are several ways to add heat! Increase the red pepper flakes to ½ or 1 teaspoon. You can also add a finely chopped serrano or jalapeño pepper along with the onion. For a different kind of heat, stir in ½ teaspoon of smoked paprika or cayenne pepper with the thyme. A drizzle of sriracha or chili crisp on top before serving is also fantastic.
Can I use brown rice instead of white rice?
Yes, but you’ll need to adjust the liquid and cooking time. Brown rice requires about 30-40 minutes more cooking time and more liquid. Use 3 cups of broth for 1 ½ cups of brown rice. After adding the liquid, bring to a boil, cover, and simmer on low for 50-60 minutes before adding the chicken back. The chicken will need to be cooked separately or added for the last 30 minutes to avoid overcooking.
Pin This Recipe!

One-Pan Garlic Butter Chicken and Rice: Easy Cozy Dinner

This one-pan garlic butter chicken and rice is the ultimate comfort food for cozy nights. With crispy chicken thighs and fluffy rice soaked in garlic butter, it’s a foolproof, crowd-pleasing dinner that comes together in about an hour.
- Prep Time: 15 minutes
- Cook Time: 45 minutes
- Total Time: 1 hour
- Yield: 4 servings 1x
- Category: Main Course
- Cuisine: American
Ingredients
- 4 bone-in, skin-on chicken thighs (about 1.5 lbs)
- 1 teaspoon salt
- ½ teaspoon black pepper
- 1 teaspoon garlic powder
- 1 tablespoon olive oil
- 2 tablespoons unsalted butter
- 1 medium yellow onion, finely diced
- 5 cloves garlic, minced
- 1 ½ cups long-grain white rice (jasmine or basmati)
- 2 ½ cups low-sodium chicken broth
- ½ teaspoon dried thyme
- ¼ teaspoon red pepper flakes (optional)
- 2 tablespoons fresh parsley, chopped
- Salt and pepper to taste
Instructions
- Pat the chicken thighs completely dry with paper towels. Season generously on all sides with salt, pepper, and garlic powder. Let them sit at room temperature for about 10-15 minutes while you prep the other ingredients.
- Heat the olive oil in a large skillet over medium-high heat. When the oil is shimmering, carefully place the chicken thighs skin-side down. Cook without moving them for 5-7 minutes, until the skin is deep golden brown and crispy. Flip and cook for another 3-4 minutes on the other side. Transfer the chicken to a plate and set aside.
- Reduce the heat to medium. Add the butter to the skillet. As it melts, scrape up the browned bits from the bottom of the pan. Add the diced onion and cook for 2-3 minutes, until softened. Add the minced garlic and cook for 30 seconds, until fragrant.
- Add the rice to the skillet and stir to coat it in the garlic butter mixture. Cook, stirring constantly, for about 2 minutes until the rice smells nutty.
- Pour in the chicken broth, dried thyme, and red pepper flakes (if using). Stir everything together. Season with a pinch of salt and pepper.
- Bring the liquid to a gentle boil. Carefully place the seared chicken thighs back into the skillet, nestling them into the rice with the skin facing up. Put the lid on the skillet and reduce the heat to low. Cook undisturbed for 35-40 minutes.
- Turn off the heat and let the skillet sit, still covered, for another 10 minutes. Remove the lid carefully and fluff the rice gently with a fork. Taste and adjust seasoning with more salt and pepper if needed.
- Sprinkle the fresh parsley over the top. Serve directly from the skillet.
Notes
Don’t skip searing the chicken—it builds flavor. Resist the urge to peek while the rice cooks; every time you lift the lid, you release steam. For best results, use a kitchen scale for the rice (300g). Always use low-sodium broth to control saltiness. Leftovers keep in the fridge for up to 4 days and freeze for up to 3 months.
Nutrition
- Serving Size: 1 serving (about 1 c
- Calories: 650
- Sugar: 3
- Sodium: 800
- Fat: 28
- Saturated Fat: 10
- Carbohydrates: 60
- Fiber: 2
- Protein: 35
Keywords: one-pan chicken and rice, garlic butter chicken, easy dinner, comfort food, weeknight dinner, chicken thighs, one pot meal


