I was waiting for my car to get an oil change last October when the mechanic—a guy named Leo with grease up to his elbows—started talking about dessert. Not just any dessert, but these salted caramel apple cheesecake bars he’d made for his wife’s birthday. I wasn’t expecting baking advice from a man holding a wrench, but there I was, sitting on a plastic chair in the waiting area, listening to him describe exactly how to layer shortbread crust, creamy cheesecake, and spiced apples. He even pulled out his phone to show me a photo. The bars were beautiful, all golden and drizzled with caramel, and I knew right then I had to try making them myself.
Honestly, I’ve made a lot of apple desserts over the years. Apple crisp, apple pie, apple turnovers—you name it. But these salted caramel apple cheesecake bars felt different. They had this perfect balance of tangy cream cheese, sweet apples, and that salty-sweet caramel that just hits different in the fall. I mean, the first time I baked them, my kitchen smelled like a cider mill crossed with a bakery. My neighbor actually knocked on the door to ask what I was making. That’s when I knew this recipe was a keeper.
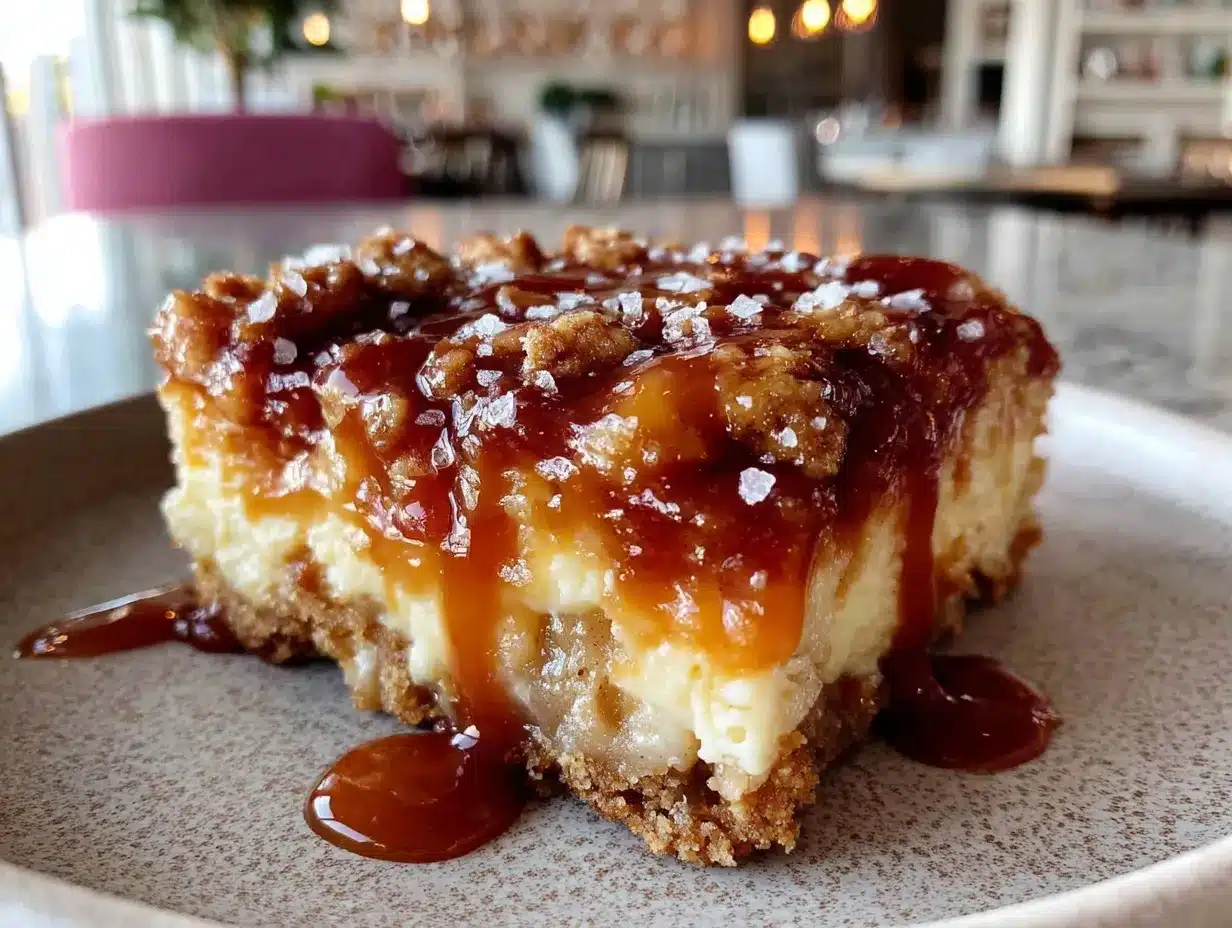
What I love most is how they capture that cozy fall feeling in every single bite. The buttery crust crumbles just right, the cheesecake layer is silky and rich, and the apples get tender and jammy as they bake. Then you finish it all off with a drizzle of salted caramel that seeps into every crevice. Maybe you’ve been there—standing over a pan of freshly baked bars, trying to convince yourself to wait until they cool before cutting into them. Spoiler alert: I never wait long enough, and honestly, warm bars are kind of the best anyway.
So here we are. A recipe that started with a mechanic named Leo and ended up becoming my go-to fall dessert. These salted caramel apple cheesecake bars are the kind of thing you make for a potluck, a Thanksgiving table, or just a random Tuesday when you need something sweet. Trust me on this one.
Why You’ll Love This Recipe
Let me tell you why these salted caramel apple cheesecake bars have earned a permanent spot in my fall baking rotation. I’ve tested this recipe at least six times—yes, six—to get the balance just right. The crust needed to be sturdy enough to hold the filling but tender enough to crumble. The cheesecake layer had to be creamy without being too heavy. And the apples? They had to soften without turning into mush. After all those trials, I can confidently say this is the best version.
- Quick & Easy: Despite looking impressive, these bars come together in about 30 minutes of active prep time. The rest is just baking and cooling—perfect for busy weeknights or last-minute dessert cravings.
- Simple Ingredients: You probably already have most of what you need in your kitchen. No fancy grocery trips required. Just butter, flour, cream cheese, apples, and a few pantry staples.
- Perfect for Fall Gatherings: These bars are made for cozy occasions—Thanksgiving, Friendsgiving, apple picking parties, or even a quiet Sunday with a cup of coffee.
- Crowd-Pleaser: I’ve brought these to three different gatherings now, and every single time, people ask for the recipe. Kids love them, adults love them—they’re universally adored.
- Unbelievably Delicious: The combination of tangy cheesecake, sweet spiced apples, buttery crust, and salted caramel is next-level comfort food. It’s the kind of dessert that makes you close your eyes after the first bite.
What makes these bars different from other apple cheesecake recipes? It’s the technique. I use a par-baked crust to prevent sogginess, and I toss the apples in a bit of flour and cinnamon before layering them on top. This simple trick keeps the apples from releasing too much liquid during baking. The result is a bar that holds its shape beautifully, with distinct layers that taste as good as they look.
Honestly, this recipe isn’t just good—it’s the kind that makes you feel like a baking pro even if you’re a beginner. It’s comfort food reimagined: richer, more satisfying, and somehow still approachable. Perfect for impressing guests without stress, or turning a simple fall evening into something memorable.
What Ingredients You Will Need
This recipe uses simple, wholesome ingredients to deliver bold flavor and satisfying texture without the fuss. Most of these are pantry staples, especially during apple season. Let me walk you through each one and share a few tips I’ve learned along the way.
For the Crust
- 1 ½ cups all-purpose flour (190 grams) — Spoon and level your flour for the best texture. Too much flour makes the crust dense.
- ½ cup granulated sugar (100 grams) — Adds just enough sweetness to balance the tangy cheesecake.
- ½ cup unsalted butter, cold and cubed (113 grams, 1 stick) — Cold butter is key for a flaky, tender crust. I like using Kerrygold for its rich flavor.
- ¼ teaspoon salt — Enhances all the flavors and balances the sweetness.
For the Cheesecake Layer
- 16 ounces cream cheese, softened (two 8-ounce blocks) — Full-fat cream cheese gives the best creamy texture. Let it sit at room temperature for at least 30 minutes before mixing.
- ½ cup granulated sugar (100 grams) — Just enough sweetness without overpowering the apples.
- 2 large eggs, room temperature — Room temperature eggs blend more smoothly into the batter, preventing lumps.
- 1 teaspoon vanilla extract — Use pure vanilla extract if you have it. The flavor difference is noticeable.
- 2 tablespoons all-purpose flour (16 grams) — Helps stabilize the cheesecake layer so it doesn’t crack.
For the Apple Layer
- 3 medium apples, peeled and thinly sliced (about 450 grams) — I recommend Honeycrisp or Granny Smith. Honeycrisp adds natural sweetness, while Granny Smith gives a nice tart contrast. (adds texture and flavor)
- 2 tablespoons granulated sugar (25 grams) — Helps draw out the apples’ natural juices and creates a light syrup as they bake.
- 1 teaspoon ground cinnamon — The star spice for fall baking. I use Saigon cinnamon for its bold, warm flavor.
- ¼ teaspoon ground nutmeg — Adds a subtle warmth that pairs beautifully with apples. Freshly grated is best if you have it.
- 1 tablespoon all-purpose flour (8 grams) — This is my secret trick. Tossing the apples in flour absorbs excess moisture and prevents a watery layer.
For the Salted Caramel Topping
- ½ cup unsalted butter (113 grams, 1 stick) — The base of the caramel. Use good quality butter for the best flavor.
- 1 cup packed brown sugar (200 grams) — Light or dark brown sugar both work. Dark brown sugar gives a deeper, more molasses-like flavor.
- ½ cup heavy cream (120 ml) — Creates that silky, pourable consistency. Don’t substitute with milk—it won’t be as rich.
- 1 teaspoon vanilla extract — Adds depth to the caramel.
- ½ teaspoon flaky sea salt (plus more for sprinkling) — Maldon sea salt is my go-to. It provides that perfect salty crunch that makes the bars irresistible.
Substitution Guidance: If you need a gluten-free option, use a 1:1 gluten-free flour blend in the crust and apple layer. For a dairy-free version, use vegan butter and dairy-free cream cheese—though the texture will be slightly less creamy. And if you’re short on time, store-bought salted caramel sauce works in a pinch, though homemade is truly worth the extra few minutes.
Equipment Needed
You don’t need a professional kitchen to make these bars, but having the right tools makes everything easier. Here’s what I use:
- 9×9-inch baking pan — This size is perfect for thick, satisfying bars. If you only have an 8×8 pan, the bars will be slightly taller and may need an extra 5 minutes of baking time.
- Parchment paper — Line your pan with parchment paper, leaving an overhang on two sides. This creates handy “handles” for lifting the bars out after they’ve cooled. Trust me, this saves so much frustration.
- Electric hand mixer or stand mixer — For beating the cream cheese until smooth. A hand mixer works perfectly; you don’t need anything fancy.
- Medium saucepan — For making the salted caramel. A heavy-bottomed pan distributes heat evenly and prevents scorching.
- Sharp knife and cutting board — For slicing those apples thin and even. I use a Y-shaped peeler for speed.
- Mixing bowls — You’ll need a few: one for the crust, one for the cheesecake batter, and one for the apples.
- Pastry cutter or fork — For cutting the cold butter into the flour mixture for the crust. A pastry cutter works faster, but two forks do the job just fine.
If you don’t have a pastry cutter, don’t stress. I’ve used my fingers plenty of times—just work quickly so the butter stays cold. And if you’re on a budget, a basic hand mixer from any grocery store will work beautifully. I actually prefer my old $20 hand mixer over my fancy stand mixer for this recipe because it’s lighter and easier to handle.
Preparation Method
Alright, let’s get baking. I’ve broken this down into clear steps with all the little details I wish someone had told me the first time I made these.
- Preheat the oven to 350°F (175°C). Line your 9×9-inch baking pan with parchment paper, leaving an overhang on two opposite sides. This will make lifting the bars out so much easier later.
- Make the crust. In a medium bowl, whisk together 1 ½ cups flour, ½ cup sugar, and ¼ teaspoon salt. Add the cold, cubed butter. Use a pastry cutter or your fingers to work the butter into the flour mixture until it resembles coarse crumbs with some pea-sized butter pieces remaining. Don’t overwork it—those little butter chunks create a flaky texture.
- Press the crust into the pan. Transfer the crust mixture to your prepared pan. Press it firmly and evenly into the bottom. I use the bottom of a measuring cup to get it really flat. Bake for 15 minutes, until the edges are just starting to turn golden. Set aside to cool while you make the filling.
- Prepare the apples. In a medium bowl, toss the thinly sliced apples with 2 tablespoons sugar, 1 teaspoon cinnamon, ¼ teaspoon nutmeg, and 1 tablespoon flour. Make sure every slice is coated. Let them sit while you make the cheesecake batter—this gives the flavors time to meld.
- Make the cheesecake filling. In a large bowl, beat the softened cream cheese with an electric mixer on medium speed until smooth and creamy, about 2 minutes. Add ½ cup sugar and beat until combined. Add the eggs one at a time, beating well after each addition. Mix in the vanilla extract. Finally, beat in 2 tablespoons flour just until incorporated. Scrape down the sides of the bowl as needed.
- Assemble the bars. Pour the cheesecake filling over the pre-baked crust and spread it evenly. Arrange the sliced apples on top of the cheesecake layer in an even pattern. Don’t worry about perfection—just spread them out so every bite gets some apple.
- Bake the bars. Bake for 35-40 minutes, until the edges are set and the center is slightly jiggly. It will firm up as it cools. If the top starts browning too quickly, tent loosely with foil after 25 minutes. Let the bars cool completely at room temperature, then refrigerate for at least 3 hours or overnight. This step is crucial—cold bars cut much cleaner.
- Make the salted caramel. While the bars chill, make the caramel. In a medium saucepan over medium heat, melt ½ cup butter. Stir in 1 cup brown sugar and bring to a simmer, stirring constantly. Cook for 2 minutes. Slowly whisk in ½ cup heavy cream—it will bubble up, so be careful. Continue stirring for another minute. Remove from heat and stir in 1 teaspoon vanilla and ½ teaspoon flaky sea salt. Let cool slightly; it will thicken as it cools.
- Finish and serve. Once the bars are fully chilled and set, lift them out of the pan using the parchment paper overhang. Cut into 9 or 16 squares, depending on how generous you’re feeling. Drizzle with salted caramel sauce and sprinkle with a little extra flaky sea salt. Serve cold or at room temperature.
Cooking Tips & Techniques
After making these bars more times than I care to admit, I’ve picked up a few tricks that make a real difference. Let me share them so you can skip the learning curve.
Don’t skip the par-bake. I learned this the hard way. The first time I made these, I poured the cheesecake filling directly onto an unbaked crust. The bottom turned out soggy and sad. Par-baking the crust for 15 minutes creates a barrier that stays crisp even after all that creamy filling goes on top. It’s a small step that makes a huge difference.
Let your cream cheese soften properly. Cold cream cheese creates lumps that no amount of beating will fix. I always take mine out of the fridge at least 30 minutes before starting. If I’m in a hurry, I cut it into cubes and let it sit on the counter while I make the crust. Life is too short for lumpy cheesecake.
Use a hot knife for clean cuts. Here’s a pro tip I picked up from a bakery: run your knife under hot water, dry it off, then slice. Repeat between each cut. This gives you those gorgeous, clean edges that look like they came from a bakery. I won’t lie—the first time I tried this, I forgot to dry the knife and ended up with watery streaks on my bars. Learn from my mistake.
Timing is everything. I like to make the bars a day ahead. They actually taste better after sitting in the fridge overnight because the flavors have time to meld together. Plus, it takes the pressure off if you’re serving them for a gathering. Just make the caramel fresh on the day you serve them.
Watch your caramel closely. Caramel can go from perfect to burnt in seconds. Keep stirring, and don’t walk away from the stove. If you see dark specks forming, you’ve gone too far. I’ve definitely had to start over a batch or two—it happens to the best of us.
Variations & Adaptations
One of the best things about this recipe is how adaptable it is. Here are some variations I’ve tried and loved:
Gluten-Free Version: Swap the all-purpose flour in the crust and apple layer with a 1:1 gluten-free flour blend. I’ve tested this with Bob’s Red Mill, and it works beautifully. The crust will be slightly more crumbly, but still delicious.
Vegan Adaptation: Use vegan butter and dairy-free cream cheese. I’ve had good results with Miyoko’s cream cheese and Country Crock plant butter. The texture is a bit softer, so I recommend chilling the bars for at least 6 hours before cutting.
Different Apple Varieties: Experiment with different apples based on what’s in season. Fuji and Gala are sweeter and create a softer texture. Granny Smith stays firmer and adds a tart contrast. My personal favorite is a mix of Honeycrisp and Granny Smith—best of both worlds.
Spice It Up: Add a pinch of cardamom or allspice to the apple mixture for a more complex flavor. I tried cardamom last Thanksgiving, and it added this lovely floral note that paired perfectly with the caramel.
Nutty Crunch: Sprinkle ½ cup of chopped pecans or walnuts over the apple layer before baking. The nuts toast in the oven and add a wonderful crunch. I did this for a potluck once, and people couldn’t stop talking about the texture.
Individual Servings: Make these in a muffin tin for individual portions. Press the crust into the bottom of greased muffin cups, add the cheesecake filling and apples, and bake for about 20 minutes. Perfect for parties or portion control.
Serving & Storage Suggestions
These bars are versatile when it comes to serving. Here’s how I like to enjoy them:
Serving Temperature: I prefer them cold straight from the fridge—the cheesecake layer is firm and creamy, and the caramel gets slightly thick and chewy. But they’re also wonderful at room temperature if you want a softer texture. If you’re serving them warm, just be aware that the bars will be more delicate and harder to cut neatly.
Presentation Ideas: Drizzle the salted caramel sauce over the top just before serving, then sprinkle with a pinch of flaky sea salt. A dollop of whipped cream on the side never hurts, and a dusting of cinnamon adds a beautiful finishing touch. For a truly decadent experience, serve with a scoop of vanilla bean ice cream.
What to Serve Alongside: These bars pair beautifully with hot apple cider, a spiced chai latte, or a strong cup of coffee. The bitterness of coffee balances the sweetness of the bars perfectly. For a fall brunch, I’ve served them alongside pumpkin muffins and a fruit salad—always a hit.
Storage Instructions: Store leftover bars in an airtight container in the refrigerator for up to 5 days. The flavors actually deepen after a day or two. To freeze, wrap individual bars tightly in plastic wrap, then place them in a freezer-safe bag. They’ll keep for up to 3 months. Thaw in the refrigerator overnight before serving.
Reheating Tips: If you want to enjoy them warm, microwave an individual bar for about 15 seconds. The cheesecake will soften, and the apples will release their juices again. Just don’t overdo it—30 seconds and the cream cheese starts to get weird.
Flavor Development: I’ve noticed that the bars taste even better on day two. The crust absorbs a bit of moisture from the cheesecake, becoming more tender, and the apple and caramel flavors have time to meld. So don’t worry about making them ahead—they’ll be even more delicious.
Nutritional Information & Benefits
Let’s be honest—these are an indulgence. But here’s the nutritional breakdown for one bar (based on 9 servings):
| Nutrient | Amount Per Serving |
|---|---|
| Calories | 480 |
| Total Fat | 28g |
| Saturated Fat | 17g |
| Cholesterol | 115mg |
| Sodium | 320mg |
| Total Carbohydrates | 54g |
| Dietary Fiber | 2g |
| Sugars | 38g |
| Protein | 6g |
While these bars aren’t health food, they do have some redeeming qualities. Apples are a good source of fiber and vitamin C, and they contain antioxidants that support heart health. Cinnamon has anti-inflammatory properties and can help regulate blood sugar. And believe it or not, the cream cheese provides a decent amount of calcium and protein.
If you’re watching your sugar intake, you can reduce the sugar in the cheesecake layer to ⅓ cup without affecting the texture too much. And for a lower-calorie option, use reduced-fat cream cheese—though I’ll warn you, the texture won’t be quite as luxuriously creamy.
Personally, I see these bars as a treat to be enjoyed in moderation. They’re the kind of dessert you make for special occasions, not everyday snacking. And honestly, a little indulgence now and then is good for the soul.
Conclusion
So there you have it—salted caramel apple cheesecake bars that started with a mechanic named Leo and ended up becoming my fall baking signature. These bars have everything you could want in a fall dessert: a buttery crust, creamy cheesecake, tender spiced apples, and that irresistible salted caramel drizzle.
What I love most about this recipe is how approachable it is. You don’t need to be a pastry chef to pull these off. The steps are straightforward, the ingredients are simple, and the result looks and tastes like something from a fancy bakery. Plus, they’re incredibly forgiving—even if your caramel seizes up or your crust crumbles a bit, they’ll still be delicious.
I’d love to hear how these turn out for you. Did you try a variation? Use a different apple variety? Forget to add the salt and end up with a sweet caramel instead? (Been there, done that.) Drop a comment below and let me know how your bars came out. And if you share them on social media, tag me—I want to see your beautiful creations.
Now go make some memories in your kitchen. Fall is waiting, and these bars are ready to become your new favorite tradition. Happy baking!
Frequently Asked Questions
Can I use store-bought caramel sauce instead of making my own?
Absolutely. While homemade salted caramel is definitely worth the effort, a good quality store-bought sauce works in a pinch. Look for one that lists cream and butter as ingredients—not just corn syrup and artificial flavors. Warm it slightly before drizzling so it flows nicely.
Why did my cheesecake layer crack?
Cracks usually happen when the cheesecake is overbaked or experiences a sudden temperature change. Make sure to pull the bars out when the center is still slightly jiggly—it will continue to set as it cools. Also, let the bars cool gradually at room temperature before refrigerating. If cracks do appear, don’t worry—the apple layer and caramel drizzle will hide them beautifully.
Can I make these bars ahead of time?
Yes, and I actually recommend it! These bars taste even better after a day in the fridge because the flavors have time to meld. Make them up to two days in advance, but wait to add the caramel drizzle until just before serving for the best texture and appearance.
What’s the best way to get clean slices?
Patience is key. Make sure the bars are fully chilled—at least 3 hours in the fridge, preferably overnight. Use a sharp knife and wipe it clean between each cut. For the cleanest slices, run your knife under hot water, dry it off, then slice. Repeat this for every cut.
Can I freeze these bars?
Yes, they freeze beautifully. Wrap individual bars tightly in plastic wrap, then place them in a freezer-safe bag or container. They’ll keep for up to 3 months. Thaw in the refrigerator overnight before serving. Add the caramel drizzle after thawing for the best texture.
Pin This Recipe!
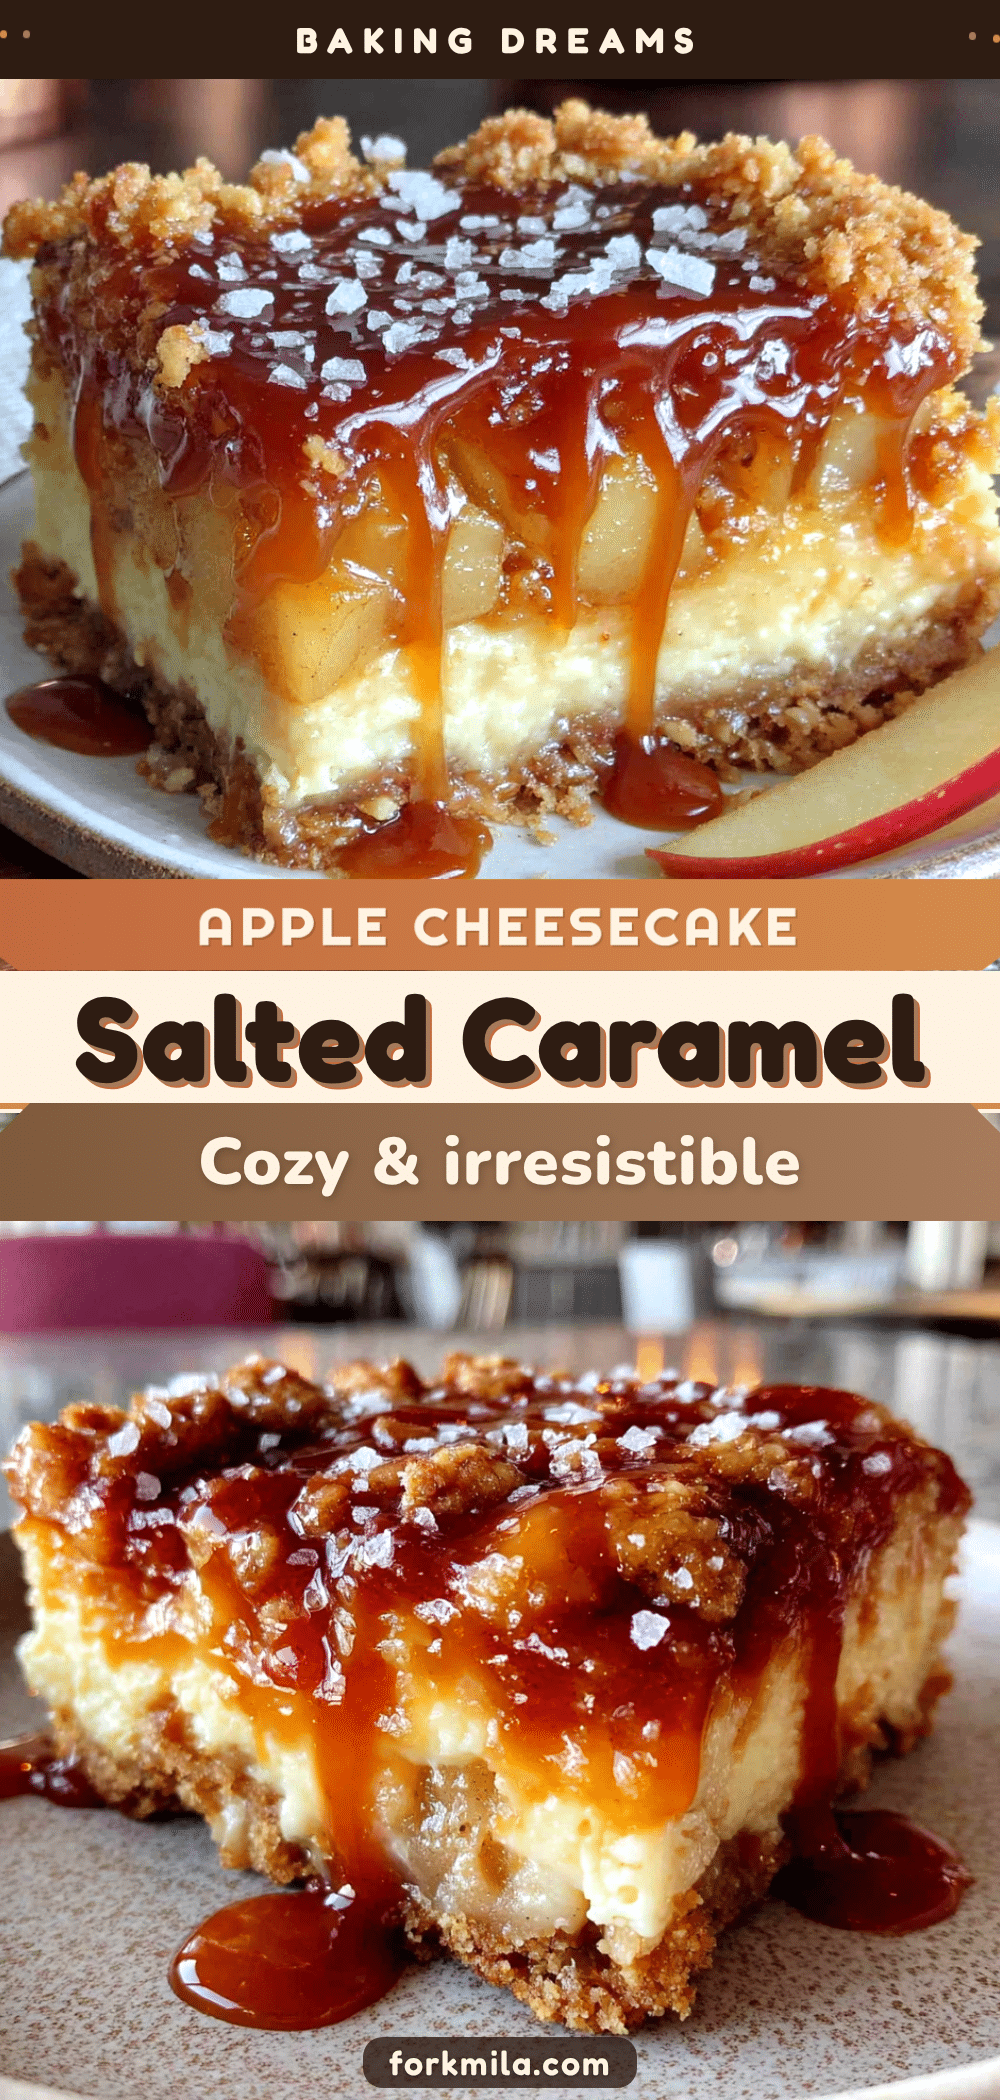
Cozy Salted Caramel Apple Cheesecake Bars: Easy Fall Dessert
These salted caramel apple cheesecake bars feature a buttery shortbread crust, creamy cheesecake layer, tender spiced apples, and a drizzle of homemade salted caramel. They’re the perfect easy fall dessert for gatherings or cozy nights in.
- Prep Time: 30 minutes
- Cook Time: 50 minutes
- Total Time: 4 hours 20 minutes (includes chilling)
- Yield: 9 servings 1x
- Category: Dessert
- Cuisine: American
Ingredients
- 1 ½ cups all-purpose flour (190 grams)
- ½ cup granulated sugar (100 grams)
- ½ cup unsalted butter, cold and cubed (113 grams, 1 stick)
- ¼ teaspoon salt
- 16 ounces cream cheese, softened (two 8-ounce blocks)
- ½ cup granulated sugar (100 grams)
- 2 large eggs, room temperature
- 1 teaspoon vanilla extract
- 2 tablespoons all-purpose flour (16 grams)
- 3 medium apples, peeled and thinly sliced (about 450 grams)
- 2 tablespoons granulated sugar (25 grams)
- 1 teaspoon ground cinnamon
- ¼ teaspoon ground nutmeg
- 1 tablespoon all-purpose flour (8 grams)
- ½ cup unsalted butter (113 grams, 1 stick)
- 1 cup packed brown sugar (200 grams)
- ½ cup heavy cream (120 ml)
- 1 teaspoon vanilla extract
- ½ teaspoon flaky sea salt (plus more for sprinkling)
Instructions
- Preheat the oven to 350°F (175°C). Line a 9×9-inch baking pan with parchment paper, leaving an overhang on two opposite sides.
- Make the crust: In a medium bowl, whisk together 1 ½ cups flour, ½ cup sugar, and ¼ teaspoon salt. Add the cold, cubed butter. Use a pastry cutter or your fingers to work the butter into the flour mixture until it resembles coarse crumbs with some pea-sized butter pieces remaining.
- Press the crust mixture firmly and evenly into the bottom of the prepared pan. Bake for 15 minutes, until the edges are just starting to turn golden. Set aside to cool.
- Prepare the apples: In a medium bowl, toss the thinly sliced apples with 2 tablespoons sugar, 1 teaspoon cinnamon, ¼ teaspoon nutmeg, and 1 tablespoon flour. Let sit while you make the cheesecake batter.
- Make the cheesecake filling: In a large bowl, beat the softened cream cheese with an electric mixer on medium speed until smooth and creamy, about 2 minutes. Add ½ cup sugar and beat until combined. Add the eggs one at a time, beating well after each addition. Mix in the vanilla extract. Beat in 2 tablespoons flour just until incorporated.
- Assemble the bars: Pour the cheesecake filling over the pre-baked crust and spread evenly. Arrange the sliced apples on top of the cheesecake layer in an even pattern.
- Bake for 35-40 minutes, until the edges are set and the center is slightly jiggly. If the top starts browning too quickly, tent loosely with foil after 25 minutes. Let cool completely at room temperature, then refrigerate for at least 3 hours or overnight.
- Make the salted caramel: In a medium saucepan over medium heat, melt ½ cup butter. Stir in 1 cup brown sugar and bring to a simmer, stirring constantly. Cook for 2 minutes. Slowly whisk in ½ cup heavy cream. Continue stirring for another minute. Remove from heat and stir in 1 teaspoon vanilla and ½ teaspoon flaky sea salt. Let cool slightly.
- Once the bars are fully chilled and set, lift them out of the pan using the parchment paper overhang. Cut into 9 or 16 squares. Drizzle with salted caramel sauce and sprinkle with a little extra flaky sea salt. Serve cold or at room temperature.
Notes
For clean slices, chill bars thoroughly and use a hot knife wiped clean between cuts. Bars taste even better on day two. Store in refrigerator for up to 5 days or freeze for up to 3 months. Add caramel drizzle just before serving for best texture.
Nutrition
- Serving Size: 1 bar
- Calories: 480
- Sugar: 38
- Sodium: 320
- Fat: 28
- Saturated Fat: 17
- Carbohydrates: 54
- Fiber: 2
- Protein: 6
Keywords: salted caramel apple cheesecake bars, fall dessert, apple cheesecake bars, easy cheesecake bars, apple dessert, caramel apple bars


