The PTA Halloween party was in six hours and I’d completely forgotten. I was staring into my fridge like it held the secrets to the universe, finding only the usual suspects—a pack of hot dogs, a can of crescent rolls, and some string cheese. Meanwhile, the sign-up sheet was filling up with promises of elaborate witch-hat cupcakes, graveyard dirt cakes, and those creepy finger-shaped cookies with almond fingernails. I had a package of Oscar Mayer and some Pillsbury dough. Honestly, I almost just bought a bag of candy on the way there.
But then, in a moment of pure, panicked inspiration, I remembered seeing something on a food blog years ago—mummy hot dogs. You know, the ones where you wrap hot dogs in strips of dough to look like bandages? I figured it was better than showing up empty-handed. I grabbed the hot dogs, sliced the string cheese into thin strips, and unrolled that tube of crescent dough with a satisfying pop. I cut the dough into thin ribbons, wrapped them haphazardly around the hot dogs (leaving a gap for the “face”), and popped them in the oven. I even used tiny dots of mustard for eyes. It took maybe fifteen minutes total, including the time I spent muttering under my breath about my own forgetfulness.
Here’s the thing—they were a total hit. Like, gone-in-ten-minutes hit. The kids went absolutely nuts for them, and the other parents kept asking me for the recipe, assuming I’d spent hours on them. I had to sheepishly admit they were just hot dogs in a costume. Maybe you’ve been there—the panic of needing to bring something impressive with absolutely nothing prepared. That’s why this recipe stuck with me. It’s the ultimate underdog story: the simplest, fastest thing on the table ended up being the most loved. These Quick Mummy Hot Dogs are my go-to for Halloween now, not because they’re fancy, but because they’re the kind of clever that makes you look like a hero when you’re really just surviving.
Why You’ll Love This Recipe
Let me tell you, as someone who has tested this recipe at least a dozen times (including one memorable attempt where I forgot to cut the dough thin enough and ended up with angry, over-stuffed hot dogs), this version is foolproof. I’ve tweaked the dough-to-hot-dog ratio, the baking time, and the cheese placement to get it just right. This isn’t just another recipe you’ll find floating around the internet—it’s the best version, tested by a busy mom who values her time and sanity.
- Quick & Easy: From fridge to table in under 20 minutes. Seriously. The oven preheats while you’re wrapping, and you’re done before the Halloween movie even starts.
- Simple Ingredients: You probably already have hot dogs, crescent rolls, and cheese in your kitchen. No special trips to a fancy grocery store for obscure ingredients.
- Perfect for Halloween Parties: Whether it’s a school party, a neighborhood gathering, or just a fun dinner before trick-or-treating, these are the star of the show.
- Crowd-Pleaser: Kids love them, adults secretly love them too, and even picky eaters will gobble them up. I’ve never seen a mummy hot dog left on a plate.
- Unbelievably Delicious: The flaky, buttery crescent dough wrapped around a juicy hot dog with a strip of melty cheese inside? It’s comfort food in a costume. The texture is perfect—crispy on the outside, soft and savory on the inside.
What makes this recipe different from all the others? It’s the little details. I’ve learned that cutting the crescent dough into thinner strips (about 1/2 inch wide) gives you a more “mummy-like” look with more bandages. I also recommend using a sharp cheddar or pepper jack cheese strip for a flavor kick that plain string cheese doesn’t always deliver. And the mustard eyes? Non-negotiable. It adds that perfect tangy pop that cuts through the richness. This recipe isn’t just good—it’s the kind that makes you close your eyes after the first bite, even if you’re a grown-up. It’s Halloween fun without the stress, and honestly, that’s the best kind of magic.
What Ingredients You Will Need
This recipe relies on a handful of simple, pantry-friendly ingredients that come together to create something way more fun than the sum of their parts. Each component plays a specific role, and I’ve tested a few brands to find what works best.
- Hot Dogs (8 standard-sized): Use your favorite brand. I personally prefer all-beef hot dogs like Hebrew National or Oscar Mayer for their flavor and snap. You can also use turkey or chicken hot dogs for a lighter option. (Note: Avoid jumbo or thick hot dogs for this recipe, as they take longer to cook through and can make the dough burn.)
- Crescent Roll Dough (1 can, 8 oz): The star of the show. I recommend Pillsbury Original Crescent Rolls for that classic flaky, buttery texture. Do not use the “big” or “grand” size cans—the dough is too thick and won’t wrap as nicely. You’ll have a harder time cutting thin strips.
- String Cheese (2-3 sticks): This adds a wonderful gooey, cheesy center. Cut each stick into thin strips lengthwise. I like using Kraft Polly-O or Sargento string cheese. For a bolder flavor, swap in a block of sharp cheddar and cut it into thin matchsticks.
- Mustard (for eyes and dipping): Yellow mustard is classic for the “mummy eyes” because of its bright color and tangy taste. You can also use ketchup for eyes, but it tends to spread more. For dipping, honey mustard or spicy brown mustard are great options.
- Optional: Egg Wash (1 egg + 1 tbsp water): Brushing the dough with a light egg wash before baking gives the mummies a beautiful golden-brown, shiny finish. It’s not strictly necessary, but it makes them look extra polished.
- Optional: Everything Bagel Seasoning or Sesame Seeds: A light sprinkle before baking adds a fun texture and extra flavor. It’s a nice touch if you’re serving them at a party.
Substitution Guidance: If you’re feeding a crowd with dietary restrictions, you can easily adapt this. Use gluten-free crescent roll dough (like the one from Pillsbury or a generic brand) for a gluten-free version. For a dairy-free option, skip the cheese or use a dairy-free cheese stick. Turkey or chicken hot dogs work perfectly for a lower-fat version. The beauty of this recipe is its flexibility—it’s hard to mess up!
Equipment Needed
You don’t need a fancy kitchen to pull these off. I’ve made them in a cramped apartment and a full-size kitchen, and the tools are the same. Here’s what you’ll need:
- Baking Sheet: A standard 13×18-inch baking sheet works best. Line it with parchment paper for easy cleanup—trust me on this one, the cheese can get sticky.
- Sharp Knife or Pizza Cutter: You need something sharp to cut the crescent dough into thin strips. A pizza cutter is my go-to because it’s fast and creates clean lines. A sharp chef’s knife works just as well.
- Small Bowl (for egg wash): If you’re using an egg wash, a small bowl and a pastry brush are handy. No pastry brush? Use a clean paper towel or even your fingers (just wash them first!).
- Cutting Board: For slicing the string cheese and hot dogs (though you usually don’t need to cut the hot dogs).
- Parchment Paper: Not strictly necessary, but it makes cleanup a breeze. I’ve also used a silicone baking mat with great results.
- Measuring Spoons: Only if you’re measuring out the egg wash or mustard. I usually just eyeball it.
Budget-Friendly Tip: Don’t have a pizza cutter? A butter knife works in a pinch, though the strips might be a bit uneven. Uneven strips just make your mummies look more “authentic” anyway—like real bandages! I once used a pair of clean kitchen shears to cut the dough, and it worked surprisingly well.
Preparation Method
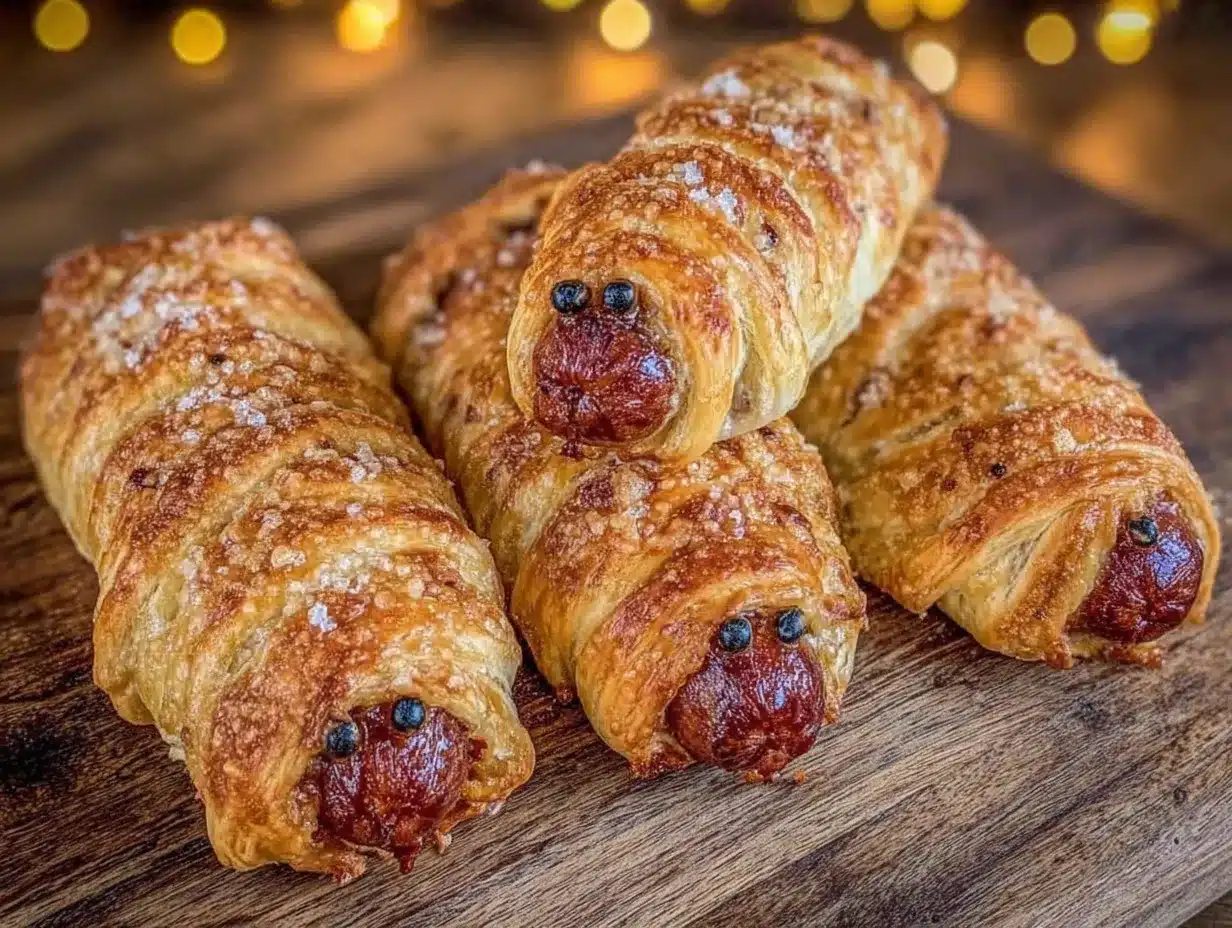
Alright, let’s get to the fun part. I’ve broken this down step-by-step so you can follow along without any hiccups. The whole process takes about 20 minutes from start to finish, including baking time.
- Preheat Your Oven: Set your oven to 375°F (190°C). While it’s heating up, line your baking sheet with parchment paper. This is a good time to take a deep breath—you’re about to be a kitchen hero.
- Prepare the Dough: Open the can of crescent rolls. Don’t freak out when it pops—it always startles me too! Unroll the dough and separate it into the 8 pre-cut triangles along the perforated lines. Now, take each triangle and cut it lengthwise into thin strips. I aim for about 3-4 strips per triangle, each about 1/2 inch wide. The thinner the strips, the more “bandaged” your mummy will look. I’ve found that using a pizza cutter makes this step super fast.
- Prepare the Cheese: Take your string cheese sticks and cut them into thin strips lengthwise. You want about 4-6 strips per stick. If you’re using a block of cheddar, cut it into thin matchsticks about the same length as the hot dog. Set these aside.
- Assemble the Mummies: Lay a hot dog on your cutting board. Place one or two thin strips of cheese alongside the hot dog. Now, take your dough strips and start wrapping them around the hot dog and cheese. Don’t wrap too tightly—you want a little bit of space between the strips so some of the hot dog and cheese peeks through. Leave a small gap about 1 inch wide near the top of the hot dog for the “face.” This is where the eyes will go. Press the ends of the dough strips gently onto the hot dog to secure them.
- Place on Baking Sheet: Transfer each wrapped mummy to your prepared baking sheet, leaving about an inch of space between them. They won’t spread much, so you can fit all 8 on a standard sheet.
- Add the Egg Wash (Optional): In a small bowl, whisk together 1 egg and 1 tablespoon of water. Using a pastry brush, lightly brush the top of each mummy with the egg wash. This gives them a beautiful golden-brown color. If you’re using everything bagel seasoning or sesame seeds, sprinkle them on now.
- Bake: Place the baking sheet in the preheated oven and bake for 10-12 minutes. At the 10-minute mark, check on them. You want the dough to be golden brown and puffed up. The cheese should be melted and bubbly. If you like them extra crispy, leave them in for the full 12 minutes. I’ve found that 11 minutes is the sweet spot in my oven.
- Add the Eyes and Serve: Remove the baking sheet from the oven and let the mummies cool for 2-3 minutes on the sheet. They’ll be hot! Once they’re cool enough to handle, transfer them to a serving plate. Using a toothpick or a small squeeze bottle, add two tiny dots of mustard for the eyes. You can also use ketchup, but mustard has a better color contrast. Serve immediately while the cheese is still gooey.
Sensory Cues: When you’re wrapping the dough, you should feel the soft, pliable texture of the crescent dough. As you bake, your kitchen will fill with the warm, buttery aroma of baking dough. When they’re done, the dough should be a deep golden brown and the cheese should be oozing out slightly. The mustard eyes should be bright and sharp against the golden dough.
Personal Tip: I’ve learned the hard way that if you wrap the dough too tightly, it can tear as it expands in the oven. Leave a little breathing room! Also, don’t skip the cooling time—the cheese inside is molten lava hot right out of the oven. I may have burned my tongue once. Okay, twice.
Cooking Tips & Techniques
I’ve made these mummies more times than I care to count, and I’ve collected a few hard-won lessons along the way. Here’s what I wish I’d known from the start.
The Dough Strip Size Matters: If your strips are too thick (over 1 inch), the mummy will look more like a hot dog in a sleeping bag than a mummy. Too thin, and they can break easily. Aim for 1/2-inch strips. I once tried to use pre-sliced dough from a tube of crescent roll “sheets” (the kind without perforations), and it was a game-changer. You can find them near the regular crescent rolls—they’re easier to cut into uniform strips.
Don’t Overcrowd the Pan: I know it’s tempting to pack them all in, but give them a little space. The dough needs room to puff up and get crispy. If they’re touching, they’ll steam instead of bake, and you’ll end up with soggy spots.
Watch the Cheese: If you’re using string cheese, be aware that it can sometimes leak out of the dough and create a cheesy mess on the pan. That’s why parchment paper is your best friend. Also, if you want less ooze, wrap the cheese completely inside the dough strips rather than leaving it exposed.
Timing is Everything: These are best served immediately. The dough is at its crispiest right out of the oven. If you’re making them for a party, time the baking so they come out just as guests are arriving. You can also prep them ahead of time (see the storage section) and bake them off right before serving.
My Biggest Failure: The first time I made these, I forgot to cut the dough into strips at all. I just wrapped the entire hot dog in a full triangle of dough. It looked like a sad, lumpy burrito. The kids still ate them, but they were not mummies. Learn from my mistakes—take the extra 30 seconds to cut the dough!
Variations & Adaptations
One of the best things about this recipe is how customizable it is. I’ve played around with different flavors and methods, and here are some of my favorite variations.
- Spicy Mummies: Use spicy jalapeño hot dogs or add a thin slice of pickled jalapeño under the cheese. You can also swap the yellow mustard for spicy brown mustard or sriracha for the eyes. My husband loves this version.
- Cheese Lover’s Mummies: Experiment with different cheeses. Pepper jack adds a nice kick, while smoked gouda gives a rich, smoky flavor. I’ve even used a thin slice of American cheese folded into a strip—it melts beautifully.
- Veggie Mummies: For a vegetarian option, use veggie hot dogs or even thick-cut carrot sticks (blanched first). The cooking time will be about the same, but keep an eye on the dough to make sure it doesn’t burn.
- Breakfast Mummies: Swap the hot dog for a fully cooked breakfast sausage link. Serve with a side of maple syrup for dipping—sweet and savory perfection. I made these for a Halloween-themed brunch once, and they were a huge hit.
- Air Fryer Mummies: If you have an air fryer, you can make these even faster. Preheat the air fryer to 350°F (175°C). Place the wrapped mummies in the basket in a single layer (you may need to work in batches). Cook for 6-8 minutes, or until the dough is golden brown. No need to flip them halfway through. They come out extra crispy!
Serving & Storage Suggestions
These mummies are best served warm, right after baking. I like to arrange them on a large platter with a small bowl of mustard or ketchup in the center for dipping. For a Halloween party, I’ll sometimes add a few “spider” decorations made from black olives and pretzel sticks around the platter. It’s a simple touch that makes the presentation pop.
What to Serve With Them: These are hearty enough to be a meal on their own, but they pair beautifully with a simple side salad or some roasted vegetables. For a party, I’ll serve them alongside other finger foods like Halloween Pizza Mummies or a bowl of creamy pumpkin soup. For drinks, apple cider or a fun Halloween punch is perfect.
Storage: If you have leftovers (which is rare in my house), let them cool completely. Store them in an airtight container in the refrigerator for up to 3 days. The dough will soften slightly, but they’re still delicious.
Reheating: The best way to reheat them is in the oven or air fryer. Bake at 350°F (175°C) for 5-7 minutes, or until the dough crisps back up. You can also microwave them for 20-30 seconds, but the dough will be soft and chewy, not crispy. I usually just microwave them because I’m impatient, and they’re still tasty.
Make-Ahead Tip: You can assemble the mummies up to 24 hours in advance. Wrap the hot dogs and cheese in the dough strips, place them on the baking sheet, and cover tightly with plastic wrap. Store in the refrigerator. When you’re ready to bake, just pop them in the oven—you may need to add 1-2 minutes to the baking time since they’re starting from cold.
Nutritional Information & Benefits
Let’s be real—these are not health food. They’re a fun, indulgent treat for a special occasion. But if you’re curious about what’s in them, here’s an estimate per mummy (based on one hot dog, one serving of crescent dough, and a thin strip of string cheese):
- Calories: Approximately 220-250
- Protein: 9-11g
- Fat: 15-18g
- Carbohydrates: 14-16g
- Sodium: 600-700mg
Health Benefits of Key Ingredients: Hot dogs are a source of protein, which helps keep you full and satisfied. The crescent dough provides carbohydrates for quick energy. Cheese adds calcium and a bit of protein. Is it a balanced meal? Not really. But for a Halloween party or a fun weeknight dinner, it’s perfectly fine in moderation.
Dietary Considerations: This recipe contains gluten (from the crescent dough) and dairy (from the cheese). For a gluten-free version, use gluten-free crescent dough. For a dairy-free version, skip the cheese or use a dairy-free alternative. Always check the labels on your hot dogs, as some brands may contain gluten or other allergens.
My Perspective: I’m all about balance. We eat healthy most nights, but Halloween is for fun. These mummies are a treat, and there’s nothing wrong with that. Enjoy them, have a good time, and don’t stress about the nutritional breakdown. Life is too short for that.
Conclusion
These Quick Mummy Hot Dogs are more than just a recipe—they’re a lifesaver. They’ve saved me from showing up empty-handed to parties, they’ve turned stressful weeknights into fun family dinners, and they’ve proven that you don’t need a lot of time or fancy ingredients to create something memorable. The best recipes are the ones that work with your life, not against it, and this one does exactly that.
I love this recipe because it’s a little bit silly, a little bit clever, and a whole lot of delicious. It reminds me that cooking doesn’t have to be complicated to be good. So go ahead—grab that pack of hot dogs and that can of crescent rolls, and make some mummies. Customize them with your favorite cheese, your favorite dipping sauce, or your favorite hot dog brand. Make them your own.
I’d love to hear how yours turn out! Did you try a fun variation? Did your kids gobble them up? Drop a comment below and let me know. And if you’re looking for more quick and easy dinner ideas, be sure to check out our collection of 20-minute meals. Happy Halloween, and happy cooking!
Frequently Asked Questions
Can I use a different type of dough?
Absolutely! While crescent roll dough is the classic choice for its flaky texture and buttery flavor, you can use puff pastry (cut into thin strips) or even pre-made pizza dough. Just keep in mind that the baking time and temperature may need to be adjusted. Puff pastry will take a bit longer and should be baked at 400°F (200°C).
How do I keep the dough from unraveling while baking?
Make sure you press the ends of the dough strips gently onto the hot dog to secure them. You can also tuck the last strip of dough underneath the mummy as you place it on the baking sheet. The dough will puff up and stick to itself as it bakes, so a little bit of unraveling is normal and actually adds to the “mummy” look!
Can I make these in advance for a party?
Yes! You can assemble the mummies up to 24 hours in advance and keep them covered in the refrigerator. Bake them off just before serving for the best texture. You can also fully bake them, let them cool, and reheat them in the oven at 350°F (175°C) for 5-7 minutes before serving.
What can I use instead of mustard for the eyes?
Ketchup works well, though it’s a bit runnier and can spread. You can also use small dots of sriracha, sambal oelek, or even tiny pieces of black olive or nori (seaweed) for a different look. For a sweet option, use a small dot of chocolate frosting or a mini chocolate chip.
Are these freezer-friendly?
Yes! You can freeze the assembled (unbaked) mummies. Place them on a baking sheet and freeze until solid, then transfer to a freezer-safe bag or container. They’ll keep for up to 2 months. To bake, place them directly on a baking sheet (no need to thaw) and add 3-5 minutes to the baking time. You can also freeze fully baked and cooled mummies, then reheat them in the oven or air fryer.
Pin This Recipe!
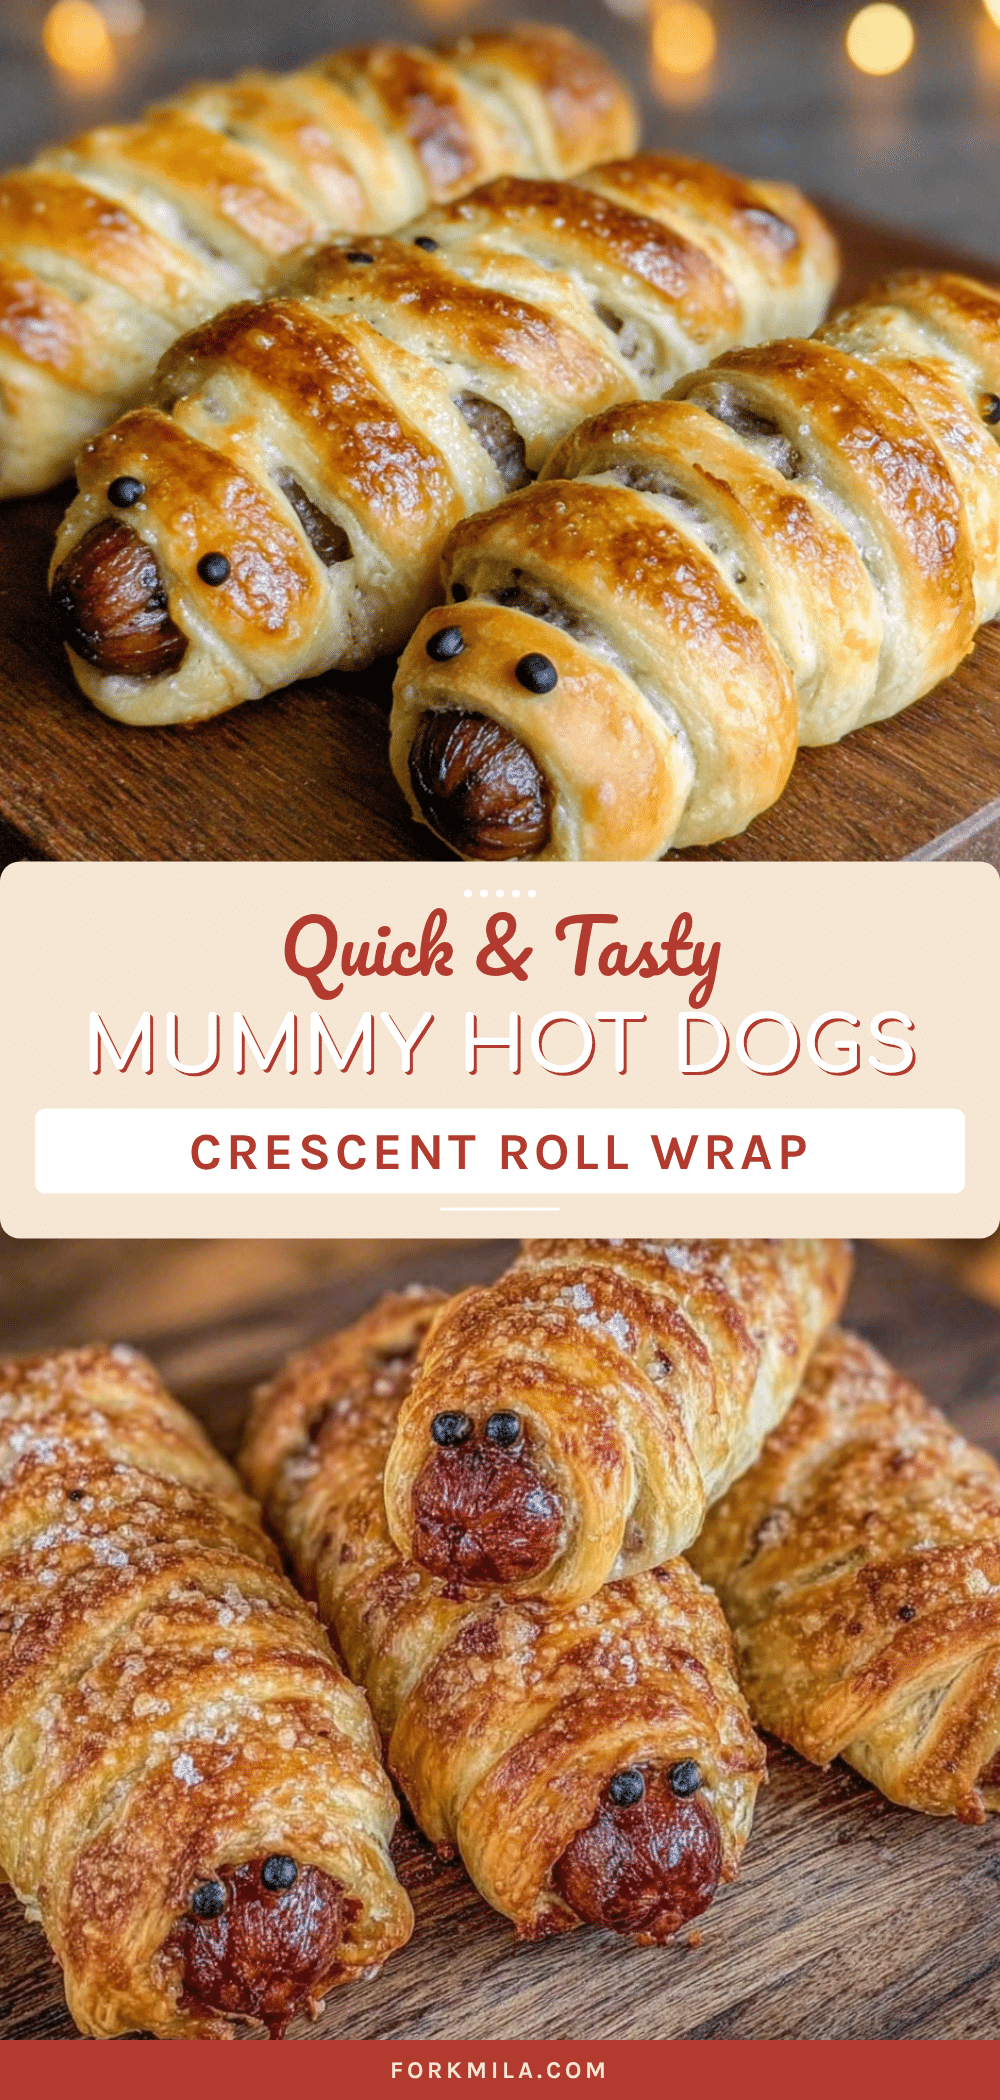
Quick Mummy Hot Dogs: Easy 20-Minute Halloween Dinner
These Quick Mummy Hot Dogs are a fun, easy Halloween dinner or party snack made with hot dogs, crescent roll dough, and cheese. Ready in under 20 minutes, they’re a crowd-pleaser that looks impressive with minimal effort.
- Prep Time: 10 minutes
- Cook Time: 12 minutes
- Total Time: 22 minutes
- Yield: 8 servings 1x
- Category: Appetizer
- Cuisine: American
Ingredients
- 8 standard-sized hot dogs
- 1 can (8 oz) crescent roll dough
- 2–3 sticks string cheese
- Mustard (for eyes and dipping)
- 1 egg (for egg wash, optional)
- 1 tablespoon water (for egg wash, optional)
- Everything bagel seasoning or sesame seeds (optional)
Instructions
- Preheat your oven to 375°F (190°C). Line a baking sheet with parchment paper.
- Open the can of crescent rolls and separate into 8 triangles. Cut each triangle lengthwise into thin strips, about 1/2 inch wide.
- Cut string cheese sticks into thin strips lengthwise (about 4-6 strips per stick).
- Place a hot dog on a cutting board. Lay one or two thin strips of cheese alongside the hot dog. Wrap dough strips around the hot dog and cheese, leaving a 1-inch gap near the top for the ‘face.’ Press ends gently to secure.
- Transfer wrapped mummies to the prepared baking sheet, leaving about an inch of space between them.
- Optional: Whisk egg and water together in a small bowl. Brush the tops of the mummies with egg wash. Sprinkle with everything bagel seasoning or sesame seeds if desired.
- Bake for 10-12 minutes, until dough is golden brown and puffed, and cheese is melted.
- Let cool for 2-3 minutes. Add two tiny dots of mustard for eyes. Serve immediately.
Notes
For best results, cut dough strips about 1/2 inch wide. Don’t wrap dough too tightly to allow for expansion. Let mummies cool for a few minutes before serving to avoid burning mouth on hot cheese. Can be assembled up to 24 hours in advance and refrigerated. For air fryer: cook at 350°F (175°C) for 6-8 minutes.
Nutrition
- Serving Size: 1 mummy
- Calories: 235
- Sugar: 3
- Sodium: 650
- Fat: 16
- Saturated Fat: 6
- Carbohydrates: 15
- Protein: 10
Keywords: mummy hot dogs, Halloween recipe, quick dinner, hot dog recipe, crescent roll recipe, kid-friendly, party food


