It was 10:47 PM on a rainy Thursday in late September, and I had this weird, unstoppable craving for something light and crispy. Not chips, not popcorn—something that would practically dissolve on my tongue. I didn’t have the energy for a complicated bake, but I had three egg whites sitting in the fridge from making custard earlier that day, and a bag of chocolate chips that was almost empty. The idea just sort of appeared in my head: ghost-shaped meringues. Honestly, I laughed at myself a little. Me, piping perfect little ghosts at nearly midnight? But there I was, dragging out my mixing bowl and hand mixer, hoping I wouldn’t wake up the kids. I spilled sugar on the counter twice and almost forgot to wipe the bowl with lemon juice, but you know what? Those little ghosts came out perfect—creepy-cute and so light they barely weighed anything. I’ve been making them every Halloween since, and they’re the one treat that makes my kids actually stop asking for candy.
Why You’ll Love This Recipe
Listen, I’ve tested a lot of Halloween recipes over the years, and most of them fall into two camps: either they look amazing but taste like cardboard, or they taste great but look like a hot mess. These ghost meringue cookies are the sweet spot where cute meets delicious, and they won’t break your grocery budget.
- Budget-Friendly Ingredients: You only need eggs, sugar, vanilla, and chocolate chips. Chances are you have most of this stuff already, which is exactly what this family needs when Halloween spending gets out of hand.
- Naturally Low-Fat & Gluten-Free: Meringues are naturally fat-free and gluten-free, so they work for pretty much everyone. No weird substitutes needed.
- Fun for Little Helpers: My five-year-old loves “painting” the ghost faces with melted chocolate using a toothpick. It’s messy but worth it for the giggles.
- Make-Ahead Friendly: These keep for weeks in an airtight container. You can bake them a full week before Halloween and still have perfect cookies for the party.
- No Fancy Equipment Required: A hand mixer or stand mixer works fine. I’ve even made these with a whisk when my mixer broke—took forever but worked!
What makes these different from every other meringue recipe out there? It’s the method. Most recipes tell you to bake them low and slow, but I’ve found that a slightly higher temperature at the start gives you that crisp exterior while keeping the inside melt-in-your-mouth soft. Plus, the cornstarch trick I’ll share below keeps them from cracking—because nobody wants a headless ghost on their cookie platter.
These cookies are the kind that make you feel like a kitchen rockstar without actually working that hard. They’re the Halloween treat that disappears first at every party, and honestly, that feels pretty good.
What Ingredients You Will Need
This recipe keeps things simple—no fancy extracts or specialty flours here. Just basic pantry staples that come together to make something magical. Here’s what you’ll need:
For the Meringue Base:
- 4 large egg whites, at room temperature (cold eggs don’t whip up as high, so let them sit out for 30 minutes)
- 1 cup (200g) granulated white sugar (not powdered—trust me on this, granulated gives better structure)
- 1/4 teaspoon cream of tartar (this stabilizes the meringue, but you can use 1/2 teaspoon lemon juice instead)
- 1 teaspoon vanilla extract (I use pure vanilla, but imitation works fine and costs less)
- 1 tablespoon cornstarch (the secret to crack-free ghosts—don’t skip it!)
For the Ghost Faces:
- 1/2 cup (90g) semi-sweet chocolate chips (I like Ghirardelli for the smooth melt, but any brand works)
- 1 teaspoon coconut oil or vegetable shortening (helps the chocolate stay shiny and smooth)
Optional Add-Ins:
- A pinch of salt (brings out the sweetness and balances the flavor)
- Food coloring gel (if you want colored ghosts—my kids once begged for pink ones and they were adorable)
Here’s a tip I learned the hard way: make sure your bowl and whisk are completely clean and dry. Any trace of grease or yolk will ruin your meringue. I wipe everything down with a paper towel dipped in lemon juice before I start—old pastry chef trick that works every time.
If you’re out of cream of tartar, that lemon juice substitute works perfectly. And honestly, I’ve made these with brown sugar before when I ran out of white—they came out slightly caramel-colored and tasted amazing, though they weren’t as ghostly white. Sometimes the best discoveries come from pantry emergencies!
Equipment Needed
You don’t need a professional bakery setup for these cookies. Here’s what I use:
- Electric hand mixer or stand mixer (a whisk works but your arm will get tired—I’ve been there)
- Large mixing bowl (glass or metal—plastic can hold grease residue)
- Baking sheet lined with parchment paper (silicone mats work too, but parchment is cheaper)
- Piping bag with a round tip (or a zip-top bag with the corner snipped off—that’s my go-to)
- Small microwave-safe bowl for melting chocolate
- Toothpicks or a small piping tip for drawing faces
My favorite budget-friendly trick: use a gallon-size zip-top bag for piping instead of buying pastry bags. Just fill it, squeeze out the air, snip a tiny corner, and you’re in business. I’ve used the same bag trick for years and it works perfectly.
One thing I wish someone had told me earlier: don’t use a non-stick baking sheet for meringues. The dark surface absorbs heat and can brown the bottoms. Stick with a light-colored pan and you’ll get prettier ghosts.
Preparation Method
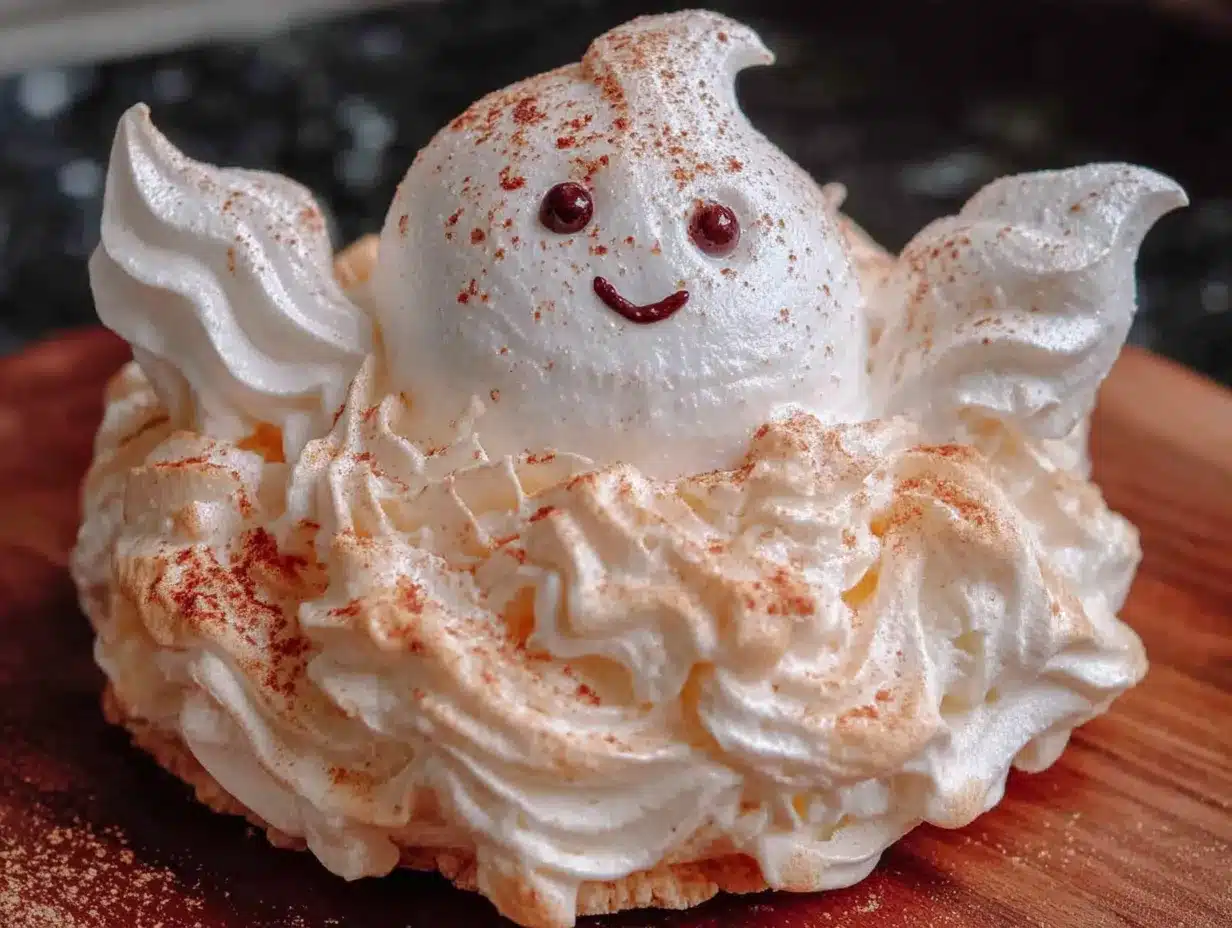
Alright, let’s make some ghosts! Set aside about 30 minutes of active prep time, plus 90 minutes for baking. The actual hands-on work is quick—most of the time is just waiting for the oven to do its thing.
- Preheat your oven to 225°F (110°C). Line two baking sheets with parchment paper. Don’t use wax paper—it’ll stick and you’ll cry. Trust me on this one.
- Wipe your mixing bowl and whisk attachment with lemon juice or vinegar. This removes any trace of grease that could stop your egg whites from whipping up. Let it air dry for a minute while you separate your eggs.
- Separate your eggs carefully. Crack each egg into a small bowl first, then transfer the white to your mixing bowl. This way, if one yolk breaks, you don’t ruin the whole batch. I’ve ruined too many meringues this way—learn from my mistakes!
- Start whipping the egg whites on medium speed. Once they get foamy (about 30 seconds), add the cream of tartar. Keep whipping until soft peaks form—when you lift the whisk, the peaks should flop over gently.
- Start adding sugar, one tablespoon at a time. This is the most important step. Add it too fast and your meringue will collapse. I set a timer for 5 minutes and add a spoonful every 15 seconds. It feels slow, but the results are worth it.
- Add the cornstarch and vanilla. Once all the sugar is in, sprinkle the cornstarch over the mixture and add the vanilla. Continue whipping on high speed for another 2-3 minutes until the meringue is stiff and glossy. You’ll know it’s ready when you rub a bit between your fingers and it feels smooth, not grainy.
- Transfer the meringue to your piping bag. If using a zip-top bag, fold the top edge down over your hand to make filling easier. Fill it about halfway—don’t overfill or you’ll get meringue everywhere.
- Pipe your ghosts. Hold the bag straight up and pipe a tall, round dollop about 1.5 inches wide. Pull the bag straight up quickly to create a little peak on top—that’s the ghost’s head. Leave about 1 inch between each ghost. Don’t worry if they look weird; they’ll puff up a little in the oven.
- Bake for 90 minutes. Place the baking sheets in the preheated oven. Here’s the trick: after 45 minutes, rotate the pans front to back and switch racks. This ensures even baking. Don’t open the oven too often—the temperature drop can crack your ghosts.
- Turn off the oven and let the ghosts cool inside. This is crucial! Leave them in the closed oven for at least 2 hours, or overnight. This slow cooling prevents cracking and gives you that perfect crisp texture.
- Melt your chocolate for the faces. Put the chocolate chips and coconut oil in a microwave-safe bowl. Microwave in 20-second bursts, stirring between each, until smooth. Let it cool for 2 minutes—hot chocolate will melt your meringue.
- Draw the ghost faces. Dip a toothpick into the melted chocolate and draw two little eyes and an open mouth on each ghost. You can also use a tiny piping tip or even a paper cone. My kids love this part—they make all kinds of silly faces.
- Let the chocolate set. Place the ghosts in the fridge for 10 minutes to speed this up, or just leave them on the counter for 30 minutes. The chocolate should be firm to the touch before you stack or store them.
One more thing: if your kitchen is humid, your meringues might get sticky. I’ve learned to only make these on dry days, or I run the air conditioner while they’re cooling. It makes a huge difference!
Cooking Tips & Techniques
After making these ghosts more times than I can count, I’ve collected a few tricks that make the process smoother. Let me share the ones that saved my sanity.
The humidity problem. Meringue and humidity are mortal enemies. If it’s raining outside, your cookies might turn out chewy instead of crispy. I learned this the hard way when I made a batch during a summer thunderstorm and ended up with ghost-shaped marshmallows. They still tasted good, but they weren’t the same. Best advice: bake on a dry day, or run a dehumidifier in your kitchen.
Don’t overmix. I know I said whip until stiff peaks, but there’s a fine line between stiff and overwhipped. If your meringue starts looking grainy or separates into curds, you’ve gone too far. Stop as soon as the mixture is glossy and holds its shape when you lift the whisk.
The cornstarch trick. This was a game-changer for me. Adding that tablespoon of cornstarch to the sugar helps absorb excess moisture and prevents those ugly cracks from forming. I used to get cracked ghosts all the time until a pastry chef friend shared this tip. Now my ghosts come out smooth every single time.
Piping consistency. If your meringue is too soft, it’ll spread into puddles instead of standing up tall. If it’s too stiff, it’ll be hard to pipe and might leave peaks that burn. The perfect consistency is when you can pipe a small dollop and it holds its shape without slumping. Practice on a corner of the parchment first if you’re unsure.
Timing strategy. I always make these in the evening and let them cool in the oven overnight. It’s such a relief to wake up to perfectly baked ghosts ready for decorating. Plus, the kids love coming downstairs to find them waiting on the counter.
Variations & Adaptations
One of the best things about this recipe is how easy it is to customize. Here are some variations I’ve tried over the years:
Vegan Meringue Ghosts: Use aquafaba (the liquid from a can of chickpeas) instead of egg whites. Replace 4 egg whites with 1/2 cup of aquafaba. Whip it the same way—it takes a little longer to reach stiff peaks, but it works beautifully. My vegan friend couldn’t believe these weren’t made with eggs.
Flavor Variations: Swap the vanilla for peppermint extract for a wintery twist, or add 1/2 teaspoon of almond extract for a nutty flavor. I once made a batch with orange extract and they tasted like those chocolate oranges you get at Christmas—amazing!
Colorful Ghosts: Add a drop of food coloring gel to the meringue after it reaches stiff peaks. Fold it in gently with a spatula to create swirls. My kids requested purple ghosts last year and they were absolutely adorable. Gel coloring works better than liquid—liquid can deflate your meringue.
Different Faces: Instead of chocolate, use melted white chocolate for a different look, or draw happy faces, surprised faces, or even silly mustaches. One year we made zombie ghosts with crooked eyes and messy mouths. The kids went wild.
Mini Ghosts: Pipe smaller ghosts (about 1 inch wide) and reduce baking time to 60 minutes. These are perfect for school parties or snack bags. I’ve made them for my daughter’s class and they were a huge hit with the teachers too.
Serving & Storage Suggestions
These ghosts are best served at room temperature, right off the baking sheet if you can manage it. They’re perfect for Halloween parties, classroom treats, or just a fun after-school snack that feels special without being loaded with sugar and fat.
Presentation ideas: Arrange them on a platter with some fake spiderwebs for a spooky effect. Or stick them upright in a bowl of popcorn for a fun graveyard scene. My kids love when I put them in a glass jar tied with orange ribbon—they look so cute peeking out.
Storage: Keep your ghosts in an airtight container at room temperature for up to 2 weeks. Don’t refrigerate them—the moisture will make them sticky. If you live in a humid climate, add a food-safe silica gel packet to the container to keep them crisp. I learned this trick from a friend who lives in Florida, and it works like magic.
Freezing: You can freeze undecorated meringues for up to 3 months. Layer them between sheets of parchment paper in a freezer-safe container. Thaw at room temperature for 30 minutes before decorating. I always make a double batch and freeze half for last-minute Halloween emergencies.
Re-crisping: If your ghosts lose their crunch, pop them back in a 200°F (95°C) oven for 15 minutes, then let them cool completely. This restores that perfect crispy texture. Just don’t do this after you’ve added the chocolate faces—the chocolate will melt.
One thing I love about these cookies is that they actually taste better the next day. The flavors meld together and the texture becomes even more delicate. So don’t worry about making them ahead—they’ll be perfect when you need them.
Nutritional Information & Benefits
Per serving (2 ghost cookies): approximately 90 calories, 0g fat, 22g carbohydrates, 2g protein, 20g sugar. These numbers are estimates and will vary based on your exact ingredients and portion sizes.
While these are definitely a treat (they’re cookies, after all!), they have some surprising benefits. Meringues are naturally fat-free and cholesterol-free since they’re made only from egg whites. They’re also gluten-free, which makes them a safe option for kids with celiac disease or gluten sensitivities. The sugar content is higher than I’d like, but the portion size is small—two little ghosts feel like a satisfying treat without overdoing it.
The egg whites provide a small amount of protein, and the cocoa in the chocolate chips offers antioxidants. Plus, the act of making these together as a family creates memories that last longer than any nutritional value. I’m all for balance—these ghosts show up once a year, and that’s perfectly okay.
If you’re watching sugar intake, you can reduce the sugar to 3/4 cup, but the texture won’t be as crisp. I’ve tried it, and honestly, the full sugar version is worth it for special occasions.
Conclusion
These Kid-Approved Ghost Meringue Cookies have become a Halloween tradition in our house, and I hope they become one in yours too. They’re proof that you don’t need expensive ingredients or complicated techniques to make something that feels truly special. Just a few pantry staples, a little patience, and a willingness to get a bit messy with the kids.
What I love most about this recipe is how it brings everyone together. My husband helps pipe the ghosts, my kids draw the faces, and we all gather around the table to admire our work before devouring them. It’s not just about the cookies—it’s about the laughter, the flour on the counter, and the sticky little fingers reaching for just one more ghost.
So go ahead, give these a try. Make them your own—add your favorite extracts, experiment with colors, or let the kids go wild with the chocolate faces. And when you do, I’d love to hear about it. Drop a comment below and tell me how your ghosts turned out, or share a photo on Pinterest with your best spooky creation. Happy Halloween, and happy baking!
Frequently Asked Questions
Can I make these without cream of tartar?
Absolutely! Substitute 1/2 teaspoon of lemon juice or white vinegar for every 1/4 teaspoon of cream of tartar. The acid helps stabilize the egg whites and gives you the same fluffy result. I’ve done this many times when I ran out of cream of tartar and it works perfectly.
Why did my meringues crack?
Several reasons: your oven temperature might be too high, you opened the oven door too often during baking, or you didn’t let them cool slowly enough in the oven. The cornstarch trick helps prevent this, but also make sure your oven is accurate—I use an oven thermometer to double-check.
Can I use liquid food coloring?
You can, but be careful. Liquid food coloring adds moisture that can deflate your meringue. If you use it, add just a drop or two and fold it in very gently with a spatula. Gel or powder food coloring works much better and gives you brighter colors without the risk.
How long do these cookies last?
Stored in an airtight container at room temperature, they’ll stay fresh and crispy for up to 2 weeks. Don’t refrigerate them—the moisture will make them sticky and soft. If they lose their crunch, re-crisp them in a 200°F oven for 15 minutes (before adding chocolate faces).
Can I pipe different shapes?
Definitely! The same meringue works for pumpkins, bats, or even simple circles. For pumpkins, pipe a round dollop and use green icing for a stem. For bats, pipe a teardrop shape and add chocolate wings. The possibilities are endless—let your imagination run wild!
Pin This Recipe!
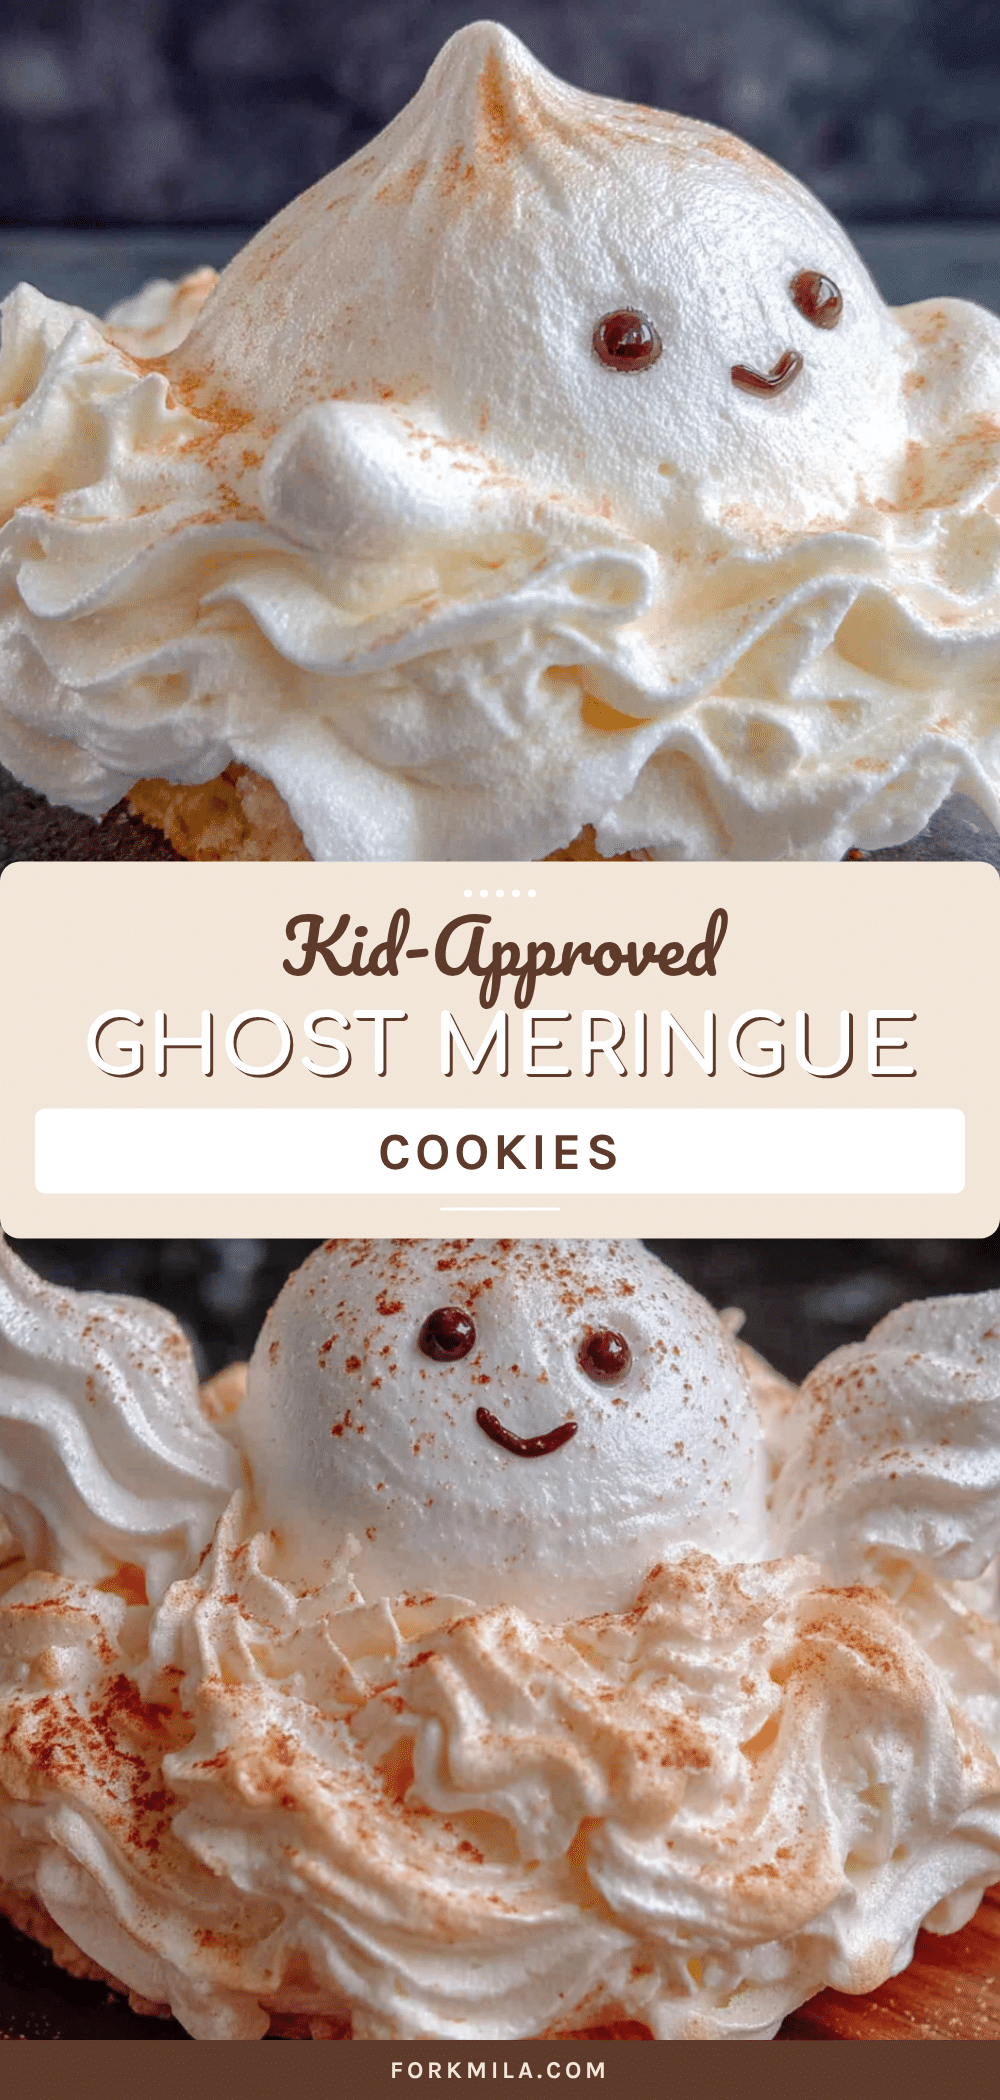
Kid-Approved Ghost Meringue Cookies: Easy Halloween Treat
These ghost-shaped meringue cookies are a fun, budget-friendly Halloween treat that’s naturally gluten-free and low-fat. With a crisp exterior and melt-in-your-mouth center, they’re easy to make with kids and perfect for parties or classroom treats.
- Prep Time: 30 minutes
- Cook Time: 90 minutes
- Total Time: 2 hours (plus 2 hours cooling time)
- Yield: 24 servings 1x
- Category: Dessert
- Cuisine: American
Ingredients
- 4 large egg whites, at room temperature
- 1 cup (200g) granulated white sugar
- 1/4 teaspoon cream of tartar (or 1/2 teaspoon lemon juice)
- 1 teaspoon vanilla extract
- 1 tablespoon cornstarch
- 1/2 cup (90g) semi-sweet chocolate chips
- 1 teaspoon coconut oil or vegetable shortening
- Pinch of salt (optional)
- Food coloring gel (optional)
Instructions
- Preheat your oven to 225°F (110°C). Line two baking sheets with parchment paper.
- Wipe your mixing bowl and whisk attachment with lemon juice or vinegar to remove any grease. Let air dry.
- Separate your eggs carefully, transferring each white to the mixing bowl. Ensure no yolk gets in.
- Start whipping the egg whites on medium speed. Once foamy (about 30 seconds), add cream of tartar. Continue whipping until soft peaks form.
- Add sugar one tablespoon at a time, waiting about 15 seconds between each addition. This should take about 5 minutes.
- Add cornstarch and vanilla. Continue whipping on high speed for 2-3 minutes until stiff, glossy peaks form. The mixture should feel smooth, not grainy, when rubbed between fingers.
- Transfer meringue to a piping bag or zip-top bag with a corner snipped off. Fill about halfway.
- Pipe ghosts by holding the bag straight up and piping a tall, round dollop about 1.5 inches wide. Pull straight up quickly to create a peak. Leave 1 inch between ghosts.
- Bake for 90 minutes. After 45 minutes, rotate pans front to back and switch racks. Avoid opening the oven too often.
- Turn off the oven and let ghosts cool inside for at least 2 hours or overnight. This prevents cracking.
- Melt chocolate chips and coconut oil in a microwave-safe bowl in 20-second bursts, stirring between each, until smooth. Let cool for 2 minutes.
- Dip a toothpick into melted chocolate and draw two eyes and an open mouth on each ghost.
- Let chocolate set in the fridge for 10 minutes or on the counter for 30 minutes until firm.
Notes
Make sure bowl and whisk are completely clean and grease-free. Only bake on dry days as humidity can make meringues sticky. For best results, let ghosts cool in the oven overnight. Store in an airtight container at room temperature for up to 2 weeks. Do not refrigerate. If ghosts lose crunch, re-crisp in a 200°F oven for 15 minutes before adding chocolate faces.
Nutrition
- Serving Size: 2 ghost cookies
- Calories: 90
- Sugar: 20
- Sodium: 25
- Carbohydrates: 22
- Protein: 2
Keywords: Halloween cookies, meringue cookies, ghost cookies, gluten-free cookies, low-fat cookies, kid-friendly Halloween treats, easy Halloween dessert


