My neighbor Lisa wasn’t trying to impress anyone. I’d stopped by to borrow a bag of sugar—classic, right?—and this warm, buttery, marshmallowy smell hit me before she even opened the screen door. She was standing at her counter, hands covered in butter, casually shaping orange blobs into little pumpkin shapes with her kids. “Oh, these?” she said when I asked. “They’re just the rice krispie things. The kids wanted to do something for Halloween.” Just the rice krispie things. I mean, honestly. She made it look like nothing—like whipping up adorable, festive treats in under twenty minutes was just another Tuesday. And maybe for her, it was. But for me, standing there in her sunny kitchen with the smell of toasted marshmallow wrapping around me, it felt like I’d stumbled onto something magical. The best part? Her six-year-old was doing most of the work. That’s when I knew this recipe was special. It’s the kind of thing you make when you want to feel like a hero parent (or aunt, or friend) without actually breaking a sweat. Maybe you’ve been there—scrolling Pinterest at 9 PM the night before the school party, realizing you have zero ideas and even less time. Well, let me tell you, these Quick Halloween Rice Krispie Treat Pumpkins are about to become your secret weapon.
Why You’ll Love This Recipe
I’ve tested this recipe about a dozen times since that day in Lisa’s kitchen, tweaking the butter ratio, the shaping technique, the decorating—all of it. And honestly, this version is the one I keep coming back to. Here’s why it works so well, especially when you’re short on time and patience.
- Quick & Easy : From start to finish, you’re looking at about 20 minutes. That’s it. No baking, no complicated steps, no waiting around for things to cool. Perfect for those “I forgot it’s tomorrow” moments.
- Simple Ingredients : You probably already have everything you need. Butter, marshmallows, Rice Krispies cereal, orange food coloring, and a few pretzel sticks. No fancy grocery store runs required.
- Perfect for Halloween : Whether it’s a classroom party, a trunk-or-treat event, or just a fun afternoon activity with the kids, these little pumpkins fit right in. They’re festive without being fussy.
- Crowd-Pleaser : I’ve brought these to three different gatherings now, and they disappear every single time. Kids love them because they’re cute. Adults love them because they taste like childhood.
- Unbelievably Delicious : There’s something about shaping them into pumpkins that makes the marshmallow-to-cereal ratio just right. You get that perfect chewy-crunchy texture in every bite.
What makes this recipe different from all the other rice krispie treat recipes out there? It’s the shaping method. Instead of pressing everything into a pan and cutting out shapes (which wastes so much cereal), you shape them by hand while the mixture is still warm. This gives you perfectly portioned, no-waste pumpkins every time. And the little green pretzel stem on top? That’s the detail that makes people say “wait, you made these?”
This recipe isn’t just good—it’s the kind of treat that makes you feel like you’ve got it all together, even when you’re running on three hours of sleep and coffee. It’s Halloween magic in twenty minutes, and honestly, we could all use a little more of that.
What Ingredients You Will Need
This recipe uses simple, pantry-friendly ingredients to deliver that classic rice krispie treat taste with a festive Halloween twist. Nothing complicated here—just the good stuff.
- 3 tablespoons unsalted butter (plus extra for greasing your hands and the spatula)
- 1 package (10 oz) marshmallows (standard size, not mini—though mini work fine too)
- 6 cups Rice Krispies cereal (or any crispy rice cereal—I’ve used store brands and they work just fine)
- Orange gel food coloring (gel works better than liquid because it doesn’t add extra moisture; I prefer Wilton brand)
- 1/2 teaspoon vanilla extract (optional, but it adds a nice warmth)
- Pretzel sticks (for the pumpkin stems—break them into 1-inch pieces)
- Green candy melts or green frosting (optional, for attaching the stems more securely)
- Small pinch of salt (trust me on this—it balances the sweetness)
Ingredient Tips : For the best texture, use fresh marshmallows. Stale ones don’t melt as smoothly and can leave you with lumpy treats. I’ve learned this the hard way, believe me. Also, gel food coloring is your friend here. Liquid food coloring can make the mixture slightly sticky and harder to shape. If you only have liquid, use it sparingly—just a few drops at a time.
Substitution Guidance : Need a gluten-free version? Most Rice Krispies are made with malt flavoring, which contains gluten. Look for a gluten-free crispy rice cereal brand—there are several good ones on the market now. For a dairy-free option, use vegan butter and vegan marshmallows. Dandies brand makes excellent vegan marshmallows that melt beautifully.
Equipment Needed
You don’t need much for this recipe, which is part of the beauty. Here’s what you’ll need:
- Large pot or Dutch oven (big enough to stir everything without spilling over—I use my 5-quart pot)
- Wooden spoon or silicone spatula (silicone is better because it doesn’t stick as much)
- Measuring cups and spoons
- Parchment paper or wax paper (for shaping—absolute lifesaver)
- Small bowl of water (for wetting your hands—keeps the mixture from sticking)
- Baking sheet or large plate (to hold the finished pumpkins)
- Microwave-safe bowl (if you’re melting the candy melts for the stems)
Budget-Friendly Tip : Don’t have a silicone spatula? A wooden spoon works perfectly fine. Just spray it with non-stick cooking spray before stirring. Same goes for your hands—butter or cooking spray works wonders. I’ve made these in a college dorm kitchen with nothing but a microwave and a plastic spoon, and they still turned out great.
Preparation Method
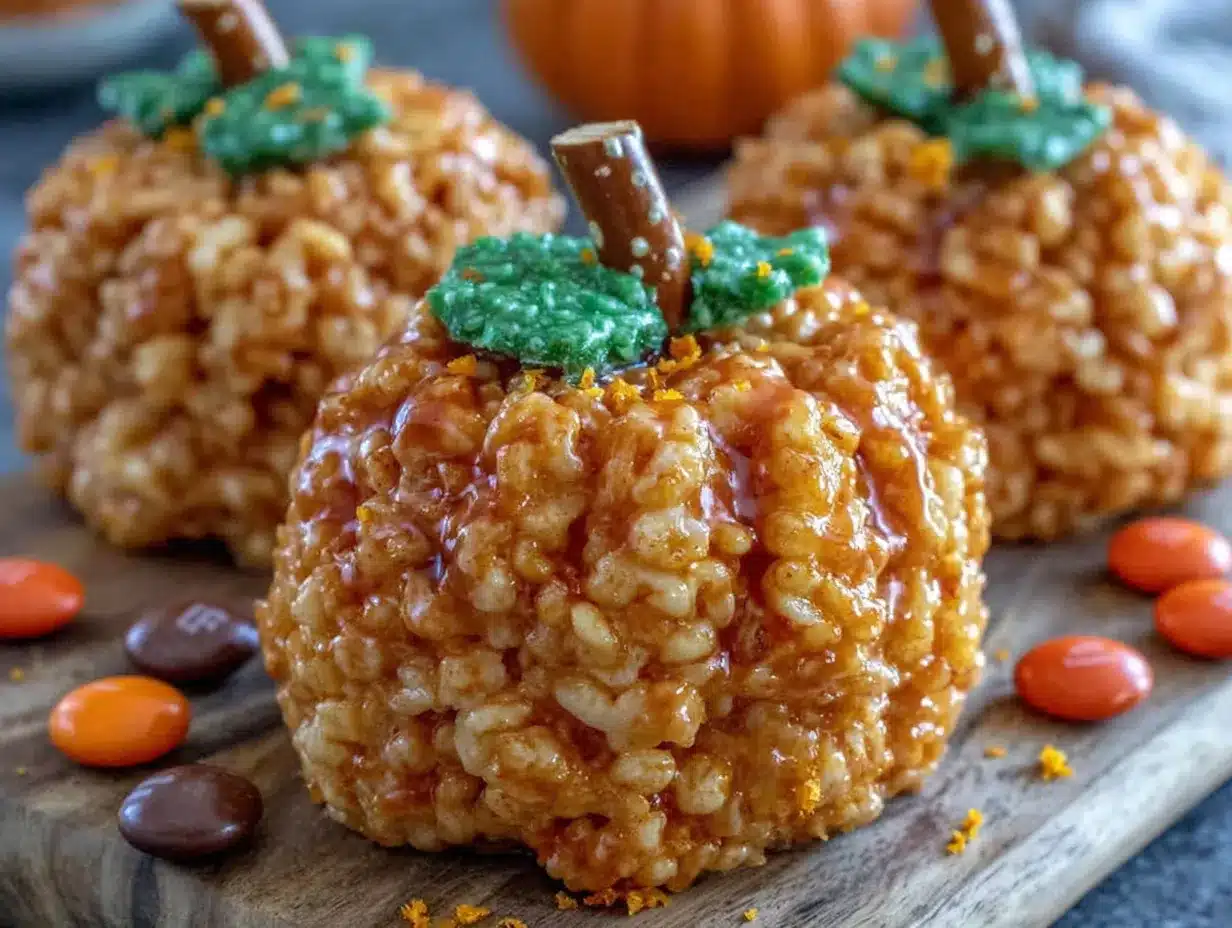
Alright, let’s get to the fun part. Here’s how to make these adorable pumpkins step by step.
- Prep your workspace. Lay out a large sheet of parchment paper on your counter. Lightly butter your hands and a silicone spatula. Set aside your pretzel sticks and a small bowl of water. Trust me, having everything ready before you start makes this process so much smoother.
- Melt the butter. In a large pot over medium-low heat, melt the 3 tablespoons of butter. Swirl the pot occasionally so it melts evenly. You want it fully melted but not browned—about 2 minutes.
- Add the marshmallows. Pour in the entire bag of marshmallows and stir constantly with your buttered spatula. Keep the heat on medium-low. The marshmallows will start to puff up and melt. This takes about 4-5 minutes. Stir until the mixture is completely smooth and silky—no lumps allowed.
- Add the vanilla and salt. Once the marshmallows are fully melted, remove the pot from the heat. Stir in the vanilla extract and the pinch of salt. The salt is my little secret—it makes the sweetness taste deeper somehow.
- Add the food coloring. Add about 8-10 drops of orange gel food coloring. Stir until the color is evenly distributed. You’re looking for a bright, vibrant pumpkin orange. If it looks too pale, add a drop or two more. Remember, the cereal will lighten the color slightly, so go a shade darker than you think you need.
- Fold in the cereal. Pour the 6 cups of Rice Krispies into the pot. Fold gently with your spatula until all the cereal is coated in the marshmallow mixture. Be careful not to crush the cereal—you want those distinct crunchy pieces. This takes about 2 minutes of gentle folding.
- Let it cool slightly. Let the mixture sit in the pot for about 2-3 minutes. It needs to be cool enough to handle but still warm enough to shape. If it cools too much, it becomes stiff and hard to work with.
- Shape the pumpkins. Dip your hands in the small bowl of water (this prevents sticking). Scoop out about 1/4 cup of the mixture and roll it into a ball. Then, gently pinch the top and bottom to create a slight pumpkin shape—a little flattened on top and bottom, round in the middle. Place each shaped pumpkin on the parchment paper. Repeat until all the mixture is used. You should get about 12-14 pumpkins, depending on size.
- Add the stems. While the pumpkins are still slightly warm, press a piece of pretzel stick into the top center of each one. Push it in about halfway. If you want extra security, dip the pretzel in melted green candy melts before inserting. This step is optional but makes them look extra polished.
- Let them set. Allow the pumpkins to cool completely at room temperature, about 15-20 minutes. They’ll firm up as they cool. Once set, they’re ready to serve or store.
Sensory Cues : When you’re folding the cereal, you should hear a soft crackling sound—that’s the marshmallow coating each piece. The mixture should feel warm and pliable when you shape it, like slightly stiff play dough. If it’s too sticky to handle, wet your hands again. If it’s too stiff to shape, you let it cool too long—pop it in the microwave for 10 seconds to soften it up.
Cooking Tips & Techniques
I’ve made these pumpkins more times than I care to count, and I’ve definitely made my share of mistakes. Here’s what I’ve learned so you don’t have to learn the hard way.
Don’t overheat the marshmallows. This is the number one mistake people make. If you cook the marshmallows on high heat or for too long, they’ll turn into a hard, sticky mess that’s impossible to work with. Keep the heat on medium-low and stir constantly. The moment they’re smooth, take the pot off the heat.
Butter your spatula and hands. I cannot stress this enough. Rice krispie mixture sticks to everything. A buttered spatula makes stirring easier, and buttered (or wet) hands make shaping a breeze. I keep a stick of butter nearby just for this purpose.
Work quickly but carefully. Once the marshmallow mixture is off the heat, you have about 10-12 minutes before it becomes too stiff to shape. That’s plenty of time, but don’t dawdle. Shape all the pumpkins first, then go back and add the stems.
Use wet hands for shaping. Dip your hands in water between each pumpkin. This prevents sticking and gives you smoother, more uniform shapes. I keep a small bowl of cool water right next to my workspace.
Make them uniform. If you’re taking these to a party or school event, try to make the pumpkins roughly the same size. I use a 1/4-cup measuring scoop to portion out the mixture. It makes the shaping faster and the final result looks more professional.
One time I forgot the food coloring. Honestly, it was a disaster. I had a tray of pale, beige blobs that looked nothing like pumpkins. My kids called them “ghost pumpkins” and refused to eat them. Learn from my mistake—add the food coloring while the marshmallow mixture is still hot and stir thoroughly.
Variations & Adaptations
One of the best things about this recipe is how easy it is to customize. Here are a few variations I’ve tried and loved.
Chocolate-Dipped Pumpkins : After the pumpkins have set, melt some orange or dark chocolate and dip the bottoms. Let them set on parchment paper. The chocolate adds a rich layer of flavor and makes them look even more festive. I did this for a Halloween party last year and they were gone in minutes.
Gluten-Free Version : Swap the Rice Krispies for a gluten-free crispy rice cereal. I’ve used the Nature’s Path brand and it works beautifully. Just make sure your marshmallows are also gluten-free—most are, but always check the label.
Add Mix-Ins : Before shaping, fold in 1/2 cup of mini chocolate chips or orange candy melts. They’ll melt slightly and create little pockets of chocolate throughout the pumpkin. My neighbor Lisa actually tried this after I told her about it, and now she swears by it.
Spiced Pumpkin Version : Add 1/2 teaspoon of pumpkin pie spice to the marshmallow mixture along with the vanilla. It gives the treats a subtle fall flavor that pairs beautifully with the sweetness. I tried this last Halloween and it was a hit with the adults.
Nut-Free Option : This recipe is naturally nut-free, which makes it perfect for school events. Just double-check your cereal and marshmallow labels to ensure they were processed in a nut-free facility.
Serving & Storage Suggestions
These little pumpkins are best served at room temperature. The texture is perfectly chewy and crunchy, and the marshmallow flavor really shines. I like to arrange them on a festive platter or cake stand for Halloween parties.
Complementary Dishes : They pair beautifully with warm apple cider or a pumpkin spice latte. For a Halloween party spread, serve them alongside caramel apples, popcorn balls, or a bowl of candy corn. They also make a great addition to a dessert charcuterie board.
Storage Instructions : Store the pumpkins in an airtight container at room temperature for up to 5 days. Layer them between sheets of parchment paper to prevent sticking. Do not refrigerate—the cold air makes them hard and stale.
Freezer Tips : You can freeze these for up to 2 months. Place them in a single layer on a baking sheet and freeze until solid, then transfer to a freezer-safe bag or container. To thaw, let them sit at room temperature for about 30 minutes. The texture will be slightly softer but still delicious.
Reheating : If your pumpkins have gone a little stale, pop one in the microwave for 5-7 seconds. It softens them right up and makes them taste fresh again. Just don’t overdo it, or they’ll become too soft.
Flavor Development : Honestly, these taste best on the first day. The marshmallow is soft and the cereal is perfectly crunchy. By day two, they’re still good, but the texture starts to soften. That’s why I recommend making them the day you plan to serve them.
Nutritional Information & Benefits
Let’s be real—these are a treat, not a health food. But here’s the estimated nutritional breakdown for one pumpkin (based on 12 servings):
| Nutrient | Amount per Serving |
|---|---|
| Calories | 165 |
| Total Fat | 4g |
| Saturated Fat | 2.5g |
| Carbohydrates | 32g |
| Sugar | 18g |
| Protein | 1g |
| Sodium | 135mg |
Health Benefits : The Rice Krispies are fortified with iron and B vitamins, so there’s that. The butter adds a small amount of vitamin A. But honestly, the main benefit here is the joy they bring. Sometimes a little sugar-fueled happiness is exactly what we need.
Dietary Considerations : This recipe is nut-free and can be made gluten-free and dairy-free with simple substitutions. It contains gluten (unless using gluten-free cereal) and dairy (unless using vegan alternatives).
Potential Allergens : This recipe contains dairy (butter) and gluten (Rice Krispies). Always check labels if you’re serving to someone with allergies.
Conclusion
These Quick Halloween Rice Krispie Treat Pumpkins are the kind of recipe that makes you look like a kitchen rockstar with almost zero effort. They’re fast, fun, and so ridiculously cute that people will assume you spent hours on them. But you and I will know the truth—twenty minutes, a handful of ingredients, and a little bit of love.
I love this recipe because it reminds me of that afternoon in Lisa’s kitchen, watching her make something special out of almost nothing. It’s the kind of cooking that feels effortless because it is. No stress, no perfectionism—just butter, marshmallows, and a little bit of Halloween magic.
So go ahead and make these for your next Halloween party, your kid’s classroom celebration, or just because you want something sweet and festive. And when everyone asks for the recipe, tell them it’s just the rice krispie things. They’ll never believe you.
I’d love to hear how yours turn out! Drop a comment below and let me know if you tried any fun variations. Happy Halloween, friends!
Frequently Asked Questions
Can I use mini marshmallows instead of regular-sized ones?
Absolutely! Mini marshmallows actually melt faster and more evenly. If you’re using mini marshmallows, use about 6 cups to replace the 10-ounce bag of regular ones. Just keep the heat on medium-low and stir constantly.
Why are my rice krispie treats too hard?
This usually happens when the marshmallows are overcooked. If you cook them on high heat or for too long, the sugar crystallizes and the treats become hard and brittle. Keep the heat low and remove the pot from the stove as soon as the marshmallows are fully melted and smooth.
Can I make these ahead of time?
Yes! You can make them up to 2 days in advance. Store them in an airtight container at room temperature. For best texture, I recommend making them the day before you plan to serve them. They’ll still be soft and delicious.
How do I get the orange color to look vibrant?
Use gel food coloring instead of liquid. Gel is more concentrated and gives you a brighter color without adding extra moisture. Start with 8-10 drops and add more if needed. Remember that the cereal will lighten the color, so go a shade darker than you want.
Can I freeze these pumpkins?
Yes, they freeze beautifully! Place them in a single layer on a baking sheet and freeze until solid, then transfer to a freezer-safe bag or container. They’ll keep for up to 2 months. Thaw at room temperature for about 30 minutes before serving.
Pin This Recipe!
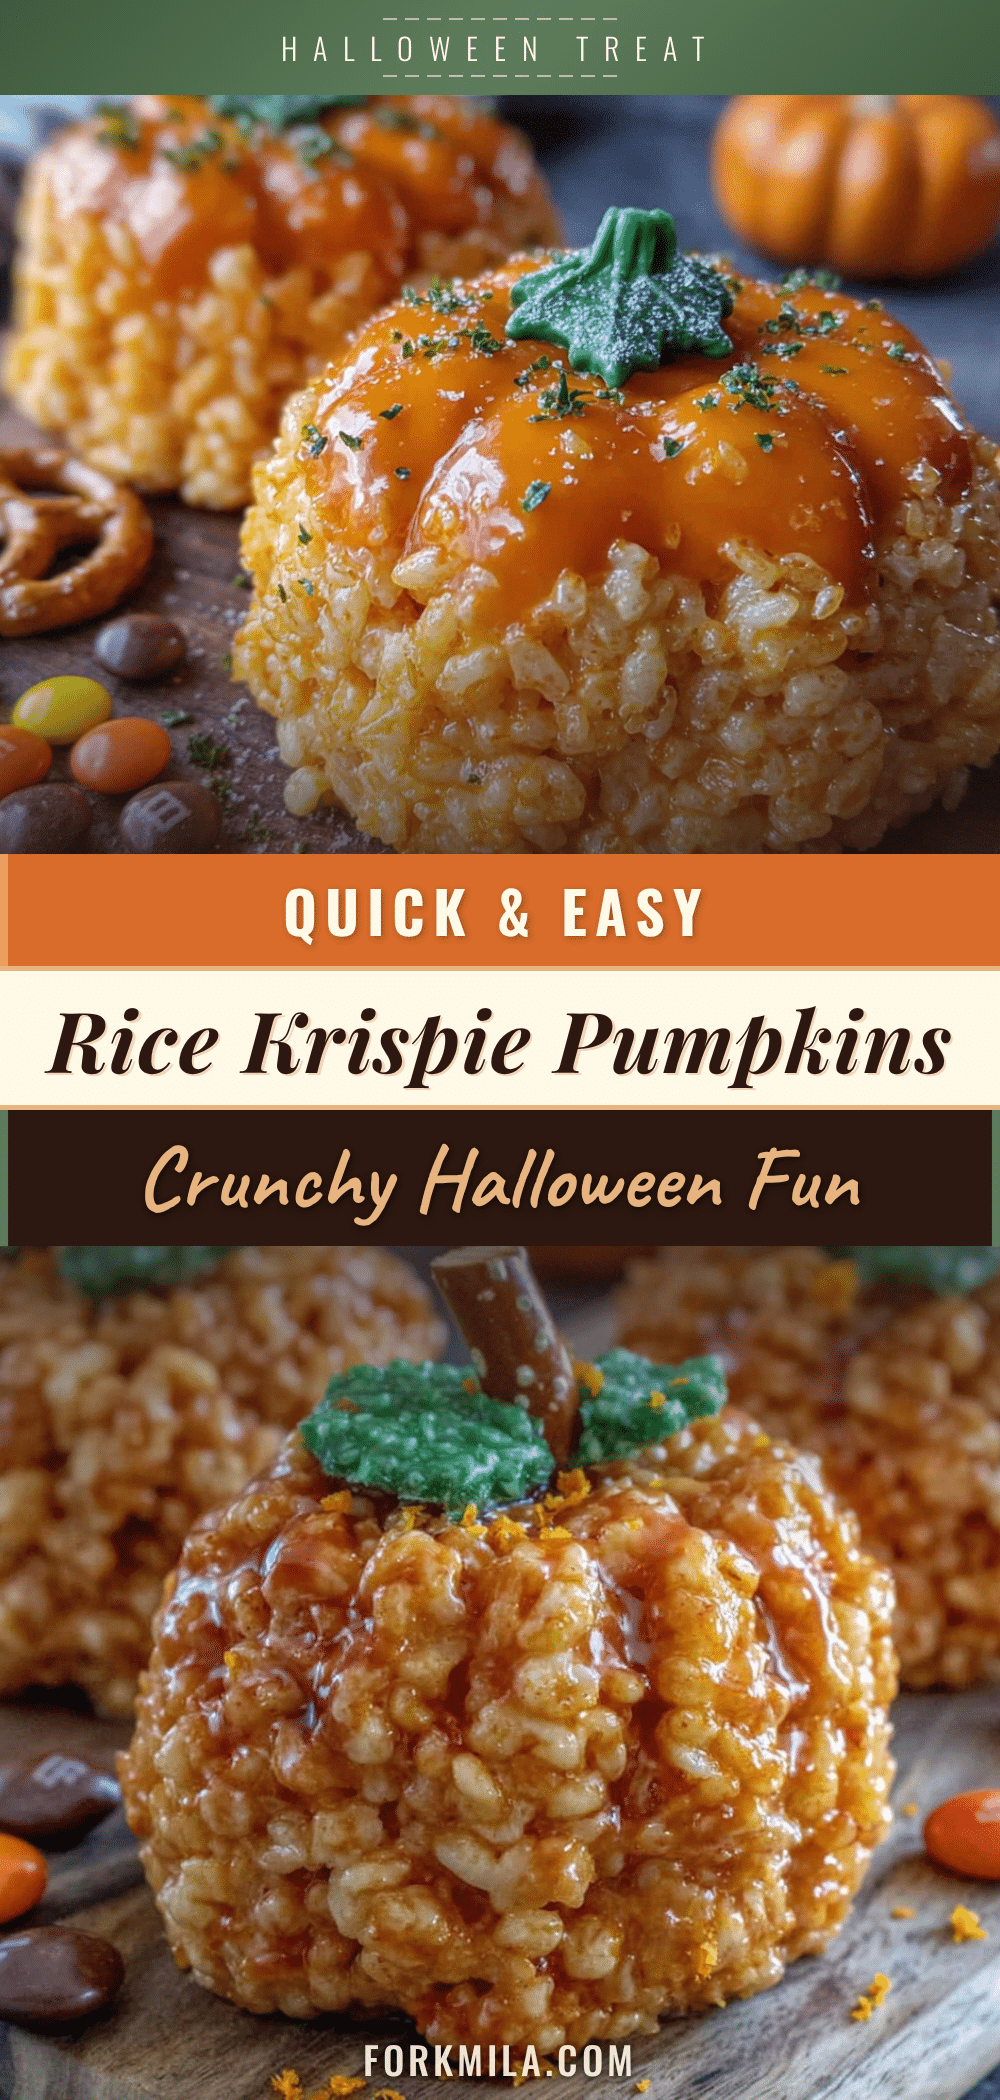
Easy Halloween Rice Krispie Treat Pumpkins in 20 Minutes
These quick and adorable Halloween Rice Krispie Treat Pumpkins are made in just 20 minutes with simple ingredients. Perfect for classroom parties, trunk-or-treat events, or a fun activity with the kids.
- Prep Time: 10 minutes
- Cook Time: 10 minutes
- Total Time: 20 minutes
- Yield: 12-14 servings 1x
- Category: Dessert
- Cuisine: American
Ingredients
- 3 tablespoons unsalted butter (plus extra for greasing)
- 1 package (10 oz) marshmallows
- 6 cups Rice Krispies cereal
- Orange gel food coloring
- 1/2 teaspoon vanilla extract (optional)
- Pretzel sticks (broken into 1-inch pieces)
- Green candy melts or green frosting (optional)
- Small pinch of salt
Instructions
- Prep your workspace: Lay out a large sheet of parchment paper on your counter. Lightly butter your hands and a silicone spatula. Set aside pretzel sticks and a small bowl of water.
- Melt the butter: In a large pot over medium-low heat, melt the 3 tablespoons of butter. Swirl occasionally until fully melted but not browned, about 2 minutes.
- Add the marshmallows: Pour in the entire bag of marshmallows and stir constantly with a buttered spatula over medium-low heat until completely smooth and silky, about 4-5 minutes.
- Add the vanilla and salt: Remove the pot from the heat. Stir in the vanilla extract and a pinch of salt.
- Add the food coloring: Add about 8-10 drops of orange gel food coloring and stir until evenly distributed. The color should be a bright, vibrant pumpkin orange.
- Fold in the cereal: Pour the 6 cups of Rice Krispies into the pot and fold gently until all cereal is coated, about 2 minutes. Be careful not to crush the cereal.
- Let it cool slightly: Let the mixture sit in the pot for 2-3 minutes until cool enough to handle but still warm.
- Shape the pumpkins: Dip your hands in water. Scoop about 1/4 cup of mixture, roll into a ball, then gently pinch the top and bottom to create a pumpkin shape. Place on parchment paper. Repeat until all mixture is used (about 12-14 pumpkins).
- Add the stems: While still warm, press a piece of pretzel stick into the top center of each pumpkin. Optionally, dip the pretzel in melted green candy melts before inserting.
- Let them set: Allow the pumpkins to cool completely at room temperature, about 15-20 minutes, until firm.
Notes
Don’t overheat the marshmallows or they’ll become hard. Butter your spatula and hands to prevent sticking. Work quickly as the mixture stiffens after 10-12 minutes. Use wet hands for shaping. For uniform pumpkins, use a 1/4-cup scoop.
Nutrition
- Serving Size: 1 pumpkin
- Calories: 165
- Sugar: 18
- Sodium: 135
- Fat: 4
- Saturated Fat: 2.5
- Carbohydrates: 32
- Protein: 1
Keywords: Halloween, Rice Krispie treats, pumpkins, no-bake, easy, kid-friendly, fall, festive


