I was standing in the frozen food aisle last November, staring at a stack of cardboard boxes, when the cold air hit me—and suddenly I was ten years old in Aunt Louise’s tiny kitchen, watching her slide a towel-covered cake onto the counter. The smell of cinnamon and nutmeg hung so thick you could almost taste it. She’d wink at me and say, “Watch close, kiddo—this one’s tricky.” I never did learn it from her. She passed a few years later, and I spent a solid decade convincing myself that pumpkin rolls were something only grandmothers and professional bakers could pull off. Honestly, I was scared of them. The cracking. The unrolling. The whole thing felt like a kitchen trap.
But here’s the thing about being a mom on a budget—you learn to tackle the things that scare you, especially when your kids start begging for “that fancy pumpkin cake from the store.” Let me tell you, paying eight bucks for a store-bought pumpkin roll that tastes like cardboard and sadness? Not happening in this house. So I grabbed a can of pumpkin puree, locked myself in the kitchen on a rainy Saturday, and decided to figure it out. Maybe you’ve been there—staring down a recipe that seems way too complicated for a regular Tuesday, but the craving just won’t quit.
This best easy pumpkin roll with cream cheese filling is the result of about seven slightly lopsided attempts and one spectacular kitchen meltdown involving a cracked spatula. But you know what? It works. It actually works. The cake rolls without breaking, the filling stays creamy without sliding out, and the whole thing tastes like autumn wrapped in a hug. I keep making it because it’s the one dessert that makes my family close their eyes on the first bite—and that’s a feeling you can’t buy in any frozen food aisle.
Why You’ll Love This Recipe
I’ve tested this recipe more times than I care to admit, and let me tell you—this version is the one that finally made me stop second-guessing myself. It’s the kind of recipe that builds confidence, even if you’ve never rolled a cake in your life. Here’s why it works for real families on real budgets:
- Comes together in under an hour—from mixing to rolling to that first glorious slice. Perfect for a Sunday afternoon project or a weekday baking session when the kids are finally asleep.
- Uses simple, affordable ingredients—no fancy extracts, no specialty flours, nothing that requires a trip to a gourmet store. You probably have most of this in your pantry right now.
- Perfect for holidays and regular Tuesdays—it looks impressive enough for Thanksgiving dessert, but it’s simple enough to make just because you’re craving something cozy.
- Kid-approved and picky-eater tested—my youngest swore she hated pumpkin until she tried this. The cream cheese filling does some kind of magic that makes everyone forget they’re eating vegetables.
- Unbelievably delicious—the texture is soft and tender, the filling is rich without being heavy, and the whole thing tastes like the best part of fall without any of the work.
What makes this recipe different from all the others? It’s the technique, honestly. Most recipes tell you to roll the cake while it’s hot, which always made me nervous. I figured out a better way—letting it cool just enough before rolling, using a specific type of towel, and trusting the process. No cracked cakes, no filling disasters, no tears. Just a beautiful, perfect pumpkin roll that makes you look like a pro.
This isn’t just good—it’s the kind of dessert that makes people ask for the recipe before they finish their first slice. It’s comfort food that feels special without the stress, and honestly, that’s exactly what family meals should be.
What Ingredients You Will Need
This recipe uses simple, wholesome ingredients to deliver bold flavor and satisfying texture without the fuss. Most of these are pantry staples, which means you can whip this up on a whim without a special grocery trip. Let’s break down what you’ll need and why each ingredient matters.
For the Pumpkin Cake
- ¾ cup all-purpose flour—standard white flour works perfectly here. I’ve tried whole wheat pastry flour in a pinch, and it works, but the texture is slightly denser. Stick with all-purpose for that soft, tender crumb.
- 1 cup granulated sugar—white sugar gives the cake structure and sweetness without weighing it down. Don’t substitute brown sugar here; it changes the moisture balance and can make the cake too sticky to roll.
- 1 teaspoon baking powder—this is your leavening agent. Make sure it’s fresh; expired baking powder is the number one reason cakes don’t rise properly.
- ½ teaspoon baking soda—works with the pumpkin’s natural acidity to create a light, airy texture.
- 2 teaspoons pumpkin pie spice—I recommend the McCormick brand for consistent flavor, but any store brand works fine. If you’re out, mix 1 teaspoon cinnamon, ½ teaspoon ginger, ¼ teaspoon nutmeg, and ¼ teaspoon cloves.
- 1 teaspoon ground cinnamon—adds that warm, cozy flavor that makes pumpkin recipes taste like fall.
- ½ teaspoon salt—balances the sweetness and enhances all the warm spices.
- 3 large eggs—room temperature is important here. Cold eggs can make the batter seize up. Set them out 30 minutes before you start, or place them in a bowl of warm water for 5 minutes.
- ⅔ cup pumpkin puree—not pumpkin pie filling! Make sure you grab 100% pure pumpkin. I use Libby’s because it’s consistently thick and not watery. If your pumpkin puree looks runny, pat it dry with paper towels before using.
- 1 teaspoon vanilla extract—pure vanilla extract adds depth. Imitation vanilla works in a pinch, but the flavor won’t be as rich.
- Powdered sugar for dusting—this is crucial for the rolling process. Don’t skip it.
For the Cream Cheese Filling
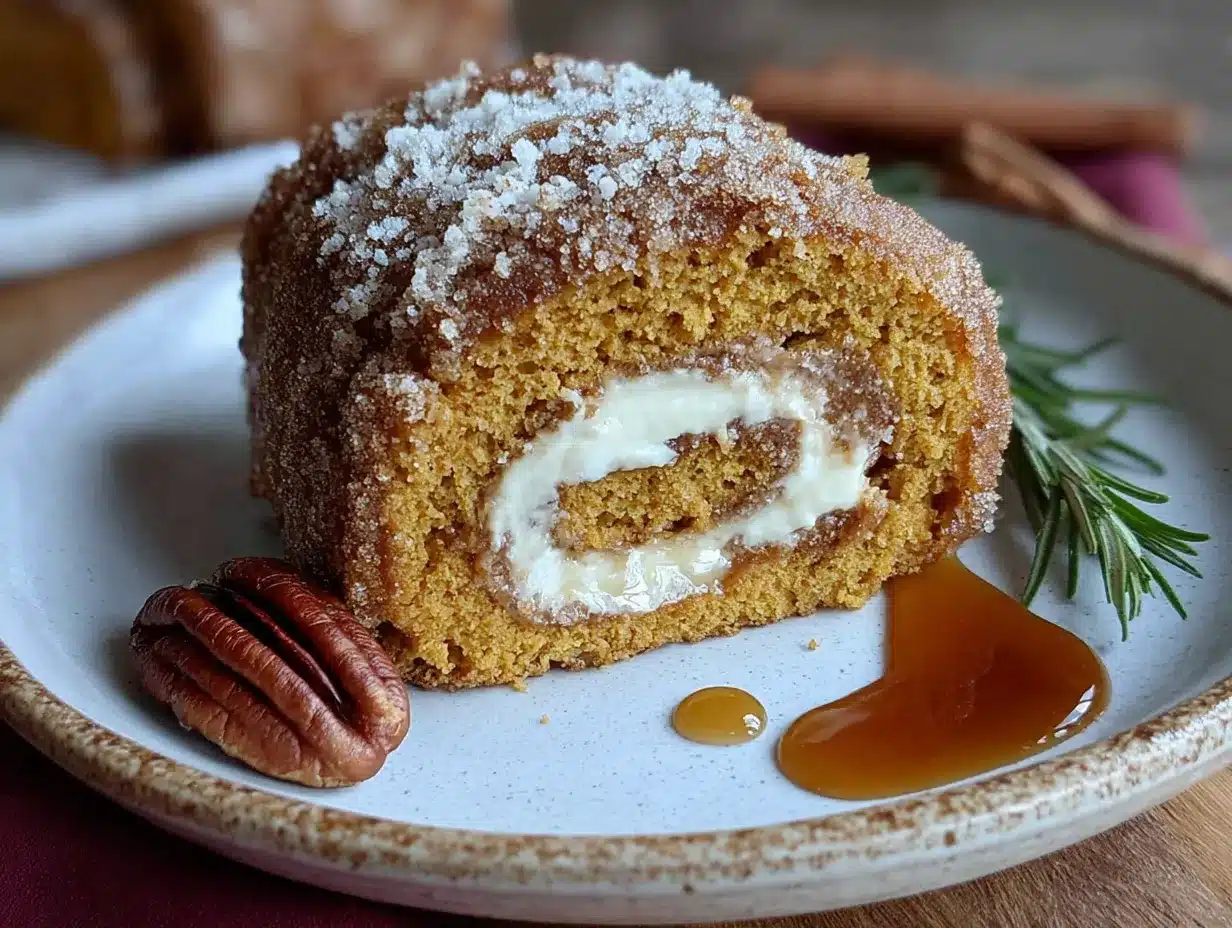
- 8 ounces cream cheese—full-fat, softened to room temperature. Low-fat cream cheese has too much water and can make the filling runny. I use Philadelphia brand for the creamiest texture.
- ¼ cup unsalted butter—softened. Salted butter works if you reduce the added salt, but unsalted gives you more control over the final flavor.
- 1 cup powdered sugar—sifted to remove lumps. Trust me, nobody wants a lumpy filling.
- 1 teaspoon vanilla extract—same as above, pure vanilla makes a difference.
Substitution Guidance: If you need a dairy-free version, use vegan cream cheese and plant-based butter. The filling will be slightly softer, so chill it for an extra 30 minutes before spreading. For a gluten-free option, swap the all-purpose flour with a 1-to-1 gluten-free baking blend that contains xanthan gum. I’ve tested this with King Arthur Measure for Measure, and it works beautifully.
Equipment Needed
You don’t need a fancy kitchen to make this recipe, but having the right tools makes the process much smoother. Here’s what you’ll need:
- 10×15-inch jelly roll pan—this is the standard size for pumpkin rolls. If you don’t have one, a rimmed baking sheet of similar dimensions works. I found mine at a thrift store for three dollars, so don’t feel like you need to buy new.
- Parchment paper—non-negotiable. You need this to lift the cake out of the pan and roll it without sticking. Wax paper won’t work; it melts in the oven.
- Clean kitchen towel—a thin, lint-free towel is best. I use an old flour sack towel. Avoid terry cloth; it leaves fuzz on the cake.
- Electric mixer—handheld or stand mixer works. You can whisk by hand, but your arm will get tired, and the filling won’t be as smooth.
- Large mixing bowls—one for dry ingredients, one for wet ingredients.
- Rubber spatula—for folding the batter and spreading the filling.
- Sifter or fine-mesh strainer—for dusting powdered sugar and sifting the powdered sugar for the filling.
- Cooling rack—helps the cake cool evenly. If you don’t have one, just let it cool in the pan a bit longer.
Budget tip: Check your local dollar store for mixing bowls and spatulas. They work just as well as expensive brands. The only thing I’d splurge on is good parchment paper—the cheap stuff tends to tear when you’re rolling the cake.
Preparation Method
Let’s get to the good part. Follow these steps carefully, and you’ll have a perfect pumpkin roll every time. I’ve included all the little details that took me years to figure out, so pay attention to the sensory cues.
- Preheat your oven to 375°F (190°C). Line your jelly roll pan with parchment paper, leaving a slight overhang on the long sides. Lightly grease the parchment with butter or non-stick spray. This extra step ensures the cake releases cleanly.
- In a medium bowl, whisk together the flour, baking powder, baking soda, pumpkin pie spice, cinnamon, and salt. Make sure everything is evenly distributed. Set this aside while you work on the wet ingredients.
- In a large bowl, beat the eggs and sugar together with an electric mixer on medium-high speed for about 2 minutes. The mixture should become thick, pale, and slightly frothy—like a thin pancake batter. This step is important because it incorporates air that helps the cake rise.
- Add the pumpkin puree and vanilla extract to the egg mixture. Beat on low speed until just combined. Don’t overmix here; you want the pumpkin to be incorporated, but you don’t want to deflate all that air you just created.
- Gradually add the dry ingredients to the wet ingredients, mixing on low speed. Stop as soon as you no longer see streaks of flour. The batter will be thick and slightly sticky—that’s normal. Scrape down the sides of the bowl with your spatula.
- Spread the batter evenly into the prepared pan. Use your spatula to push it into the corners. The layer should be thin and even—about ¼ inch thick. Don’t worry if it doesn’t look perfect; it spreads as it bakes.
- Bake for 12 to 15 minutes. The cake is done when it springs back lightly when touched in the center. The edges will be slightly golden, and the top will look dry. Don’t overbake! Overbaking is the number one reason pumpkin rolls crack. If you’re unsure, err on the side of underbaking.
- While the cake bakes, lay your clean kitchen towel flat on the counter. Generously dust it with powdered sugar—use a sifter or strainer for an even layer. This sugar will prevent the cake from sticking to the towel during the rolling process.
- As soon as the cake comes out of the oven, run a knife around the edges to loosen it. Invert the cake onto the prepared towel. Carefully peel off the parchment paper. If any cake sticks to the paper, don’t panic—just patch it back together.
- Starting at one of the short ends, gently roll the cake and towel together. Roll it tightly but not so tight that you squeeze the cake. Place the rolled cake seam-side down on a cooling rack. Let it cool completely—about 1 hour. This step is crucial. If you try to unroll it while it’s still warm, it will crack.
- While the cake cools, make the filling. In a medium bowl, beat the softened cream cheese and butter together until smooth and fluffy—about 2 minutes. Sift in the powdered sugar and add the vanilla. Beat until everything is combined and silky. Don’t overbeat, or the filling can become too soft.
- Once the cake is completely cool, gently unroll it. Don’t worry if it doesn’t lie perfectly flat; it will settle. Spread the cream cheese filling evenly over the cake, leaving a ½-inch border around the edges. This prevents the filling from squishing out when you roll it again.
- Re-roll the cake without the towel this time. Roll it as tightly as you can without forcing it. Wrap the rolled cake tightly in plastic wrap and refrigerate for at least 2 hours. This chilling step sets the filling and makes slicing much easier.
- When ready to serve, trim the ends for a clean look. Slice into 1-inch rounds and dust with extra powdered sugar just before serving.
Personal tip: I always set a timer for the cooling step. It’s easy to get distracted and try to rush the process. Patience here is everything—trust me, I learned this the hard way after three cracked cakes.
Cooking Tips & Techniques
Over the years, I’ve made every mistake in the book so you don’t have to. Here are the most important lessons I’ve learned:
Don’t skip the powdered sugar on the towel. This isn’t just for sweetness—it creates a non-stick barrier that allows the cake to roll without tearing. I once forgot this step and ended up with a cake that looked like a crumpled map. Not pretty.
Roll the cake while it’s still warm. This is the most critical technique. Warm cake is pliable; cold cake is brittle. The moment it comes out of the oven, you need to roll it. I know it feels counterintuitive, but trust the process. The cake will hold its rolled shape as it cools, which makes the final roll with filling much easier.
Use room temperature ingredients for the filling. Cold cream cheese creates lumps that are nearly impossible to beat out. Leave your cream cheese and butter on the counter for at least 30 minutes before starting. If you’re in a hurry, cut them into small cubes and microwave for 10-second intervals until softened but not melted.
Watch your baking time like a hawk. Every oven runs differently. My old oven would bake this cake in exactly 12 minutes; my current one takes 14. Start checking at 10 minutes and keep a close eye. The difference between a perfect roll and a cracked disaster is about 90 seconds.
Let the cake cool completely before adding the filling. I know I said to roll it warm, but that’s for the initial roll without filling. If you spread cream cheese filling on a warm cake, it will melt into a greasy mess. Patience pays off here.
Multitasking strategy: While the cake is cooling in its rolled shape, make the filling and clean up your kitchen. By the time you’re done, the cake should be ready to unroll and fill. This makes the whole process feel efficient instead of drawn out.
Variations & Adaptations
One of the best things about this recipe is how easily it adapts to different tastes and dietary needs. Here are some variations I’ve tried and loved:
Chocolate Pumpkin Roll: Replace 2 tablespoons of the flour with unsweetened cocoa powder. The chocolate flavor pairs beautifully with the pumpkin spice. My kids go crazy for this version, and it looks stunning dusted with cocoa powder instead of powdered sugar.
Vegan Pumpkin Roll: Use flax eggs (1 tablespoon ground flaxseed + 3 tablespoons water per egg) and vegan cream cheese and butter. The texture is slightly denser, but the flavor is spot on. I’ve brought this to potlucks where no one even noticed it was vegan.
Gluten-Free Version: Substitute the all-purpose flour with a 1-to-1 gluten-free baking blend that contains xanthan gum. I’ve tested this with Bob’s Red Mill 1-to-1 Baking Flour, and it rolls beautifully. Just be gentle when handling the cake—gluten-free baked goods are more delicate.
Spiced Pecan Pumpkin Roll: Sprinkle ½ cup of finely chopped pecans over the filling before rolling. The crunch adds a lovely texture contrast. Toast the pecans first for extra flavor—just 5 minutes in a 350°F oven will do it.
Pumpkin Roll with Maple Cream Cheese Filling: Replace the vanilla extract in the filling with 1 tablespoon of pure maple syrup. The maple flavor complements the pumpkin beautifully. This is my personal favorite variation for Thanksgiving.
Personal variation I love: I sometimes add a pinch of orange zest to the cake batter. The citrus brightens the pumpkin flavor and makes the whole thing taste more complex. It’s a tiny change that makes a big impression.
Serving & Storage Suggestions
This pumpkin roll is best served chilled, straight from the refrigerator. The cold filling firms up nicely, making it easier to slice cleanly. Here’s how to make the most of it:
Serving temperature: Remove the roll from the fridge about 10 minutes before slicing. This takes the chill off without making the filling too soft. Dust with powdered sugar right before serving for that picture-perfect look.
Presentation ideas: Arrange slices on a platter with a sprinkle of cinnamon and a few fresh cranberries for color. For a holiday table, add a dollop of whipped cream and a drizzle of caramel sauce. It looks fancy but takes zero extra effort.
Complementary dishes: This pumpkin roll pairs beautifully with a hot cup of apple cider or a spiced chai latte. For a full fall spread, serve it alongside a warm apple crisp or a slice of pumpkin bread. The flavors all work together without competing.
Storage instructions: Wrap the rolled cake tightly in plastic wrap and store it in the refrigerator for up to 5 days. The flavors actually improve after a day or two—the spices meld together and the filling sets perfectly. You can also freeze it for up to 3 months. Wrap it in plastic wrap, then aluminum foil, and thaw overnight in the refrigerator before serving.
Reheating tips: This is a cold dessert, so reheating isn’t necessary. But if you prefer it slightly warm, microwave individual slices for 10 seconds. The cake will soften, and the filling will become creamy. Just don’t overdo it, or the filling will melt.
How flavors develop over time: The pumpkin spice flavor becomes more pronounced on the second and third days. If you’re making this for a special occasion, I actually recommend making it a day ahead. It’s one of those rare desserts that gets better with age.
Nutritional Information & Benefits
Let’s be honest—this is a dessert, not a health food. But it does have some surprising benefits thanks to the pumpkin. Here’s a rough breakdown per slice (based on 10 slices):
| Nutrient | Amount per Slice |
|---|---|
| Calories | 280 |
| Total Fat | 14g |
| Saturated Fat | 8g |
| Cholesterol | 85mg |
| Sodium | 220mg |
| Total Carbohydrates | 36g |
| Dietary Fiber | 1g |
| Sugars | 26g |
| Protein | 4g |
| Vitamin A | 120% DV |
Health benefits of key ingredients: Pumpkin is packed with vitamin A, which supports eye health and immune function. It’s also rich in fiber, which aids digestion. The cream cheese provides calcium and protein, while the eggs offer high-quality protein and B vitamins. Is it a health food? No. But it’s not empty calories either.
Dietary considerations: This recipe contains gluten, dairy, and eggs. For gluten-free and vegan options, see the variations section above. If you’re watching your sugar intake, you can reduce the sugar in the cake by ¼ cup without affecting the texture too much—but the filling needs the full amount for proper consistency.
My personal wellness perspective: I believe in enjoying desserts in moderation. This pumpkin roll is a once-in-a-while treat, not an everyday snack. But when you do indulge, make it count. Life’s too short for mediocre desserts.
Conclusion
This best easy pumpkin roll with cream cheese filling is more than just a recipe—it’s a little piece of autumn that you can create in your own kitchen, no fancy skills required. I spent years thinking this dessert was out of my league, and now I make it without a second thought. That’s the kind of confidence I want you to have.
Don’t be afraid to make this your own. Add a little extra cinnamon if that’s your thing. Swap in pecans for the filling. Make it for Thanksgiving, or make it on a random Tuesday because you deserve something sweet. The beauty of this recipe is that it’s forgiving enough for beginners but impressive enough for experienced bakers.
I’d love to hear how yours turns out. Did you try a variation? Did your kids ask for seconds? Drop a comment below and let me know. And if you’re looking for more fall favorites, don’t miss my pumpkin bread recipe or my apple crisp recipe for even more seasonal goodness.
Happy baking, friends. May your rolls be tight, your filling be creamy, and your kitchen smell like the coziest place on earth.
Frequently Asked Questions
Why did my pumpkin roll crack when I tried to roll it?
Cracking usually happens for one of three reasons: the cake was overbaked, it cooled too much before the initial roll, or the towel wasn’t dusted with enough powdered sugar. Make sure you roll the cake while it’s still warm from the oven, and check your baking time carefully. If the cake feels dry to the touch, it’s probably overdone.
Can I make this pumpkin roll ahead of time?
Absolutely! In fact, I recommend it. The flavors meld together and the filling sets perfectly after a day in the refrigerator. You can make it up to 2 days ahead and keep it wrapped tightly in plastic wrap. Just dust with powdered sugar right before serving.
Can I freeze a pumpkin roll?
Yes, and it freezes beautifully. Wrap the finished, chilled roll tightly in plastic wrap, then in a layer of aluminum foil. Freeze for up to 3 months. Thaw overnight in the refrigerator before slicing and serving. Don’t dust with powdered sugar until after thawing.
How do I get clean slices without the filling squishing out?
Use a sharp, serrated knife and wipe it clean between each slice. Chilling the roll for at least 2 hours before slicing is essential—the filling needs to be firm. If you’re having trouble, try refrigerating the roll for 4 hours or even overnight.
Can I use fresh pumpkin instead of canned?
You can, but you’ll need to cook and puree it first, then drain off as much liquid as possible. Fresh pumpkin has more water than canned, which can make the cake too wet to roll properly. If you’re using fresh pumpkin, spread the puree on paper towels and pat it dry before adding it to the batter.
Pin This Recipe!
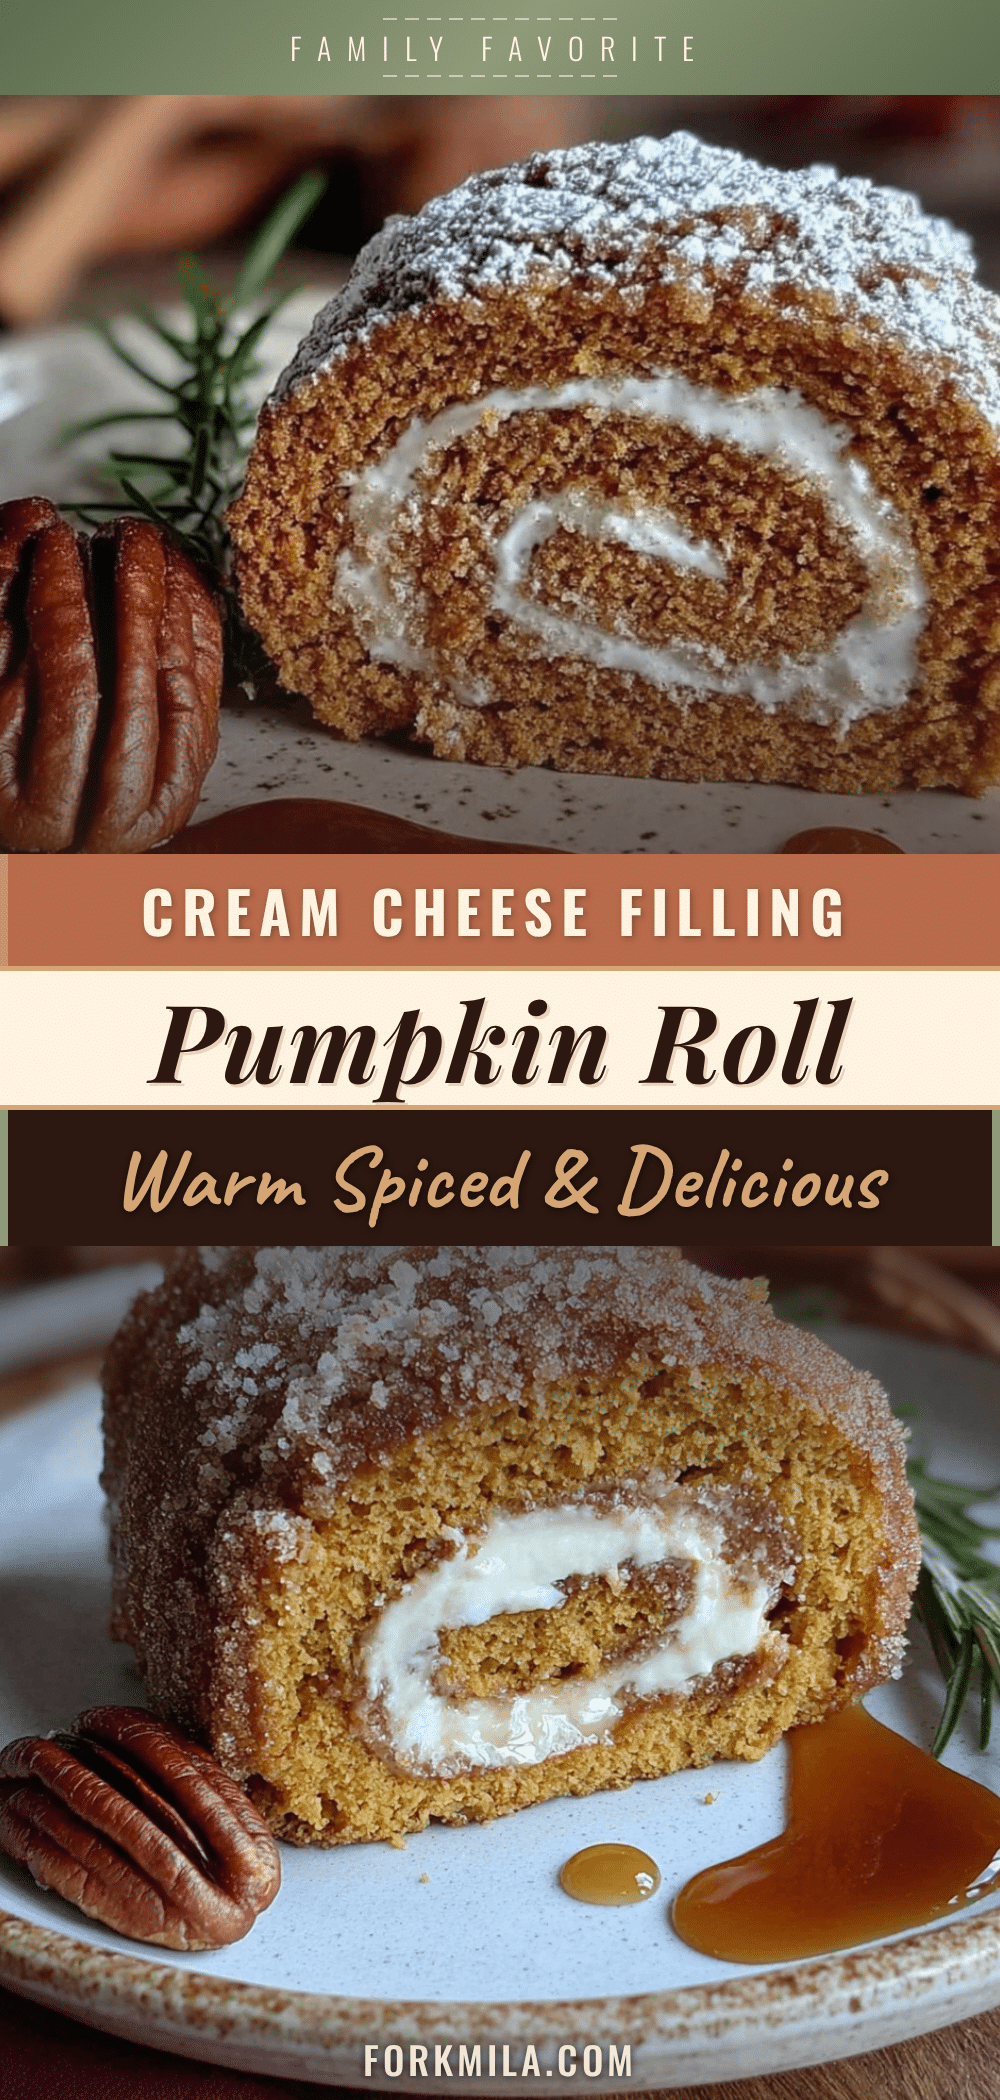
Best Easy Pumpkin Roll with Cream Cheese Filling
This best easy pumpkin roll with cream cheese filling is the result of about seven slightly lopsided attempts and one spectacular kitchen meltdown involving a cracked spatula. But it works—the cake rolls without breaking, the filling stays creamy without sliding out, and the whole thing tastes like autumn wrapped in a hug.
- Prep Time: 20 minutes
- Cook Time: 15 minutes
- Total Time: 1 hour 35 minutes (includes cooling and chilling)
- Yield: 10 servings 1x
- Category: Dessert
- Cuisine: American
Ingredients
- ¾ cup all-purpose flour
- 1 cup granulated sugar
- 1 teaspoon baking powder
- ½ teaspoon baking soda
- 2 teaspoons pumpkin pie spice
- 1 teaspoon ground cinnamon
- ½ teaspoon salt
- 3 large eggs, room temperature
- ⅔ cup pumpkin puree (not pumpkin pie filling)
- 1 teaspoon vanilla extract
- Powdered sugar for dusting
- 8 ounces cream cheese, softened
- ¼ cup unsalted butter, softened
- 1 cup powdered sugar, sifted
- 1 teaspoon vanilla extract
Instructions
- Preheat your oven to 375°F (190°C). Line your jelly roll pan with parchment paper, leaving a slight overhang on the long sides. Lightly grease the parchment with butter or non-stick spray.
- In a medium bowl, whisk together the flour, baking powder, baking soda, pumpkin pie spice, cinnamon, and salt. Set aside.
- In a large bowl, beat the eggs and sugar together with an electric mixer on medium-high speed for about 2 minutes until thick, pale, and slightly frothy.
- Add the pumpkin puree and vanilla extract to the egg mixture. Beat on low speed until just combined.
- Gradually add the dry ingredients to the wet ingredients, mixing on low speed until no streaks of flour remain. The batter will be thick and slightly sticky.
- Spread the batter evenly into the prepared pan, about ¼ inch thick.
- Bake for 12 to 15 minutes until the cake springs back lightly when touched in the center and the edges are slightly golden.
- While the cake bakes, lay a clean kitchen towel flat on the counter and generously dust it with powdered sugar.
- As soon as the cake comes out of the oven, run a knife around the edges to loosen it. Invert the cake onto the prepared towel and carefully peel off the parchment paper.
- Starting at one of the short ends, gently roll the cake and towel together. Place seam-side down on a cooling rack and let cool completely, about 1 hour.
- While the cake cools, make the filling: In a medium bowl, beat the softened cream cheese and butter together until smooth and fluffy, about 2 minutes. Sift in the powdered sugar and add the vanilla. Beat until combined and silky.
- Once the cake is completely cool, gently unroll it. Spread the cream cheese filling evenly over the cake, leaving a ½-inch border around the edges.
- Re-roll the cake without the towel, as tightly as possible without forcing it. Wrap tightly in plastic wrap and refrigerate for at least 2 hours.
- When ready to serve, trim the ends for a clean look. Slice into 1-inch rounds and dust with extra powdered sugar just before serving.
Notes
Don’t skip the powdered sugar on the towel—it creates a non-stick barrier. Roll the cake while it’s still warm; warm cake is pliable, cold cake is brittle. Use room temperature ingredients for the filling to avoid lumps. Watch your baking time carefully; overbaking is the number one reason pumpkin rolls crack. Let the cake cool completely before adding the filling. For best results, chill the roll for at least 2 hours before slicing.
Nutrition
- Serving Size: 1 slice (1/10 of rol
- Calories: 280
- Sugar: 26
- Sodium: 220
- Fat: 14
- Saturated Fat: 8
- Carbohydrates: 36
- Fiber: 1
- Protein: 4
Keywords: pumpkin roll, cream cheese filling, easy pumpkin dessert, fall dessert, Thanksgiving dessert, pumpkin cake roll


