This was supposed to be a batch of my go-to granola bars. I had the oats measured, the nuts chopped, and I was feeling pretty good about myself for being so organized on a Tuesday morning. Then I grabbed the wrong can from the pantry. Instead of the applesauce I always use, I grabbed a can of pumpkin puree I’d stashed away for some future baking project that never happened. I poured it in before I even realized what I’d done. The batter turned a funny shade of orange, and I just stood there, spatula in hand, staring at the mess I’d made. The oven was already preheated, the kids were asking for breakfast, and I was too tired to start over. So I just baked it anyway, fully expecting to toss the whole thing in the trash.
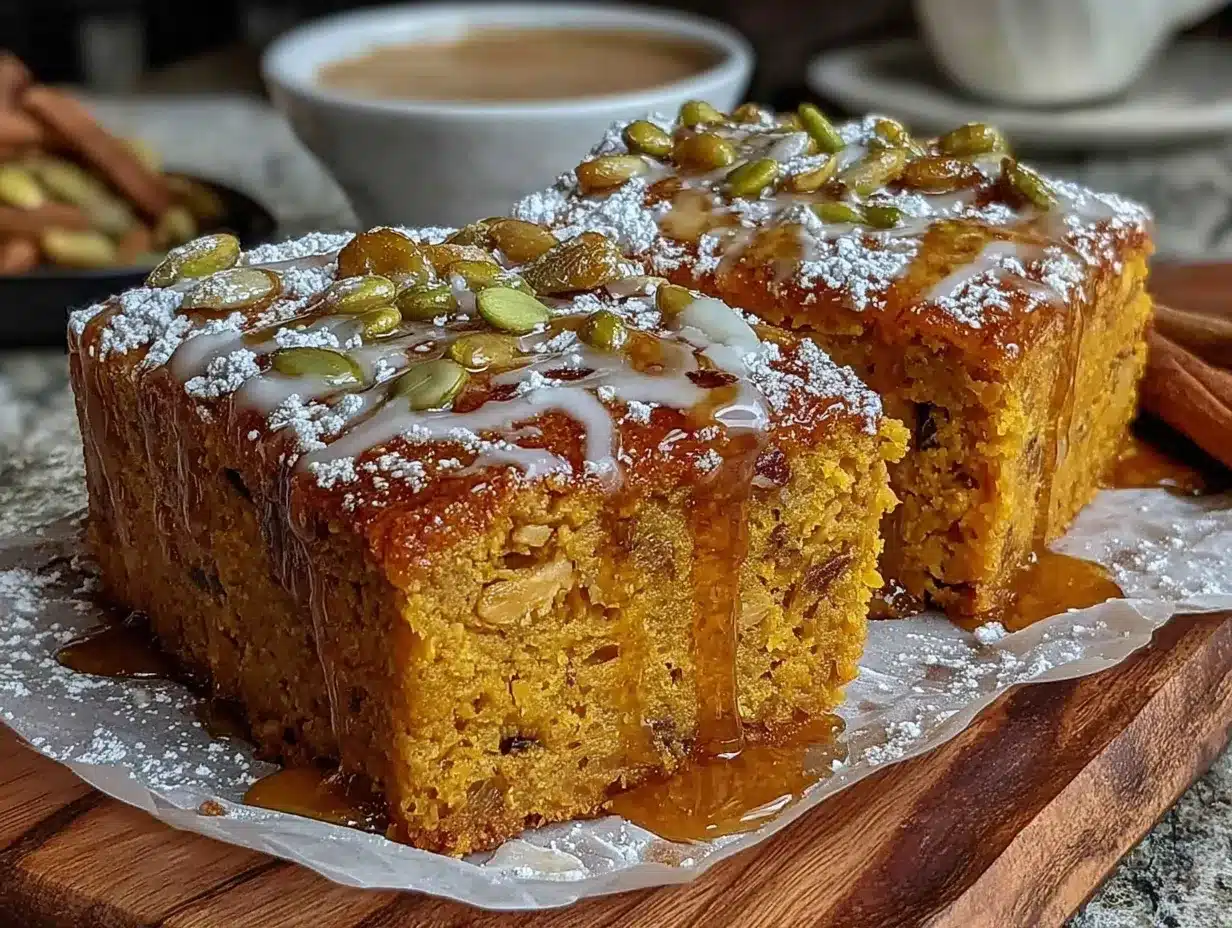
What came out of the oven was nothing like the plan—and honestly, it was so much better. The kitchen smelled like autumn in a way that made me stop and take a deep breath. The edges were golden, the center was soft, and when I cut into them, they held together perfectly. I mean, I took one bite and just stood there in disbelief. My husband walked in and asked what smelled so good, and before I could explain the disaster, he had already grabbed one off the cooling rack. He ate three before I could even get a picture. That’s when I knew I had stumbled onto something special. These bars have become my fall secret weapon, and I make them every single week from September through November. Maybe you’ve had one of those kitchen moments where everything goes wrong but somehow turns out right. That’s exactly how these cozy healthy pumpkin oat breakfast bars were born.
Why You’ll Love This Recipe
Let me tell you why these bars have earned a permanent spot in my weekly rotation. I’ve tested this recipe about a dozen times to get the texture just right, and I’m pretty proud of where it landed. These aren’t your typical dry, crumbly breakfast bars that fall apart the second you pick them up. They’re soft, chewy, and packed with real pumpkin flavor without being overly sweet.
- Quick & Easy: From start to finish, these come together in under 30 minutes. Mix everything in one bowl, pour it into a pan, and let the oven do the work. Perfect for busy mornings when you need something fast.
- Simple Ingredients: You probably have most of these in your pantry already. No weird specialty flours or hard-to-find ingredients. Just good, honest staples that work together beautifully.
- Perfect for Meal Prep: Make a batch on Sunday, and you’ve got breakfast sorted for the whole week. They actually get better after a day or two in the fridge, which is rare for baked goods.
- Crowd-Pleaser: I’ve brought these to playdates, work meetings, and family gatherings, and they always disappear fast. Even people who claim they don’t like pumpkin end up reaching for seconds.
- Actually Healthy: No refined sugar, whole grain oats, and real pumpkin for a boost of vitamin A. You can feel good about eating these for breakfast or grabbing one as an afternoon snack.
What makes these different from the other pumpkin oat bars out there? It’s the texture, honestly. I spent a long time figuring out how to get them moist without being mushy and chewy without being tough. The secret is in how you handle the oats and the ratio of wet to dry ingredients. These bars hold together like a dream but still feel light and satisfying. They’re the kind of breakfast that makes you look forward to getting out of bed in the morning, even on the coldest, darkest days of fall.
What Ingredients You Will Need
This recipe uses simple, wholesome ingredients to deliver bold flavor and satisfying texture without the fuss. Most of these are pantry staples, which makes this recipe perfect for those mornings when you want something homemade but don’t want to run to the store.
- Rolled oats – 2 cups (use old-fashioned rolled oats, not quick-cooking. They give the bars a better texture and help them hold together. I prefer Bob’s Red Mill or Quaker)
- Pumpkin puree – 1 cup (not pumpkin pie filling! Make sure you grab 100% pure pumpkin. Libby’s is my go-to brand)
- Ripe bananas – 2 medium, mashed (the riper the better. Those spotty bananas sitting on your counter are perfect here)
- Egg – 1 large, room temperature
- Honey or maple syrup – 1/4 cup (use maple syrup for a vegan option, honey for a slightly different flavor profile)
- Coconut oil – 2 tablespoons, melted (or use melted butter for a richer taste)
- Vanilla extract – 1 teaspoon
- Pumpkin pie spice – 1 1/2 teaspoons (or make your own with cinnamon, nutmeg, ginger, and cloves)
- Cinnamon – 1 teaspoon
- Baking powder – 1 teaspoon
- Salt – 1/4 teaspoon
- Mix-ins (optional) – 1/2 cup chocolate chips, chopped nuts, or dried cranberries
For the best results, make sure your bananas are really ripe—like, almost black. That’s when they’re sweetest and easiest to mash. If your bananas aren’t ripe enough, you can pop them in a 300°F oven for 10 minutes to soften them up. It’s a trick I learned from a pastry chef friend, and it works like a charm.
If you’re watching your sugar intake, you can reduce the honey or maple syrup to 2 tablespoons. The bananas add plenty of natural sweetness, especially if they’re super ripe. For a nut-free version, skip the mix-ins or use seeds like pumpkin seeds or sunflower seeds instead.
Equipment Needed
You don’t need a fancy kitchen to make these bars. Here’s what you’ll need:
- 8×8 inch baking pan – This is the perfect size for these bars. A 9×9 will work too, but the bars will be slightly thinner and may bake a few minutes faster
- Parchment paper – Trust me on this one. Line your pan with parchment paper, leaving some overhang on the sides. It makes lifting the bars out so much easier
- Large mixing bowl – Any big bowl will do. I use my grandmother’s old ceramic mixing bowl, but a glass or stainless steel one works just fine
- Fork or potato masher – For mashing those bananas. A fork works perfectly if you don’t have a masher
- Spatula – For mixing and spreading the batter evenly in the pan
- Measuring cups and spoons – Accurate measurements matter in baking, so use proper measuring tools rather than guessing
If you don’t have an 8×8 pan, you can use a loaf pan and adjust the baking time slightly. The bars will be thicker, so add about 5-7 minutes to the baking time. Just keep an eye on them and test with a toothpick when they look golden on top.
Preparation Method
- Preheat your oven to 350°F (175°C). Line your 8×8 baking pan with parchment paper, leaving about 2 inches of overhang on two opposite sides. This will be your handle for lifting the bars out later. Lightly grease the parchment with a little coconut oil or cooking spray.
- Mash the bananas. In your large mixing bowl, mash the two ripe bananas with a fork until they’re mostly smooth. A few small lumps are fine—they add texture. The bananas should be really soft and almost liquidy when you’re done.
- Add the wet ingredients. To the mashed bananas, add the pumpkin puree, egg, honey or maple syrup, melted coconut oil, and vanilla extract. Whisk everything together until it’s well combined and smooth. The mixture should be a beautiful deep orange color at this point.
- Mix the dry ingredients separately. In a small bowl, whisk together the rolled oats, pumpkin pie spice, cinnamon, baking powder, and salt. This ensures the spices and leavening are evenly distributed throughout the bars. I learned this the hard way after biting into a bar with a pocket of pure baking powder—not pleasant!
- Combine wet and dry. Pour the dry ingredients into the wet mixture. Stir with your spatula until just combined. Be careful not to overmix—you want everything to come together without developing any toughness. The batter will be thick and slightly sticky, almost like a cookie dough consistency.
- Fold in your mix-ins. If you’re using chocolate chips, nuts, or dried fruit, gently fold them in now. I usually add about 1/2 cup of dark chocolate chips because the little pockets of melted chocolate take these bars to another level. But honestly, they’re delicious plain too.
- Transfer to the pan. Scrape the batter into your prepared pan and spread it evenly with your spatula. Press it down firmly so it’s compact and level. The batter should be about 1 inch thick. Wet your spatula slightly if the batter sticks to it.
- Bake. Place the pan in the preheated oven and bake for 20-25 minutes. The bars are done when the edges are golden brown and a toothpick inserted in the center comes out clean or with just a few moist crumbs. The top should feel firm to the touch but still give slightly when pressed.
- Cool completely. This is the hardest part, I know. Let the bars cool in the pan for about 10 minutes, then use the parchment overhang to lift them out onto a wire rack. Let them cool completely before cutting—about 30 minutes. If you cut them while they’re warm, they’ll fall apart. Trust me, I’ve ruined many a batch by being impatient.
- Cut and serve. Once completely cool, use a sharp knife to cut into 9 or 12 squares. I prefer 9 bars for a more substantial breakfast portion, but 12 works well for snacks or smaller appetites.
Cooking Tips & Techniques
After making these bars more times than I can count, I’ve picked up a few tricks that make a real difference. First, don’t skip the parchment paper. I know it seems like an extra step, but I’ve had bars that stuck to the pan so badly I had to eat them with a spoon. The parchment paper guarantees perfect release every single time.
If your batter seems too wet, don’t panic. Pumpkin puree varies in moisture content depending on the brand. If it looks soupier than expected, add an extra tablespoon of oats. If it’s too dry, add a splash of milk or water. The batter should be thick but scoopable, like a muffin batter that’s slightly denser than usual.
One mistake I made early on was overbaking these bars. They go from perfectly moist to dry and crumbly very quickly. Start checking them at the 18-minute mark. The edges should be set and golden, but the center might still look slightly underdone. That’s okay—they’ll continue to set as they cool. Overbaked bars are sad bars, and nobody wants that.
For the best texture, let these bars cool completely before storing them. If you put them away while they’re still warm, condensation will make them soggy. I learned this when I packed some up for a road trip and ended up with a sad, mushy mess by lunchtime.
Variations & Adaptations
One of the things I love most about this recipe is how versatile it is. Here are some variations I’ve tried and loved:
- Vegan version: Replace the egg with a flax egg (1 tablespoon ground flaxseed mixed with 3 tablespoons water, let sit for 5 minutes). Use maple syrup instead of honey, and make sure your chocolate chips are dairy-free. The texture will be slightly denser but still delicious.
- Gluten-free option: Use certified gluten-free rolled oats. That’s the only change you need to make—these bars are naturally gluten-free as long as your oats are safe. I’ve tested this with several brands, and they all work perfectly.
- Protein boost: Add 2 tablespoons of your favorite protein powder. You might need to add an extra tablespoon of milk to balance the moisture. I’ve used vanilla and unflavored protein powders with good results. Chocolate protein powder is amazing if you’re using chocolate chips.
- Nutty crunch: Fold in 1/2 cup of chopped pecans or walnuts. Toast them first in a dry pan for 3-4 minutes to bring out their flavor. The crunch adds a lovely contrast to the soft bars.
- Apple pumpkin combo: Replace one of the bananas with 1/2 cup of unsweetened applesauce. This gives the bars a lighter, fruitier flavor and makes them even more moist. It’s my favorite fall variation.
I once made a batch with dried cranberries and white chocolate chips for a holiday party, and they were gone in 20 minutes. Don’t be afraid to experiment—this recipe is pretty forgiving.
Serving & Storage Suggestions
These bars are incredibly versatile when it comes to serving. I love them straight out of the fridge on a warm morning, but they’re also amazing warmed up for about 10 seconds in the microwave. The chocolate chips get all melty, and the spices smell incredible.
For a more substantial breakfast, crumble one bar over a bowl of Greek yogurt and drizzle with a little extra honey. It’s like having pumpkin pie for breakfast, but actually healthy. You can also spread a little almond butter or cream cheese on top for extra richness.
Storage is simple. Keep the bars in an airtight container in the refrigerator for up to 5 days. They actually get better on day two as the flavors meld together. For longer storage, wrap individual bars in plastic wrap and place them in a freezer bag. They’ll keep in the freezer for up to 3 months. When you’re ready to eat one, just let it thaw in the fridge overnight or pop it in the microwave for 20-30 seconds.
If you’re packing these for lunch or a snack, let them come to room temperature first. Cold bars are firmer and less likely to get squished in a lunchbox. I’ve sent these to school with my kids countless times, and they always come home with empty lunchboxes.
Nutritional Information & Benefits
Here’s the approximate nutritional breakdown for one bar (based on 9 servings, without mix-ins):
- Calories: 180
- Protein: 4g
- Carbohydrates: 32g
- Fiber: 4g
- Sugar: 12g (naturally occurring from bananas and honey)
- Fat: 5g
- Vitamin A: 80% of daily value (hello, pumpkin!)
These bars are packed with good-for-you ingredients. Pumpkin is loaded with vitamin A, which supports eye health and your immune system. Oats provide steady energy thanks to their complex carbohydrates and fiber. Bananas add potassium and natural sweetness without refined sugar. I love that I can feel good about feeding these to my family—they’re genuinely nutritious, not just pretending to be.
If you’re watching your sugar intake, you can reduce the honey to 2 tablespoons. The bars will be less sweet but still delicious, especially if you use very ripe bananas. For a lower-carb option, replace half the oats with almond flour. The texture will be different but still very satisfying.
Conclusion
These cozy healthy pumpkin oat breakfast bars have become a staple in my kitchen for good reason. They started as a happy accident, but now I make them on purpose every fall. They’re the kind of recipe that makes you feel like you’re eating something indulgent when you’re actually nourishing your body. That’s a win in my book.
I’d love for you to try these and make them your own. Add your favorite mix-ins, adjust the sweetness to your liking, or double the batch to share with friends. The best recipes are the ones that evolve with the people who make them. So go ahead—grab that can of pumpkin, mash those spotty bananas, and see what happens. Maybe you’ll create your own happy accident.
If you do make these, I’d love to hear about it. Drop a comment below and let me know what variations you tried. Did you add chocolate chips? Pecans? Did your kids love them as much as mine do? Share your experience and tag a friend who needs a little cozy breakfast energy in their life. Happy baking, friends!
Frequently Asked Questions
Can I use quick oats instead of rolled oats?
You can, but the texture will be different. Quick oats are more finely ground, so they absorb moisture faster and create a softer, almost mushy texture. Rolled oats give the bars more structure and chewiness. If you only have quick oats, reduce the baking time by 2-3 minutes and expect a denser bar.
How do I know when the bars are done baking?
The edges should be golden brown and pulling away slightly from the sides of the pan. Insert a toothpick into the center—it should come out clean or with just a few moist crumbs. The top should feel firm but spring back slightly when pressed. Don’t overbake, or the bars will be dry.
Can I make these bars nut-free?
Absolutely! The base recipe is nut-free as written. Just skip any nut-based mix-ins and use seeds like pumpkin seeds or sunflower seeds instead. Make sure your chocolate chips are processed in a nut-free facility if allergies are a concern.
Why did my bars fall apart?
This usually happens for one of three reasons: they were cut while still warm, there wasn’t enough binding ingredient (bananas or egg), or they were underbaked. Let the bars cool completely before cutting—at least 30 minutes. If they’re still falling apart, try adding an extra tablespoon of oats next time to absorb excess moisture.
Can I freeze these bars?
Yes, they freeze beautifully! Wrap individual bars in plastic wrap, then place them in a freezer-safe bag. They’ll keep for up to 3 months. To thaw, leave one in the fridge overnight or microwave for 20-30 seconds. They’re actually delicious straight from the freezer on a warm day—like a healthy frozen treat.
Pin This Recipe!
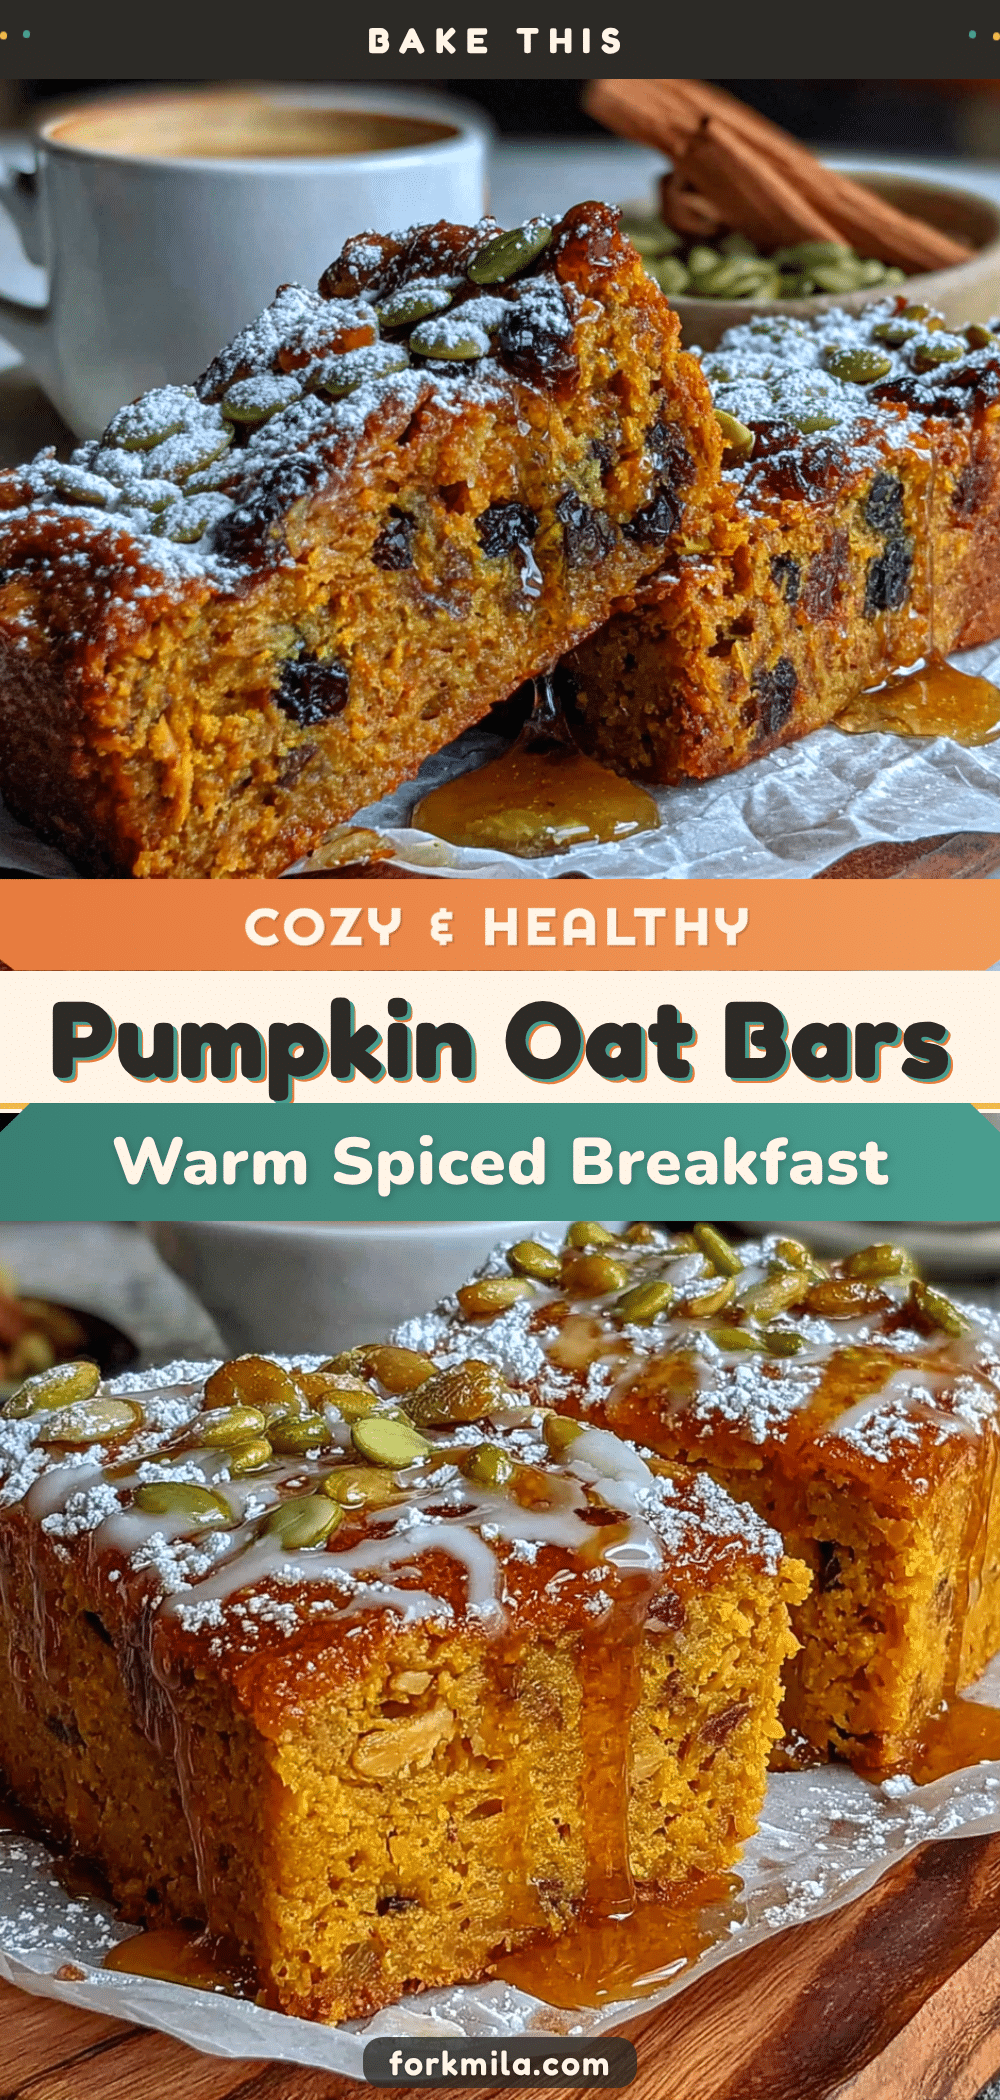
Best Healthy Pumpkin Oat Breakfast Bars
Soft, chewy, and packed with real pumpkin flavor, these healthy pumpkin oat breakfast bars are made with simple ingredients and come together in under 30 minutes. Perfect for meal prep, they’re a cozy fall breakfast that even pumpkin skeptics love.
- Prep Time: 10 minutes
- Cook Time: 20-25 minutes
- Total Time: 30-35 minutes
- Yield: 9-12 servings 1x
- Category: Breakfast
- Cuisine: American
Ingredients
- 2 cups rolled oats (old-fashioned, not quick-cooking)
- 1 cup pumpkin puree (100% pure, not pumpkin pie filling)
- 2 medium ripe bananas, mashed
- 1 large egg, room temperature
- 1/4 cup honey or maple syrup (maple syrup for vegan option)
- 2 tablespoons coconut oil, melted (or melted butter)
- 1 teaspoon vanilla extract
- 1 1/2 teaspoons pumpkin pie spice
- 1 teaspoon cinnamon
- 1 teaspoon baking powder
- 1/4 teaspoon salt
- 1/2 cup mix-ins (optional): chocolate chips, chopped nuts, or dried cranberries
Instructions
- Preheat your oven to 350°F (175°C). Line an 8×8 inch baking pan with parchment paper, leaving about 2 inches of overhang on two opposite sides. Lightly grease the parchment with coconut oil or cooking spray.
- In a large mixing bowl, mash the two ripe bananas with a fork until mostly smooth (a few small lumps are fine).
- Add the pumpkin puree, egg, honey or maple syrup, melted coconut oil, and vanilla extract to the mashed bananas. Whisk until well combined and smooth.
- In a small bowl, whisk together the rolled oats, pumpkin pie spice, cinnamon, baking powder, and salt.
- Pour the dry ingredients into the wet mixture. Stir with a spatula until just combined. Do not overmix. The batter will be thick and slightly sticky.
- If using mix-ins (chocolate chips, nuts, or dried fruit), gently fold them in now.
- Scrape the batter into the prepared pan and spread it evenly with a spatula. Press it down firmly so it is compact and level (about 1 inch thick).
- Bake for 20-25 minutes, until the edges are golden brown and a toothpick inserted in the center comes out clean or with a few moist crumbs.
- Let the bars cool in the pan for 10 minutes, then use the parchment overhang to lift them out onto a wire rack. Cool completely (about 30 minutes) before cutting.
- Once completely cool, cut into 9 or 12 squares with a sharp knife.
Notes
For best texture, use old-fashioned rolled oats, not quick-cooking. Let bars cool completely before cutting to prevent crumbling. Store in an airtight container in the refrigerator for up to 5 days. Freeze individual bars wrapped in plastic wrap in a freezer bag for up to 3 months. For a vegan version, replace the egg with a flax egg (1 tablespoon ground flaxseed mixed with 3 tablespoons water, let sit for 5 minutes) and use maple syrup instead of honey. For gluten-free, use certified gluten-free rolled oats.
Nutrition
- Serving Size: 1 bar (based on 9 se
- Calories: 180
- Sugar: 12
- Sodium: 95
- Fat: 5
- Saturated Fat: 3
- Carbohydrates: 32
- Fiber: 4
- Protein: 4
Keywords: pumpkin oat bars, healthy breakfast bars, pumpkin breakfast, fall breakfast, meal prep breakfast, no refined sugar, whole grain


