I was supposed to be making a pumpkin roll. You know, that classic fall dessert that looks all impressive and spiraled? Yeah, that was the plan. I had the cream cheese softening, the pumpkin puree measured out, and my three-year-old “helping” by licking the spatula. Then my phone rang, the dog barked at a leaf outside, and somewhere in that chaos, I grabbed the mini muffin tin instead of the jelly roll pan. I didn’t even realize my mistake until I had already spooned the batter into those tiny little cups. I stood there, staring at the pan, thinking, well, I guess we’re doing this now. Honestly, I was ready to toss the whole thing and order pizza. But I figured, what the heck, maybe the kids will think they’re cute. What came out of that oven was nothing like the elegant pumpkin roll I had planned—and it was so much better. These little guys were perfect, poppable, and my kids devoured them before they even cooled down. My neighbor, a mom of four, came over later and said, “These are dangerous. I ate six.” And that’s when I knew this happy little accident was a keeper. Maybe you’ve been there—a kitchen fail that turns into your most-requested recipe. That’s this one.
Why You’ll Love This Recipe
Let me tell you why these mini pumpkin cheesecake bites have become my fall baking MVP. I’ve tested this recipe about seven times to get that perfect balance of creamy filling and spiced pumpkin flavor, and I can say with confidence—it works every single time.
- Kid-Approved & Parent-Approved: These are small enough for little hands, but they’re not just “kid food.” Adults gobble them up too. I brought a batch to a playdate and the moms asked for the recipe before the kids did.
- Simple Ingredients: You probably have most of this stuff in your pantry right now. No weird extracts or hard-to-find spices. Just good, honest ingredients.
- Quick & Easy: From start to finish, you’re looking at about 35 minutes. That’s faster than a trip to the bakery, and way cheaper.
- Perfect for Fall Gatherings: Thanksgiving, Halloween parties, or just a Tuesday afternoon—these little bites fit right in. They’re not messy, they don’t need a fork, and they travel well.
- Budget-Friendly: A single can of pumpkin puree goes a long way here. You can make a whole batch for less than the cost of a fancy coffee drink.
What makes this recipe different from the dozens of pumpkin cheesecake recipes out there? It’s the texture, honestly. The filling is light and fluffy, not dense and heavy like some cheesecakes. And the crust? It’s buttery and holds together without crumbling everywhere. That’s a game-changer when you’re feeding kids who eat with their hands.
This is the kind of recipe that makes you close your eyes after the first bite. It’s comfort food, reimagined into something you can pop in your mouth while standing at the kitchen counter. No judging here.
What Ingredients You Will Need
This recipe uses simple, wholesome ingredients to deliver that cozy fall flavor without any fuss. Most of these are pantry staples, especially if you do any kind of fall baking.
For the Crust
- 1 ½ cups graham cracker crumbs (about 10-12 full sheets, crushed fine) – You can buy pre-crushed crumbs, but I like doing it myself in a zip-top bag. It’s a great job for little helpers.
- ¼ cup granulated sugar – Just enough sweetness to balance the tangy cream cheese.
- 6 tablespoons unsalted butter, melted – I use salted butter in a pinch and just skip the pinch of salt. It works fine.
- Pinch of salt – Don’t skip this. It makes the crust taste more like a real dessert, not just sugar and butter.
For the Pumpkin Cheesecake Filling
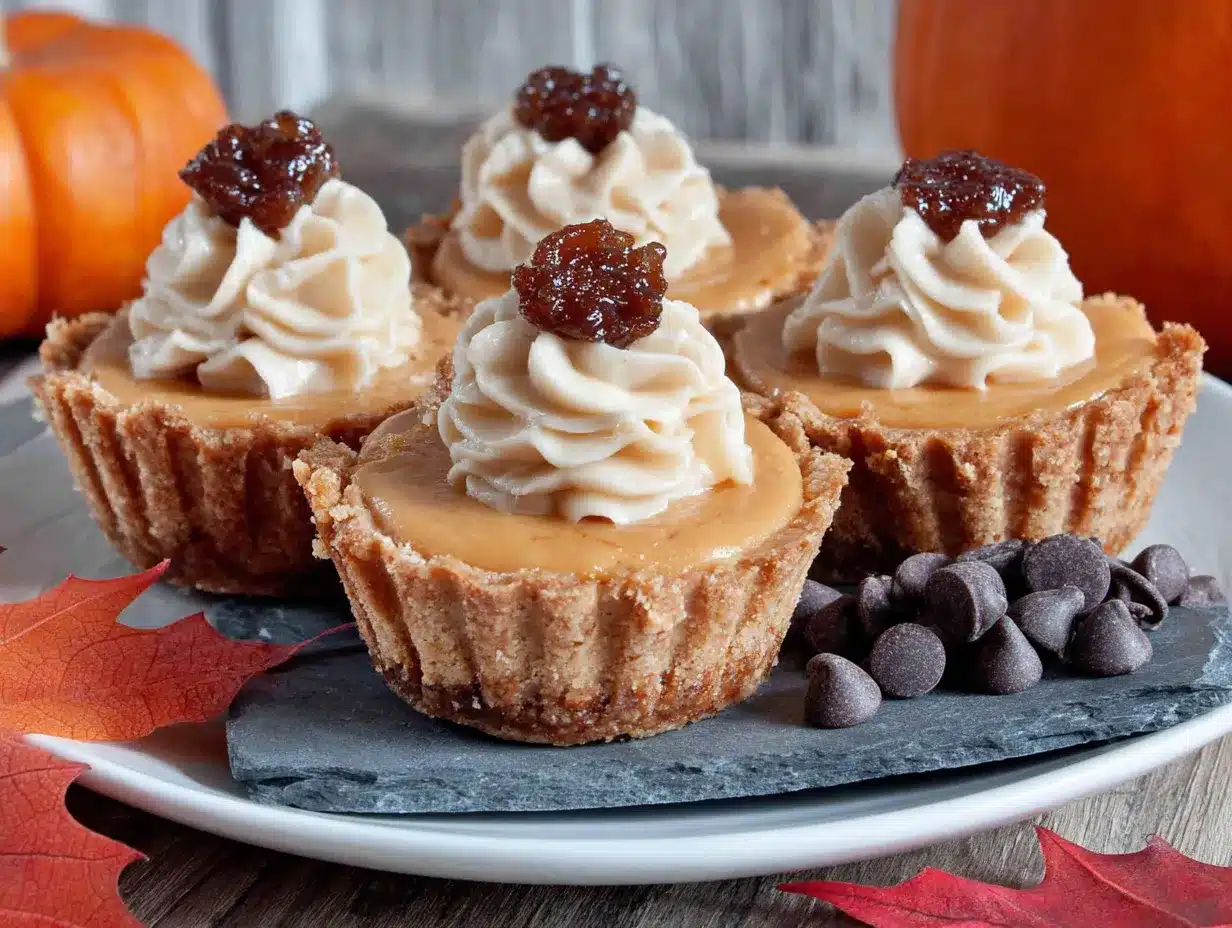
- 8 ounces cream cheese, softened – Full-fat is best for that creamy texture. Low-fat works, but the filling won’t be as luscious. Let it sit out for at least 30 minutes before you start.
- ½ cup granulated sugar – You can reduce this to ⅓ cup if your family prefers less sweet desserts.
- ½ cup pumpkin puree – Not pumpkin pie filling! Make sure you grab the 100% pure pumpkin puree. Libby’s is my go-to brand because it’s consistent and not too watery.
- 1 large egg – Room temperature is best. If you forget, just pop the egg in a bowl of warm water for 5 minutes.
- 1 teaspoon vanilla extract – Pure vanilla makes a difference, but imitation works in a pinch.
- 1 teaspoon pumpkin pie spice – If you don’t have it, mix ½ teaspoon cinnamon, ¼ teaspoon ginger, ⅛ teaspoon nutmeg, and a tiny pinch of cloves.
- ½ teaspoon ground cinnamon – Because you can never have too much cinnamon in a fall recipe.
Optional Toppings
- Whipped cream – Homemade or store-bought, a tiny dollop on top makes them look fancy.
- Caramel sauce – A drizzle adds that extra “wow” factor for special occasions.
- Chopped pecans or walnuts – For a little crunch. My kids pick them off, but the adults love them.
Equipment Needed
You don’t need a fancy kitchen to make these. Here’s what you’ll need:
- Mini muffin tin – This is non-negotiable. A standard 24-cup mini muffin tin works perfectly. I’ve had my cheap non-stick one for years and it still works great.
- Mixing bowls – One medium, one small. Nothing special.
- Electric hand mixer or stand mixer – You can mix by hand if your arm is strong, but the mixer gets the cream cheese smoother. I’ve done it both ways, and the mixer wins every time.
- Measuring cups and spoons – For accuracy. Baking is a science, even if I’m a little loosey-goosey with it sometimes.
- Zip-top bag or food processor – For crushing graham crackers. A rolling pin over a bag works too, and it’s oddly satisfying.
- Muffin liners – Mini-sized ones. They make cleanup so much easier. If you don’t have them, grease the pan well with butter or cooking spray.
If you don’t have a mini muffin tin, you can use a regular muffin tin and just adjust the baking time. They’ll be more like mini cheesecakes than bites, but still delicious.
Preparation Method
Alright, let’s get baking. I’ll walk you through this step-by-step so you don’t end up like me, accidentally making a different recipe.
Step 1: Preheat and Prep
Preheat your oven to 350°F (175°C). Line your mini muffin tin with mini paper liners. If you don’t have liners, grease each cup generously with butter or non-stick spray. Trust me, you want the liners. The first time I made these without liners, I spent 20 minutes chiseling them out.
Step 2: Make the Crust
In a small bowl, combine the graham cracker crumbs, ¼ cup sugar, and a pinch of salt. Pour in the melted butter and stir with a fork until it looks like wet sand. It should clump together when you press it between your fingers. If it’s too dry, add another tablespoon of melted butter. If it’s too wet, add a tablespoon more crumbs.
Scoop about 1 heaping teaspoon of the crust mixture into each muffin cup. Use a small measuring spoon or your fingers to press it down firmly. I use the bottom of a shot glass to really pack it in—works like a charm. You want a solid, even layer. Don’t worry if it comes up the sides a little; that’s fine.
Step 3: Bake the Crust
Pop the tin in the oven and bake the crusts for 5 minutes. They should be lightly golden and smell toasty. Pull them out and let them cool on a wire rack while you make the filling. This step is important—a pre-baked crust stays crisp instead of getting soggy from the filling.
Step 4: Make the Filling
In a medium mixing bowl, beat the softened cream cheese with an electric mixer on medium speed until it’s smooth and creamy. No lumps allowed. Scrape down the sides of the bowl with a spatula. Add the ½ cup sugar and beat until combined, about 1 minute.
Add the pumpkin puree, egg, vanilla, pumpkin pie spice, and cinnamon. Beat on low speed until everything is mixed together. Don’t overmix—you don’t want to incorporate too much air, which can cause cracks. The batter should be smooth, thick, and a beautiful orange color. It smells amazing already.
Step 5: Fill the Cups
Spoon the filling into each crust-lined cup. I use a small cookie scoop for this—it’s the perfect size and keeps things neat. Fill each cup almost to the top, leaving just a tiny bit of room. The filling won’t rise much, so you can be generous. A 1-tablespoon scoop works great here.
Step 6: Bake the Cheesecake Bites
Bake at 350°F (175°C) for 14-16 minutes. The edges should look set, but the centers will still jiggle slightly when you gently shake the pan. That’s good—they’ll firm up as they cool. If you overbake them, they can get dry and crack. I learned that the hard way when I left them in for 20 minutes because I got distracted folding laundry.
Step 7: Cool and Chill
Let the bites cool in the pan for 10 minutes on a wire rack. Then, carefully transfer them to the rack to cool completely. Once they’re at room temperature, pop them in the fridge for at least 2 hours. This is the hardest part, I know. But the chilling step is what gives them that perfect creamy texture. Overnight is even better.
Cooking Tips & Techniques
I’ve made these mini pumpkin cheesecake bites about a dozen times now, and I’ve picked up a few tricks along the way. Here’s what I wish someone had told me the first time.
Don’t skip the pre-bake for the crust. I tried skipping it once because I was in a hurry, and the crust turned into a soggy mess. That five-minute pre-bake makes all the difference. It keeps the crust crisp and gives it a nice golden color.
Room temperature ingredients matter. Cold cream cheese creates lumps that are nearly impossible to beat out. You’ll end up with a grainy filling, and nobody wants that. Set your cream cheese and egg out on the counter 30-45 minutes before you start. If you forget, you can microwave the cream cheese in 10-second bursts, but be careful—it can melt if you overdo it.
Use a water bath? No need. With full-size cheesecakes, a water bath prevents cracking. But these mini bites are so small that they cook evenly without one. Just don’t overbake them, and you’ll be fine. I’ve never used a water bath for these, and they come out perfect every time.
Watch the jiggle. When you think they’re done, give the pan a gentle shake. The edges should be firm, but the centers should have a slight wobble. That’s your cue to pull them out. They’ll continue to set as they cool.
Let them chill completely. I know it’s tempting to eat one warm, but they’re much better cold. The flavor develops, and the texture gets that creamy, almost mousse-like quality. I usually make them the night before I need them.
Variations & Adaptations
One of the best things about this recipe is how flexible it is. Here are some ways to change it up based on what you have or who you’re feeding.
Gluten-Free Version: Swap the graham crackers for gluten-free graham crackers or crushed gluten-free cookies. I’ve used gluten-free vanilla wafers before, and they worked beautifully. Just check the package to make sure they’re certified gluten-free if that’s a concern.
Dairy-Free Option: Use a dairy-free cream cheese alternative, like the one from Kite Hill or Miyoko’s. The texture will be slightly softer, but the flavor is still great. Use a vegan butter substitute for the crust. I tried this for a friend with a dairy allergy, and she said they were the best thing she’d eaten all fall.
Gingersnap Crust: Instead of graham crackers, use crushed gingersnaps. The spicy ginger flavor pairs beautifully with the pumpkin. My husband’s family loves this version. You might need a little less butter since gingersnaps are often more buttery than graham crackers.
Chocolate Drizzle: Melt some semi-sweet chocolate chips with a teaspoon of coconut oil and drizzle it over the chilled bites. It adds a touch of richness that feels extra special. I did this for a Halloween party, and they disappeared in minutes.
Lighter Version: Use reduced-fat cream cheese and cut the sugar to ⅓ cup. The texture won’t be quite as creamy, but it’s still delicious. I’ve made these for a post-Thanksgiving brunch when everyone was trying to be “good,” and they were a hit.
Serving & Storage Suggestions
These mini pumpkin cheesecake bites are best served cold, straight from the fridge. I like to arrange them on a pretty platter and top each one with a tiny dollop of whipped cream and a sprinkle of cinnamon. It makes them look like they came from a fancy bakery.
They’re perfect for parties because they’re self-contained and not messy. Kids can grab them without making a sticky mess, and adults appreciate the portion control. I’ve served them alongside a cup of hot apple cider, and it was a match made in heaven.
Storage: Store them in an airtight container in the refrigerator for up to 5 days. Honestly, they’re best within the first 3 days. After that, the crust starts to soften a little. But I’ve never had leftovers last that long.
Freezing: These freeze beautifully. Place the cooled, chilled bites on a baking sheet and freeze for 1 hour, or until solid. Then transfer them to a freezer-safe bag or container. They’ll keep for up to 3 months. To thaw, just move them to the fridge overnight. Don’t microwave them—they’ll get rubbery.
Reheating: I don’t recommend reheating these. They’re meant to be eaten cold. But if you absolutely must have them warm, microwave one for about 10 seconds. The texture will be softer, but still tasty.
One thing I love about this recipe is that the flavors actually get better after a day in the fridge. The pumpkin spice melds with the cream cheese, and the whole thing becomes more cohesive. So don’t be afraid to make them a day ahead.
Nutritional Information & Benefits
Here’s the nutritional breakdown for one mini pumpkin cheesecake bite (based on 24 bites, using full-fat cream cheese and standard ingredients):
| Nutrient | Amount per Bite |
|---|---|
| Calories | 115 |
| Fat | 7g |
| Saturated Fat | 4g |
| Carbohydrates | 12g |
| Sugar | 8g |
| Protein | 2g |
| Vitamin A | 15% DV |
Pumpkin is packed with vitamin A, which is great for eye health and your immune system. It’s also a good source of fiber. The cream cheese adds calcium, but it’s also higher in fat, so these are definitely a treat, not an everyday snack. I like to think of them as a fun way to get a little bit of vegetable into a dessert.
For anyone watching their sugar intake, you can reduce the sugar to ⅓ cup in the filling and use a sugar substitute in the crust. But honestly, these are meant to be a special treat. I don’t stress about the numbers when I’m making them for a holiday gathering.
Conclusion
So there you have it—mini pumpkin cheesecake bites that started as a mistake and became a family favorite. These little guys are proof that sometimes the best recipes come from the messiest moments. They’re easy enough for a weeknight, fancy enough for a party, and budget-friendly enough for any family.
I love how versatile they are. You can dress them up with toppings or keep them simple. You can make them ahead and pull them out when you need a quick dessert. And honestly, they just taste like fall in the best possible way.
I’d love to hear how yours turn out. Did you try a different crust? Add a topping? Did your kids eat them before they cooled down? Drop a comment below and let me know. And if you share a photo on Pinterest or Instagram, tag me—I want to see your beautiful creations. Happy baking, friends!
Frequently Asked Questions
Can I use canned pumpkin pie filling instead of pumpkin puree?
No, I wouldn’t recommend that. Pumpkin pie filling already has sugar and spices added, so your cheesecake bites would be way too sweet and the texture would be off. Stick with 100% pure pumpkin puree for the best results.
Why did my cheesecake bites crack on top?
Cracks usually happen from overbaking or from the filling being too cold when it goes into the oven. Make sure your cream cheese and egg are at room temperature, and pull the bites out when the centers are still slightly jiggly. They’ll set up perfectly as they cool.
Can I make these without a mini muffin tin?
Absolutely. You can use a regular 12-cup muffin tin. The baking time will be longer—about 20-22 minutes. They’ll be more like mini cheesecakes than bites, but they’ll taste just as good. You might want to double the crust recipe to get a good layer on the bottom.
How do I get the cheesecake bites out of the pan without them sticking?
Mini paper liners are your best friend here. If you don’t have them, grease the pan generously with butter or non-stick spray. Let the bites cool completely in the pan, then run a thin knife around the edge of each one before lifting them out. Patience is key—don’t try to rush it while they’re still warm.
Can I freeze these mini pumpkin cheesecake bites?
Yes, they freeze wonderfully. Freeze them on a baking sheet first, then transfer to a freezer bag. They’ll keep for up to 3 months. Thaw them overnight in the fridge before serving. The texture stays creamy and delicious.
Pin This Recipe!
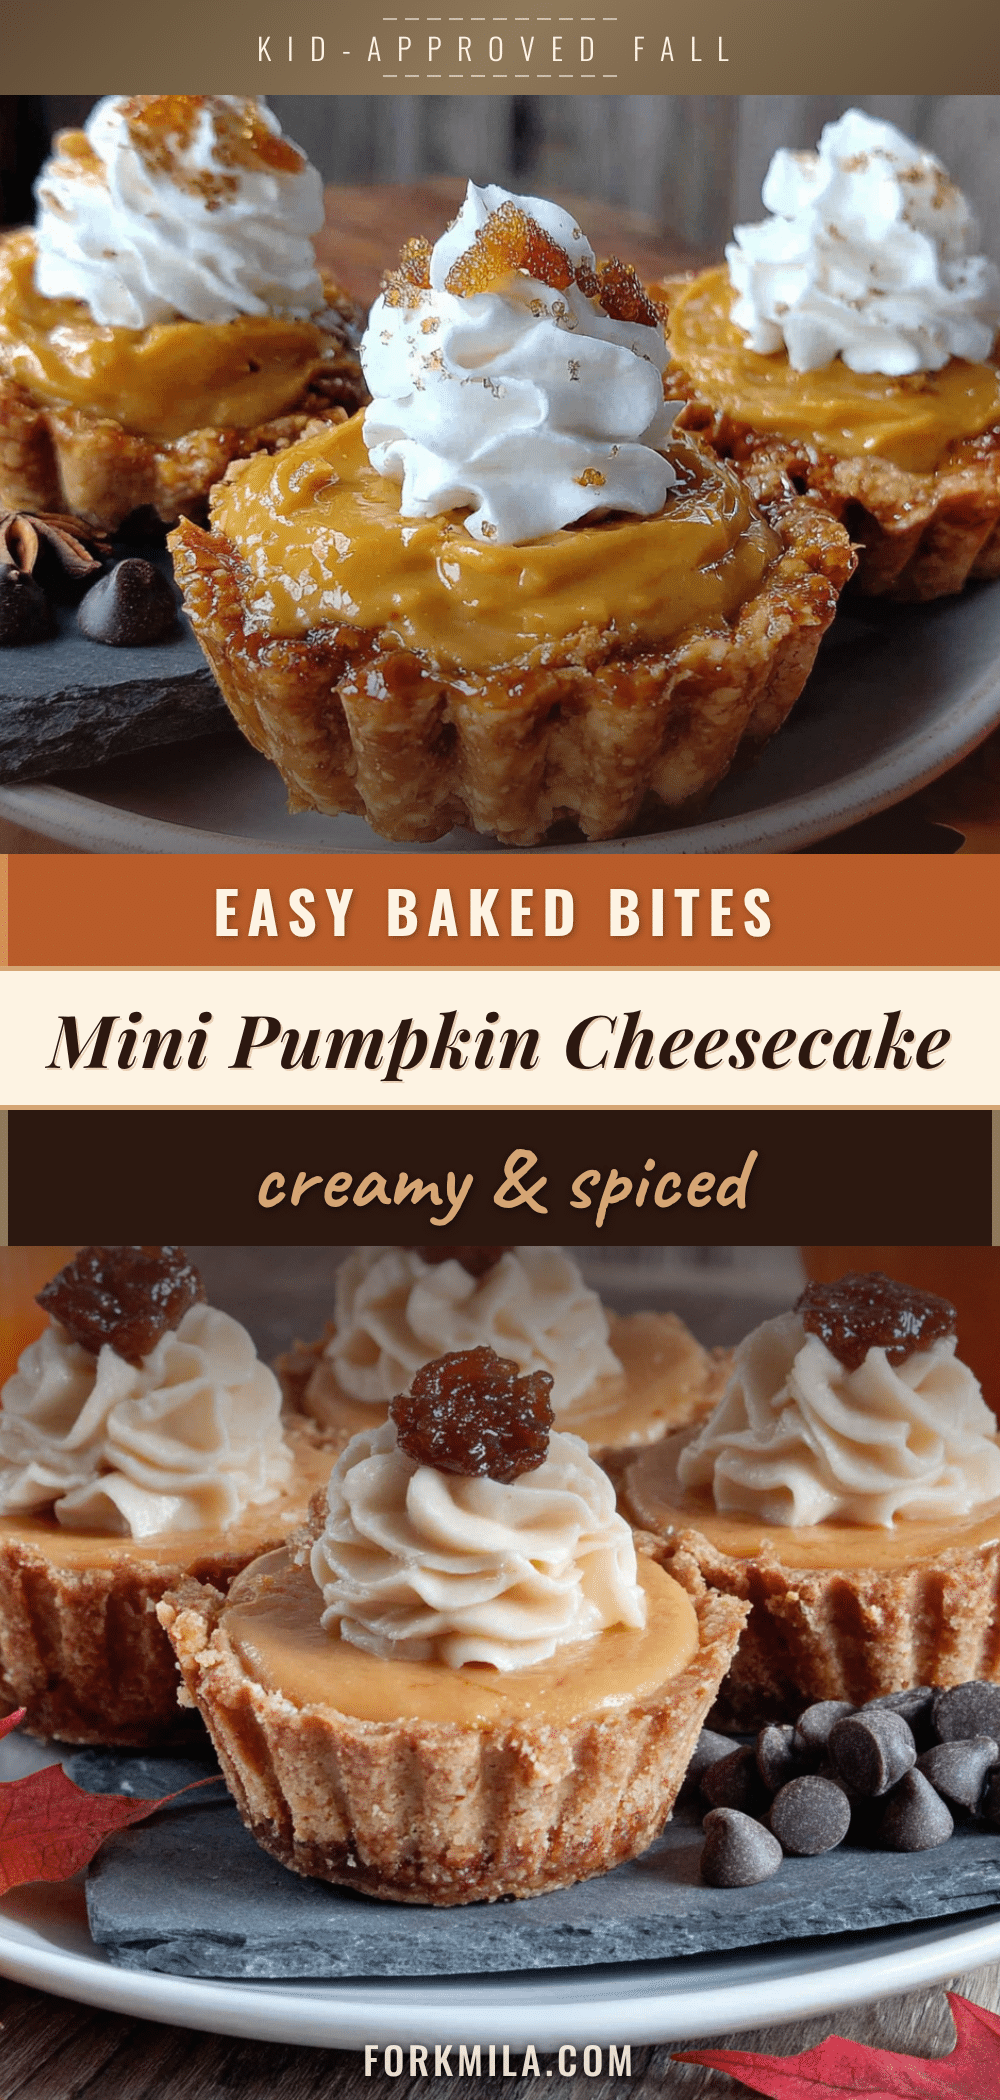
Mini Pumpkin Cheesecake Bites: Best Kid-Approved Fall Treat
These mini pumpkin cheesecake bites are a happy accident turned family favorite. With a buttery graham cracker crust and a light, fluffy pumpkin cheesecake filling, they’re the perfect poppable fall treat that kids and adults alike will devour.
- Prep Time: 15 minutes
- Cook Time: 16 minutes
- Total Time: 2 hours 31 minutes (includes chilling time)
- Yield: 24 servings 1x
- Category: Dessert
- Cuisine: American
Ingredients
- 1 ½ cups graham cracker crumbs (about 10–12 full sheets, crushed fine)
- ¼ cup granulated sugar
- 6 tablespoons unsalted butter, melted
- Pinch of salt
- 8 ounces cream cheese, softened
- ½ cup granulated sugar
- ½ cup pumpkin puree (100% pure, not pumpkin pie filling)
- 1 large egg, room temperature
- 1 teaspoon vanilla extract
- 1 teaspoon pumpkin pie spice
- ½ teaspoon ground cinnamon
- Whipped cream (optional, for topping)
- Caramel sauce (optional, for topping)
- Chopped pecans or walnuts (optional, for topping)
Instructions
- Preheat oven to 350°F (175°C). Line a mini muffin tin with mini paper liners or grease generously.
- In a small bowl, combine graham cracker crumbs, ¼ cup sugar, and a pinch of salt. Pour in melted butter and stir with a fork until mixture resembles wet sand and clumps together when pressed.
- Scoop about 1 heaping teaspoon of crust mixture into each muffin cup. Press down firmly using a small measuring spoon or the bottom of a shot glass to create a solid, even layer.
- Bake crusts for 5 minutes until lightly golden and fragrant. Remove and let cool on a wire rack.
- In a medium mixing bowl, beat softened cream cheese with an electric mixer on medium speed until smooth and creamy. Scrape down sides of bowl.
- Add ½ cup sugar and beat until combined, about 1 minute.
- Add pumpkin puree, egg, vanilla, pumpkin pie spice, and cinnamon. Beat on low speed until just combined. Do not overmix.
- Spoon filling into each crust-lined cup, filling almost to the top. A 1-tablespoon cookie scoop works well.
- Bake at 350°F (175°C) for 14-16 minutes. Edges should be set but centers will still jiggle slightly when shaken.
- Let cool in pan for 10 minutes on a wire rack, then carefully transfer bites to rack to cool completely.
- Refrigerate for at least 2 hours, or overnight, before serving. Serve cold.
Notes
Don’t skip pre-baking the crust to prevent sogginess. Use room temperature cream cheese and egg for a smooth filling. No water bath needed for these mini bites. Watch for the jiggle test to avoid overbaking. Chill completely for best texture and flavor. Store in an airtight container in the refrigerator for up to 5 days. Freeze for up to 3 months.
Nutrition
- Serving Size: 1 mini cheesecake bi
- Calories: 115
- Sugar: 8
- Fat: 7
- Saturated Fat: 4
- Carbohydrates: 12
- Protein: 2
Keywords: mini pumpkin cheesecake bites, pumpkin cheesecake, fall dessert, kid-friendly, easy pumpkin recipe, mini cheesecake, Thanksgiving dessert, Halloween treat


