My neighbor Frank is an accountant. I mean, a real, honest-to-goodness numbers guy who wears pressed khakis and talks about tax brackets at block parties. So when he showed up at my door last October holding a massive wooden board piled high with cheese, cured meats, and what looked like tiny, jewel-toned fruits, I was confused. “Thought you might need a trial run for the big day,” he said, nodding toward my kitchen where a lone, sad-looking turkey was thawing in the sink. I wasn’t expecting cooking advice from an accountant, but there I was, standing on my porch, listening to him describe exactly how to build the perfect Thanksgiving charcuterie board with fall fruits. He talked about balancing textures and colors the way he probably talks about balancing ledgers—with precise, quiet confidence. Honestly, I was stunned. The man who spent his days buried in spreadsheets had created the most beautiful, edible centerpiece I had ever seen. There were figs, sliced in half, their pink insides glowing like little stars. There were wedges of brie and a log of goat cheese rolled in crushed pecans. A handful of rosemary sprigs poked out like tiny trees. It was art. And the best part? It was easy. I scribbled his advice on a napkin right there, and that napkin is still tucked into my favorite cookbook. You know that feeling when you realize the best ideas come from the last place you’d think to look? That was this board. It’s the reason I now make one every single Thanksgiving, and it’s the reason I’m sharing it with you today.
Why You’ll Love This Recipe
Let’s be real—Thanksgiving hosting is a lot. You’re juggling a turkey, sides, pies, and a house full of hungry people who are all asking, “When do we eat?” This Thanksgiving charcuterie board with fall fruits is your secret weapon. It keeps guests happy, the kitchen clear, and your stress levels manageable. I’ve tested this board at four different Thanksgiving gatherings now, and it never fails to steal the show before the main event even starts.
- No Cooking Required: Seriously. There’s no oven time, no stovetop fuss. Just slicing, arranging, and watching everyone grab a napkin and dig in.
- Simple Ingredients: You can find everything at a regular grocery store. No specialty shops or weird online orders needed.
- Perfect for Hosting: This board is designed to feed a crowd. It scales up beautifully and looks incredible on any table.
- Crowd-Pleaser: I’ve watched picky kids go for the apple slices and cheese cubes, while adults fight over the last piece of prosciutto-wrapped fig. It truly has something for everyone.
- Unbelievably Impressive: The mix of colors, textures, and fall flavors—think crisp apples, honey-drizzled goat cheese, and salty prosciutto—looks like you spent hours on it. But you didn’t. It’s the kind of board that makes people close their eyes after the first bite, and honestly, that’s the best compliment a host can get.
This isn’t just another cheese board. It’s your stress-free, crowd-feeding, conversation-starting Thanksgiving hero.
What Ingredients You Will Need
This recipe uses simple, seasonal ingredients to create a board that’s as beautiful as it is delicious. Everything can be prepped the day before, which is a lifesaver when you’re hosting. Here’s what you’ll need to gather:
For the Cheeses (The Foundation)
- 8 ounces Brie cheese (I prefer a double or triple cream brie for that ultra-creamy texture)
- 8 ounces Sharp cheddar cheese (aged, in a block, for slicing)
- 4 ounces Goat cheese log (plain or herbed—I love the Vermont Creamery brand)
For the Meats (The Savory Bite)
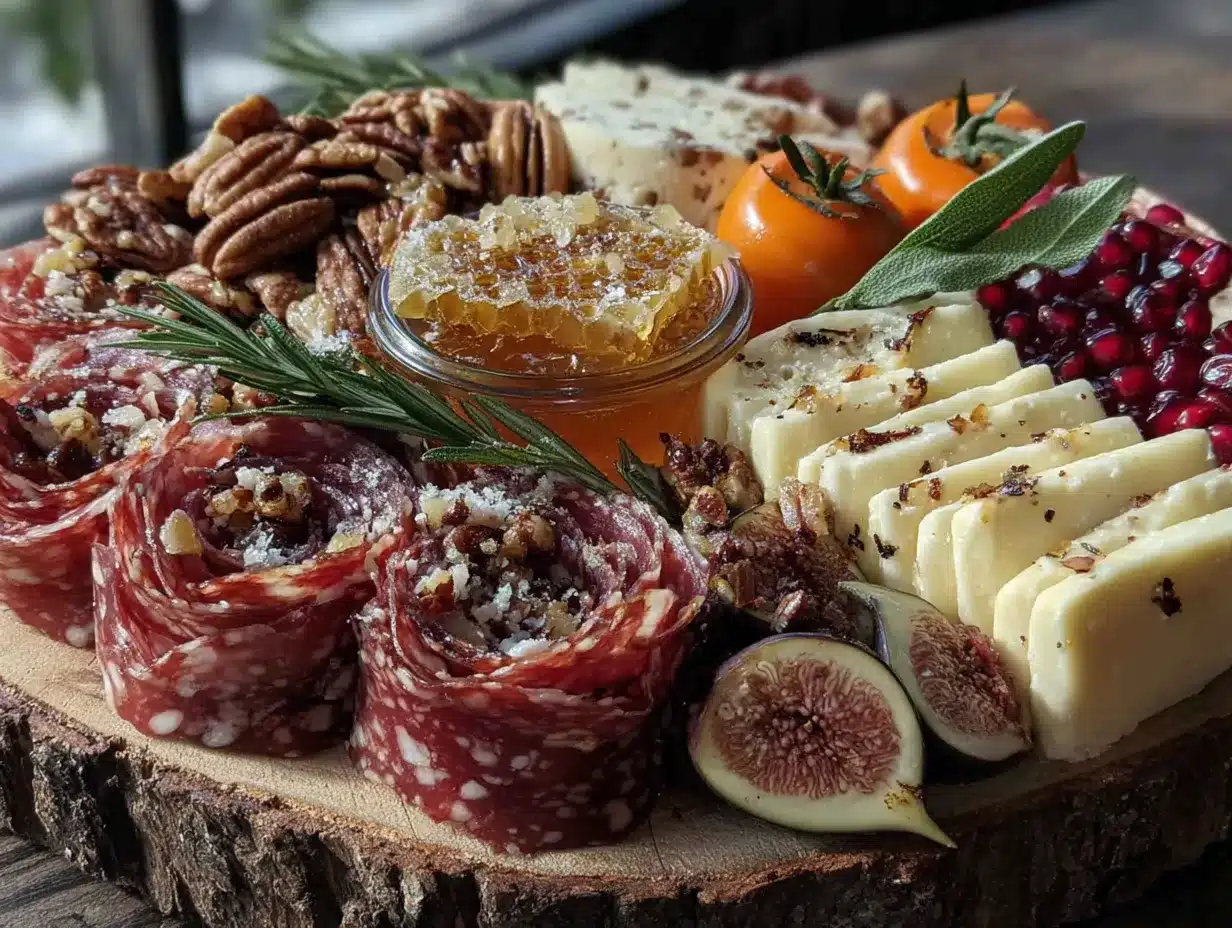
- 6 ounces Prosciutto (thinly sliced, look for it at the deli counter)
- 6 ounces Salami (Genoa or soppressata, sliced into thin rounds)
For the Fall Fruits (The Star of the Show)
- 2 crisp apples (Honeycrisp or Fuji, sliced thin—toss with a little lemon juice to prevent browning)
- 1 cup fresh figs (halved lengthwise; if out of season, use dried mission figs)
- 1 cup red or green seedless grapes (small clusters left on the stem look gorgeous)
- 1/2 cup dried cranberries (adds a tart pop of color)
For the Crunch & Spread
- 1 cup mixed nuts (toasted pecans and Marcona almonds are my go-to)
- 1/3 cup honey (local honey if you can find it—it’s worth it for the flavor)
- 1 small baguette (sliced into 1/2-inch rounds and lightly toasted)
- 1 box of crackers (water crackers or a buttery Ritz-style work well)
For the Garnish (Don’t Skip This)
- Fresh rosemary sprigs (a few, for that “fall forest” look)
- Fresh thyme sprigs (scattered lightly over the cheese)
- Pomegranate seeds (about 1/4 cup, for jewel-like pops of color)
Substitution Tip: If you’re dairy-free, use a firm vegan cheese and a cashew-based spread. For a nut-free version, swap the almonds for pumpkin seeds and skip the pecans. The board is totally flexible—that’s the beauty of it.
Equipment Needed
You don’t need anything fancy, but having the right tools makes the process smoother. Trust me, I learned the hard way after trying to arrange a board on a tiny cutting board once. It was a mess.
- A large wooden board or platter (at least 12×18 inches—a cutting board, a marble slab, or even a baking sheet lined with parchment works in a pinch)
- Small bowls or ramekins (for honey, olives, or dried fruit—keeps things tidy)
- Cheese knives (one for soft cheese, one for hard cheese—or just use clean butter knives)
- Paring knife (for slicing fruit and cheese)
- Tongs or small spoons (for the nuts and olives)
- Parchment paper (optional, but great for easy cleanup)
I found my favorite board at a thrift store for five dollars. It’s a little scratched up, but that just adds character. Don’t stress if you don’t have a fancy platter—a clean, flat surface is all you need.
Preparation Method
Building a Thanksgiving charcuterie board with fall fruits is all about the order of operations. Follow these steps, and you’ll have a masterpiece in under 20 minutes.
- Start with your board. Place your large board or platter on the counter. If you’re using a wooden board, a quick wipe with a damp cloth is all it needs. Position your small bowls for honey, cranberries, or any other loose items first—this anchors the layout.
- Place the cheeses. Unwrap your brie, cheddar, and goat cheese. Place them at different points on the board, not all clustered together. Think of them as the “mountains” of your landscape. Cut the cheddar into thin slices or triangles and fan them out slightly. Leave the brie whole, but score the top in a crosshatch pattern so guests know where to cut. The goat cheese log can go whole or sliced into thick rounds—I like to leave it whole and let guests dig in.
- Add the meats. Fold the prosciutto slices into loose ribbons or waves and place them near one of the cheeses. Fan the salami slices in a line or a small pile. Meats should look effortless, not perfectly arranged. A little messiness is part of the charm.
- Layer in the fall fruits. This is where the board comes to life. Arrange the sliced apples in a fan pattern near the cheddar. Place the halved figs around the brie—they’re like little flavor bombs. Tuck clusters of grapes into any empty spaces. Scatter the dried cranberries in a small pile or in one of your bowls. The colors should feel abundant and seasonal—deep reds, purples, and greens.
- Fill the gaps with crunch. Sprinkle the toasted pecans and almonds in the remaining open areas. Don’t be shy—they fill the visual gaps and add texture. Place your baguette slices and crackers in a stack or two on the board itself, or on a separate small plate next to it. I like to put crackers on the board for convenience, but if you’re worried about them getting soggy, keep them on the side.
- Drizzle and garnish. Drizzle the honey over the goat cheese and the brie. Don’t drown it—just a light, zigzag drizzle. Sprinkle the pomegranate seeds over the whole board like edible confetti. Tuck the rosemary sprigs and thyme sprigs in between the cheeses and fruits. They add a beautiful, earthy aroma and a pop of green that screams “fall.”
- Step back and adjust. Look at your board from a few feet away. Are there any big empty spots? Fill them with a few extra nuts or a small pile of grapes. The goal is abundance—you want it to look full and generous.
Pro tip: I always set the board out about 30 minutes before guests arrive. The cheese needs to come to room temperature for the best flavor, and it gives me a moment to admire my work before the chaos begins.
Cooking Tips & Techniques
I’ve made about a dozen of these boards, and I’ve learned a few things the hard way. Here’s what I wish someone had told me the first time.
- Room temperature is key. Cheese straight from the fridge is bland and hard. Take everything out at least 30 minutes before serving. I usually build the board, then let it sit while I finish the turkey.
- Don’t overthink the layout. The best boards look a little wild. Group things in clusters, not rows. Think “farmer’s market display” not “museum exhibit.”
- Watch out for soggy crackers. If you’re building the board hours ahead, keep the crackers and bread separate until the last minute. Nothing ruins a good cracker like a damp board.
- Use a damp paper towel for apples. If you’re slicing apples early, toss them in a little lemon juice or sprite to keep them from browning. I forgot to do this once, and my apples looked like rusty pennies. Not cute.
- Multitask like a pro. While the turkey rests, that’s your window to assemble the board. It gives you something to do, and your guests will hover around it like moths to a flame—keeping them out of the kitchen.
Honestly, the biggest mistake I ever made was trying to make the board too perfect. I spent an hour arranging salami roses and cheese fans, and by the time I was done, I was stressed and the cheese was sweaty. Now I keep it loose. It tastes the same, and it takes a fraction of the time.
Variations & Adaptations
One of the best things about a Thanksgiving charcuterie board with fall fruits is how endlessly adaptable it is. Here are a few ways to switch it up based on your crowd or what you have on hand.
- Vegetarian Version: Skip the prosciutto and salami entirely. Add more cheese—like a creamy blue cheese or a smoked gouda—and load up on extra nuts and dried fruits. Roasted chickpeas are also a great savory, crunchy addition.
- Gluten-Free Friendly: Replace the baguette with gluten-free crackers or sliced cucumber rounds. Rice crackers work beautifully and add a nice crunch.
- Spicy Twist: Add a drizzle of hot honey over the goat cheese instead of regular honey. The heat pairs amazingly with the sweet figs and salty prosciutto. I did this for a Friendsgiving last year, and it was gone in ten minutes.
- Add Some Veggies: For a pop of freshness, add some crisp celery sticks, baby carrots, or sliced endive. They add a nice crunch and balance out all the rich cheese and meat.
- Dessert Board: Believe it or not, you can turn this into a dessert board by swapping the meats for dark chocolate squares and dried apricots. Add a bowl of caramel for dipping the apples. It’s a game-changer for after-dinner snacking.
My personal favorite variation? I add a small bowl of fig jam next to the brie. It’s a little extra, but the sweet and savory combo is absolutely killer. Try it once, and you’ll never go back.
Serving & Storage Suggestions
This board is designed to be served at room temperature, which makes it perfect for a busy host. Set it out on a coffee table or a sideboard about 30 minutes before dinner. Guests can graze while you finish up in the kitchen, and it takes the pressure off having a perfectly timed appetizer.
What to serve alongside: This board pairs beautifully with a crisp white wine like Sauvignon Blanc or a dry rosé. For a non-alcoholic option, a sparkling apple cider is festive and fall-appropriate. If you’re serving it as part of the main meal, it works great next to a simple green salad or a bowl of roasted butternut squash soup.
Storage: If you have leftovers (which is rare, but it happens), store the cheeses and meats separately in airtight containers in the fridge. The fruits and nuts can be stored in zip-top bags. The board itself should be wiped clean and stored flat. Leftover cheese will keep for about a week, and the meats for about three days.
Reheating: You don’t really reheat a charcuterie board, but if you want to revive the baguette slices, pop them in a 350°F oven for about 5 minutes. The honey will thicken in the fridge, so let the cheese come back to room temperature before serving leftovers.
One thing I love about this board is how the flavors develop. The cheese and honey mingle overnight, and sometimes the leftovers taste even better the next day. Just saying.
Nutritional Information & Benefits
While this board is definitely a treat, it also offers some surprising nutritional perks. The fall fruits bring fiber and antioxidants, while the cheese and nuts provide protein and healthy fats that keep everyone satisfied until the main course.
Estimated per serving (based on 12 servings):
- Calories: ~350
- Protein: 14g
- Fat: 22g
- Carbohydrates: 28g
- Fiber: 4g
- Sugar: 18g (mostly from fruit and honey)
Health Highlights:
– Apples and figs are packed with fiber and vitamin C.
– Nuts provide heart-healthy unsaturated fats and vitamin E.
– Cheese is a great source of calcium and protein.
– Pomegranate seeds are loaded with antioxidants.
Dietary Considerations: This recipe contains dairy (cheese), gluten (crackers, baguette), and nuts. For a dairy-free version, use vegan cheese alternatives. For a nut-free version, swap the pecans and almonds for pumpkin seeds or sunflower seeds. Always check labels if you’re serving someone with a severe allergy.
I’m not a nutritionist, but I love that this board lets people graze on whole foods like fruit and nuts while still feeling indulgent. It’s balance, you know?
Conclusion
So there it is—the Thanksgiving charcuterie board with fall fruits that started with a napkin scribble from my accountant neighbor. It’s easy, it’s beautiful, and it’s the kind of thing that makes people stop and say, “Wait, you made this?” And you did. With zero stress and a whole lot of flavor.
I really hope you give this board a try for your next gathering. Customize it however you like—swap in your favorite cheese, add a spicy kick, or go all-in on the fall fruits. The beauty is in the flexibility. And honestly, seeing everyone gathered around the table, grabbing a slice of apple and a piece of brie, is one of my favorite parts of Thanksgiving.
If you make this board, I’d love to hear about it! Drop a comment below and tell me what your favorite combination was. Did you add the hot honey? Did your kids go for the figs? Share your story—I read every single one. And if you loved it, pass it along to a friend who’s hosting this year. Let’s make Thanksgiving a little easier, one beautiful board at a time.
Happy hosting, and happy eating!
Frequently Asked Questions
Can I make this board a day ahead of time?
You can prep most of it the day before. Slice the fruits and store them in airtight bags in the fridge. Arrange the cheeses and meats on the board, then cover it tightly with plastic wrap. Add the crackers, nuts, and fresh herbs right before serving to keep everything crisp.
How do I keep the apples from turning brown?
Toss the apple slices in a little lemon juice or a splash of Sprite. It won’t change the flavor much, and it keeps them looking fresh for hours. I usually do this right before I arrange them on the board.
How many people does this board serve?
This recipe is designed to serve 10 to 12 people as an appetizer. If you’re using it as a main course for a light lunch, it will serve about 6. For a big crowd, just double the ingredients and use a larger board or two smaller boards.
What if I can’t find fresh figs?
No problem! Dried mission figs work beautifully and have an even sweeter, more concentrated flavor. You can also use sliced pear or persimmon for a similar texture and fall feel.
Can I add hot elements to the board?
Absolutely. A small bowl of warm, honey-drizzled nuts or a baked brie with cranberries would be a fantastic addition. Just make sure to place the hot items in a small oven-safe dish on the side so they don’t make the other ingredients warm or soggy.
Pin This Recipe!
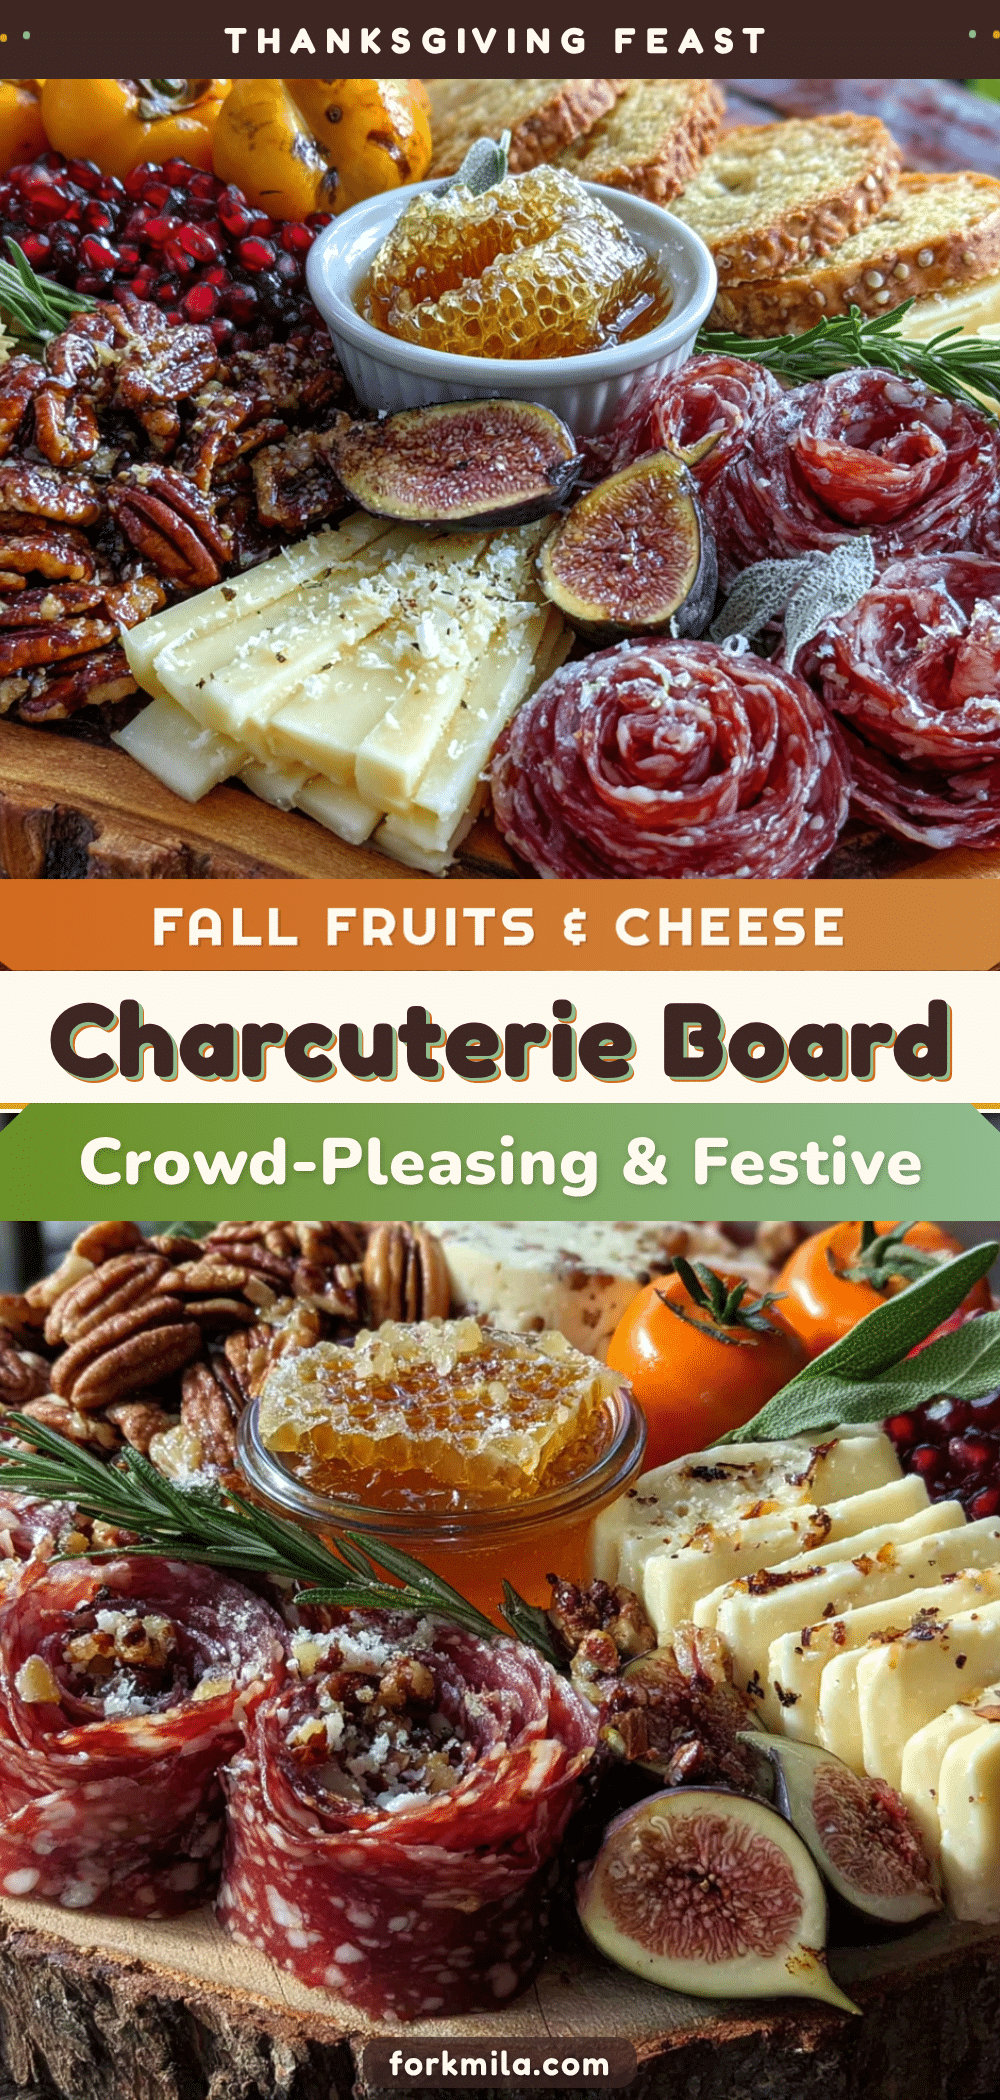
The Best Thanksgiving Charcuterie Board with Fall Fruits
This stunning Thanksgiving charcuterie board with fall fruits is your secret weapon for stress-free hosting. It keeps guests happy, the kitchen clear, and your stress levels manageable with no cooking required.
- Prep Time: 20 minutes
- Cook Time: 0 minutes
- Total Time: 20 minutes
- Yield: 12 servings 1x
- Category: Appetizer
- Cuisine: American
Ingredients
- 8 ounces Brie cheese (double or triple cream)
- 8 ounces Sharp cheddar cheese (aged, block)
- 4 ounces Goat cheese log (plain or herbed)
- 6 ounces Prosciutto (thinly sliced)
- 6 ounces Salami (Genoa or soppressata, sliced into thin rounds)
- 2 crisp apples (Honeycrisp or Fuji, sliced thin)
- 1 cup fresh figs (halved lengthwise; or dried mission figs)
- 1 cup red or green seedless grapes (small clusters)
- 1/2 cup dried cranberries
- 1 cup mixed nuts (toasted pecans and Marcona almonds)
- 1/3 cup honey (local if possible)
- 1 small baguette (sliced into 1/2-inch rounds, lightly toasted)
- 1 box crackers (water crackers or buttery Ritz-style)
- Fresh rosemary sprigs (for garnish)
- Fresh thyme sprigs (for garnish)
- 1/4 cup pomegranate seeds (for garnish)
Instructions
- Start with your board. Place your large board or platter on the counter. Position small bowls for honey, cranberries, or other loose items first to anchor the layout.
- Place the cheeses. Unwrap brie, cheddar, and goat cheese. Place them at different points on the board. Cut cheddar into thin slices or triangles and fan them out. Leave brie whole but score the top in a crosshatch pattern. Leave goat cheese log whole or slice into thick rounds.
- Add the meats. Fold prosciutto slices into loose ribbons or waves and place near one cheese. Fan salami slices in a line or small pile.
- Layer in the fall fruits. Arrange sliced apples in a fan pattern near cheddar. Place halved figs around brie. Tuck grape clusters into empty spaces. Scatter dried cranberries in a small pile or bowl.
- Fill the gaps with crunch. Sprinkle toasted pecans and almonds in remaining open areas. Place baguette slices and crackers in stacks on the board or on a separate plate.
- Drizzle and garnish. Drizzle honey over goat cheese and brie in a light zigzag. Sprinkle pomegranate seeds over the whole board. Tuck rosemary and thyme sprigs between cheeses and fruits.
- Step back and adjust. Look at the board from a few feet away. Fill any big empty spots with extra nuts or a small pile of grapes. The goal is abundance.
Notes
Set the board out about 30 minutes before guests arrive so cheese comes to room temperature. Keep crackers and bread separate until last minute to prevent sogginess. Toss apple slices in lemon juice to prevent browning. The board can be prepped the day before – slice fruits and store in airtight bags, arrange cheeses and meats on board and cover tightly with plastic wrap, then add crackers, nuts, and fresh herbs right before serving.
Nutrition
- Serving Size: 1 serving (based on
- Calories: 350
- Sugar: 18
- Sodium: 650
- Fat: 22
- Saturated Fat: 8
- Carbohydrates: 28
- Fiber: 4
- Protein: 14
Keywords: Thanksgiving charcuterie board, fall charcuterie board, holiday appetizer, cheese board, easy appetizer, no-cook appetizer, Thanksgiving appetizer


