I was standing in my driveway last Tuesday, wrestling with a trash bag that had decided to betray me, when the smell hit me. It wasn’t my garbage—it was my neighbor’s, three houses down, and it was unmistakable. Garlic, butter, something crispy and golden. And just like that, I was eleven years old at my Aunt Patty’s kitchen table, watching her pull a tray of chicken from the oven, the skin so crackly you could hear it from across the room. She passed away five years ago, and I haven’t thought about that specific Tuesday night dinner in probably a decade. But there I was, holding a ripped trash bag, suddenly desperate for that exact crunch. I dropped the bag, went inside, and grabbed a pack of chicken thighs from the freezer. I mean, honestly, you know that feeling when a random scent just hijacks your whole afternoon? That was me. I wanted that garlicky, parmesan-crusted chicken, and I wanted it fast. The air fryer was my only hope for a Tuesday night miracle. And let me tell you—it worked. These crispy garlic parmesan chicken thighs became my new obsession, and I’ve made them three times since. That’s the kind of recipe this is. One that finds you when you least expect it and refuses to let go.
Why You’ll Love This Recipe
Let me be honest with you—I’ve tested this recipe seven times to get it just right. Seven times. My family is probably tired of chicken thighs, but they kept eating them, so I kept tweaking. Here’s why these air fryer crispy garlic parmesan chicken thighs are different from every other recipe you’ve tried.
- Quick & Easy: From fridge to plate in 30 minutes flat. No marinating, no complicated steps, just dinner on the table before you’ve finished your second glass of wine.
- Simple Ingredients: You’ve probably got garlic powder, parmesan, and chicken thighs in your kitchen right now. No fancy grocery runs needed—I promise.
- Perfect for Busy Weeknights: This is the recipe you make on a Wednesday when you forgot to thaw anything. It’s also fancy enough for Sunday dinner with the in-laws.
- Crowd-Pleaser: My kids, who usually pick at their food, actually asked for seconds. My husband said they were “restaurant quality.” I’ll take it.
- Unbelievably Crispy: The air fryer gives you that deep-fried crunch without the oil bath. The parmesan creates this golden crust that shatters when you bite into it.
What makes this version different? It’s the double-coating technique. Most recipes just toss chicken in breadcrumbs and call it done. I do a light flour dusting first, then an egg wash, then a parmesan-panko mixture. It sounds fussy, but it takes two extra minutes and gives you a crust that actually stays on the chicken instead of sliding off. Plus, I use freshly grated parmesan—not the stuff in the green can—because it melts differently and creates that shatter-crisp texture you’re after. Trust me on this one.
What Ingredients You Will Need
This recipe uses simple, everyday ingredients that come together to create something truly special. Most of these are pantry staples, which is exactly what you want on a busy night.
For the Chicken
- 4 boneless, skinless chicken thighs (about 1.5 lbs total) — I prefer thighs over breasts here because they stay juicier in the air fryer. If you only have breasts, just adjust cooking time by a few minutes.
- 1/2 cup all-purpose flour — This helps the egg wash stick and creates that first layer of crispiness.
- 2 large eggs, beaten — Room temperature works best, but cold is fine in a pinch.
- 1 cup panko breadcrumbs — Regular breadcrumbs work too, but panko gives you that extra-crunchy texture. I use Ian’s brand for gluten-free options sometimes.
- 1/2 cup freshly grated parmesan cheese — Please, please grate it yourself. The pre-shredded stuff has anti-caking agents that prevent proper melting. It takes 30 seconds with a microplane.
- 1 teaspoon garlic powder — Not garlic salt. We’ll add salt separately so we control the sodium.
- 1 teaspoon onion powder — Adds depth without being overpowering.
- 1/2 teaspoon smoked paprika — Optional, but it adds a subtle smokiness that pairs beautifully with the parmesan.
- 1/2 teaspoon dried oregano — Italian seasoning works too if that’s what you have.
- 1/2 teaspoon salt — I use kosher salt. Adjust based on your preference and the saltiness of your parmesan.
- 1/4 teaspoon black pepper — Freshly ground is always better.
- 2 tablespoons olive oil — Mixed into the breadcrumb mixture to help with browning. Avocado oil works too.
For Serving (Optional But Recommended)
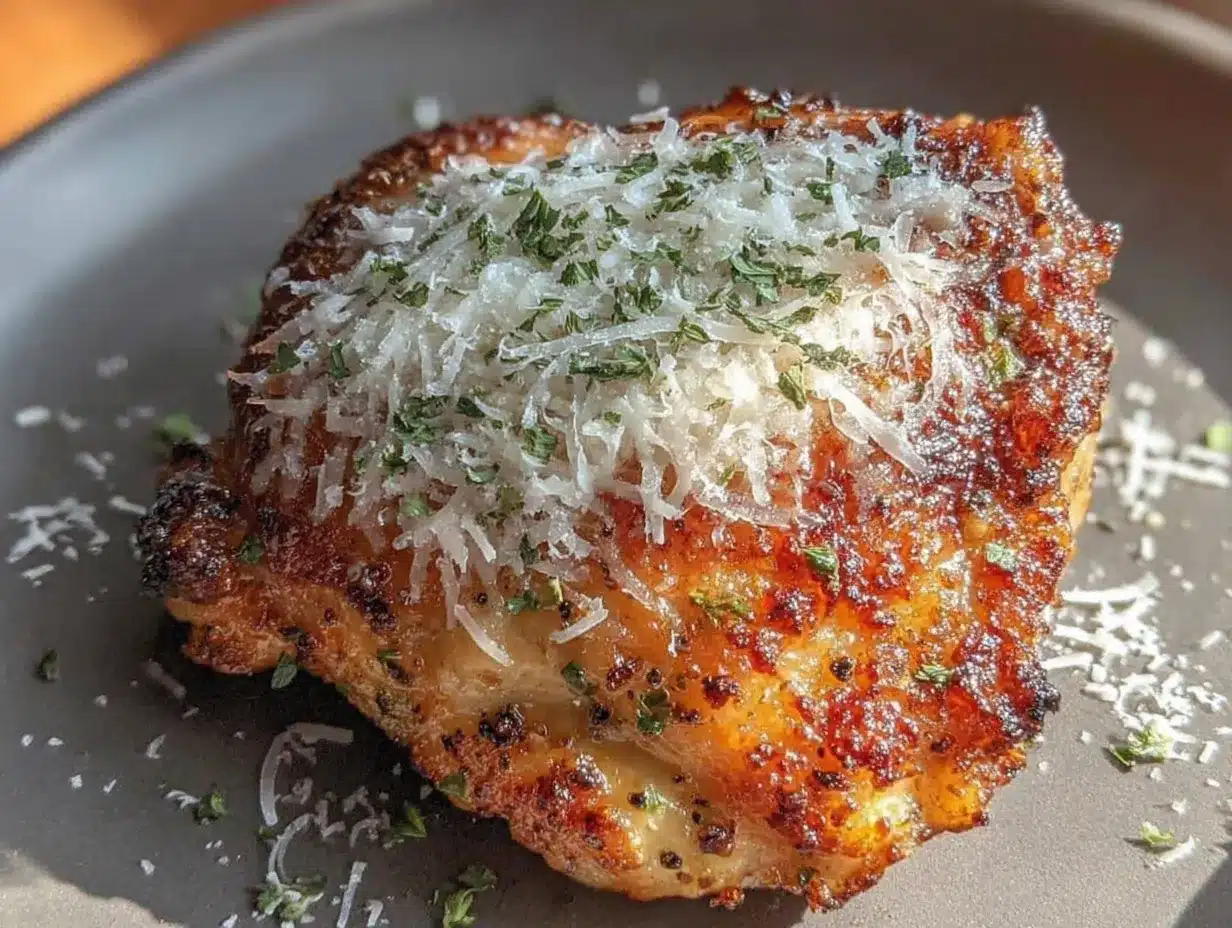
- Fresh parsley, chopped — For color and freshness.
- Extra grated parmesan — Because more cheese is never a bad idea.
- Lemon wedges — A squeeze of lemon right before eating cuts through the richness perfectly.
Substitution Notes: For a gluten-free version, swap the all-purpose flour for a 1:1 gluten-free flour blend and use gluten-free panko. For dairy-free, use nutritional yeast instead of parmesan (about 1/4 cup) and skip the extra cheese on top. I’ve tried both variations, and while they’re different, they’re still delicious in their own right.
Equipment Needed
You don’t need a professional kitchen for this recipe, but a few key tools make the process smoother. Here’s what you’ll need:
- Air Fryer — Any brand works. I use a 5.8-quart Cosori, and it handles four thighs perfectly without overcrowding. If yours is smaller, cook in batches.
- Three shallow bowls — For the flour, egg wash, and breadcrumb mixture. Pie plates or wide soup bowls work great.
- Tongs — For transferring chicken without making a mess. Silicone-tipped ones won’t scratch your air fryer basket.
- Meat thermometer — This is non-negotiable for me. Chicken needs to reach 165°F internally, and guessing isn’t worth the risk. A $10 instant-read thermometer from Amazon works perfectly.
- Microplane or fine grater — For grating parmesan. A box grater works too, but a microplane gives you that fluffy, meltable texture.
- Spray bottle or oil mister — For lightly oiling the air fryer basket. Parchment liners designed for air fryers also work, but they can affect crispiness if not properly ventilated.
Budget-Friendly Tip: Don’t have a meat thermometer? You can check doneness by cutting into the thickest part of a thigh. The juices should run clear, and there should be no pinkness. But honestly, spend the ten bucks—it saves so much anxiety.
Preparation Method
Alright, let’s get cooking. I’ve broken this down into simple steps so you don’t miss anything. Trust the process, and you’ll have the crispiest garlic parmesan chicken thighs of your life.
- Preheat your air fryer to 380°F (193°C). This takes about 3-5 minutes depending on your model. Don’t skip this step—adding chicken to a cold air fryer messes with the cooking time and crispiness.
- Pat the chicken thighs dry with paper towels. This is crucial. Excess moisture is the enemy of crispiness. Really press those paper towels in there. I usually use three or four per thigh.
- Set up your breading station. In the first shallow bowl, add the 1/2 cup flour, 1/2 teaspoon salt, and 1/4 teaspoon pepper. Mix with a fork. In the second bowl, beat the two eggs until they’re uniform in color. In the third bowl, combine the panko breadcrumbs, grated parmesan, garlic powder, onion powder, smoked paprika, dried oregano, and the 2 tablespoons olive oil. Mix with a fork until the oil is evenly distributed—it should look like damp sand.
- Coat each chicken thigh. First, dredge in the flour mixture, shaking off any excess. You want a light, even coating, not a thick clump. Then dip into the beaten eggs, letting any excess drip off. Finally, press firmly into the panko-parmesan mixture, making sure every surface is covered. I use one hand for the dry ingredients and one for the wet to keep from turning into a breaded mess myself.
- Place the breaded thighs in the air fryer basket. Make sure they’re in a single layer with space between them—crowding leads to steaming instead of crisping. If your air fryer is small, cook in batches. I know it’s tempting to cram them all in, but resist. Your patience will be rewarded.
- Lightly spray the tops of the chicken with cooking spray. This helps the panko brown evenly. I use avocado oil spray because it has a high smoke point, but any neutral oil works.
- Cook at 380°F for 12 minutes. Don’t open the air fryer during this time—you’ll let all the hot air out and mess with the cooking process.
- Flip the chicken thighs carefully with tongs. They should be golden on the bottom. Spray the newly exposed side with a little more oil.
- Cook for another 8-10 minutes. The total cooking time should be 20-22 minutes, but start checking at 18 minutes if your thighs are on the smaller side. The internal temperature should reach 165°F when inserted into the thickest part of the thigh. The exterior should be deeply golden and crispy—you’ll hear it when you tap it with a fork.
- Let the chicken rest for 5 minutes. I know you want to eat it immediately, but resting allows the juices to redistribute. Cut into one too early and all that delicious moisture ends up on your cutting board instead of in your mouth.
Sensory Check: At the 12-minute mark, your kitchen should smell like garlic and toasted parmesan—that nutty, savory aroma that makes your stomach growl. The chicken should look golden brown with darker spots where the cheese has caramelized. When you tap it, it should sound hollow and crispy, not soft or squishy.
Cooking Tips & Techniques
I’ve learned a few things the hard way so you don’t have to. Here are my best tips for perfect air fryer crispy garlic parmesan chicken thighs every single time.
Don’t skip the oil in the breadcrumb mixture. I made this mistake the first time, thinking I’d save calories. The result was dry, pale chicken with breadcrumbs that fell off. The oil helps the panko toast evenly and creates that golden color we’re after. It also helps the coating stick to the chicken during cooking.
Let the breaded chicken rest for 5 minutes before air frying. This is a game-changer. After you’ve breaded all the thighs, let them sit on a plate for 5 minutes. This gives the coating time to adhere properly. I learned this from a fried chicken recipe, and it works just as well for air frying. The crust stays put instead of sliding off when you flip them.
Use a meat thermometer, not a timer. Air fryers vary wildly in temperature accuracy. My friend’s air fryer runs 25 degrees hot. Mine runs 10 degrees cool. A thermometer takes the guesswork out. Chicken thighs are done at 165°F, but I actually pull mine at 160°F because they continue cooking while resting. This keeps them juicy instead of dry.
If your coating is browning too fast, lower the temperature. This happened to me once when I used a particularly sharp parmesan. The outside was getting dark at 12 minutes, but the inside wasn’t done. I dropped the temperature to 350°F and added 5 minutes to the cooking time. Problem solved. Don’t be afraid to adjust based on what you’re seeing.
Clean your air fryer basket between batches. If you’re cooking more than four thighs, wipe out the basket with a paper towel between batches. Those little burnt bits of breadcrumb will smoke and taste bitter if left to accumulate. Trust me, I learned this one the smelly way.
Variations & Adaptations
One of the best things about this recipe is how adaptable it is. Here are some variations I’ve tried and loved.
Spicy Buffalo Version: Add 1 tablespoon of buffalo sauce to the egg wash and mix 1/2 teaspoon of cayenne pepper into the breadcrumb mixture. Serve with ranch or blue cheese dressing for dipping. My husband requests this version at least once a week.
Herb and Lemon Version: Swap the garlic powder for 2 tablespoons of fresh minced garlic (mixed into the breadcrumbs) and add the zest of one lemon. Replace the dried oregano with fresh rosemary and thyme. This version feels lighter and brighter—perfect for spring dinners.
Gluten-Free Version: Use a 1:1 gluten-free flour blend instead of all-purpose flour and gluten-free panko breadcrumbs. I’ve tested this with King Arthur’s Measure for Measure flour and Ian’s gluten-free panko, and the texture is nearly identical to the original. The only difference is the breadcrumbs are slightly less crunchy, but still delicious.
Dairy-Free Version: Replace the parmesan with 1/4 cup of nutritional yeast mixed into the panko. Nutritional yeast has that savory, cheesy flavor without any dairy. You’ll also want to skip the extra parmesan at the end. I was skeptical about this one, but honestly, it’s really good—different, but good.
Oven-Baked Version: If you don’t have an air fryer, bake the breaded chicken thighs on a wire rack set over a baking sheet at 400°F for 25-30 minutes. The wire rack is essential—it lets air circulate underneath so the bottom stays crispy instead of steaming on the pan. Flip halfway through for even browning.
Serving & Storage Suggestions
These crispy garlic parmesan chicken thighs are versatile enough for any meal. Here’s how I like to serve and store them.
Serving: Serve immediately while the crust is at its crispiest. I like to arrange the thighs on a platter with lemon wedges and a sprinkle of fresh parsley. A side of roasted vegetables—asparagus, broccoli, or green beans—complements the richness perfectly. For a heartier meal, serve with mashed potatoes or a simple arugula salad with lemon vinaigrette. The acidity cuts through the fat and cheese beautifully.
Storage: Leftover chicken thighs keep in an airtight container in the refrigerator for up to 4 days. The crust will soften, but don’t worry—we’ll fix that in the reheating step. I don’t recommend freezing these because the panko coating gets soggy during thawing.
Reheating: The air fryer is your best friend here. Reheat at 350°F for 3-4 minutes, flipping halfway through. This restores most of the original crispiness. The microwave will make them soggy, so avoid it if you can. If you’re reheating a large batch, spread them in a single layer in the air fryer basket and add a minute or two to the time.
Flavor Development: Interestingly, these chicken thighs taste even better the next day as leftovers. The garlic and parmesan flavors meld together overnight, creating a deeper, more complex taste. I sometimes make a double batch just for the leftovers—they’re perfect chopped up over a salad for lunch.
Nutritional Information & Benefits
Let’s talk numbers. Per serving (one chicken thigh), here’s what you’re looking at:
- Calories: Approximately 380-420
- Protein: 32g
- Fat: 22g (including 6g saturated fat)
- Carbohydrates: 16g
- Fiber: 1g
- Sugar: 1g
- Sodium: 580mg
These numbers will vary based on your specific ingredients and portion sizes. Chicken thighs are naturally higher in fat than breasts, but that fat is what keeps them juicy during air frying. They’re also an excellent source of selenium, niacin, and vitamin B6.
Health Benefits: Chicken thighs provide high-quality protein that keeps you full and satisfied. Parmesan cheese adds calcium and a small amount of protein. The air fryer method significantly reduces oil usage compared to traditional frying, cutting calories and unhealthy fats. If you’re watching your sodium, use low-sodium breadcrumbs and reduce the added salt.
Dietary Considerations: This recipe is naturally nut-free and egg-free if you skip the egg wash (use buttermilk instead). For low-carb diets, replace the panko with crushed pork rinds or almond flour—both work surprisingly well and keep the carbs under 5g per serving.
Conclusion
These air fryer crispy garlic parmesan chicken thighs have become a staple in my kitchen for good reason. They’re fast enough for a Tuesday night, impressive enough for company, and forgiving enough for a beginner cook. The combination of garlic, parmesan, and that shatter-crisp crust is honestly addictive—I’ve yet to meet someone who doesn’t love them.
I want you to make this recipe your own. Add more garlic if you’re a garlic lover like me. Dial up the heat with extra cayenne. Swap the herbs based on what’s growing in your garden. Cooking should be flexible and fun, not rigid and stressful. The only rule is that you enjoy the process and the result.
When you make these—and I hope you do—come back and tell me how they turned out. Did your family ask for seconds? Did you try a variation I haven’t thought of? Drop a comment below or tag me in your photos. I genuinely love hearing about your kitchen wins. Now go get those chicken thighs crispy! You’ve got this.
Frequently Asked Questions
Can I use chicken breasts instead of thighs?
Absolutely. Chicken breasts will work, but they cook faster and can dry out more easily. Reduce the cooking time to 15-18 minutes total, and check for an internal temperature of 165°F. I recommend pounding thicker breasts to an even thickness first so they cook uniformly.
Why is my coating falling off?
This usually happens for one of three reasons: the chicken wasn’t patted dry enough, the breading wasn’t pressed on firmly enough, or you skipped the 5-minute rest after breading. Make sure you’re really pressing that panko mixture into the chicken, and let the breaded pieces sit before cooking. The rest step is non-negotiable for me now.
Can I make these ahead of time?
You can bread the chicken up to 4 hours ahead and keep it in the refrigerator on a wire rack. Don’t cover it tightly with plastic wrap—you want the coating to stay dry. When you’re ready to cook, let it sit at room temperature for 10 minutes while your air fryer preheats. The cooking time remains the same.
How do I keep the chicken from sticking to the air fryer basket?
Lightly spray the basket with cooking oil before adding the chicken, and make sure your chicken has been sprayed or brushed with oil too. If you’re still having sticking issues, use perforated parchment liners designed for air fryers. Just make sure they’re weighed down by the food so they don’t fly up into the heating element.
Can I double this recipe?
Yes, but you’ll need to cook in batches. Overcrowding the air fryer basket is the fastest way to end up with soggy chicken. Each batch needs space for air to circulate. Keep the first batch warm in a 200°F oven on a wire rack while you finish cooking the rest. The wire rack prevents the bottoms from steaming and getting soft.
Pin This Recipe!
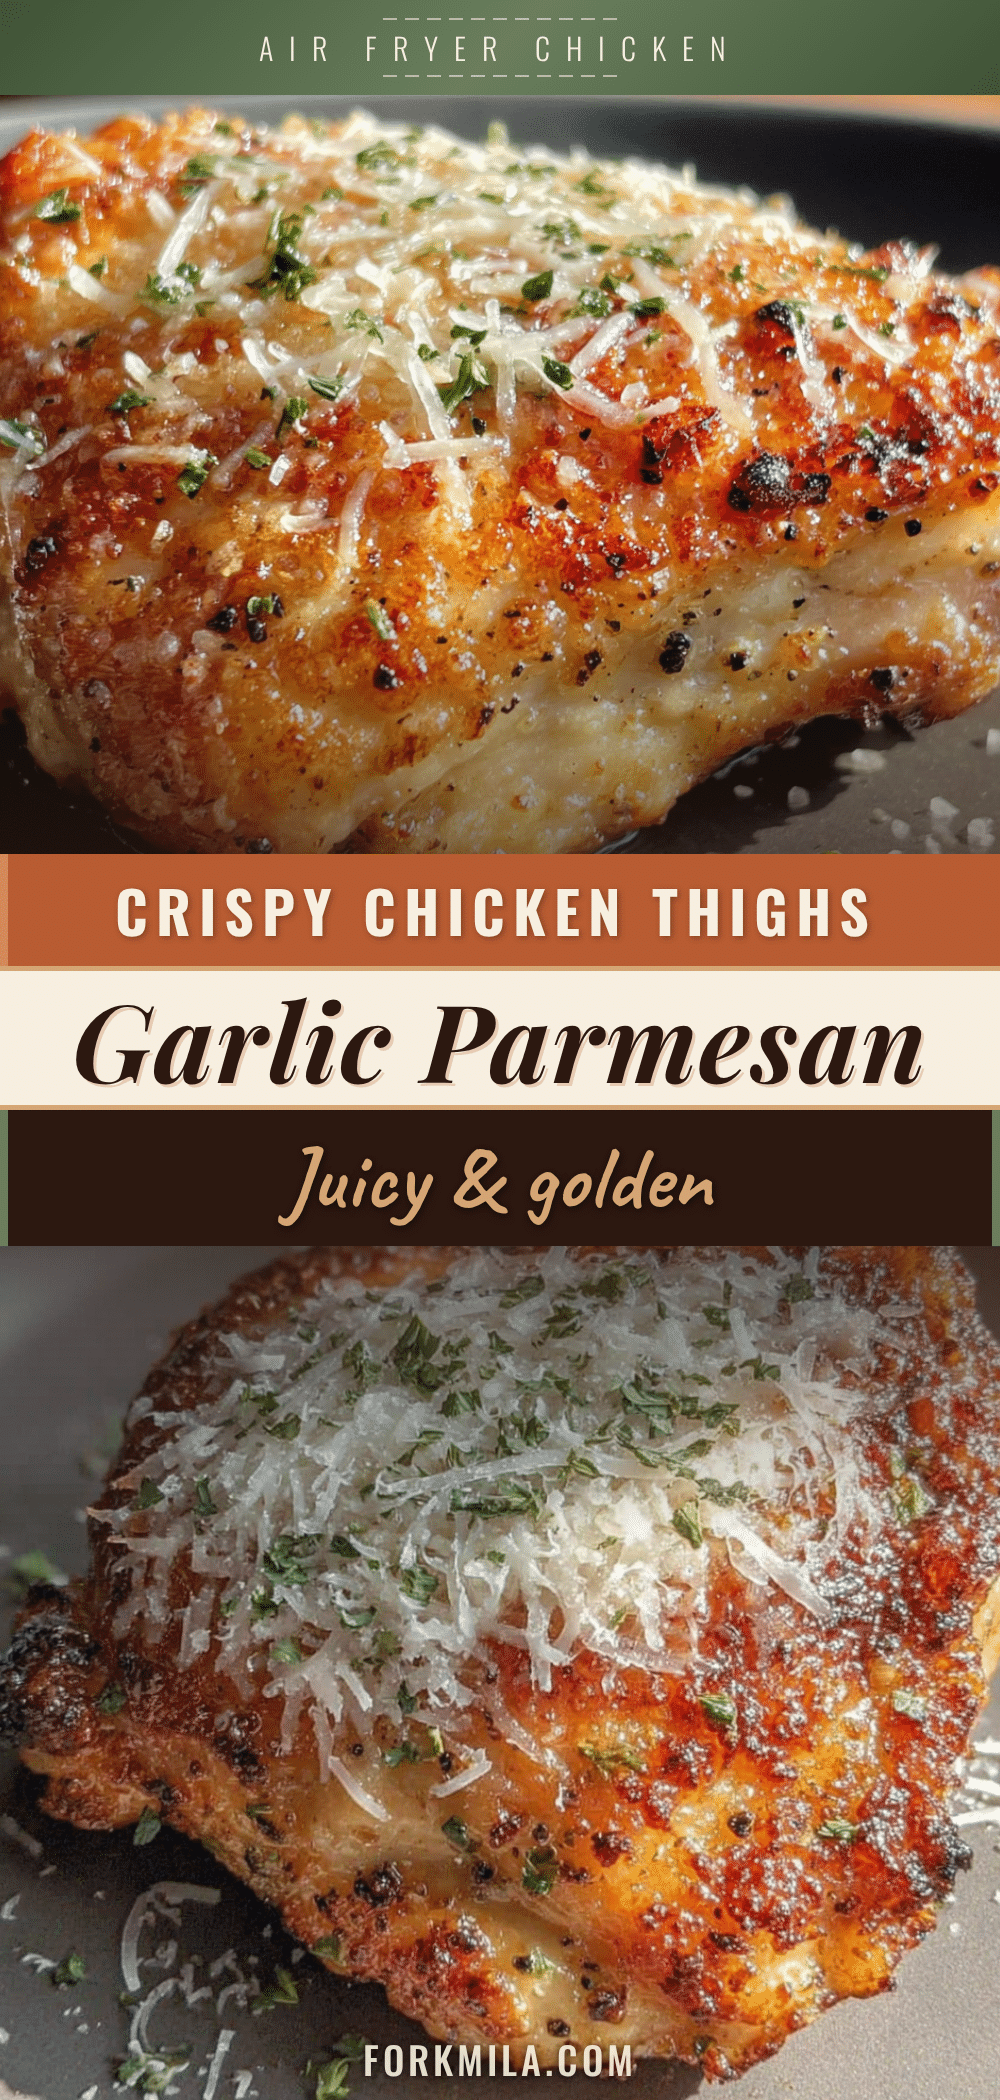
30-Minute Air Fryer Crispy Garlic Parmesan Chicken Thighs
Crispy, golden, and packed with garlic parmesan flavor, these air fryer chicken thighs are ready in just 30 minutes. Perfect for busy weeknights, this recipe delivers a shatter-crisp crust without deep frying.
- Prep Time: 10 minutes
- Cook Time: 20 minutes
- Total Time: 30 minutes
- Yield: 4 servings 1x
- Category: Main Course
- Cuisine: American
Ingredients
- 4 boneless, skinless chicken thighs (about 1.5 lbs total)
- 1/2 cup all-purpose flour
- 2 large eggs, beaten
- 1 cup panko breadcrumbs
- 1/2 cup freshly grated parmesan cheese
- 1 teaspoon garlic powder
- 1 teaspoon onion powder
- 1/2 teaspoon smoked paprika
- 1/2 teaspoon dried oregano
- 1/2 teaspoon salt
- 1/4 teaspoon black pepper
- 2 tablespoons olive oil
- Fresh parsley, chopped (for serving, optional)
- Extra grated parmesan (for serving, optional)
- Lemon wedges (for serving, optional)
Instructions
- Preheat your air fryer to 380°F (193°C).
- Pat the chicken thighs dry with paper towels.
- Set up your breading station: In the first shallow bowl, mix flour, salt, and pepper. In the second bowl, beat the eggs. In the third bowl, combine panko, parmesan, garlic powder, onion powder, smoked paprika, dried oregano, and olive oil until it looks like damp sand.
- Coat each chicken thigh: Dredge in flour mixture (shake off excess), dip in beaten eggs (let excess drip off), then press firmly into panko-parmesan mixture until fully covered.
- Place breaded thighs in the air fryer basket in a single layer with space between them.
- Lightly spray the tops of the chicken with cooking spray.
- Cook at 380°F for 12 minutes without opening the air fryer.
- Flip the chicken thighs carefully with tongs and spray the newly exposed side with oil.
- Cook for another 8-10 minutes, until internal temperature reaches 165°F and exterior is deeply golden and crispy.
- Let the chicken rest for 5 minutes before serving.
Notes
For best results, let breaded chicken rest 5 minutes before air frying to help coating adhere. Use freshly grated parmesan for optimal melting and crispiness. If coating browns too fast, lower temperature to 350°F and add 5 minutes. Clean air fryer basket between batches to prevent burnt bits from smoking.
Nutrition
- Serving Size: 1 chicken thigh
- Calories: 400
- Sugar: 1
- Sodium: 580
- Fat: 22
- Saturated Fat: 6
- Carbohydrates: 16
- Fiber: 1
- Protein: 32
Keywords: air fryer chicken thighs, crispy garlic parmesan chicken, quick chicken dinner, weeknight chicken recipe, air fryer recipe


