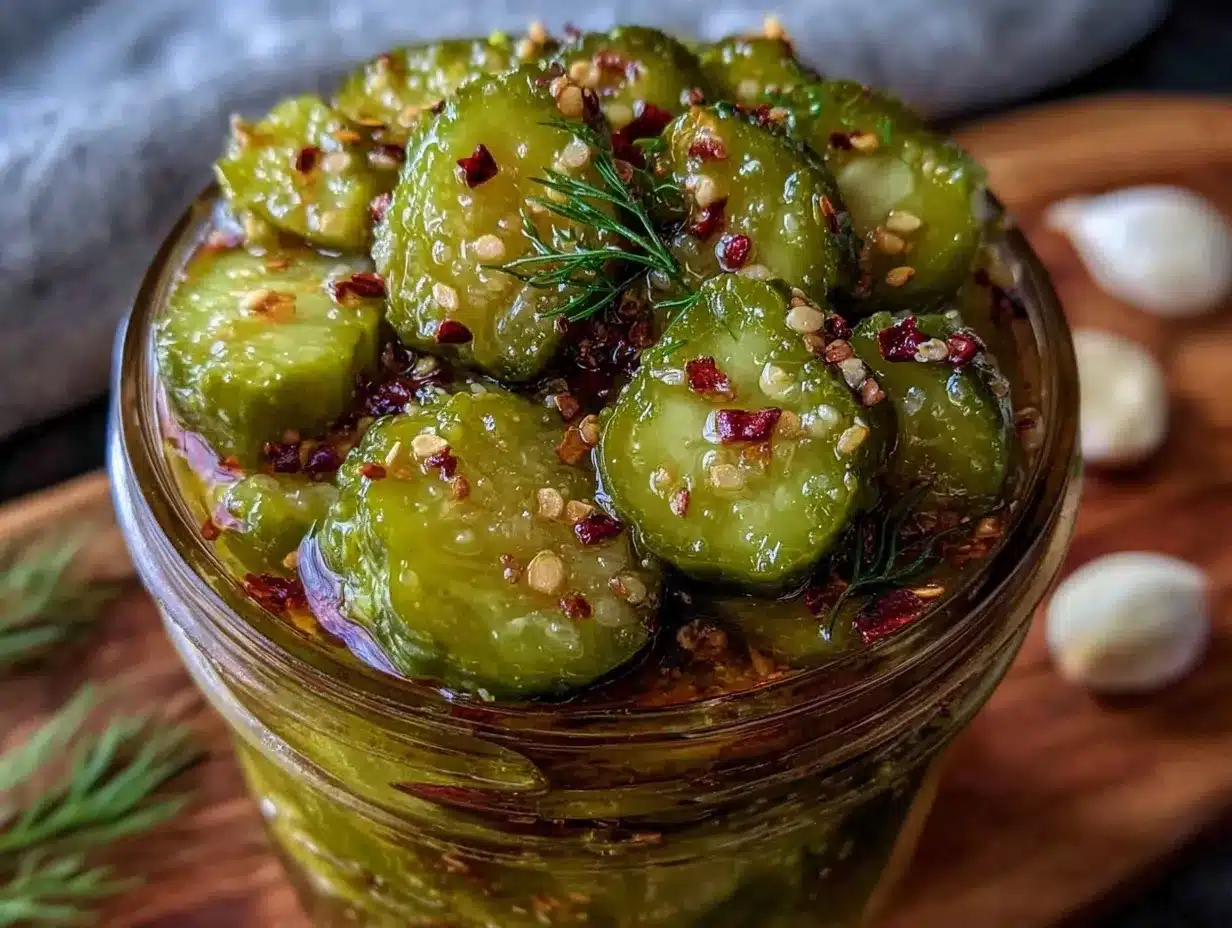
My friend Max had adamantly refused to touch pickles for over a decade. No joke. Then one rainy Thursday, while I was tinkering with this crispy garlic dill refrigerator pickles ready in 48 hours recipe just for myself, I caught him sneaking back to the fridge with a jar in hand—halfway through eating them, no less. Honestly, I wasn’t expecting a pickle skeptic to flip so fast, but there it was, the crunch and tang winning him over in a way nothing else had before.
Let me tell you, I get it. Pickles can be hit or miss, you know? Sometimes they turn out soggy, overly sour, or just downright boring. That’s why this recipe stuck with me. It’s the kind of quick homemade pickle that doesn’t demand a month of waiting, yet still delivers that crackling crispness and bright dill-garlic punch you’re dreaming of. I mean, the timing is perfect when you suddenly crave that zingy crunch but don’t want to wait forever.
Maybe you’ve been there too—eyeing those store-bought jars with suspicion, wondering if making your own will be worth the fuss. Honestly, this recipe doesn’t ask for much: a bit of patience (48 hours, to be exact), a handful of simple ingredients, and the right technique. The moment you hear that unmistakable snap when biting into these pickles, you’ll know it was worth every minute. And if Max can change his mind, there’s hope for anyone.
Why You’ll Love This Recipe
This crispy garlic dill refrigerator pickles ready in 48 hours recipe isn’t just a quick fix; it’s been carefully tested to get the balance of flavors and texture just right. I’ve tried countless batches, tweaking garlic levels and dill amounts until it felt just right—never too overpowering, but always bold.
- Quick & Easy: Ready to crunch in just 48 hours—perfect for when you want homemade pickles without the wait.
- Simple Ingredients: Uses pantry staples like cucumbers, garlic, vinegar, and fresh dill—no specialty stores needed.
- Perfect for Snacks & Sandwiches: Adds that satisfying snap and tang to burgers, sandwiches, or just on their own.
- Crowd-Pleaser: Friends and family keep asking for the recipe once they try these.
- Unbelievably Delicious: The crispness rivals store-bought deli pickles but with a fresher, homemade taste.
What sets this recipe apart is the careful brining process and the use of fresh garlic cloves and dill sprigs, which infuse the cucumbers with just the right amount of flavor. Plus, the fridge pickling technique means no boiling or canning fuss—just toss everything in a jar and wait. It’s comfort food in pickle form, the kind that turns casual snacking into a mini celebration.
What Ingredients You Will Need
This recipe calls for straightforward, wholesome ingredients that work together to create that iconic garlic dill pickle taste with a perfect crunch. Most of these are easy to keep on hand or find at your local grocery store.
- Fresh cucumbers (about 1.5 pounds / 700 grams) – I recommend small pickling cucumbers or Kirby cucumbers for their sturdy texture.
- Garlic cloves (4-5, peeled and smashed) – fresh, pungent garlic is key here.
- Fresh dill sprigs (3-4 sprigs) – look for bright green, fragrant dill; frozen dill won’t pack the same punch.
- White vinegar (1 cup / 240 ml) – provides the tang and helps preserve crispness.
- Water (1 cup / 240 ml) – balances the vinegar’s acidity.
- Pickling salt (1 tablespoon) – use pickling or kosher salt to avoid additives that cloud the brine.
- Granulated sugar (1 teaspoon) – just enough to round out the acidity.
- Black peppercorns (1 teaspoon) – adds subtle spice without overpowering.
- Red pepper flakes (optional, 1/4 teaspoon) – for a slight kick, if you like.
If you’re after a gluten-free or low-sodium option, adjusting the salt or swapping in apple cider vinegar can be done, but it will lightly change the flavor profile. This recipe shines with its simplicity, so I stick close to these basics. For the best crunch, I dry the cucumbers thoroughly before packing them in the jar, which helps avoid sogginess.
Equipment Needed
For making these refrigerator pickles, you don’t need much. A few basic kitchen tools will get you going without fuss:
- Glass jar with airtight lid (1 quart / 1 liter size recommended) – Mason jars or any clean glass container work well.
- Measuring cups and spoons – for precise brine ratios.
- Sharp knife – to slice cucumbers evenly. I find a serrated knife helps with the tougher skins.
- Cutting board – preferably non-porous for easy cleanup.
- Small bowl – to mix the brine ingredients.
If you don’t have a Mason jar, any clean container that seals tightly will do, but glass is preferred to avoid any unwanted flavors. I once tried plastic and the pickles ended up tasting a bit off, so learned that the hard way! Also, having a garlic press isn’t necessary since smashing the cloves with the flat side of a knife works just fine.
Preparation Method
- Wash and slice the cucumbers: Rinse about 1.5 pounds (700 grams) of small pickling cucumbers thoroughly. Trim off the blossom ends, as they can cause softening. Slice the cucumbers into 1/4-inch (6 mm) thick rounds or spears, depending on your preference. Pat dry with a clean towel to remove excess moisture.
- Prepare the brine: In a small bowl, combine 1 cup (240 ml) white vinegar, 1 cup (240 ml) water, 1 tablespoon pickling salt, and 1 teaspoon granulated sugar. Stir until the salt and sugar dissolve completely. This balance keeps the pickles crisp and flavorful.
- Pack the jar: Place 4-5 peeled, smashed garlic cloves and 3-4 fresh dill sprigs into the bottom of a clean 1-quart (1 liter) glass jar. Add 1 teaspoon black peppercorns and optional 1/4 teaspoon red pepper flakes for a subtle spicy note. Then tightly pack the cucumber slices into the jar, leaving about 1/2 inch (1.3 cm) headspace at the top.
- Pour in the brine: Slowly pour the brine over the cucumbers, ensuring they are fully submerged. Use a clean utensil to press the cucumbers gently if needed. Seal the jar tightly with its lid.
- Refrigerate: Place the jar in the refrigerator and let it sit for at least 48 hours before tasting. The pickles will develop their signature crispness and flavor during this time. Give the jar a gentle shake every 12 hours to redistribute flavors.
- Enjoy: After 48 hours, your pickles are ready to crunch! Keep refrigerated and consume within 2-3 weeks for best freshness.
If you notice any cloudiness in the brine after a few days, don’t worry—that’s normal fermentation activity. Just give the jar a quick sniff; if it smells fresh and tangy, it’s good to eat. Sometimes I’ve forgotten to press down the cucumbers right away, which led to a few floating slices, but shaking the jar fixed that quickly. Little details like trimming the blossom ends and drying the cucumbers really help avoid mushy results.
Cooking Tips & Techniques
Getting that perfect crunch with homemade pickles can be a bit of an art, but here are some tips I’ve gathered over the years:
- Use the right cucumbers: Smaller, firmer pickling cucumbers are your best bet. Regular slicing cucumbers often have more water and softer skins.
- Trim the blossom ends: Those contain enzymes that can make pickles mushy over time.
- Dry the cucumbers thoroughly: Excess water dilutes the brine and risks soggy pickles. I always pat mine dry with a clean kitchen towel before packing.
- Don’t skip the salt and sugar balance: Salt controls fermentation and crispness; sugar softens the sharpness of vinegar just enough.
- Keep the pickles submerged: Use a small weight or press down with a clean utensil to avoid air exposure; floating slices can spoil faster.
- Give the jar a shake: Gently shaking every 12 hours helps distribute flavors evenly and keeps things fresh.
One time I underestimated the importance of pickling salt and used regular table salt—it made the brine cloudy and the flavor flat. Lesson learned! Also, some folks swear by adding a grape leaf or a bay leaf for extra crispness, but I find fresh dill and garlic do the trick just fine. Timing-wise, don’t rush the 48-hour wait; the flavor and crunch develop during this chilling period.
Variations & Adaptations
This recipe is quite flexible if you want to mix things up or accommodate dietary needs:
- Spicy kick: Add extra red pepper flakes or a sliced jalapeño for heat. This variation pairs well with grilled meats.
- Low-sodium version: Reduce pickling salt by half and increase vinegar slightly to compensate for flavor.
- Herb swaps: Try replacing dill with fresh tarragon or fresh thyme for a different herbal twist.
- Vegan-friendly brine: This recipe is naturally vegan, but for a slightly sweeter brine, swap sugar with maple syrup or agave nectar.
- Quick pickle spears: Instead of slices, cut cucumbers into spears for a chunkier bite that’s great for dipping.
Personally, I once added a few mustard seeds and whole coriander seeds for a bit more complexity—it turned out surprisingly delightful. Also, if you want a fermented twist, let the jar sit at room temperature for 24 hours before refrigerating, but keep an eye on it to avoid over-fermentation. For those with gluten sensitivities, this recipe is naturally gluten-free, just double-check your vinegar label.
Serving & Storage Suggestions
These crispy garlic dill refrigerator pickles ready in 48 hours shine best chilled straight from the fridge. They make an excellent snack on their own or add a crisp, tangy punch to sandwiches, burgers, and charcuterie boards.
- Serve alongside classic deli sandwiches or the next time you make crispy garlic chicken for a zesty crunch contrast.
- Pair with creamy spreads or tangy cheeses like goat cheese or cream cheese to balance their acidity.
- Store the pickles tightly sealed in the refrigerator for up to 3 weeks. The flavor deepens over time but the crunch may soften slightly after the first week.
- For reheating (if used in cooked dishes), warm gently on the stovetop or microwave just until heated through; avoid overcooking to keep texture.
One time, I packed these pickles along with a picnic basket for a sunny afternoon—letting friends taste fresh homemade pickles was a highlight. They kept perfectly chilled in a cooler and didn’t lose their snap even hours later. A great reminder that simple, fresh flavors can really elevate casual meals.
Nutritional Information & Benefits
These pickles are low in calories (about 10-15 calories per serving of 2 slices), fat-free, and packed with flavor. The vinegar contributes acetic acid, which some studies suggest may aid digestion and blood sugar control, while garlic adds immune-boosting properties.
Since the recipe uses fresh cucumbers, it’s a good source of hydration and dietary fiber. It’s naturally gluten-free and vegan, making it friendly for a variety of diets. Just watch the sodium if you’re on a low-salt plan—consider reducing the salt or rinsing the pickles briefly before eating.
Overall, this recipe strikes a nice balance between indulgence and health, giving you that satisfying savory crunch without guilt.
Conclusion
If you’ve ever been on the fence about homemade pickles, this crispy garlic dill refrigerator pickles ready in 48 hours recipe is a gentle nudge to try making your own. It’s straightforward, quick enough to satisfy sudden pickle cravings, and rewards you with that satisfying crunch and fresh garlic-dill flavor that store-bought jars rarely match.
Feel free to tweak the garlic, dill, or spice levels to suit your palate—that’s part of the fun. I keep coming back to this recipe because it’s reliable, delicious, and honestly, because it’s the perfect way to prove even the most stubborn pickle doubters wrong.
Give it a shot, then share your experience or your own twists below. Let’s keep the pickle conversation going—because good food is best when shared!
FAQs
How long do refrigerator pickles last in the fridge?
They typically stay fresh and crunchy for about 2-3 weeks when kept sealed and refrigerated.
Can I use regular cucumbers instead of pickling cucumbers?
You can, but regular slicing cucumbers have more water and thinner skins, which may result in softer pickles.
Do I need to boil the brine for refrigerator pickles?
Nope! This recipe uses a cold brine, making it quicker and easier without sacrificing flavor or safety.
Can I make these pickles without fresh dill?
Fresh dill is key for flavor, but if unavailable, dried dill can be used—just reduce the amount since it’s more concentrated.
Why are my pickles sometimes soggy?
Common causes include not trimming blossom ends, excess moisture on cucumbers, or insufficient salt in the brine. Patting cucumbers dry and following the recipe closely helps keep them crisp.
PrintCrispy Garlic Dill Refrigerator Pickles
Quick and easy homemade refrigerator pickles with a perfect crunch and bright garlic-dill flavor, ready in just 48 hours.
- Prep Time: 15 minutes
- Cook Time: 0 minutes
- Total Time: 48 hours 15 minutes
- Yield: About 1 quart (4 servings) 1x
- Category: Condiment
- Cuisine: American
Ingredients
- 1.5 pounds (700 grams) fresh pickling cucumbers or Kirby cucumbers
- 4–5 garlic cloves, peeled and smashed
- 3–4 fresh dill sprigs
- 1 cup (240 ml) white vinegar
- 1 cup (240 ml) water
- 1 tablespoon pickling salt (or kosher salt)
- 1 teaspoon granulated sugar
- 1 teaspoon black peppercorns
- 1/4 teaspoon red pepper flakes (optional)
Instructions
- Wash and slice the cucumbers: Rinse about 1.5 pounds (700 grams) of small pickling cucumbers thoroughly. Trim off the blossom ends. Slice into 1/4-inch (6 mm) thick rounds or spears. Pat dry with a clean towel.
- Prepare the brine: In a small bowl, combine 1 cup (240 ml) white vinegar, 1 cup (240 ml) water, 1 tablespoon pickling salt, and 1 teaspoon granulated sugar. Stir until dissolved.
- Pack the jar: Place 4-5 peeled, smashed garlic cloves and 3-4 fresh dill sprigs into the bottom of a clean 1-quart (1 liter) glass jar. Add 1 teaspoon black peppercorns and optional 1/4 teaspoon red pepper flakes. Tightly pack cucumber slices into the jar, leaving 1/2 inch headspace.
- Pour in the brine: Slowly pour the brine over the cucumbers, ensuring they are fully submerged. Press gently if needed. Seal the jar tightly.
- Refrigerate: Place the jar in the refrigerator and let sit for at least 48 hours. Shake gently every 12 hours to redistribute flavors.
- Enjoy: After 48 hours, pickles are ready to eat. Keep refrigerated and consume within 2-3 weeks.
Notes
Trim blossom ends to prevent mushiness. Dry cucumbers thoroughly before packing to avoid soggy pickles. Shake jar every 12 hours to redistribute flavors. Use pickling or kosher salt to avoid cloudy brine. Optional red pepper flakes add a spicy kick. Store refrigerated and consume within 2-3 weeks for best freshness.
Nutrition
- Serving Size: 2 slices
- Calories: 1015
- Sugar: 1
- Sodium: 400
- Carbohydrates: 2
- Fiber: 0.5
Keywords: refrigerator pickles, garlic dill pickles, quick pickles, homemade pickles, crunchy pickles, easy pickles