There used to be a tiny, unassuming taqueria on a dusty corner in Silver City, New Mexico, that made the most unforgettable Hatch green chile chicken enchiladas. When they closed—literally overnight, with a handwritten sign taped to the door that said “Se Acabó”—I felt like I’d lost a friend. I mean, I’d drive forty minutes just for those enchiladas, and I’m not even someone who usually drives for food. After twelve tries—some so bad I actually threw them away—I finally got it.
The secret, I realized, wasn’t just the chiles. It was the creaminess. The way the sauce hugged each tortilla without drowning it. Honestly, I’m still chasing that first bite I had back in 2019, but this version? It’s close. Really close. You know that feeling when you take a forkful and everything just stops? Yeah, that’s what we’re going for here.
I remember the night I cracked the code. It was a Tuesday, I’d burned my wrist on the oven rack, and I’d forgotten to buy sour cream. But I had cream cheese in the fridge—a leftover from bagel Sunday—and I thought, why not? That accidental swap changed everything. The sauce got velvety, the chiles mellowed out just enough, and the whole thing tasted like the Southwest in a baking dish. That’s the version I’m sharing today. It’s the one that made my neighbor, Mrs. Alvarez, knock on my door and ask for the recipe. And she’s from Hatch, so that felt like a win.
Why You’ll Love This Recipe
Let me tell you—this isn’t just another enchilada recipe. This is the one you’ll make when you want to impress someone without spending all day in the kitchen. It’s the one that tastes like you slaved over it, but really, it comes together in about forty minutes. I’ve tested this on my picky-eater cousin, my dad who “doesn’t do spicy,” and a friend from Santa Fe who swore her abuela’s recipe was unbeatable. All of them asked for seconds.
Here’s what makes this recipe stand out:
- Quick & Easy: From start to table in under an hour. Perfect for a weeknight when you’re craving something warm and comforting but don’t want to order takeout again.
- Simple Ingredients: No trips to a specialty store. You’ll find everything at your regular grocery—cream cheese, sour cream, shredded chicken, and of course, those beautiful Hatch chiles.
- Perfect for Entertaining: Make it ahead, pop it in the oven when guests arrive, and watch them fall in love. It’s a crowd-pleaser that works for potlucks, family dinners, or even a fancy taco Tuesday.
- Crowd-Pleaser: The creamy sauce mellows out the heat of the chiles, so even people who usually shy away from spicy food will dig in. My six-year-old nephew ate three.
- Unbelievably Delicious: The combination of tender chicken, roasted Hatch chiles, and that luscious cream sauce is next-level comfort food. It’s the kind of meal that makes you close your eyes after the first bite.
This recipe is different because of the sauce. Most enchilada recipes use a red or green sauce that can be thin or watery. This one uses a cream cheese and sour cream base that’s thick, rich, and coats every single tortilla perfectly. It’s not just good—it’s the kind of good that makes you text your friends about it the next day.
What Ingredients You Will Need
This recipe uses simple, wholesome ingredients that come together to create something truly special. Most of these are pantry staples or easy to find at your local grocery store. Let’s break it down so you know exactly what to grab.
For the Creamy Hatch Green Chile Sauce
- 2 tablespoons unsalted butter (adds richness and helps thicken the sauce)
- 2 tablespoons all-purpose flour (creates a roux for a smooth, thick sauce)
- 1 cup chicken broth (use low-sodium so you can control the salt)
- 4 ounces cream cheese, softened (this is the magic ingredient—makes it velvety)
- 1/2 cup sour cream (adds tanginess and creaminess)
- 1 cup roasted Hatch green chiles, chopped (fresh or canned—I prefer the 505 Southwestern brand when fresh aren’t in season)
- 1/2 teaspoon garlic powder (not fresh garlic—powder blends better into the creamy sauce)
- 1/4 teaspoon cumin (just enough to hint at warmth without overpowering)
- Salt and pepper, to taste
For the Enchiladas
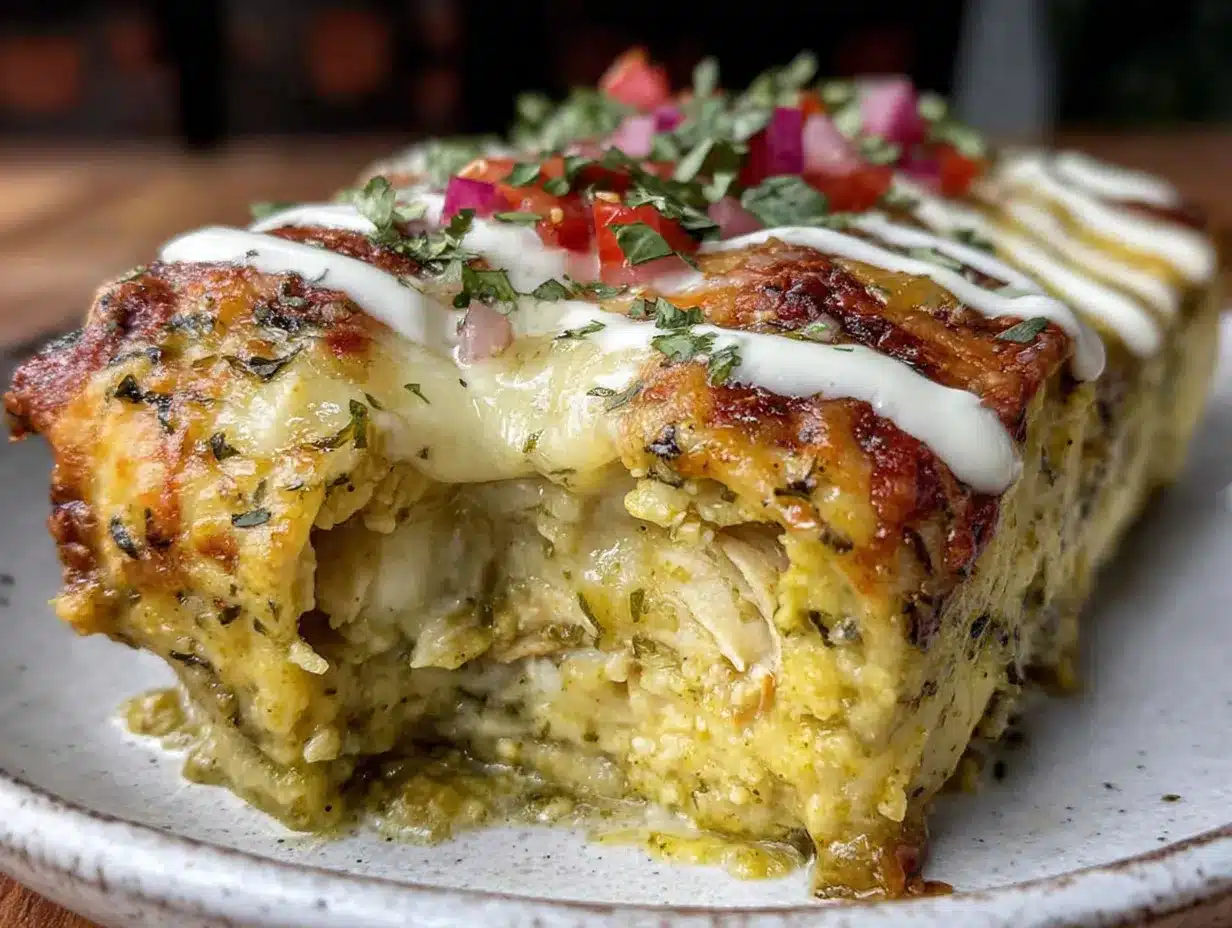
- 3 cups cooked shredded chicken (rotisserie chicken works beautifully here)
- 2 cups shredded Monterey Jack cheese (melts like a dream; you can also use a Mexican blend)
- 1/2 cup shredded sharp cheddar cheese (adds a little bite and color)
- 8-10 flour tortillas (medium size—corn tortillas work too, but flour gives a softer texture)
- 1/4 cup chopped green onions, for garnish
- 1/4 cup fresh cilantro, chopped, for garnish
When choosing your Hatch chiles, look for the medium heat level if you’re unsure. The cream sauce tames the heat significantly, but you can always use mild if you’re serving kids or spice-sensitive guests. I personally love the medium ones—they have that distinctive Hatch flavor without being overwhelming. If you’re using canned chiles, drain them well before chopping. Nobody wants watery enchiladas!
For the cream cheese, I recommend Philadelphia—it’s consistent and melts smoothly. Let it sit out for about twenty minutes before you start cooking so it blends easily into the sauce. And for the chicken, any leftover cooked chicken works. I’ve used thighs, breasts, and even a leftover rotisserie chicken from Costco. It all tastes amazing.
Equipment Needed
You don’t need a fancy kitchen to make these enchiladas. Here’s what you’ll need:
- 9×13-inch baking dish (glass or ceramic works best—metal can sometimes react with the acidic chiles)
- Medium saucepan (for making the sauce)
- Whisk (to keep the sauce smooth and lump-free)
- Large skillet (if you’re warming the tortillas before rolling)
- Cutting board and sharp knife (for chopping chiles and garnishes)
- Mixing bowl (for combining the chicken and some cheese)
- Spatula or wooden spoon
- Measuring cups and spoons
If you don’t have a whisk, a fork works in a pinch—just be prepared to whisk a little harder. And if you don’t have a 9×13 dish, you can use two smaller dishes or even a cast-iron skillet. I once made these in a disposable aluminum pan for a potluck, and they turned out perfectly. Don’t let missing equipment stop you!
One tip: if you’re using a metal baking dish, keep an eye on the edges. Metal conducts heat faster, so the edges might brown more quickly. Just cover with foil if needed.
Preparation Method
Alright, let’s get cooking. I’ll walk you through every step so you feel confident, even if it’s your first time making enchiladas from scratch.
- Preheat your oven to 375°F (190°C). While it’s heating, lightly grease your 9×13 baking dish with butter or non-stick spray. This prevents sticking and makes cleanup easier.
- Make the creamy Hatch green chile sauce. In a medium saucepan over medium heat, melt the butter. Once it’s bubbling, whisk in the flour and cook for about 1 minute. You’re looking for a pale golden color—don’t let it brown. This is your roux, and it’s the foundation of the sauce. Slowly pour in the chicken broth while whisking constantly. Keep whisking until the mixture thickens, about 2-3 minutes. It should look like a thin gravy at this point.
- Add the cream cheese and sour cream. Reduce the heat to low. Add the softened cream cheese in chunks, whisking until completely smooth. Then whisk in the sour cream. The sauce will look glossy and luxurious. Stir in the chopped Hatch chiles, garlic powder, cumin, and a pinch of salt and pepper. Taste it! You might want a little more salt or an extra pinch of cumin. Set the sauce aside. If it thickens too much while sitting, just whisk in a splash of milk or broth.
- Prepare the chicken filling. In a mixing bowl, combine the shredded chicken with about 1/2 cup of the Monterey Jack cheese and 2 tablespoons of the sauce. This keeps the chicken moist and flavorful. Don’t skip this step—it makes a difference in every bite.
- Warm the tortillas. This is a game-changer. Cold tortillas crack when you roll them. Warm them in a dry skillet over medium heat for about 10 seconds per side, or wrap them in a damp paper towel and microwave for 30 seconds. They should be pliable but not hot.
- Assemble the enchiladas. Spread about 1/2 cup of the sauce evenly across the bottom of your prepared baking dish. This prevents the tortillas from sticking and adds flavor to the bottom layer. Take a warm tortilla, place about 1/4 cup of the chicken mixture in a line down the center, and sprinkle a tiny bit of cheese on top. Roll it up tightly and place it seam-side down in the dish. Repeat with the remaining tortillas, fitting them snugly in a single layer. You should get about 8-10 enchiladas depending on your tortilla size.
- Top with sauce and cheese. Pour the remaining sauce over the rolled enchiladas, spreading it evenly with a spatula. Sprinkle the remaining Monterey Jack and cheddar cheese on top. Don’t be shy—the cheese is what creates that gorgeous golden crust.
- Bake. Place the dish in the preheated oven and bake for 20-25 minutes, until the sauce is bubbly and the cheese is melted and lightly browned. If you want a deeper golden top, switch to broil for the last 2 minutes—but watch it carefully so it doesn’t burn.
- Rest and garnish. Let the enchiladas rest for 5 minutes before serving. This helps them set so they don’t fall apart when you cut into them. Sprinkle with chopped green onions and fresh cilantro. Serve hot!
A quick note: if your sauce seems too thin before baking, don’t worry. The cream cheese and sour cream will thicken it as it bakes. And if it’s too thick, just add a little more broth. You’ve got this.
Cooking Tips & Techniques
After making these enchiladas more times than I can count, I’ve picked up a few tricks that make a real difference. Let me share them so you can skip my mistakes.
Don’t overfill the tortillas. I know it’s tempting to stuff them, but too much filling makes them hard to roll and they’ll burst open during baking. About 1/4 cup is perfect. Think of it as a generous spoonful, not a mountain.
Toast your chiles if using fresh ones. If you’re lucky enough to have fresh Hatch chiles, roast them under the broiler or on a gas flame until the skin is charred and blistered. Let them steam in a plastic bag for 10 minutes, then peel off the skin. The smoky flavor is incredible. I’ve burned my fingers doing this more times than I’ll admit, but it’s worth it.
Make the sauce ahead of time. You can prepare the creamy Hatch sauce up to two days in advance. Store it in the fridge and reheat it gently on the stove, whisking in a splash of milk if it’s too thick. This makes assembly night a breeze.
Use room-temperature cream cheese. Cold cream cheese will leave lumps in your sauce. Let it sit on the counter for 20-30 minutes before you start. If you forget, cut it into small cubes and microwave for 10 seconds—just don’t melt it.
Layer your cheese strategically. Mixing some cheese into the filling keeps every bite cheesy, while the cheese on top creates that beautiful crust. I learned this the hard way after making enchiladas with cheese only on top—the inside was sad and dry.
Let the enchiladas rest. I know you’ll want to dig in immediately, but resting for 5 minutes allows the sauce to thicken slightly and the flavors to meld. Plus, they’ll hold their shape better when you serve them. Trust me on this one.
Variations & Adaptations
One of the best things about this recipe is how flexible it is. Here are some ways to make it your own:
- Make it vegetarian: Swap the chicken for black beans, pinto beans, or roasted vegetables like zucchini and bell peppers. The creamy sauce works beautifully with any filling. I’ve made a version with sweet potatoes and black beans that my vegetarian sister requests every time she visits.
- Go low-carb or keto: Use low-carb tortillas or even large cabbage leaves blanched briefly in boiling water. The sauce is already keto-friendly thanks to the cream cheese and sour cream. Just skip the flour in the roux and use a low-carb thickener like xanthan gum.
- Add more heat: If you like things spicy, use hot Hatch chiles or add a diced jalapeño to the sauce. You can also sprinkle some crushed red pepper flakes on top before baking. My brother-in-law adds a tablespoon of chipotle in adobo to the sauce—it’s fiery but amazing.
- Try different cheeses: Pepper Jack adds a nice kick, while queso fresco gives a crumbly, salty finish. I’ve even used a smoked gouda that added an unexpected depth. Just avoid pre-shredded cheese if you can—it has anti-caking agents that prevent smooth melting.
- Make it dairy-free: Use a dairy-free cream cheese, vegan sour cream, and your favorite plant-based shreds. The sauce might be slightly thinner, so cook it a little longer to thicken. I’ve tested this with Kite Hill cream cheese and it worked surprisingly well.
I once made a breakfast version with scrambled eggs and chorizo instead of chicken. It was ridiculous in the best way. Don’t be afraid to experiment—this recipe is forgiving and delicious no matter what you throw in.
Serving & Storage Suggestions
These enchiladas are best served hot, straight from the oven, with a generous spoonful of the sauce from the bottom of the dish. The flavors are bold and satisfying on their own, but they pair beautifully with a few simple sides.
What to serve alongside: A simple side of Mexican rice and refried beans turns this into a full meal. A crisp green salad with lime vinaigrette cuts through the richness nicely. And don’t forget the toppings—sliced avocado, extra sour cream, a squeeze of fresh lime, or even a drizzle of hot sauce for those who want more kick.
For drinks: A cold Mexican beer like Modelo or a tangy margarita complements the creamy, smoky flavors perfectly. If you’re not drinking alcohol, a sparkling water with lime is refreshing and cleanses the palate.
Storing leftovers: These enchiladas keep beautifully in the fridge for up to 4 days. Let them cool completely, then cover the dish tightly with foil or transfer individual portions to airtight containers. The flavors actually deepen overnight—I often think they taste even better the next day.
Freezing instructions: You can freeze the assembled but unbaked enchiladas for up to 3 months. Assemble them in a freezer-safe dish, cover tightly with foil and plastic wrap, and freeze. When you’re ready to bake, thaw overnight in the fridge, then bake as directed, adding about 10 minutes to the cooking time since you’re starting from cold.
Reheating tips: For best results, reheat in a 350°F oven for about 15 minutes, covered with foil to prevent drying out. The microwave works in a pinch, but the tortillas can get a bit soft. If you’re reheating just one or two, a toaster oven is a great middle ground.
One thing I’ve noticed—the sauce thickens as it sits, so leftovers might be a little denser. Just add a splash of milk or broth when reheating to bring back that velvety texture.
Nutritional Information & Benefits
Here’s a rough estimate per serving (one enchilada, using flour tortillas and the full amount of sauce and cheese):
- Calories: Approximately 380-420
- Protein: 24g
- Fat: 22g
- Carbohydrates: 22g
- Fiber: 2g
- Sugar: 3g
These numbers will vary based on the specific brands you use and any substitutions. For a lighter version, use corn tortillas, low-fat cream cheese, and reduced-fat sour cream. You can also use less cheese on top—though I wouldn’t recommend it for the full experience!
Health benefits of key ingredients: Hatch green chiles are packed with vitamin C and capsaicin, which may boost metabolism and reduce inflammation. Chicken provides lean protein, and the calcium from the cheese supports bone health. The cream cheese and sour cream add healthy fats that help you feel satisfied and full.
This recipe is naturally gluten-free if you use corn tortillas and a gluten-free flour blend for the roux. It’s also low-carb friendly with the right tortilla choice. Just be mindful of portion sizes if you’re watching your calories—these enchiladas are rich and satisfying, so one or two is usually plenty.
I personally love that this meal feels indulgent but uses real, whole ingredients. It’s comfort food you can feel good about eating, especially when you load it up with fresh toppings.
Conclusion
These creamy Hatch green chile chicken enchiladas are more than just a recipe—they’re a little piece of New Mexico that you can bring into your own kitchen. Whether you’re recreating a memory from a favorite taqueria or trying Hatch chiles for the first time, this dish delivers every single time. It’s rich, comforting, and surprisingly easy to pull off on a busy weeknight.
I hope you make these and fall in love with them the way I did. Don’t be afraid to tweak the heat level, swap in your favorite cheese, or add extra toppings. That’s the beauty of cooking—it’s yours to play with. And honestly, even if you mess up a step, it’ll still be delicious. I’ve burned the bottom of the sauce before, and we still ate every last bite.
If you try this recipe, I’d love to hear about it. Leave a comment below and tell me how it went—did you add anything fun? Did your family love it? Share a photo on Pinterest and tag me so I can see your beautiful creation. Happy cooking, friends!
Frequently Asked Questions
Can I use canned Hatch chiles instead of fresh?
Absolutely! Canned Hatch chiles work perfectly and save time. Just make sure to drain them well before chopping so your sauce doesn’t get watery. I use the 505 Southwestern brand when fresh chiles aren’t in season, and it tastes fantastic.
How do I keep my enchiladas from getting soggy?
The key is not to oversaturate the tortillas with sauce. Spread a thin layer on the bottom of the dish, but don’t drown them. Also, warming the tortillas before rolling helps them hold up better. And letting the enchiladas rest after baking allows excess moisture to absorb.
Can I make this recipe ahead of time?
Yes! You can assemble the enchiladas completely (without baking) up to 24 hours in advance. Cover and refrigerate. When you’re ready to eat, bake as directed, adding about 5-10 minutes to the cooking time since the dish will be cold from the fridge.
What’s the best way to shred chicken for this recipe?
I use two forks to shred cooked chicken breasts or thighs. For a faster method, use a hand mixer on low speed—it shreds the chicken in seconds without making a mess. Rotisserie chicken is my go-to for convenience; just remove the skin and shred the meat.
How spicy are these enchiladas?
With medium Hatch chiles, they have a mild warmth that’s noticeable but not overwhelming. The creamy sauce tames the heat significantly. If you’re sensitive to spice, use mild chiles. If you love heat, go for hot or add extra chiles to the sauce.
Pin This Recipe!
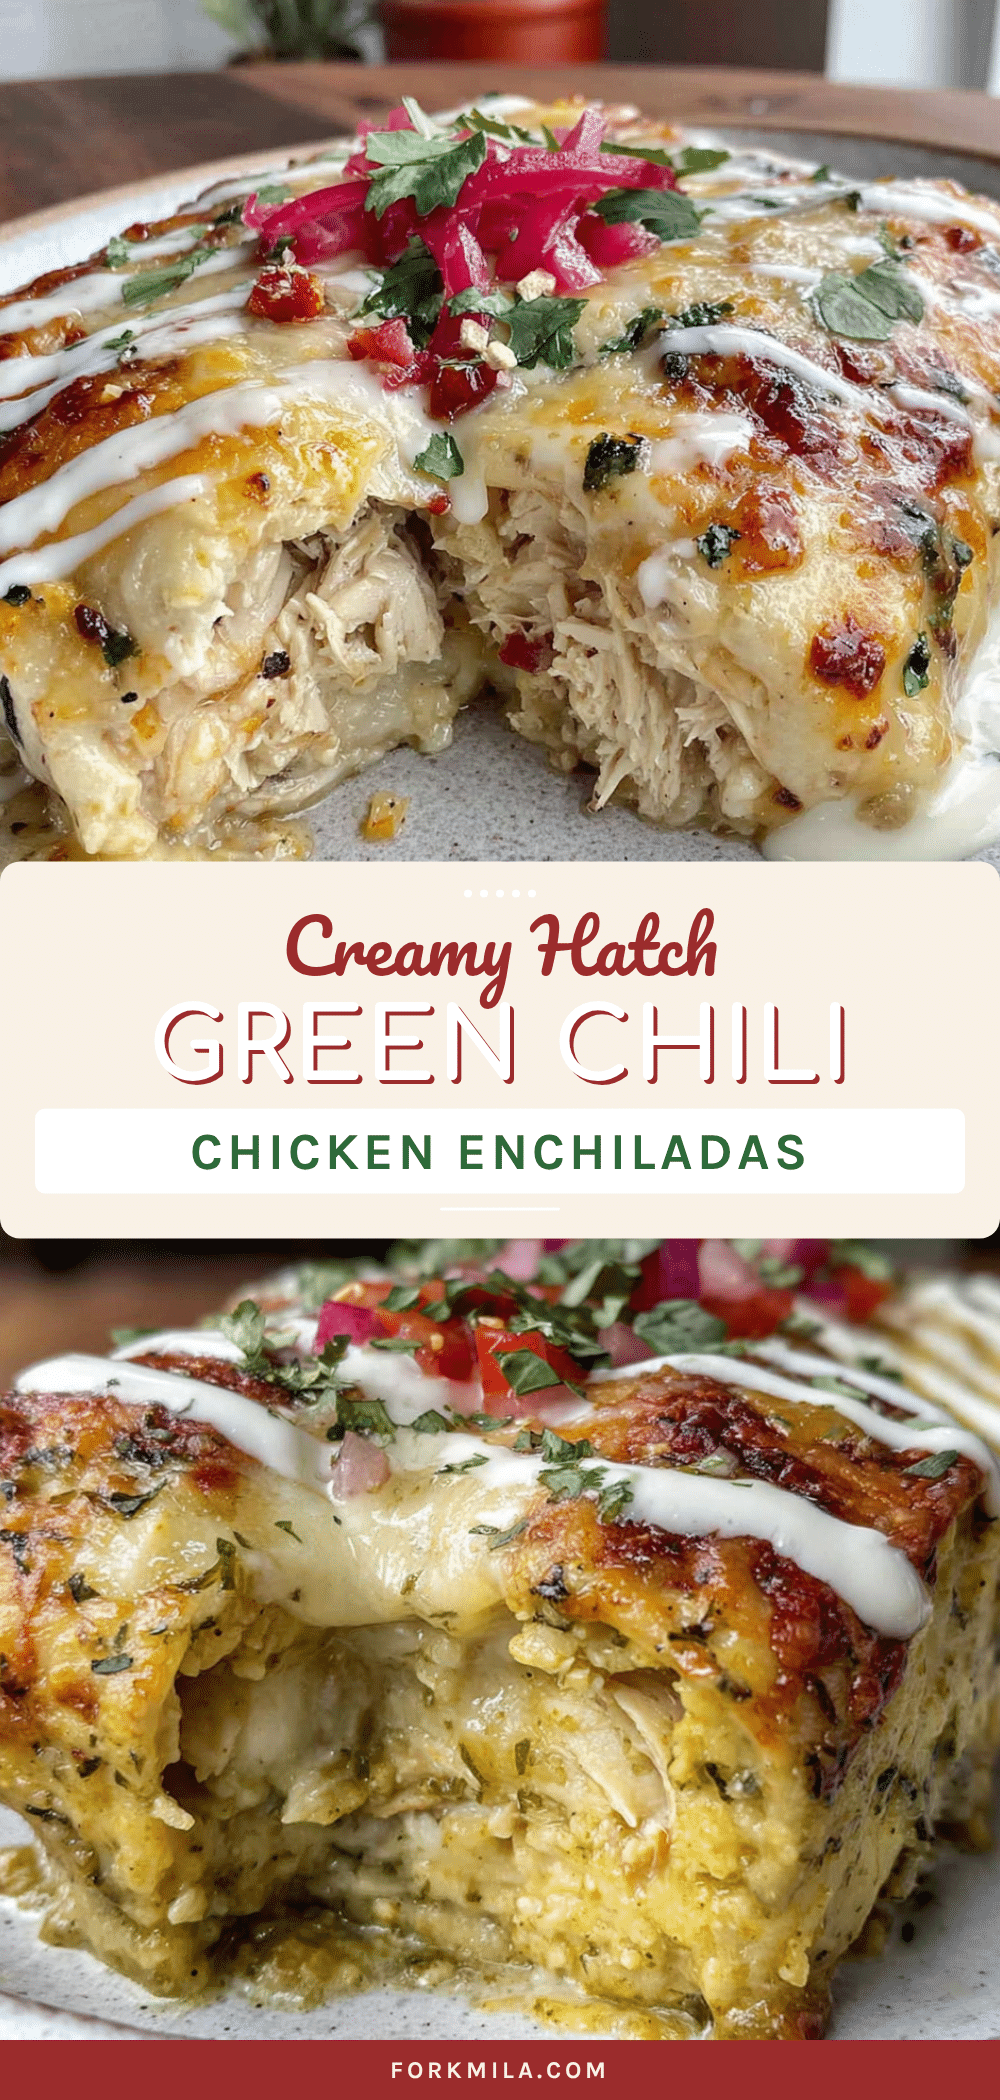
Easy Creamy Hatch Green Chile Chicken Enchiladas

These creamy Hatch green chile chicken enchiladas feature a velvety cream cheese and sour cream sauce that perfectly coats tender chicken and tortillas. Ready in under an hour, this crowd-pleasing dish brings the flavors of New Mexico to your table.
- Prep Time: 20 minutes
- Cook Time: 25 minutes
- Total Time: 45 minutes
- Yield: 8-10 servings 1x
- Category: Main Course
- Cuisine: Mexican, Southwestern
Ingredients
- 2 tablespoons unsalted butter
- 2 tablespoons all-purpose flour
- 1 cup low-sodium chicken broth
- 4 ounces cream cheese, softened
- 1/2 cup sour cream
- 1 cup roasted Hatch green chiles, chopped
- 1/2 teaspoon garlic powder
- 1/4 teaspoon cumin
- Salt and pepper, to taste
- 3 cups cooked shredded chicken
- 2 cups shredded Monterey Jack cheese
- 1/2 cup shredded sharp cheddar cheese
- 8–10 medium flour tortillas
- 1/4 cup chopped green onions, for garnish
- 1/4 cup fresh cilantro, chopped, for garnish
Instructions
- Preheat your oven to 375°F (190°C). Lightly grease a 9×13-inch baking dish with butter or non-stick spray.
- Make the creamy Hatch green chile sauce: In a medium saucepan over medium heat, melt the butter. Whisk in the flour and cook for about 1 minute until pale golden. Slowly pour in the chicken broth while whisking constantly. Continue whisking until the mixture thickens, about 2-3 minutes.
- Reduce heat to low. Add the softened cream cheese in chunks, whisking until smooth. Whisk in the sour cream. Stir in the chopped Hatch chiles, garlic powder, cumin, and a pinch of salt and pepper. Set aside.
- Prepare the chicken filling: In a mixing bowl, combine the shredded chicken with 1/2 cup of the Monterey Jack cheese and 2 tablespoons of the sauce.
- Warm the tortillas in a dry skillet over medium heat for about 10 seconds per side, or microwave wrapped in a damp paper towel for 30 seconds.
- Assemble the enchiladas: Spread about 1/2 cup of the sauce evenly across the bottom of the prepared baking dish. Place about 1/4 cup of the chicken mixture in a line down the center of each tortilla, sprinkle a little cheese on top, roll tightly, and place seam-side down in the dish. Repeat with remaining tortillas.
- Pour the remaining sauce over the rolled enchiladas, spreading evenly. Sprinkle the remaining Monterey Jack and cheddar cheese on top.
- Bake for 20-25 minutes, until bubbly and cheese is melted and lightly browned. For a deeper golden top, broil for the last 2 minutes, watching carefully.
- Let the enchiladas rest for 5 minutes before serving. Garnish with chopped green onions and fresh cilantro. Serve hot.
Notes
The sauce can be made up to 2 days ahead. Use room-temperature cream cheese for a smooth sauce. Let enchiladas rest after baking to set. For a lighter version, use corn tortillas, low-fat cream cheese, and reduced-fat sour cream.
Nutrition
- Serving Size: 1 enchilada
- Calories: 400
- Sugar: 3
- Sodium: 600
- Fat: 22
- Saturated Fat: 12
- Carbohydrates: 22
- Fiber: 2
- Protein: 24
Keywords: Hatch green chile, chicken enchiladas, creamy enchiladas, New Mexico recipe, easy dinner, weeknight meal


