I was standing in the canned goods aisle last October when it hit me — that faint, dusty-sweet smell of pumpkin puree mixing with the cardboard of the display box. And just like that, I was eight years old, sitting on my aunt Dottie’s linoleum kitchen floor, watching her peel the plastic lid off a tub of Cool Whip with her thumbnail. She had this way of making everything look effortless, even dessert. I remember the yellow cake mix box sitting on the counter, and I asked her why she wasn’t making the cake part from scratch. She just winked and said, “Honey, sometimes the best things come from the shortest ingredient lists.” I didn’t get it then. I mean, I was a kid — I thought homemade meant complicated.
But here’s the thing about that pumpkin dump cake: it tasted like fall in a way that felt almost too easy. I forgot about it for years, honestly. Then last week, I was staring at a can of pumpkin in my own pantry, trying to figure out what to bring to a neighbor’s potluck, and I remembered that golden, crumbly top and the soft, spiced layer underneath. I grabbed the cake mix without overthinking it. And let me tell you, the second that butter melted into the dry mix and started bubbling, I was right back on that linoleum floor. Maybe you’ve had that feeling — when a recipe isn’t just food, it’s a time machine.
That’s why I keep coming back to this easy pumpkin dump cake. It’s not fancy, and it doesn’t pretend to be. But it’s the kind of dessert that makes people close their eyes after the first bite. And honestly, that’s exactly the feeling I was trying to chase in that grocery aisle.
Why You’ll Love This Recipe
Let me be straight with you — I’ve tested a lot of pumpkin desserts over the years. Some were disasters (don’t ask about the pumpkin mousse incident of 2019). But this one? It’s the one I make again and again, and here’s why you’ll feel the same way.
- Quick & Easy: This comes together in about 10 minutes of active prep time. No mixer required, no creaming butter and sugar, no rolling dough. If you can open a can and sprinkle a box of cake mix, you can make this.
- Simple Ingredients: You need exactly three main ingredients — pumpkin puree, sweetened condensed milk, and yellow cake mix. Plus butter and eggs, which I’m betting you already have. No fancy grocery trips needed.
- Perfect for Fall Gatherings: This is your potluck hero, your Thanksgiving shortcut, your “I forgot to make dessert” savior. It feeds a crowd and everyone thinks you spent hours on it.
- Crowd-Pleaser: Kids love the crunchy, buttery topping. Adults love the warm pumpkin spice flavor. Even people who say they don’t like pumpkin end up going back for seconds.
- Unbelievably Delicious: The texture is what gets me every time. You get this soft, almost pudding-like pumpkin layer on the bottom, and then this golden, crispy, buttery crumble on top. It’s pure comfort.
What makes this different from other pumpkin dump cakes? I’ve found that using sweetened condensed milk instead of evaporated milk gives it a richer, creamier texture that doesn’t get watery. And I’ve learned the hard way that how you sprinkle that cake mix matters — more on that later. This isn’t just another version of a dump cake. It’s the one that makes you wonder why you ever bothered with complicated pumpkin desserts in the first place.
This is the kind of dessert that makes you close your eyes after that first warm, buttery, pumpkin-spiced bite. It’s fall on a plate, and it takes almost no effort at all.
What Ingredients You Will Need
This recipe uses simple, wholesome ingredients to create something that tastes far more complex than it is. Most of these are pantry staples, especially if you keep a well-stocked baking cabinet during the fall season.
For the Pumpkin Layer:
- 1 can (15 oz) pumpkin puree (not pumpkin pie filling — make sure you grab the 100% pure pumpkin. I prefer Libby’s for consistent texture and flavor).
- 1 can (14 oz) sweetened condensed milk (this is the secret to the creamy, rich bottom layer. Eagle Brand is my go-to, but store brands work fine too).
- 2 large eggs, at room temperature (room temperature eggs blend more smoothly into the pumpkin mixture, giving you a silkier texture).
- 1 teaspoon pumpkin pie spice (you can use a mix of ½ teaspoon cinnamon, ¼ teaspoon nutmeg, ¼ teaspoon ginger, and a pinch of cloves if you don’t have the blend).
- ½ teaspoon vanilla extract (adds warmth and rounds out the pumpkin flavor beautifully).
For the Topping:
- 1 box (15.25 oz) yellow cake mix (Duncan Hines or Betty Crocker both work great. Do not use a “butter recipe” or “pudding in the mix” version — stick with the classic yellow cake mix for the best crumbly texture).
- ¾ cup unsalted butter, melted (salted butter works too, just reduce any added salt. I use unsalted to control the salt level).
- ½ cup chopped pecans or walnuts (optional, but highly recommended for that extra crunch. Toast them lightly first for deeper flavor).
Substitution Guidance: If you’re out of sweetened condensed milk, you can use a can of evaporated milk plus ¾ cup of sugar, but the texture won’t be quite as luxurious. For a dairy-free version, use full-fat coconut milk sweetened condensed milk and a vegan butter substitute. And if you’re gluten-sensitive, there are gluten-free yellow cake mixes that work perfectly here — just check the box size and adjust accordingly.
Equipment Needed
You don’t need a fancy kitchen to make this easy pumpkin dump cake. Here’s what you’ll actually use:
- 9×13-inch baking dish (glass or ceramic works best — metal can sometimes cause the edges to brown too quickly. I use a Pyrex dish and it’s never let me down).
- Large mixing bowl (for whisking the pumpkin layer ingredients together).
- Whisk or spatula (a whisk works faster, but a sturdy spatula gets the job done too).
- Measuring cups and spoons (for the pumpkin pie spice, vanilla, and butter).
- Small saucepan or microwave-safe bowl (for melting the butter).
- Cooling rack (optional, but helps the cake cool evenly if you’re serving it warm).
If you don’t have a 9×13 dish, you can use a slightly smaller dish — just keep an eye on the baking time, as it may need a few extra minutes. And honestly, I’ve made this in a disposable aluminum pan for potlucks and it turned out just fine. No need to overthink the equipment here.
Preparation Method
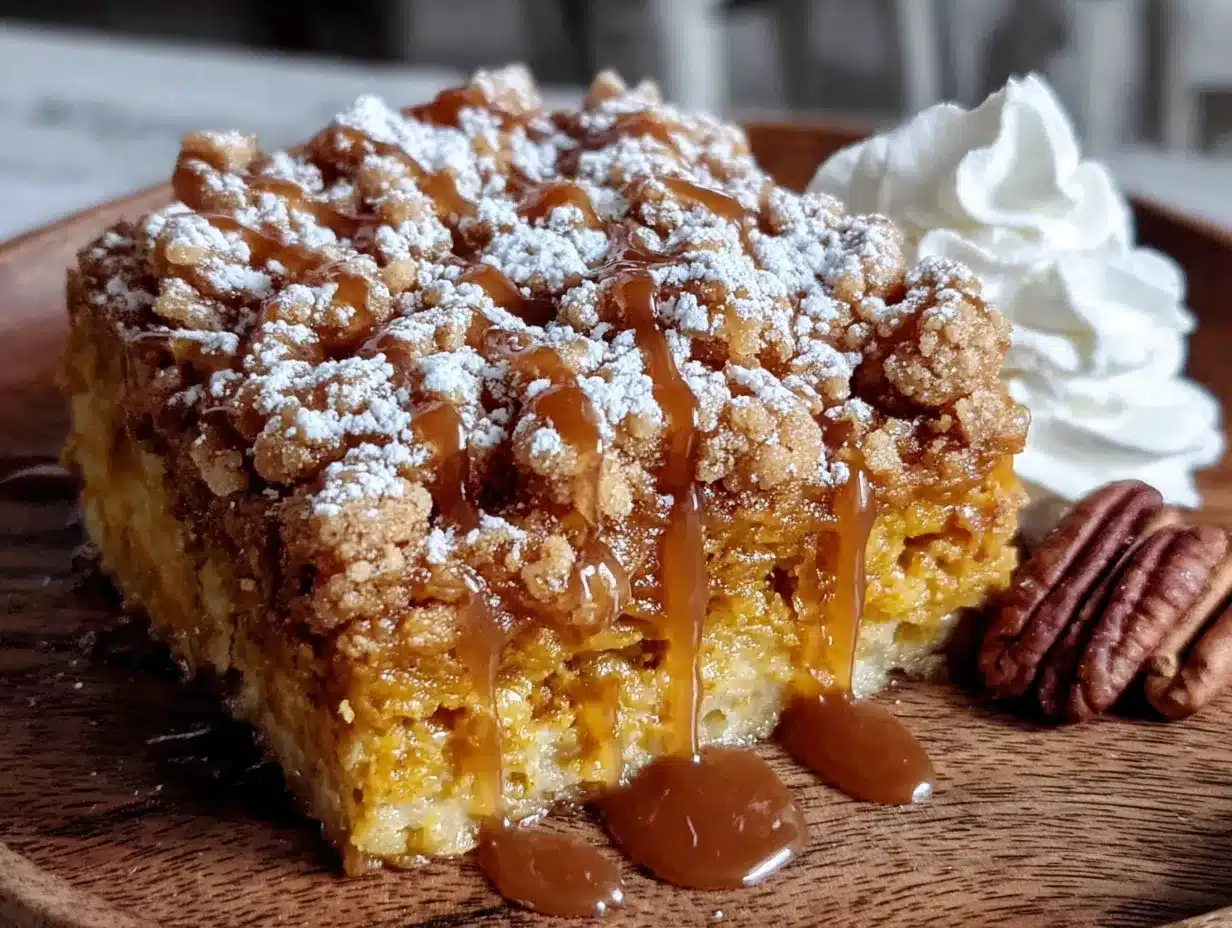
Alright, let’s get to the good part. This is one of those recipes where the method matters more than you’d think — even though it’s simple, there are a few tricks I’ve learned the hard way.
-
Preheat your oven to 350°F (175°C). Lightly grease your 9×13 baking dish with butter or non-stick spray. Don’t skip this step — the pumpkin layer can stick if you do.
-
Make the pumpkin layer. In your large mixing bowl, combine the pumpkin puree, sweetened condensed milk, eggs, pumpkin pie spice, and vanilla extract. Whisk until completely smooth and well combined. It should look like a thick, glossy orange pudding. I like to taste it at this point — it should be sweet and spiced, not bland. If it tastes flat, add another pinch of spice.
-
Pour the pumpkin mixture into the prepared baking dish. Spread it evenly with your spatula. Take your time here — an even layer means even baking. I usually give the dish a gentle shake to help it settle.
-
Now for the tricky part — the cake mix layer. Sprinkle the dry yellow cake mix evenly over the pumpkin layer. Here’s the thing: don’t dump it all in one spot and try to spread it. That creates clumps of dry mix that never fully hydrate. Instead, take handfuls and scatter it like you’re feeding chickens — evenly, gently, covering every inch. This is probably the most important step I’ve learned through trial and error.
-
Drizzle the melted butter over the cake mix. And I mean drizzle — don’t pour it all in one place. Use a spoon or a small measuring cup and go back and forth across the entire dish. Try to get the butter on as much of the cake mix as possible. Some spots will stay dry, and that’s okay — those create the crunchy bits. If you’re using nuts, sprinkle them over the top now.
-
Bake for 40-45 minutes. The cake is done when the top is deep golden brown and the edges are bubbling. You might see a few spots where the pumpkin layer peeks through — that’s normal. The center should be set but still slightly jiggly underneath the crispy top.
-
Let it cool for at least 15-20 minutes before serving. I know it’s tempting to dig in right away, but this gives the layers time to set. If you serve it too hot, it’ll be soupy. Warm is perfect. Room temperature is also wonderful.
Prep Note: You can assemble this up to 24 hours in advance and keep it covered in the fridge. Just add 5-10 minutes to the baking time if starting from cold.
Cooking Tips & Techniques
I’ve made this pumpkin dump cake at least a dozen times, and I’ve made pretty much every mistake you can imagine. Let me save you some trouble.
The biggest mistake? Using pumpkin pie filling instead of pure pumpkin. I did this once when I was rushing, and the result was overly sweet, gloopy, and weirdly firm. Stick with 100% pure pumpkin puree. Your taste buds will thank you.
Another common issue: Not melting the butter enough. If your butter is only partially melted, it won’t distribute evenly through the cake mix, and you’ll end up with dry pockets of powder. Melt it completely, but don’t let it brown — just warm enough to be liquid.
Timing tip: Start checking your cake at the 35-minute mark. Ovens vary wildly. Mine runs a little hot, so I usually pull it at 38 minutes. You want that top to be a rich, deep golden color — not pale, but not burnt either. If the top is getting too dark but the center isn’t set yet, tent it loosely with foil for the last 10 minutes.
My favorite trick? Let the cake sit overnight in the fridge. I know that sounds crazy for a “quick” dessert, but the flavors meld together beautifully, and the texture becomes even more fudgy and dense. It’s almost like a pumpkin cheesecake bar at that point. Serve it cold or gently warmed — both are incredible.
One more thing: Don’t overmix the pumpkin layer. A few small lumps are fine. Overmixing can make the eggs tough, and you want that layer to stay soft and creamy.
Variations & Adaptations
This easy pumpkin dump cake is a fantastic base recipe, and I’ve played around with it more times than I can count. Here are a few of my favorite twists:
Chocolate Pumpkin Dump Cake: Swap the yellow cake mix for a chocolate cake mix. The combination of chocolate and pumpkin is surprisingly good — think chocolate pumpkin bread, but easier. My kids devour this version.
Spiced-Up Version: Add ½ teaspoon of cardamom and a pinch of black pepper to the pumpkin layer. The pepper doesn’t make it spicy — it just enhances the pumpkin flavor in a way that’s hard to describe but impossible to ignore. I learned this trick from a spice shop owner at a farmers market, and it’s become my secret weapon.
Vegan Adaptation: Use a vegan yellow cake mix, replace the eggs with flax eggs (1 tablespoon ground flaxseed + 3 tablespoons water per egg), and use a dairy-free sweetened condensed coconut milk. Melted vegan butter works for the topping. I’ve tested this, and while the texture is slightly less creamy, it’s still absolutely delicious.
Gluten-Free Option: There are several good gluten-free yellow cake mixes on the market now. King Arthur’s is my favorite. Everything else stays the same. No one at your table will know the difference.
Personal Variation: Last Thanksgiving, I added a layer of chopped dried cranberries and orange zest to the pumpkin mixture before topping with the cake mix. The tartness cut through the sweetness perfectly, and it looked beautiful with the orange and red peeking through the golden top. It’s now my official holiday version.
Serving & Storage Suggestions
This pumpkin dump cake is incredibly versatile when it comes to serving. Here’s how I like to do it:
Serving Temperature: Warm is my absolute favorite — the pumpkin layer is soft and almost pudding-like, and the topping stays crunchy. But room temperature is fantastic too, especially if you’re serving it at a potluck or buffet. Cold from the fridge? Honestly, it’s like a completely different dessert — denser, more like a pumpkin bar. All three are worth trying.
What to Serve With It: A scoop of vanilla ice cream is the classic pairing, and for good reason — the cold, creamy ice cream against the warm, buttery cake is heaven. Whipped cream works beautifully too, especially if you add a pinch of cinnamon to it. For something a little different, try a dollop of crème fraîche or Greek yogurt — the tanginess balances the sweetness perfectly.
Storage Instructions: Cover the dish tightly with plastic wrap or foil and store in the refrigerator for up to 5 days. The topping will soften over time, but that’s not necessarily a bad thing — it becomes more like a streusel. If you want to keep it crunchier, store it uncovered in the fridge for the first day.
Freezer Instructions: This freezes beautifully. Let the cake cool completely, then wrap the entire dish in plastic wrap, then a layer of foil. Freeze for up to 3 months. Thaw overnight in the refrigerator and reheat in a 300°F oven for about 15 minutes, or microwave individual portions for 30-45 seconds.
Reheating Tips: The microwave works in a pinch, but the oven does a better job of reviving that crispy topping. If you’re reheating the whole dish, cover it with foil and warm at 325°F for 15 minutes, then uncover for 5 minutes to crisp up the top.
Nutritional Information & Benefits
Let’s be real — this is a dessert, and it’s meant to be enjoyed. But there are a few bright spots worth mentioning.
Estimated Nutritional Values (per serving, based on 12 servings):
- Calories: 380
- Total Fat: 18g
- Saturated Fat: 10g
- Carbohydrates: 52g
- Sugar: 36g
- Protein: 5g
- Fiber: 2g
- Vitamin A: 190% DV (from the pumpkin)
Health Benefits: Pumpkin is packed with vitamin A, which is fantastic for eye health and immune function. It’s also a good source of fiber and antioxidants. The eggs add protein, and if you use nuts, you’ll get some healthy fats and a little extra protein too. Is this a health food? No. But it’s not empty calories either.
Dietary Considerations: This recipe is vegetarian. With the substitutions I mentioned above, it can be made vegan and gluten-free. It contains dairy, eggs, and gluten in its standard form, and nuts if you add them.
My personal take? I love that this dessert lets me enjoy something indulgent while still getting a decent dose of vitamin A and fiber from the pumpkin. It’s comfort food that doesn’t make me feel terrible afterward — and that’s a win in my book.
Conclusion
Look, I know there are a million pumpkin desserts out there. But this easy pumpkin dump cake with yellow cake mix topping is the one I keep coming back to, year after year. It’s the one I make when I’m short on time but still want to impress. It’s the one that makes people say, “Wait, that’s it? That’s all you did?”
This recipe is forgiving, adaptable, and genuinely delicious. Whether you serve it warm with ice cream, cold from the fridge for breakfast (I won’t tell), or at a Thanksgiving table surrounded by family, it delivers every single time. I love that it feels special without being stressful — and honestly, isn’t that what we all want from our cooking?
So go ahead and make it your own. Add chocolate chips. Throw in some pecans. Swap the spice blend. This recipe can handle it. And when you take that first bite — warm, buttery, pumpkin-spiced perfection — I hope you close your eyes too.
If you make this, I’d love to hear about it. Drop a comment below and tell me how it turned out, or share your own twist on it. Happy fall, friends!
Frequently Asked Questions
Can I make this pumpkin dump cake ahead of time?
Absolutely! You can assemble it up to 24 hours in advance and keep it covered in the fridge. Just add 5-10 minutes to the baking time. It also tastes great the next day — the flavors actually get better overnight.
Can I use pumpkin pie filling instead of pumpkin puree?
I wouldn’t recommend it. Pumpkin pie filling is already sweetened and spiced, which will throw off the balance of the recipe. Stick with 100% pure pumpkin puree for the best results.
Why is my dump cake soupy in the middle?
This usually happens if the cake wasn’t baked long enough, or if the pumpkin mixture was too wet. Make sure your oven is fully preheated and bake until the center is set but still slightly jiggly. Letting it cool for at least 15-20 minutes also helps it firm up.
Can I use a different flavor of cake mix?
Yes! Spice cake mix is a fantastic option for extra fall flavor. White cake mix works too, and chocolate cake mix creates a delicious chocolate-pumpkin combo. Just avoid any “butter recipe” or “pudding in the mix” versions, as they can change the texture.
How do I store leftovers and how long will they last?
Cover the dish tightly and store in the refrigerator for up to 5 days. You can also freeze it for up to 3 months. Reheat in the oven at 325°F for about 15 minutes to revive the crispy topping.
Pin This Recipe!
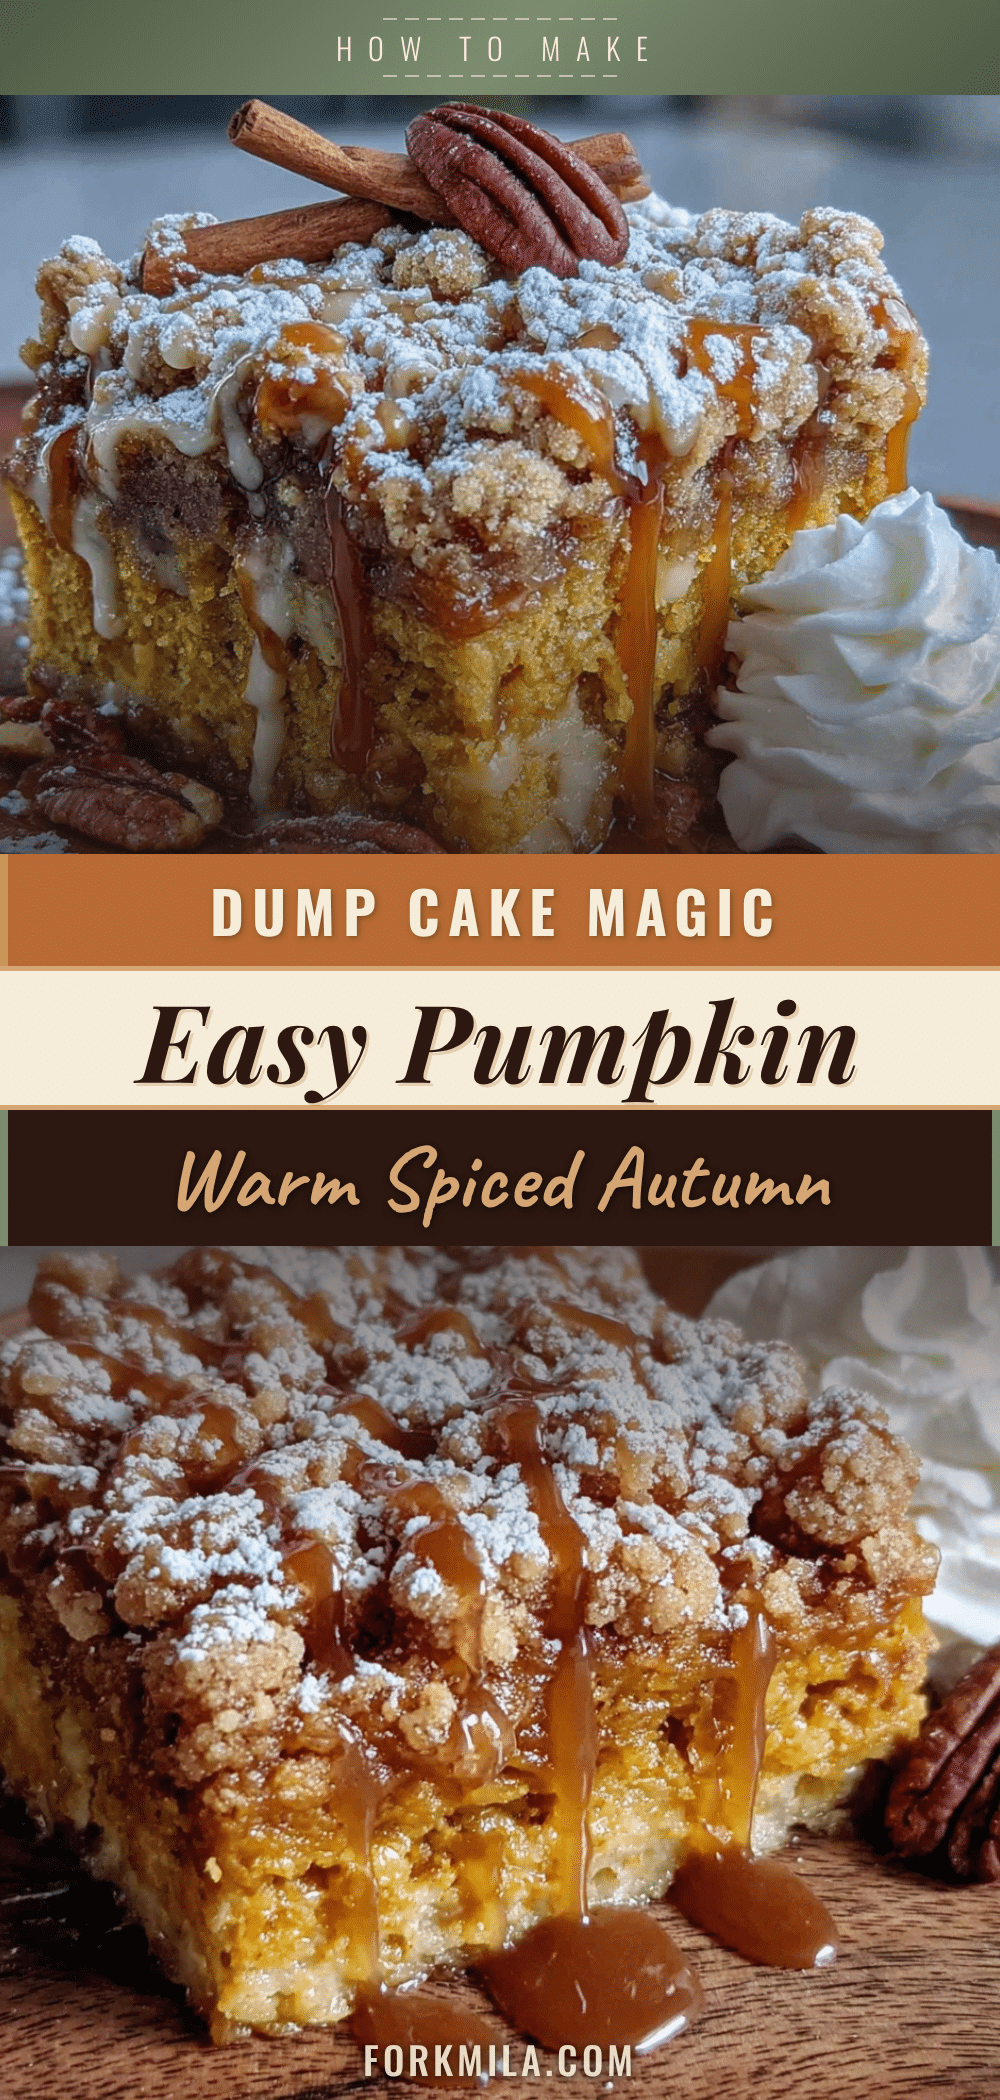
Easy Pumpkin Dump Cake: Best 3-Ingredient Fall Dessert
This easy pumpkin dump cake is a quick and delicious fall dessert made with just three main ingredients: pumpkin puree, sweetened condensed milk, and yellow cake mix. It features a soft, creamy pumpkin layer topped with a golden, buttery crumble, perfect for potlucks and holiday gatherings.
- Prep Time: 10 minutes
- Cook Time: 40-45 minutes
- Total Time: 50-55 minutes
- Yield: 12 servings 1x
- Category: Dessert
- Cuisine: American
Ingredients
- 1 can (15 oz) pumpkin puree (not pumpkin pie filling)
- 1 can (14 oz) sweetened condensed milk
- 2 large eggs, at room temperature
- 1 teaspoon pumpkin pie spice
- ½ teaspoon vanilla extract
- 1 box (15.25 oz) yellow cake mix (classic, not butter recipe or pudding in the mix)
- ¾ cup unsalted butter, melted
- ½ cup chopped pecans or walnuts (optional)
Instructions
- Preheat your oven to 350°F (175°C). Lightly grease a 9×13-inch baking dish with butter or non-stick spray.
- In a large mixing bowl, combine the pumpkin puree, sweetened condensed milk, eggs, pumpkin pie spice, and vanilla extract. Whisk until completely smooth and well combined.
- Pour the pumpkin mixture into the prepared baking dish and spread it evenly with a spatula.
- Sprinkle the dry yellow cake mix evenly over the pumpkin layer. Take handfuls and scatter it gently to cover every inch.
- Drizzle the melted butter over the cake mix, going back and forth across the entire dish to cover as much of the cake mix as possible. If using nuts, sprinkle them over the top now.
- Bake for 40-45 minutes, until the top is deep golden brown and the edges are bubbling. The center should be set but still slightly jiggly underneath the crispy top.
- Let it cool for at least 15-20 minutes before serving. Serve warm, at room temperature, or cold.
Notes
For best results, use 100% pure pumpkin puree, not pumpkin pie filling. Melt butter completely but do not let it brown. Start checking the cake at 35 minutes; if the top is browning too quickly, tent with foil. Letting the cake sit overnight in the fridge enhances the flavor and texture. To reheat, cover with foil and warm at 325°F for 15 minutes, then uncover for 5 minutes to crisp the top.
Nutrition
- Serving Size: 1 slice (1/12 of cak
- Calories: 380
- Sugar: 36
- Fat: 18
- Saturated Fat: 10
- Carbohydrates: 52
- Fiber: 2
- Protein: 5
Keywords: pumpkin dump cake, easy pumpkin dessert, 3-ingredient dessert, fall dessert, pumpkin cake, dump cake


