This was supposed to be a simple jar salad. You know the kind—layered, pretty, Instagram-worthy. I had my glass jars lined up on the counter, my chopped veggies ready, and I was feeling incredibly organized for a Sunday meal prep session. Then I grabbed the wrong pack of noodles from the pantry. Instead of the soba noodles I’d planned for a cold sesame salad, I grabbed a pack of instant ramen. I was already running late for a phone call, and honestly, I didn’t have the energy to swap them out. I just tossed the dry, crumbled noodles into the jar, added some leftover shredded chicken and hot broth, screwed the lid on, and figured I’d deal with the consequences later.
What came out of that jar at lunch the next day was nothing like the plan—and so much better. The noodles hadn’t turned into a mushy, sad paste. They were perfectly tender, having absorbed just enough broth to be flavorful without falling apart. The chicken was still juicy, the veggies had a slight crunch, and I didn’t have to microwave anything or dirty a single bowl. I sat there at my desk, spoon in one hand, jar in the other, genuinely shocked that my lazy mistake had produced the best work-from-home lunch I’d ever had.
I mean, let me tell you, I’ve been burned by soggy noodles before. We all have, right? That moment when you look forward to a comforting bowl of ramen, only to find a bloated, textureless mess. It’s a tragedy. But this jar method? It’s a game-changer. The trick is all in the layering—keeping the dry noodles separate from the hot liquid until you’re ready to eat. It’s so simple, I almost feel silly for not thinking of it sooner. Maybe you’ve been there, staring at a sad, soggy lunch, wishing for something better. These easy no-soggy-noodle chicken ramen lunch jars are that better thing. And honestly, I keep making them because they turn a chaotic Tuesday into a moment of quiet, delicious victory.
Why You’ll Love This Recipe
Let’s be real for a second. We all want a lunch that’s fast, delicious, and doesn’t require a sink full of dishes. These ramen lunch jars check all those boxes and then some. I’ve tested this method a dozen times, tweaking the liquid ratio and the noodle placement, and I can confidently say this is the foolproof way to get a perfect, hot lunch without any of the hassle.
- Quick & Easy: This comes together in under 10 minutes of prep. Seriously. You’re just layering ingredients into a jar. No cooking, no stirring, no stress. Perfect for those Sunday meal prep sessions when you’d rather be doing literally anything else.
- Simple Ingredients: No fancy grocery trips needed. You probably have ramen noodles, leftover chicken (or rotisserie!), and a few veggies in your fridge right now. It’s the ultimate pantry-staple meal.
- Perfect for Busy Weekdays: Whether you’re at the office, working from home, or packing a picnic, these jars are a lifesaver. Just add hot water, wait a few minutes, and you have a steaming bowl of comfort food on demand.
- Crowd-Pleaser: I’ve made these for my family and friends, and they always get the same reaction—surprise that it actually works, followed by a request for the recipe. Kids love the “magic” of the noodles cooking in the jar.
- Unbelievably Delicious: The texture is what gets me every time. The noodles are firm but tender, the broth is flavorful, and the veggies retain a perfect crunch. It’s not just a sad desk lunch—it’s a genuinely satisfying meal.
What makes this recipe different from the rest? It’s the layering technique. By keeping the dry noodles and delicate toppings away from the hot water until you’re ready to eat, you avoid the dreaded soggy noodle syndrome. It’s a simple hack, but it changes everything. This isn’t just another ramen hack—it’s your new favorite way to eat lunch. It’s comfort food reimagined for the modern, busy life—faster, smarter, but with the same soul-soothing satisfaction.
What Ingredients You Will Need
This recipe uses simple, wholesome ingredients to deliver bold flavor and satisfying texture without the fuss. Most of these are pantry staples, making it incredibly easy to throw together on a whim.
- Instant Ramen Noodles (2 packages): The star of the show. I prefer the ones from Nissin or Maruchan for their consistent texture. Discard the seasoning packets or save them for another use. We’re making our own, better broth here. (Pro-tip: Look for “premium” or “hearty” ramen blocks for a thicker, chewier noodle.)
- Cooked Chicken (1 cup, shredded or diced): Leftover rotisserie chicken is my go-to for convenience. You can also use poached chicken breasts, grilled chicken thighs, or even canned chicken in a pinch. The chicken adds protein and makes this a complete meal.
- Low-Sodium Soy Sauce (2 tablespoons): This is the base of our savory broth. Low-sodium is key here so you can control the salt level. If you only have regular soy sauce, use 1 ½ tablespoons and taste before adding more.
- Miso Paste (1 tablespoon, white or yellow): This adds a deep, umami richness that you just can’t get from a seasoning packet. I like the Hikari brand for its smooth, mellow flavor. It dissolves easily in hot water. (You can find it in the refrigerated section of most grocery stores.)
- Rice Vinegar (1 tablespoon): A little bit of acidity brightens up the whole dish and balances the richness of the broth. Unseasoned rice vinegar is best.
- Sesame Oil (1 teaspoon): A small amount goes a long way. It adds a nutty, toasty aroma that makes the ramen taste restaurant-quality.
- Garlic (2 cloves, minced): Fresh garlic is non-negotiable here. It provides a pungent, aromatic kick that powdered garlic just can’t replicate.
- Fresh Ginger (1 teaspoon, grated): Another aromatic powerhouse. Grate it on a microplane for the best flavor distribution. It adds a warm, slightly spicy note.
- Vegetables (1 cup, total): This is where you can get creative. I usually use a mix of:
- Carrots (julienned): For a sweet crunch.
- Snow Peas or Sugar Snap Peas (halved): For a fresh, snappy texture.
- Corn Kernels (frozen or canned, drained): Adds a pop of sweetness.
- Green Onions (sliced): For a mild oniony finish.
- Optional Toppings:
- Soft-Boiled Egg (halved): The classic ramen companion. It adds richness and protein.
- Seaweed Snacks (crumbled): For a salty, ocean-y flavor.
- Sesame Seeds (toasted): For a nutty garnish.
- Chili Oil or Sriracha: For heat lovers.
Equipment Needed
You don’t need a professional kitchen for this, which is part of the beauty. Here’s what you’ll need:
- Wide-Mouth Mason Jars (2, 16-ounce or 24-ounce): The wide mouth is crucial for easy layering and eating. I’ve tried standard-mouth jars, and it’s a frustrating mess trying to get the noodles out. Ball or Mason brands are reliable. (Tip: Run the jars under hot water before filling to prevent thermal shock when you add boiling water later.)
- Small Bowl or Liquid Measuring Cup: For mixing the broth concentrate.
- Cutting Board and Knife: For prepping your veggies and chicken.
- Measuring Spoons: For accuracy with the soy sauce, miso, and vinegar.
- Microplane or Grater: For grating the fresh ginger and garlic. A fine grater works, but a microplane is faster and creates a paste that dissolves instantly.
- Tea Kettle or Small Pot: To boil water. An electric kettle is the fastest option, but a pot on the stove works perfectly fine.
I’ve made these jars with a cheap kettle and a fancy one—the results are the same. Don’t overthink the equipment. The most important tool is the jar itself.
Preparation Method
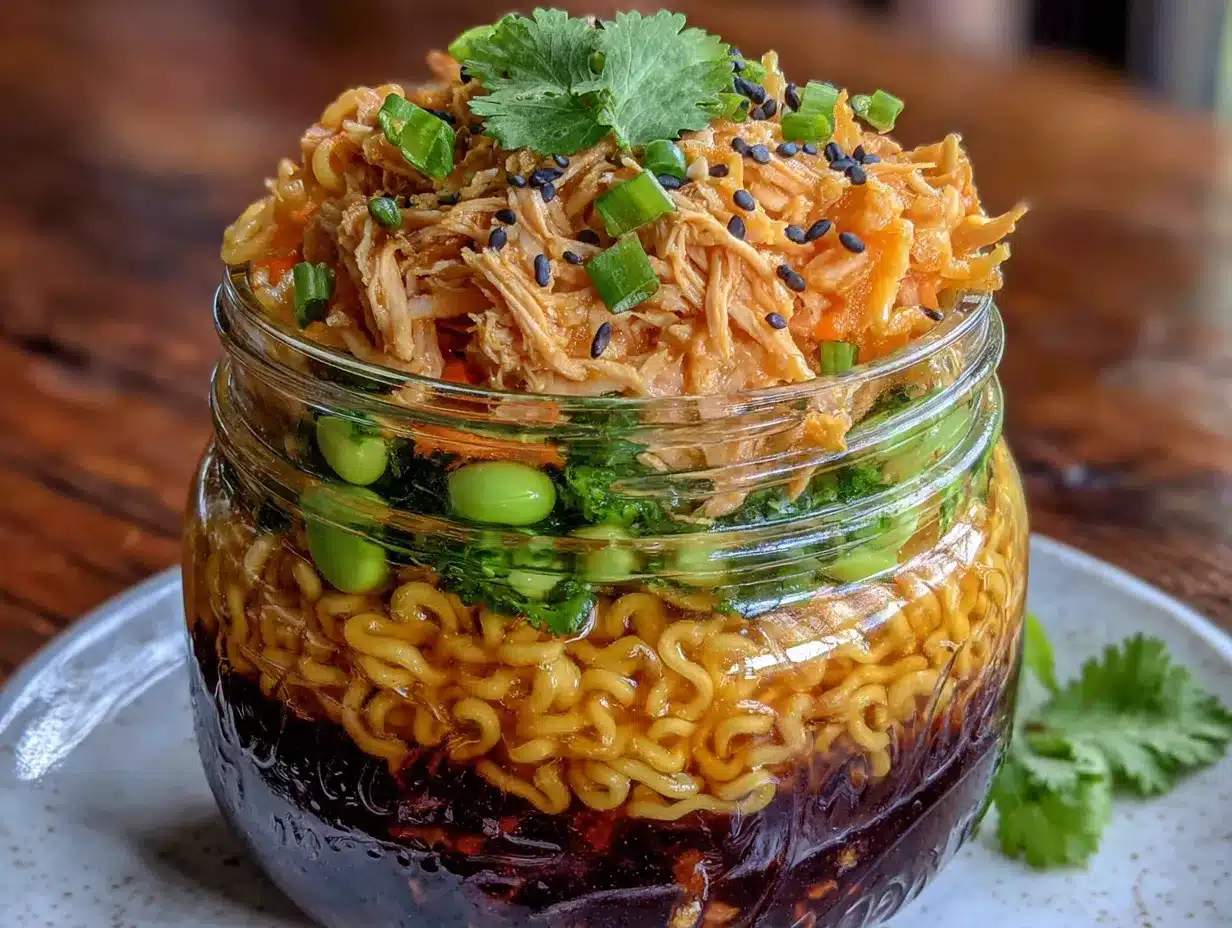
Here’s the step-by-step process. Follow this order, and you will never have a soggy noodle again. I promise.
- Prepare the Broth Concentrate: In your small bowl or liquid measuring cup, combine the low-sodium soy sauce, miso paste, rice vinegar, sesame oil, minced garlic, and grated ginger. Whisk until the miso is fully dissolved and the mixture is smooth. It will be a thick, fragrant paste. Set this aside. This is your flavor bomb.
- Layer the Jars (Bottom Layer – Flavor Base & Protein): Divide the broth concentrate evenly between your two wide-mouth mason jars. Spoon it into the bottom. Next, divide the shredded or diced cooked chicken between the jars, placing it directly on top of the concentrate. This allows the chicken to soak up the flavors as the jar sits.
- Layer the Jars (Middle Layer – The Veggies): Now, add your chosen vegetables. This layer acts as a barrier. I like to start with the heartier veggies like julienned carrots and snow peas, then add the softer ones like corn and green onions. Pack them down gently but firmly. This layer should completely cover the chicken and create a solid “lid” of veggies.
- Layer the Jars (Top Layer – The Dry Noodles): This is the most important step. Break the instant ramen noodle blocks in half (or into smaller pieces, depending on the size of your jar mouth). Place the dry, uncooked noodles on top of the vegetable layer. Do not press them down. You want them to sit loosely on top. This is what keeps them from getting soggy. The hot water will only reach them when you pour it in right before eating.
- Seal and Store: Screw the lids on tightly. Store the jars in the refrigerator for up to 4 days. The noodles will stay perfectly dry and firm because they are separated from the moist ingredients below by the vegetable barrier.
- When You’re Ready to Eat: Remove a jar from the fridge. Remove the lid. Pour boiling water from your kettle or pot into the jar, filling it until the noodles are just covered. The water needs to be at a rolling boil for the noodles to cook properly.
- Steep and Stir: Put the lid back on loosely (just resting on top, not screwed tight) to trap the heat. Let it sit for 3 to 4 minutes. You’ll see the noodles soften and absorb the liquid. After 3 minutes, give it a good stir with a fork or chopsticks to mix the broth concentrate from the bottom with the hot water and noodles. The miso and soy sauce will dissolve and create a beautiful, savory broth.
- Add Toppings and Enjoy: If you’re using a soft-boiled egg, seaweed, or sesame seeds, add them now. Stir gently one more time. Eat directly from the jar! The wide mouth makes it easy to get every last noodle and piece of chicken.
Cooking Tips & Techniques
I’ve made every mistake in the book so you don’t have to. Here are my hard-earned tips for perfect results every time.
- The Water Must Be Boiling: This is non-negotiable. Lukewarm water from the tap won’t cook the noodles. It will just make them warm and chewy. Use a kettle that whistles or a pot where you can see the vigorous, rolling bubbles. The heat is what rehydrates and softens the ramen.
- Don’t Overfill the Jar: When you pour the boiling water, leave about a half-inch of space at the top. This gives you room to stir without sloshing hot liquid everywhere. Trust me, I’ve learned this the hard way (and have the slightly burned fingers to prove it).
- Patience is a Virtue: Let the jar sit for the full 3-4 minutes. I know you’re hungry, but the noodles need that time to absorb the liquid and become tender. If you stir too early, you’ll end up with some hard, crunchy bits mixed in with the soft ones.
- Pack Your Veggies Tightly: The vegetable layer is your defense against sogginess. If there are gaps, steam from the chicken and broth concentrate can rise and soften the noodles over time. A tight, compact layer of veggies prevents this.
- Use a Fork to Stir: Chopsticks are traditional and fun, but a fork is actually better for breaking up the ramen block and mixing everything evenly. I keep a plastic fork in my desk drawer specifically for this purpose.
Variations & Adaptations
This recipe is a fantastic base for customization. Here are some of my favorite ways to switch it up.
- Spicy Gochujang Ramen: Add 1 tablespoon of gochujang (Korean chili paste) to the broth concentrate. It adds a sweet, spicy, and deeply savory kick. I’d also add some kimchi in the vegetable layer for extra tang and crunch. This is my personal favorite when I need a serious flavor punch.
- Vegetarian or Vegan “Chicken” Ramen: Replace the chicken with 1 cup of cubed, extra-firm tofu (pressed and pan-fried for best texture) or a generous handful of shiitake mushrooms. Use a vegan-friendly miso paste and ensure your ramen noodles are egg-free (most instant varieties are). The mushrooms add a meaty, umami flavor that is incredibly satisfying.
- Peanut Butter “Sesame” Noodles: This is a fun twist. Add 1 tablespoon of creamy peanut butter to the broth concentrate. It melts into the hot water, creating a rich, nutty, and slightly creamy broth. It pairs beautifully with shredded carrots, cucumber slices, and a sprinkle of crushed peanuts on top.
- Low-Carb/Zucchini Noodle Version: Swap the ramen noodles for a generous portion of spiralized zucchini or zucchini “zoodles.” Do not cook them. Layer them in the jar just like the ramen. When you add the hot water, let it sit for only 1-2 minutes to warm the zoodles through. They will remain crisp and fresh, and the broth is still amazing.
Serving & Storage Suggestions
These jars are designed for convenience, but a little extra care goes a long way.
- Serving Temperature: Eat these jars hot, straight after steeping. The broth should be steaming. If it’s not hot enough after 4 minutes, microwave the jar (without the lid!) for 30 seconds. The wide mouth makes it safe for microwave use.
- Presentation: For a pretty presentation, add your toppings (egg, seaweed, sesame seeds) right before serving. The contrast of the bright green onions against the golden broth is very appealing. I sometimes eat mine straight from the jar, but for a nicer lunch at home, I’ll pour it into a bowl.
- Storage: Store the uncooked jars in the refrigerator for up to 4 days. The noodles will remain perfectly dry. Do not freeze the assembled jars, as the vegetables will become watery and the texture will be compromised upon thawing.
- Reheating (If Needed): If you’ve already added the hot water and let it steep, you can reheat the ramen in the microwave for 30-60 seconds. Add a splash of water or extra broth if it has thickened too much. The noodles will soften further, so it’s best to eat it right away.
- Flavor Development: The flavors in the broth concentrate actually meld together beautifully in the fridge overnight. The garlic and ginger infuse the soy sauce and miso, making the second-day jar taste even more complex than the first. It’s a happy accident I discovered by forgetting to eat one.
Nutritional Information & Benefits
This is a balanced, satisfying meal that you can feel good about eating. Here’s a rough estimate per serving (one jar, without optional egg or extra toppings).
| Nutrient | Amount Per Serving |
|---|---|
| Calories | ~420 |
| Protein | ~30g |
| Fat | ~15g |
| Carbohydrates | ~45g |
| Fiber | ~5g |
| Sodium | ~800mg (varies by soy sauce) |
Pin This Recipe!
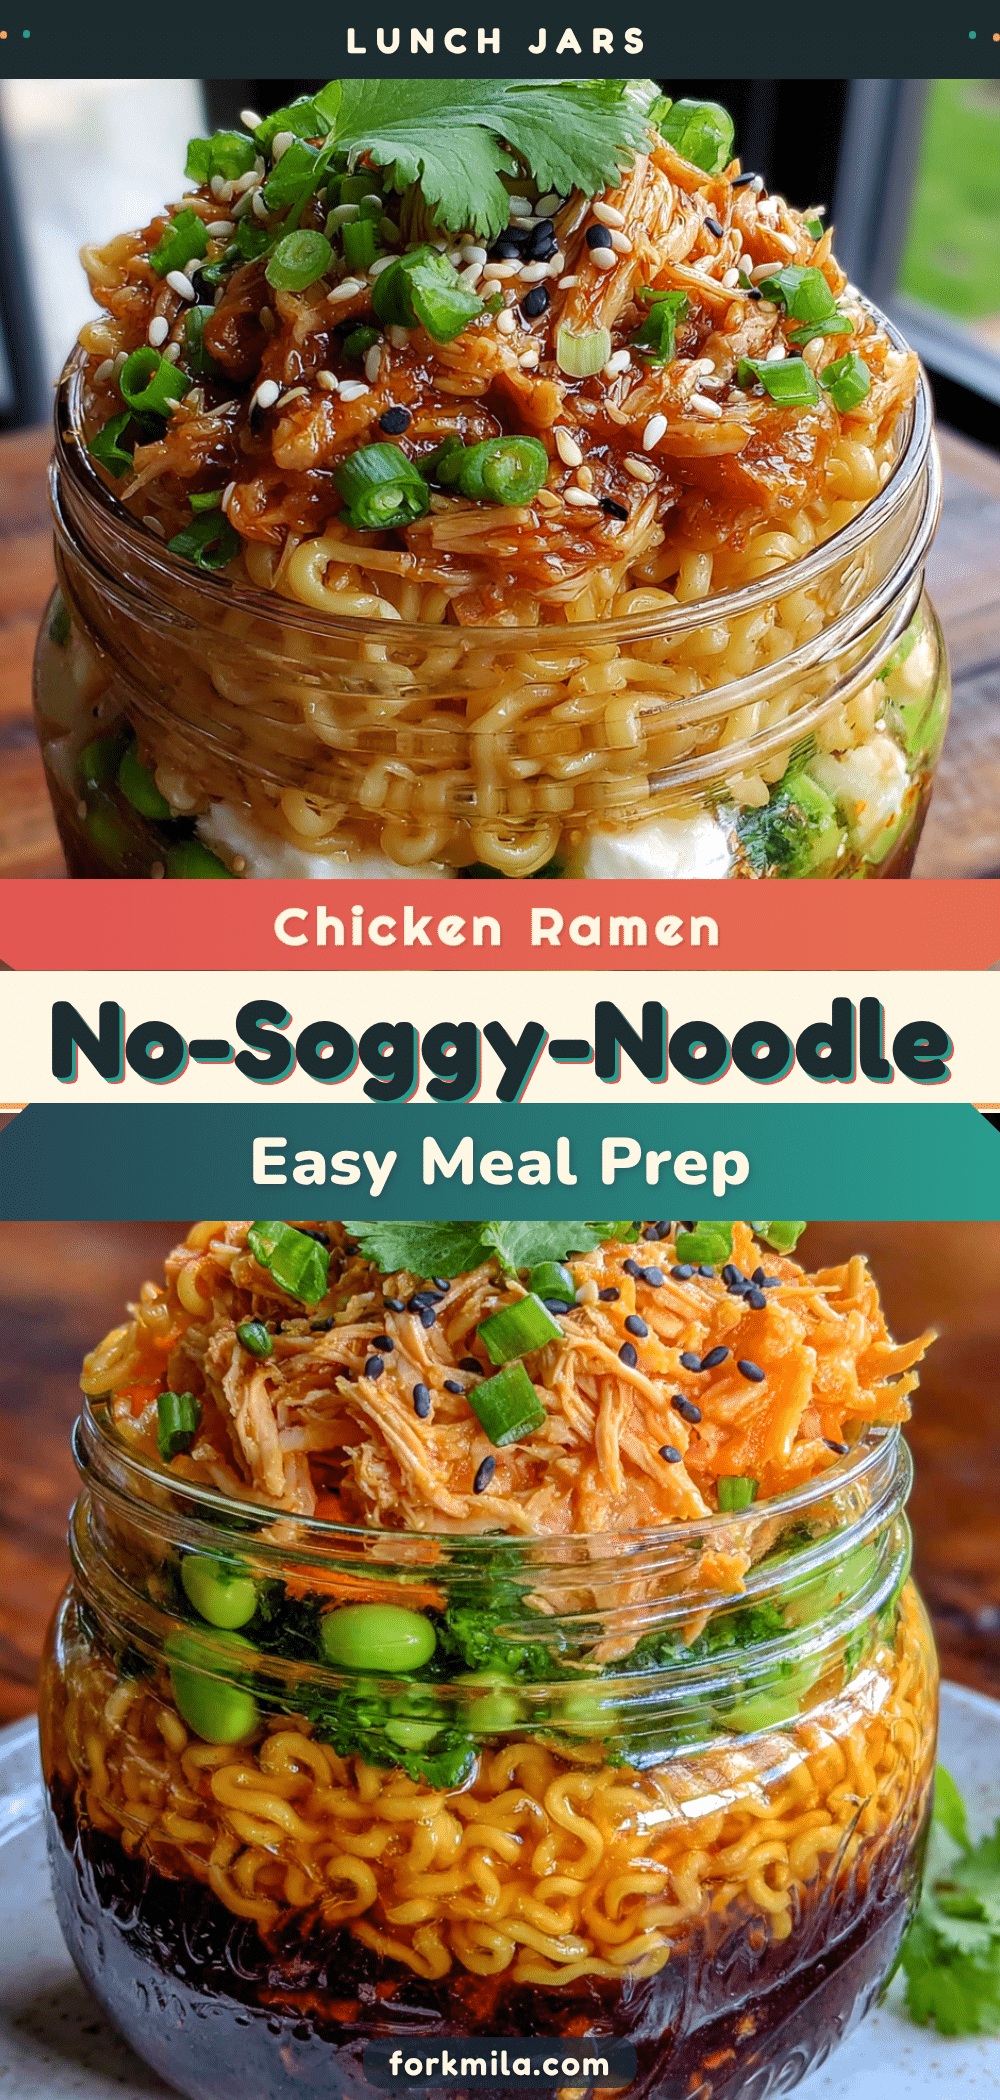
Easy No-Soggy Noodle Chicken Ramen Lunch Jars
These easy no-soggy noodle chicken ramen lunch jars are a game-changer for busy weekdays. Just layer ingredients in a jar, add hot water when ready, and enjoy a perfectly tender, flavorful ramen without any mushy noodles.
- Prep Time: 10 minutes
- Cook Time: 4 minutes
- Total Time: 14 minutes
- Yield: 2 servings 1x
- Category: Main Course
- Cuisine: Japanese-inspired
Ingredients
- 2 packages instant ramen noodles (e.g., Nissin or Maruchan, seasoning packets discarded)
- 1 cup cooked chicken, shredded or diced
- 2 tablespoons low-sodium soy sauce
- 1 tablespoon white or yellow miso paste
- 1 tablespoon rice vinegar (unseasoned)
- 1 teaspoon sesame oil
- 2 cloves garlic, minced
- 1 teaspoon fresh ginger, grated
- 1 cup mixed vegetables (e.g., julienned carrots, halved snow peas or sugar snap peas, corn kernels, sliced green onions)
- Optional toppings: soft-boiled egg (halved), crumbled seaweed snacks, toasted sesame seeds, chili oil or sriracha
Instructions
- Prepare the broth concentrate: In a small bowl or liquid measuring cup, combine the low-sodium soy sauce, miso paste, rice vinegar, sesame oil, minced garlic, and grated ginger. Whisk until the miso is fully dissolved and the mixture is smooth. Set aside.
- Layer the jars (bottom layer – flavor base & protein): Divide the broth concentrate evenly between two wide-mouth mason jars. Spoon it into the bottom. Next, divide the shredded or diced cooked chicken between the jars, placing it directly on top of the concentrate.
- Layer the jars (middle layer – the veggies): Add your chosen vegetables. Start with heartier veggies like julienned carrots and snow peas, then add softer ones like corn and green onions. Pack them down gently but firmly to create a solid ‘lid’ of veggies.
- Layer the jars (top layer – the dry noodles): Break the instant ramen noodle blocks in half (or into smaller pieces). Place the dry, uncooked noodles on top of the vegetable layer. Do not press them down; they should sit loosely on top.
- Seal and store: Screw the lids on tightly. Store the jars in the refrigerator for up to 4 days.
- When you’re ready to eat: Remove a jar from the fridge. Remove the lid. Pour boiling water into the jar, filling it until the noodles are just covered.
- Steep and stir: Put the lid back on loosely (just resting on top) to trap the heat. Let it sit for 3 to 4 minutes. After 3 minutes, give it a good stir with a fork or chopsticks to mix the broth concentrate from the bottom with the hot water and noodles.
- Add toppings and enjoy: If using a soft-boiled egg, seaweed, or sesame seeds, add them now. Stir gently one more time. Eat directly from the jar.
Notes
The key to avoiding soggy noodles is the layering technique: keep dry noodles separate from moist ingredients until ready to eat. Use boiling water for proper noodle cooking. Pack veggies tightly to prevent steam from softening noodles. Jars can be stored in the fridge for up to 4 days. For best results, let the jar sit for the full 3-4 minutes before stirring.
Nutrition
- Serving Size: 1 jar
- Calories: 420
- Sugar: 6
- Sodium: 800
- Fat: 15
- Saturated Fat: 3
- Carbohydrates: 45
- Fiber: 5
- Protein: 30
Keywords: ramen lunch jars, no-soggy noodles, meal prep, chicken ramen, easy lunch, jar meals, work lunch