It was 11:47 PM on a random Thursday, and I had the weirdest craving for something chocolatey, creamy, and a little bit silly. You know that feeling when your brain decides it wants a dessert that feels like a happy memory from childhood, but your adult body is begging you not to raid the sugar stash? I was standing there in my pajamas, staring into the fridge, when I spotted a container of Greek yogurt and a ripe avocado. Honestly, I almost closed the door and grabbed a boring apple instead. But then I remembered the pack of gummy worms hiding in the back of the pantry from my nephew’s last visit. And just like that, a slightly unhinged idea was born.
I didn’t have Oreos or pudding mix—the usual suspects for a classic dirt cup. But I had cocoa powder, a little honey, and that avocado I mentioned. Let me tell you, mashing avocado into chocolate pudding at midnight feels like a secret experiment you’re not sure will work. My kitchen was quiet, the spoon was scraping the bowl, and I kept thinking, “This is either going to be genius or a total disaster.” Spoiler alert: it was genius. The texture was so silky and rich, I actually did a little happy dance right there on the cold tile floor.
That first bite hit me with this unexpected wave of nostalgia. It tasted like the dirt cups I loved as a kid, but somehow cleaner and more satisfying. I mean, my usual self would have stressed about the sugar crash the next morning, but this version? It felt like a win. I added the crushed chocolate wafer crumbs on top, poked a few gummy worms in, and snapped a photo at midnight because I knew I’d want to remember this moment. Maybe you’ve been there—standing in your kitchen, improvising with what you have, and stumbling onto something that just works. That’s how these healthy chocolate dirt cups came to be, and honestly, I haven’t stopped making them since.
Why You’ll Love This Recipe
Let me be real with you—I’ve tested this recipe about six times to get it just right. The first batch was a little too avocado-forward (you know, that grassy taste), and the second was too runny. But by batch number three, I had nailed the perfect balance. This isn’t just another healthy dessert that tastes like cardboard. It’s the real deal, and I’m saying that as someone who has eaten a lot of sad “healthy” treats in my day.
- Quick & Easy: This comes together in about 10 minutes of active prep. Seriously, if you can blend and crush, you can make this. Perfect for those last-minute school parties or when a craving hits out of nowhere.
- Simple Ingredients: You probably have most of this in your kitchen right now. No weird superfood powders or expensive extracts. Just real food that works together beautifully.
- Perfect for Kid-Friendly Fun: Whether it’s a birthday party, an Earth Day treat, or just a Tuesday that needs a little whimsy, these dirt cups deliver. Kids love the gummy worms, and adults love that they’re not loaded with processed junk.
- Crowd-Pleaser: I brought these to a potluck once, and people were shocked when I told them what was in them. They just kept saying, “Wait, there’s avocado in this?” It’s a fun little secret.
- Unbelievably Delicious: The texture is what gets me every time—silky, creamy, and deeply chocolatey without being heavy. It’s the kind of dessert that makes you close your eyes after the first spoonful.
What makes this recipe different from all the other dirt cups out there? It’s the secret ingredient, honestly. Blending avocado into the pudding base gives it this ultra-smooth texture that you just can’t get with milk and cornstarch alone. Plus, it adds healthy fats and fiber, so you actually feel satisfied after eating it—not like you need to lie down for an hour. This is comfort food reimagined: healthier, faster, but with the same soul-soothing satisfaction you remember from childhood.
What Ingredients You Will Need
This recipe uses simple, wholesome ingredients to create a dessert that feels indulgent but is actually pretty good for you. Most of these are pantry staples or easy to find at any grocery store.
- For the Chocolate Pudding Base:
- 1 large ripe avocado (should be soft to the touch, not brown inside)
- 1/4 cup unsweetened cocoa powder (I prefer Ghirardelli for its rich flavor)
- 1/4 cup honey or maple syrup (adjust to your sweetness preference)
- 1/2 cup plain Greek yogurt (full-fat or 2% works best for creaminess)
- 1/4 cup unsweetened almond milk (or any milk you have on hand)
- 1 teaspoon vanilla extract (adds warmth and depth)
- Pinch of sea salt (trust me on this—it makes the chocolate pop)
- For the “Dirt” Topping:
- 1/2 cup chocolate wafer cookies (like Oreo-style, but I use a gluten-free brand called Glutino)
- OR 1/2 cup crushed graham crackers mixed with 1 tablespoon cocoa powder
- For the Fun Factor:
- 6-8 gummy worms per cup (look for organic or reduced-sugar versions if you want)
- Optional: A few mint leaves or edible flowers for garnish (makes them look extra fancy)
A few notes on ingredient selection: When picking your avocado, make sure it’s perfectly ripe—firm but gives slightly when you press it. A hard avocado won’t blend smoothly, and an overripe one can taste bitter. I usually buy my avocados a few days ahead and let them ripen on the counter. For the cocoa powder, I’ve tried both Dutch-processed and natural, and honestly, natural cocoa gives a more intense chocolate flavor that I prefer here. If you’re dairy-free, swap the Greek yogurt for a thick coconut yogurt—just make sure it’s unsweetened so you can control the sugar level.
For the gummy worms, look for brands that use real fruit juice and avoid high-fructose corn syrup if you can. I’ve used Annie’s organic gummy worms before, and they’re a hit with kids. But honestly, any gummy worm will work—this is a forgiving recipe.
Equipment Needed
You don’t need a fancy kitchen to make these healthy chocolate dirt cups. Here’s what I use every time:
- Food processor or high-speed blender: This is key for getting that silky smooth pudding texture. I use a Cuisinart food processor, but a NutriBullet or Vitamix works great too.
- 4 small serving cups or ramekins: I love using clear glass cups so you can see the layers. Mason jars work perfectly if you want to make them portable.
- Ziploc bag and rolling pin: For crushing the cookies into dirt-like crumbs. You can also use a food processor, but smashing them by hand is oddly satisfying.
- Rubber spatula: To scrape every last bit of pudding out of the processor—don’t waste a drop!
- Measuring cups and spoons: For accuracy, though I often eyeball the honey and cocoa after the first few times.
If you don’t have a food processor, a bowl and a fork can work in a pinch, but you’ll need to mash the avocado really well. I’ve done it before, and the texture is a little chunkier—still tasty, just not as smooth. My best tip? Invest in a good food processor if you make healthy desserts often. It pays for itself in convenience.
Preparation Method
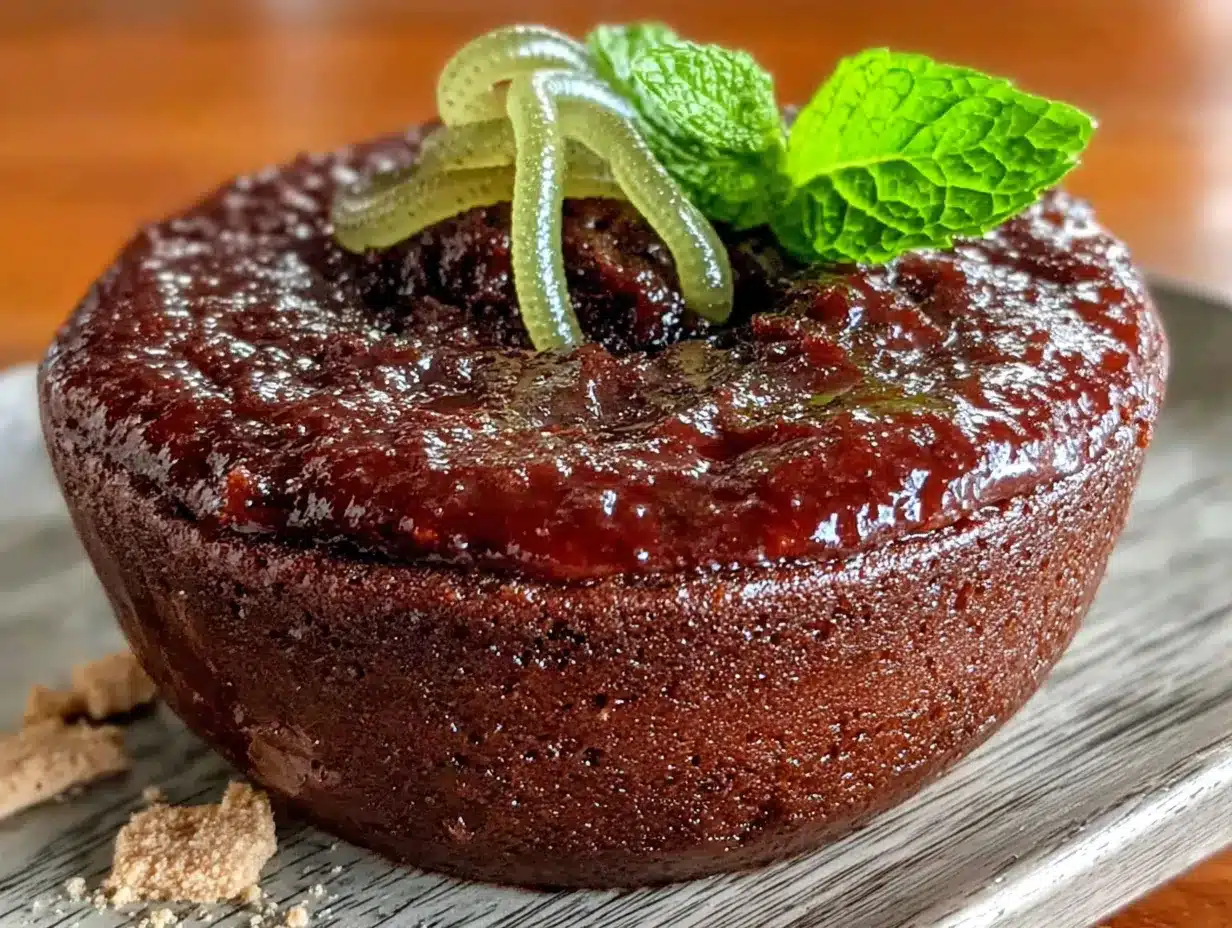
Alright, let’s get to the fun part. Here’s how to make these healthy chocolate dirt cups step by step.
- Prep your avocado: Cut the avocado in half, remove the pit, and scoop the flesh into your food processor. Make sure it’s ripe—if it’s still firm, it won’t blend into that creamy texture we’re after. I once used a slightly underripe avocado, and the pudding had little green chunks. Not ideal.
- Add the wet ingredients: To the food processor, add the Greek yogurt, almond milk, honey (or maple syrup), and vanilla extract. Don’t add the cocoa powder yet—I like to blend the avocado and liquids first to make sure it’s completely smooth. Pulse it a few times, then let it run for about 30 seconds. Scrape down the sides with your spatula.
- Incorporate the dry ingredients: Add the cocoa powder and a pinch of sea salt. Blend again for another 30-45 seconds until everything is combined and the mixture is silky smooth. Taste it here—if you want it sweeter, add a little more honey. If it’s too thick, add another tablespoon of almond milk. The consistency should be like a thick pudding, not runny.
- Chill the pudding: Transfer the pudding to a bowl, cover it with plastic wrap (press it directly onto the surface to prevent a skin from forming), and refrigerate for at least 30 minutes. This step is important—the pudding thickens as it chills, and the flavors meld together. I’ve skipped this step before when I was impatient, and the texture was a bit loose. Trust me, the wait is worth it.
- Make the dirt topping: While the pudding chills, crush your chocolate wafer cookies. Place them in a Ziploc bag, seal it, and use a rolling pin to crush them into fine crumbs. You want them to look like actual dirt—some bigger pieces are fine, but aim for mostly fine crumbs. If you’re using graham crackers with cocoa powder, mix them together in a small bowl.
- Assemble the cups: Pull the chilled pudding out of the fridge. Spoon about 1/4 cup of pudding into each serving cup. Then add a layer of the crushed cookie crumbs—about 2 tablespoons per cup. Repeat with another layer of pudding and another layer of crumbs. I like to end with the crumbs on top so it looks like a little pot of dirt.
- Add the gummy worms: Gently poke 2-3 gummy worms into each cup so they look like they’re crawling out of the dirt. You can also leave a few lying on top for a more playful look. My nephew always insists on having one worm completely buried with just its head poking out—it’s his signature move.
- Final chill (optional but recommended): Pop the assembled cups back in the fridge for another 15-20 minutes before serving. This helps the layers set and makes the presentation cleaner. But if you’re like me and can’t wait, dig in immediately—no judgment here.
And there you have it! Eight simple steps to a dessert that looks like a little garden of chocolatey goodness. The whole process takes about 10 minutes of active work, plus the chilling time.
Cooking Tips & Techniques
After making these healthy chocolate dirt cups more times than I can count, I’ve learned a few tricks that make a real difference.
Don’t over-blend the avocado. I know it sounds counterintuitive, but if you blend it for too long, the avocado can become warm and slightly bitter. Pulse it first, then blend just until smooth. You want it creamy, not heated up.
Use room temperature ingredients. Cold yogurt and cold almond milk can make the pudding seize up a bit. Let them sit on the counter for 10 minutes before blending. I learned this the hard way when my first batch came out lumpy because everything was straight from the fridge.
Taste as you go. This is the most important tip I can give you. Everyone’s sweetness preference is different, and avocados vary in size. Taste the pudding before you chill it and adjust the honey or cocoa powder as needed. I once made a batch that was too bitter because my cocoa powder was extra dark. A little extra maple syrup fixed it right up.
Crush the cookies finely. If you leave big chunks of cookie, they can get soggy and ruin the “dirt” effect. Use a rolling pin or even a heavy saucepan to get those crumbs fine. I like to leave a few slightly bigger pieces for texture, but mostly fine crumbs.
Plan your timing. The pudding needs at least 30 minutes to chill, so don’t start this recipe 10 minutes before guests arrive. I usually make the pudding the night before and assemble the cups the next day. The flavors actually get better overnight—it’s like magic.
Variations & Adaptations
One of the best things about this recipe is how easy it is to change up. Here are a few variations I’ve tried and loved:
Vegan Version: Swap the Greek yogurt for a thick coconut yogurt or silken tofu. Use maple syrup instead of honey. The texture is a tiny bit different—slightly less creamy—but still delicious. I made this for a vegan friend’s birthday, and she couldn’t stop eating them.
Nut-Free Option: Use oat milk or regular cow’s milk instead of almond milk. Most gummy worms are nut-free, but check the label if you’re serving someone with allergies. I’ve used oat milk before, and it works perfectly.
High-Protein Twist: Add a scoop of chocolate or vanilla protein powder to the pudding mixture. You might need to add a little extra almond milk to adjust the consistency. This is my go-to post-workout treat—it feels like cheating but isn’t.
Seasonal Variations: In the summer, I sometimes layer in fresh raspberries or strawberries for a fruity twist. In the fall, a sprinkle of cinnamon or pumpkin pie spice in the pudding is amazing. I once made a pumpkin chocolate version for Halloween, and it was a huge hit.
Different “Dirt” Toppings: If you don’t have chocolate wafer cookies, try crushed graham crackers, crushed pretzels (for a salty-sweet vibe), or even crushed nuts like almonds or pecans. I’ve used crushed Oreo-style cookies before, and they work great—just scrape out the cream filling first if you want to keep it healthier.
Serving & Storage Suggestions
These healthy chocolate dirt cups are best served cold, straight from the fridge. I like to let them sit out for about 5 minutes before serving so they’re not ice-cold, but that’s a personal preference.
For presentation, I use clear glass cups or small mason jars so you can see the beautiful layers of pudding and “dirt.” It makes them look so much more appealing—especially for kids. Sometimes I add a mint leaf on top or a few edible flowers for a garden vibe. It’s totally optional but adds a nice touch.
These pair wonderfully with a glass of cold milk (dairy or plant-based) or a warm cup of coffee. The bitterness of the coffee balances the sweetness of the dessert perfectly. I’ve also served them alongside fresh fruit for a more balanced snack plate.
Storage: Keep any leftover cups covered in the fridge for up to 3 days. The gummy worms will soften over time, so if you’re making them ahead, add the worms just before serving. I made the mistake of adding them the night before once, and they turned into sad, squishy blobs. Still tasty, but not as fun to look at.
Freezing: You can freeze the pudding on its own (without the dirt topping or gummy worms) for up to a month. Thaw it in the fridge overnight, then assemble fresh. I do this when I have leftover avocado that needs using up—it’s a great way to meal prep desserts.
Nutritional Information & Benefits
Here’s the rough nutritional breakdown for one serving (based on 4 servings per recipe, using Greek yogurt and honey):
- Calories: ~220
- Protein: 6g
- Fat: 12g (mostly healthy fats from avocado)
- Carbohydrates: 28g
- Fiber: 5g
- Sugar: 16g (naturally occurring from honey and minimal added)
The star ingredient here is the avocado. It’s packed with heart-healthy monounsaturated fats, fiber, and potassium. Plus, it gives the pudding that luxurious texture without any heavy cream. The Greek yogurt adds protein and probiotics, which are great for gut health. And the cocoa powder? It’s rich in antioxidants called flavonoids that can help reduce inflammation. Honestly, this is a dessert you can feel good about eating.
This recipe is naturally gluten-free if you use gluten-free wafer cookies or graham crackers. It’s also vegetarian and can easily be made vegan or dairy-free. The only potential allergen is the gummy worms—some contain gelatin (which is not vegetarian) or are processed in facilities with nuts. Always check labels if you’re serving someone with dietary restrictions.
Conclusion
I know I might be biased, but these healthy chocolate dirt cups have become one of my most-requested recipes. They’re fun, they’re delicious, and they make you feel like a kid again without the sugar crash. Whether you’re making them for a birthday party, a classroom treat, or just because you had a long week and deserve something special, they never disappoint.
I love how customizable they are—you can tweak the sweetness, swap the toppings, or make them allergy-friendly without losing the magic. And honestly, watching someone’s face light up when they see the gummy worms poking out of the “dirt” is priceless. It’s one of those simple joys that reminds me why I love cooking.
So go ahead—grab an avocado, some cocoa powder, and a pack of gummy worms. Give these a try, and let me know how they turn out! I’d love to hear about your variations in the comments, or if you made them for a special occasion. Tag me in your photos, too—I always get a kick out of seeing your creations. Happy cooking, and remember: dessert doesn’t have to be complicated to be amazing.
Frequently Asked Questions
Can I use a different fruit instead of avocado?
Avocado is key for the creamy texture, but you can use silken tofu or a very ripe banana as a substitute. Banana will change the flavor to more of a chocolate-banana vibe, which is also delicious. Just note that the texture will be slightly different—less silky and more dense.
How long do these dirt cups last in the fridge?
They’ll keep for up to 3 days in an airtight container. However, the gummy worms will soften over time, so I recommend adding them just before serving. The pudding itself actually gets better after a day—the flavors meld together beautifully.
Can I make these ahead of time for a party?
Absolutely! Make the pudding up to 2 days in advance and store it in the fridge. Assemble the cups with the dirt topping and gummy worms on the day of your party. This makes party prep so much easier—you can focus on other things while the dessert is ready to go.
Are these healthy enough for kids to eat regularly?
I’d say yes, in moderation. They have less sugar than traditional dirt cups and include healthy fats and protein from the avocado and yogurt. They’re a great option for a school lunch treat or an after-school snack. Just keep an eye on the gummy worm portion—those can add extra sugar if you go overboard.
What if I don’t have a food processor?
No problem! You can mash the avocado with a fork until very smooth, then whisk in the other ingredients vigorously. The texture won’t be as silky, but it will still taste great. A blender works too—just make sure to scrape down the sides often. I’ve even used an immersion blender in a deep bowl, and it worked fine.
Pin This Recipe!
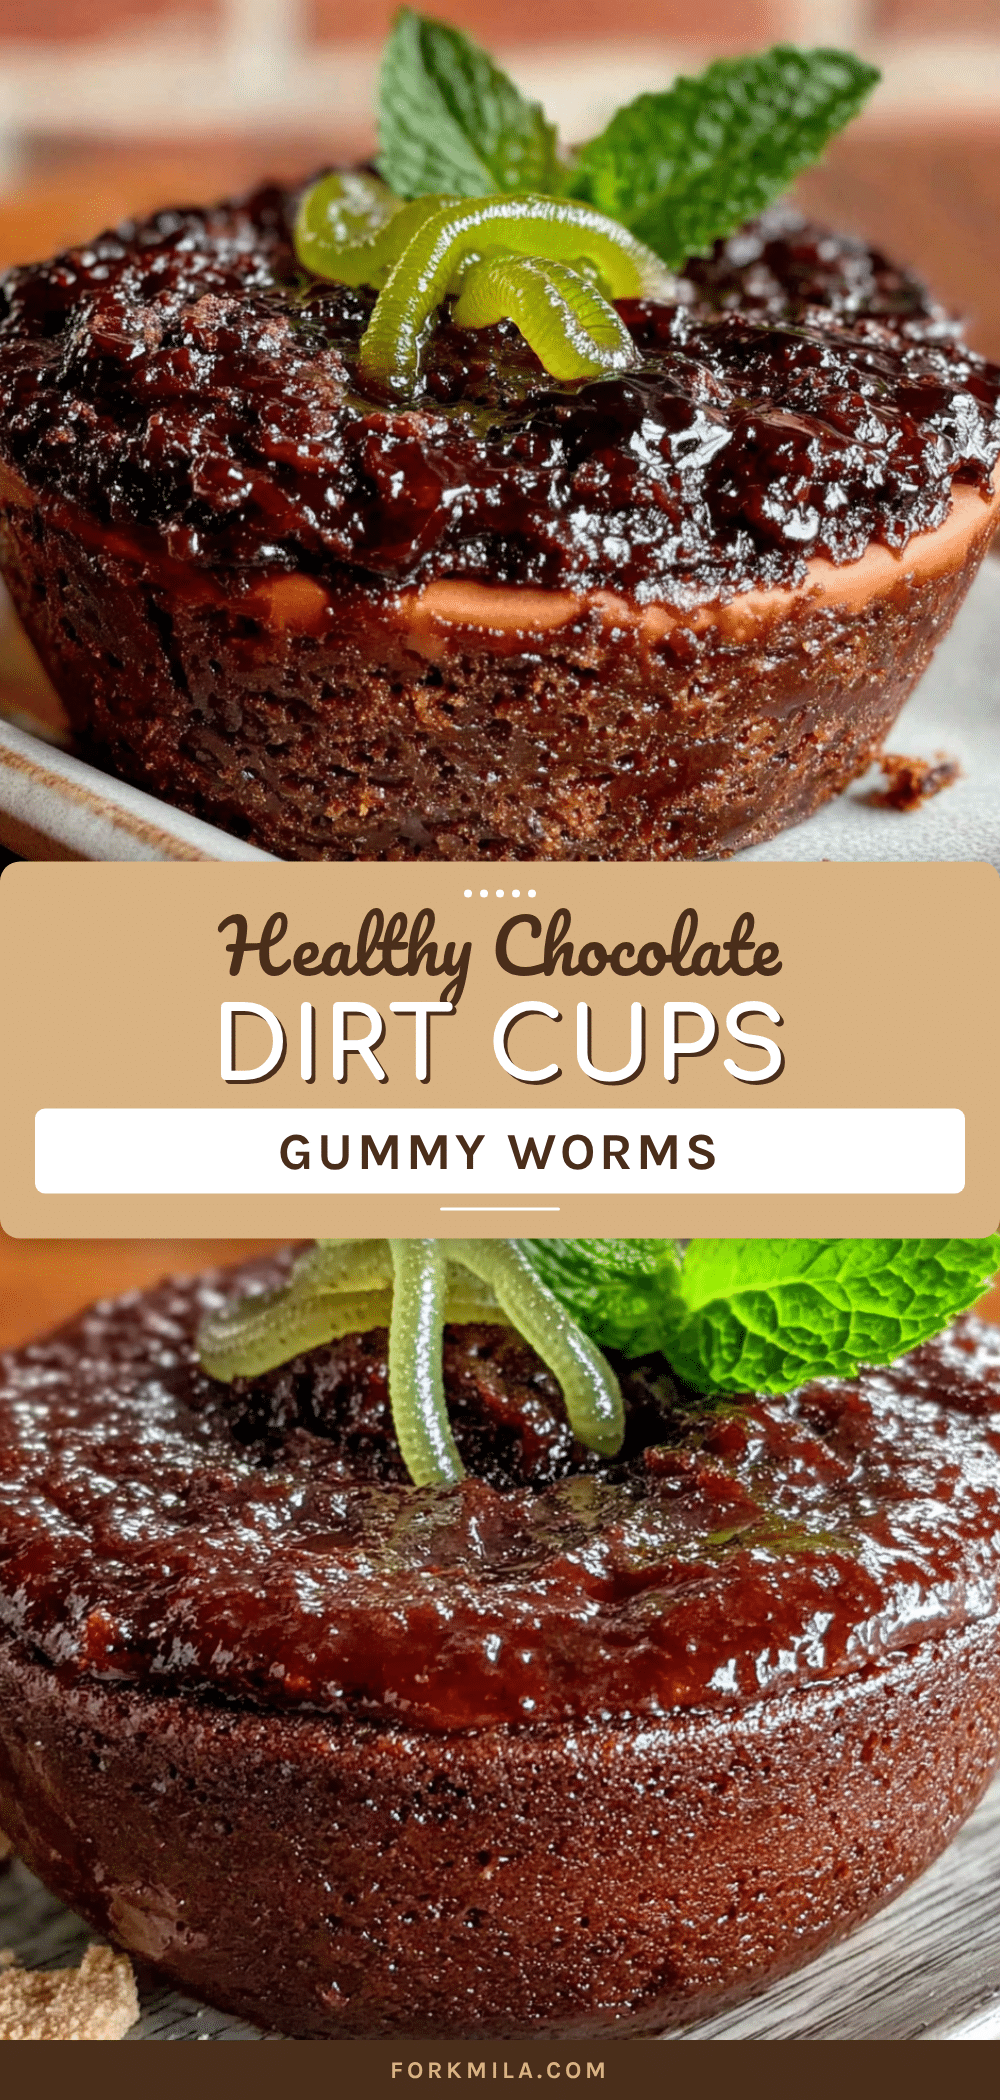
Healthy Chocolate Dirt Cups (Easy Kid-Friendly Dessert)
A healthier twist on the classic dirt cup dessert, featuring a silky avocado-chocolate pudding layered with crushed cookie ‘dirt’ and gummy worms. This quick, easy, and kid-friendly treat is made with simple ingredients and is surprisingly nutritious.
- Prep Time: 10 minutes
- Cook Time: 0 minutes
- Total Time: 40 minutes (includes 30 minutes chilling)
- Yield: 4 servings 1x
- Category: Dessert
- Cuisine: American
Ingredients
- 1 large ripe avocado
- 1/4 cup unsweetened cocoa powder
- 1/4 cup honey or maple syrup
- 1/2 cup plain Greek yogurt (full-fat or 2%)
- 1/4 cup unsweetened almond milk (or any milk)
- 1 teaspoon vanilla extract
- Pinch of sea salt
- 1/2 cup chocolate wafer cookies (or gluten-free alternative like Glutino)
- OR 1/2 cup crushed graham crackers mixed with 1 tablespoon cocoa powder
- 6–8 gummy worms per cup (organic or reduced-sugar recommended)
- Optional: mint leaves or edible flowers for garnish
Instructions
- Cut the avocado in half, remove the pit, and scoop the flesh into a food processor.
- Add Greek yogurt, almond milk, honey (or maple syrup), and vanilla extract to the food processor. Pulse a few times, then blend for about 30 seconds until smooth. Scrape down the sides.
- Add cocoa powder and a pinch of sea salt. Blend for another 30-45 seconds until silky smooth. Taste and adjust sweetness or thickness as needed.
- Transfer the pudding to a bowl, cover with plastic wrap pressed directly onto the surface, and refrigerate for at least 30 minutes to thicken.
- While the pudding chills, crush the chocolate wafer cookies in a sealed Ziploc bag using a rolling pin until they resemble fine dirt crumbs.
- Spoon about 1/4 cup of chilled pudding into each serving cup. Add a layer of crushed cookie crumbs (about 2 tablespoons per cup). Repeat with another layer of pudding and another layer of crumbs, ending with crumbs on top.
- Gently poke 2-3 gummy worms into each cup so they appear to be crawling out of the dirt.
- Optional: Refrigerate assembled cups for another 15-20 minutes before serving to set the layers. Serve cold.
Notes
Use a ripe avocado for best texture. Chill the pudding for at least 30 minutes to thicken. Add gummy worms just before serving to prevent them from softening. For a vegan version, use coconut yogurt and maple syrup. For a nut-free option, use oat milk or cow’s milk. The pudding can be made up to 2 days in advance and stored in the fridge.
Nutrition
- Serving Size: 1 cup
- Calories: 220
- Sugar: 16
- Sodium: 120
- Fat: 12
- Saturated Fat: 2
- Carbohydrates: 28
- Fiber: 5
- Protein: 6
Keywords: healthy chocolate dirt cups, avocado chocolate pudding, kid-friendly dessert, easy dessert, no-bake dessert, gluten-free dessert, healthy dessert


