It was 11:47 PM on a random Wednesday, and I had this overwhelming urge for something sweet and yeasty—the kind of craving that makes no sense at that hour but feels absolutely urgent. I didn’t have the traditional pan de muerto ingredients I usually reach for, but I had a bag of anise seeds I’d bought on a whim at the Mexican market last month and three oranges sitting in the fruit bowl. So I started mixing flour and butter in my tiny kitchen, convinced I was about to create either a masterpiece or a total disaster. Honestly, I was too tired to care which.
The radio was playing some old bolero station, and I was wearing pajama pants with a hole in the knee. That’s when it hit me—instead of the usual orange blossom water, why not go all in with fresh orange zest and let the anise do its thing? I mean, I’d been making this bread for years for Día de Muertos gatherings, but something about the late hour made me throw caution to the wind. The dough came together sticky and fragrant, and when I pulled it out of the oven at 1 AM, the whole apartment smelled like a bakery in Oaxaca.
Maybe you’ve been there—that moment when a recipe finally clicks not because you followed the rules, but because you stopped following them. This version stuck with me because it made the bread feel brighter, more aromatic, and honestly more memorable than any traditional batch I’d made before. And when I served it at my next gathering, people didn’t just eat it—they closed their eyes and asked what I’d done differently.
Why You’ll Love This Recipe
Let me tell you, after testing this pan de muerto recipe at least seven times (yes, seven—my neighbors were very happy about it), I can say with confidence that this version is the one you want for your next dinner party or festive gathering. It brings together the warmth of anise and the brightness of fresh orange zest in a way that feels both traditional and surprising.
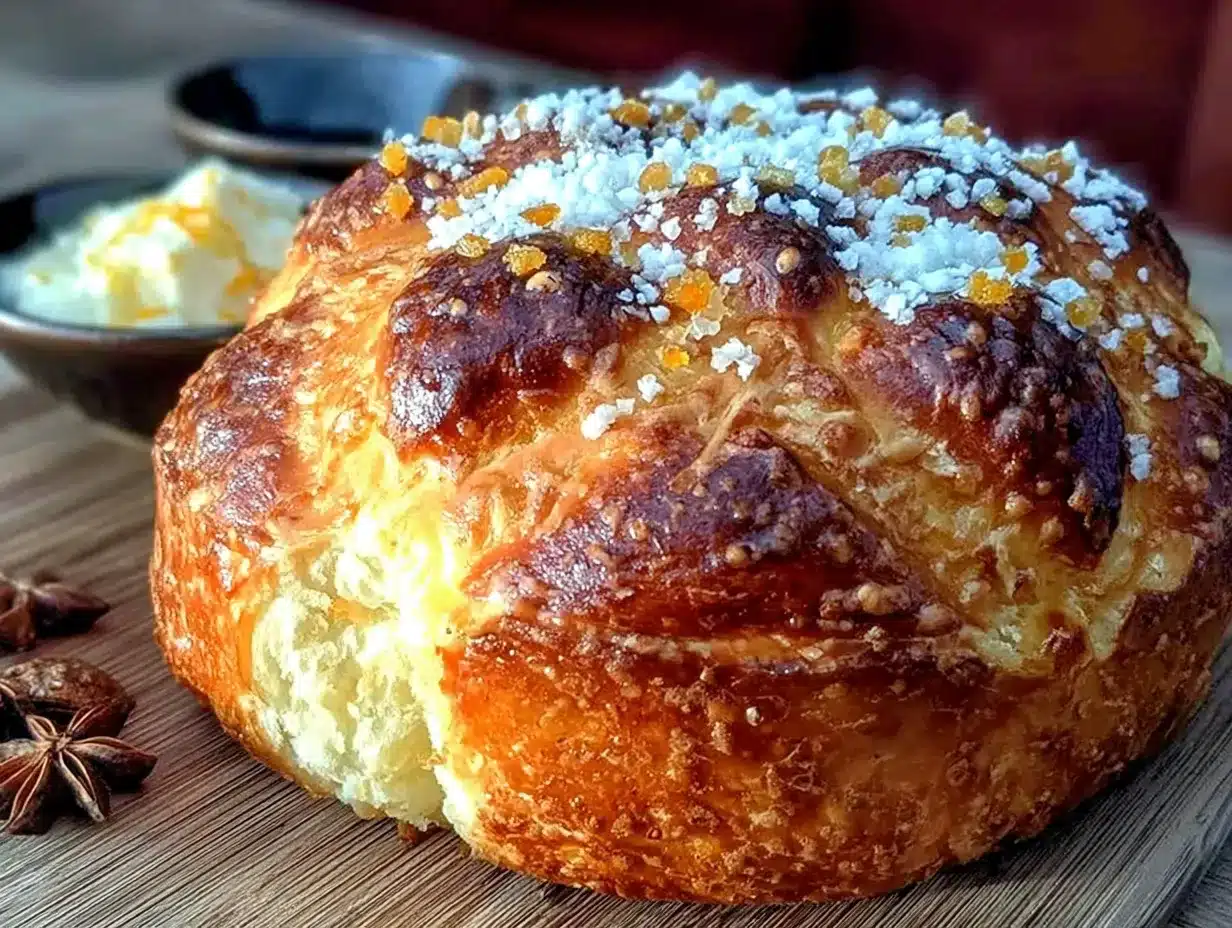
- Show-Stopping Presentation : The golden crust with the signature bone-shaped decorations makes this bread look like you spent hours in the kitchen—but the dough comes together in about 20 minutes of active work.
- Incredible Aroma : The combination of orange zest and anise fills your kitchen with a fragrance that tells everyone something special is happening. Trust me, your guests will start hovering near the oven.
- Perfect for Hosting : This bread is made for gatherings. It serves beautifully alongside hot chocolate, coffee, or even a glass of Mexican hot chocolate for a truly festive spread.
- Make-Ahead Friendly : You can prepare the dough the night before and bake it fresh the day of your event. Your future self will thank you.
- Crowd-Pleasing Flavor : It’s not too sweet—just sweet enough. The orange and anise create a sophisticated flavor that appeals to both kids and adults.
What makes this recipe different from the rest is the technique of blooming the anise seeds in warm butter before adding them to the dough. It releases their essential oils in a way that dry seeds just can’t match. Plus, using fresh orange zest instead of extract gives you that bright, natural citrus flavor that tastes like you picked it straight from the tree. This isn’t just another pan de muerto—it’s the version that will have people asking for the recipe before they finish their first slice.
What Ingredients You Will Need
This recipe uses simple, wholesome ingredients to deliver that signature pan de muerto flavor and texture. Most of these are pantry staples, but a couple might require a quick trip to the store.
- All-purpose flour, 4 cups (500g) — I prefer Gold Medal or King Arthur for consistent results. The protein content gives the perfect structure for this bread.
- Active dry yeast, 2 ¼ teaspoons (1 packet) — Make sure it’s fresh! Old yeast is the number one reason bread fails.
- Warm milk, ½ cup (120ml), heated to about 110°F — Not too hot, or you’ll kill the yeast. It should feel like warm bathwater on your wrist.
- Granulated sugar, ¾ cup (150g) — Divided use. Some goes in the yeast mixture, the rest in the dough.
- Unsalted butter, ½ cup (113g), softened — Let it sit out for at least 30 minutes. Cold butter doesn’t incorporate properly.
- Large eggs, 3, room temperature — Cold eggs can shock the dough and slow rising. Leave them out for an hour.
- Orange zest, from 2 large oranges — Use a microplane for the finest zest. Avoid the white pith—it’s bitter.
- Anise seeds, 1 tablespoon — I buy mine from the bulk section at Whole Foods. They stay fragrant for months in a sealed jar.
- Vanilla extract, 1 teaspoon — Pure vanilla, not imitation. It makes a difference in the final flavor.
- Salt, 1 teaspoon — Fine sea salt works best. It balances the sweetness without making the bread taste salty.
- For the topping : ¼ cup (50g) granulated sugar mixed with 1 teaspoon orange zest — This gets sprinkled on after baking for that signature sparkly finish.
- For the glaze : ¼ cup (60g) melted butter mixed with 2 tablespoons orange juice — Brushed on warm bread for moisture and shine.
If you can’t find anise seeds, fennel seeds make a decent substitute—they’re milder but still give that licorice-like warmth. For a dairy-free version, use plant-based butter and oat milk. Just know the texture will be slightly denser.
Equipment Needed
You don’t need a professional bakery setup for this recipe, but having the right tools makes everything smoother.
- Stand mixer with dough hook — This is my preferred method. It kneads the dough evenly without tiring your arms. A KitchenAid or Cuisinart works great.
- Large mixing bowl — Glass or stainless steel works best. Plastic can retain odors.
- Baking sheet — A half-sheet pan lined with parchment paper. No need to grease it.
- Microplane or fine zester — For getting that perfect orange zest without the bitter pith.
- Pastry brush — For applying the butter-orange glaze. A silicone brush is easiest to clean.
- Kitchen scale — Not essential, but highly recommended for accurate flour measurements. I use my Escali all the time.
- Plastic wrap or a clean kitchen towel — For covering the dough while it rises.
- Cooling rack — Lets air circulate so the bottom doesn’t get soggy.
If you don’t have a stand mixer, you can absolutely knead by hand. It takes about 10-12 minutes of steady work, and honestly, there’s something meditative about it. Just make sure your surface is lightly floured and you’re using the heel of your hand to push the dough away from you.
Preparation Method
- Bloom the yeast : In a small bowl, combine the warm milk, 1 tablespoon of sugar, and the active dry yeast. Stir gently and let it sit for 5-10 minutes until it becomes frothy. If it doesn’t foam, your yeast is dead—start over with fresh yeast.
- Toast the anise : In a small skillet over medium heat, toast the anise seeds for 1-2 minutes until fragrant. Be careful—they burn quickly. Remove from heat and let cool slightly.
- Mix the dough : In the bowl of your stand mixer, combine the flour, remaining sugar, and salt. Add the softened butter, eggs, orange zest, vanilla extract, toasted anise seeds, and the yeast mixture. Mix on low speed with the dough hook until a shaggy dough forms, about 2 minutes.
- Knead the dough : Increase speed to medium and knead for 8-10 minutes. The dough should be smooth, elastic, and slightly tacky but not sticky. If it’s too sticky, add flour 1 tablespoon at a time. If it’s too dry, add warm milk 1 teaspoon at a time. You know it’s ready when you can stretch a small piece into a thin windowpane without tearing.
- First rise : Shape the dough into a ball and place it in a lightly greased bowl. Cover with plastic wrap and let it rise in a warm, draft-free place for 1.5 to 2 hours, or until doubled in size. I usually put mine in the microwave with a cup of hot water—works like a charm.
- Shape the bread : Punch down the dough and turn it onto a lightly floured surface. Divide it into two pieces—one larger piece (about two-thirds of the dough) for the base, and one smaller piece for the decorations. Shape the large piece into a round loaf and place it on your prepared baking sheet.
- Make the decorations : Divide the smaller piece into 4 equal balls. Roll each into a rope about 6 inches long. Place two ropes across the top of the loaf to form a cross, and the other two ropes around the sides to form a ring. Pinch the ends to secure them. Use your fingers to press indentations where the bones would connect—this gives the traditional pan de muerto look.
- Second rise : Cover the shaped bread loosely with plastic wrap and let it rise for 45 minutes to 1 hour, until puffy but not doubled.
- Preheat and bake : About 20 minutes before the second rise is done, preheat your oven to 350°F (175°C). Bake the bread for 25-30 minutes, until golden brown and hollow-sounding when tapped on the bottom. If the top browns too quickly, tent it with foil after 15 minutes.
- Glaze and finish : While the bread is still warm, brush it generously with the melted butter and orange juice mixture. Immediately sprinkle with the orange-sugar topping. Let it cool on a wire rack for at least 20 minutes before serving.
Here’s a tip I learned the hard way—don’t skip the second rise. I once rushed it and ended up with a dense, heavy bread that looked more like a hockey puck than pan de muerto. The second rise is what gives it that light, airy crumb.
Cooking Tips & Techniques
After making this bread more times than I care to count, I’ve picked up a few tricks that make a real difference.
Temperature matters more than you think. If your kitchen is cold, your dough will take forever to rise. I’ve had batches take 3 hours in a drafty apartment. On the flip side, if it’s too hot, the yeast can overproof and collapse. Aim for a steady 75-80°F. I use my oven’s proof setting if I’m in a hurry—just make sure the light is off so it doesn’t get too warm.
Don’t overthink the decorations. I used to stress about making the bone shapes perfect, but honestly, rustic is part of the charm. The bread is meant to look handmade. My first attempt looked like a toddler’s art project, and it still tasted incredible. Your guests will be too busy eating to judge your shaping skills.
Watch the anise. I once got distracted and burnt my anise seeds—the bread had a bitter, almost smoky taste that wasn’t pleasant. Toast them just until you can smell them, then pull them off the heat immediately. They’ll continue toasting in the residual heat of the pan.
Multitask wisely. While the dough is rising, prep your glaze and topping. Zest the oranges, measure the sugar, melt the butter. It saves you from scrambling later when the bread is hot and ready for that final touch.
Use a thermometer for the milk. I know, it sounds fussy, but yeast is finicky. Milk that’s too hot (above 120°F) will kill it instantly. Too cold (below 100°F) and it won’t activate properly. An instant-read thermometer is a $10 investment that saves you from flat bread.
Variations & Adaptations
One of the best things about this recipe is how flexible it is. Here are some ways to make it your own.
Chocolate Orange Pan de Muerto : Add ¼ cup of cocoa powder to the flour mixture and reduce the flour by 2 tablespoons. The chocolate pairs beautifully with the orange zest. I made this version for a friend’s birthday, and it disappeared in 10 minutes.
Dairy-Free Version : Substitute the butter with vegan butter and use oat milk instead of cow’s milk. The texture will be slightly less tender, but the flavor is still fantastic. I’ve tested this with Earth Balance and it works well.
Spiced Variation : Add 1 teaspoon of ground cinnamon and ½ teaspoon of ground cloves along with the flour. This gives the bread a warmer, more complex flavor that’s perfect for fall gatherings.
Gluten-Free Adaptation : Use a 1:1 gluten-free flour blend that contains xanthan gum. Cup4Cup works great. The dough will be stickier and harder to shape, so wet your hands with water when handling it. The texture won’t be exactly the same, but it’s still delicious.
Savory Twist : Reduce the sugar to ¼ cup, omit the orange zest, and add 1 tablespoon of dried rosemary and ½ cup of grated Parmesan cheese. Shape into small rolls instead of a large loaf. Serve with soup or stew for a unique bread experience.
Serving & Storage Suggestions
This bread is best served warm, but it’s still wonderful at room temperature. Here’s how to make the most of it.
Serving temperature : If you’re hosting a gathering, bake the bread earlier in the day and let it cool completely. About 10 minutes before serving, pop it in a 300°F oven for 5 minutes to warm through. It brings back that fresh-baked aroma and soft texture.
What to serve alongside : Traditional Mexican hot chocolate is the classic pairing—the spices in the chocolate complement the orange and anise perfectly. Coffee with cinnamon, spiced apple cider, or even a glass of horchata also work beautifully. For a brunch spread, serve it with fresh fruit and whipped cream.
Presentation tip : Place the bread on a wooden board or a colorful ceramic plate. Dust with a little extra orange sugar right before serving. Arrange marigold flowers around the base for a stunning Día de Muertos presentation—your guests will be impressed before they even take a bite.
Storage : Store leftover bread in an airtight container at room temperature for up to 3 days. Do not refrigerate—it will dry out the bread. If you need to keep it longer, wrap it tightly in plastic wrap and freeze for up to 2 months.
Reheating : To revive day-old bread, wrap it in foil and warm it in a 300°F oven for 10 minutes. For individual slices, the microwave works in a pinch—just 15 seconds, or it gets rubbery.
Flavor development : Honestly, this bread tastes even better the next day. The orange and anise flavors meld together overnight, creating a more harmonious taste. So don’t stress about baking it fresh the day of—day-old is actually my preference.
Nutritional Information & Benefits
While pan de muerto is definitely a treat, it does offer some nutritional perks worth noting.
- Estimated per serving (1/8 of the loaf): 320 calories, 12g fat, 48g carbohydrates, 6g protein, 2g fiber, 18g sugar.
- Orange zest is packed with vitamin C and antioxidants. Just one tablespoon provides about 10% of your daily vitamin C needs. It also contains flavonoids that support immune health.
- Anise seeds have been used in traditional medicine for centuries. They’re known to aid digestion and reduce bloating—perfect after a heavy meal. They also contain small amounts of calcium and iron.
- Eggs provide high-quality protein and choline, which supports brain health. Using whole eggs instead of just whites gives the bread its rich color and tender crumb.
- Butter in moderation provides vitamin A and healthy fats that help your body absorb fat-soluble vitamins from other foods.
This bread is not gluten-free, dairy-free, or vegan, but it is nut-free and can be adapted for most dietary needs (see variations above). If you’re watching your sugar intake, you can reduce the sugar to ½ cup without compromising the texture too much—just know the bread won’t be as sweet.
Conclusion
This pan de muerto with orange zest and anise has become my go-to recipe for every gathering, from Día de Muertos celebrations to casual dinner parties. It’s the kind of bread that makes people stop mid-conversation and say, “Wait, what is this?” The combination of bright citrus and warm anise creates something truly special—a bread that honors tradition while feeling fresh and exciting.
I love this recipe because it’s forgiving enough for beginners but impressive enough for experienced bakers. The aroma alone is worth the effort. And honestly, there’s something deeply satisfying about pulling a golden, fragrant loaf out of the oven and watching your guests’ faces light up.
So go ahead—make this for your next gathering. Customize it with your favorite spices, shape it however you like, and don’t stress about perfection. The best part of homemade bread is the love you put into it. I’d love to hear how yours turns out! Drop a comment below with your variations or questions, and share a photo of your creation on Pinterest or Instagram. Happy baking!
Frequently Asked Questions
Can I make this pan de muerto ahead of time?
Absolutely! You can prepare the dough through the first rise, punch it down, wrap it tightly in plastic wrap, and refrigerate it for up to 24 hours. When you’re ready to bake, let it come to room temperature for about 30 minutes, then shape and proceed with the second rise.
Why isn’t my dough rising?
This is usually a yeast issue. Either your yeast was expired, your milk was too hot and killed it, or your kitchen is too cold. Check the expiration date on your yeast packet and use a thermometer for your milk. If your kitchen is chilly, place the dough in the oven with the light on and a bowl of hot water.
Can I use orange extract instead of fresh zest?
You can, but I don’t recommend it. Fresh orange zest gives a bright, natural citrus flavor that extract just can’t match. Extract can taste artificial and often has a bitter aftertaste. If you’re in a pinch, use 1 teaspoon of orange extract and add an extra tablespoon of orange juice to the dough.
How do I know when the bread is fully baked?
The top should be deep golden brown, and the bread should sound hollow when you tap the bottom. If you have an instant-read thermometer, the internal temperature should be 190-200°F. If the top is browning too quickly but the center isn’t done, tent the loaf with foil for the last 10 minutes of baking.
Can I freeze this bread?
Yes! Let the bread cool completely, wrap it tightly in plastic wrap, then in aluminum foil, and freeze for up to 2 months. To thaw, leave it at room temperature for 3-4 hours. For best results, warm it in a 300°F oven for 10 minutes before serving. Do not freeze the glazed bread—add the glaze after thawing and reheating.
Pin This Recipe!
Best Easy Pan de Muerto Recipe with Orange Zest
This pan de muerto recipe combines the warmth of anise and the brightness of fresh orange zest for a bread that is both traditional and surprising. It’s perfect for Día de Muertos celebrations or any festive gathering.
- Prep Time: 20 minutes
- Cook Time: 30 minutes
- Total Time: 3 hours 20 minutes (including rising time)
- Yield: 8 servings 1x
- Category: Bread
- Cuisine: Mexican
Ingredients
- 4 cups (500g) all-purpose flour
- 2 ¼ teaspoons (1 packet) active dry yeast
- ½ cup (120ml) warm milk (about 110°F)
- ¾ cup (150g) granulated sugar, divided
- ½ cup (113g) unsalted butter, softened
- 3 large eggs, room temperature
- Zest from 2 large oranges
- 1 tablespoon anise seeds
- 1 teaspoon vanilla extract
- 1 teaspoon fine sea salt
- For the topping: ¼ cup (50g) granulated sugar mixed with 1 teaspoon orange zest
- For the glaze: ¼ cup (60g) melted butter mixed with 2 tablespoons orange juice
Instructions
- Bloom the yeast: In a small bowl, combine the warm milk, 1 tablespoon of sugar, and the active dry yeast. Stir gently and let it sit for 5-10 minutes until frothy.
- Toast the anise: In a small skillet over medium heat, toast the anise seeds for 1-2 minutes until fragrant. Remove from heat and let cool slightly.
- Mix the dough: In the bowl of a stand mixer, combine the flour, remaining sugar, and salt. Add the softened butter, eggs, orange zest, vanilla extract, toasted anise seeds, and the yeast mixture. Mix on low speed with the dough hook until a shaggy dough forms, about 2 minutes.
- Knead the dough: Increase speed to medium and knead for 8-10 minutes until smooth, elastic, and slightly tacky.
- First rise: Shape the dough into a ball and place it in a lightly greased bowl. Cover and let rise in a warm place for 1.5 to 2 hours, until doubled in size.
- Shape the bread: Punch down the dough and divide into two pieces—one larger piece (about two-thirds) for the base, and one smaller piece for decorations. Shape the large piece into a round loaf and place on a parchment-lined baking sheet.
- Make the decorations: Divide the smaller piece into 4 equal balls. Roll each into a 6-inch rope. Place two ropes across the top of the loaf to form a cross, and the other two around the sides to form a ring. Pinch ends to secure. Press indentations for bone shapes.
- Second rise: Cover loosely and let rise for 45 minutes to 1 hour, until puffy.
- Preheat and bake: Preheat oven to 350°F (175°C). Bake for 25-30 minutes until golden brown and hollow-sounding when tapped. Tent with foil if browning too quickly.
- Glaze and finish: While warm, brush with melted butter and orange juice mixture. Immediately sprinkle with orange-sugar topping. Cool on a wire rack for at least 20 minutes before serving.
Notes
Don’t skip the second rise for a light, airy crumb. The bread tastes even better the next day as flavors meld. For a dairy-free version, use plant-based butter and oat milk.
Nutrition
- Serving Size: 1 slice (1/8 of loaf
- Calories: 320
- Sugar: 18
- Sodium: 290
- Fat: 12
- Saturated Fat: 7
- Carbohydrates: 48
- Fiber: 2
- Protein: 6
Keywords: pan de muerto, day of the dead bread, orange zest, anise, mexican bread, holiday bread


