This was supposed to be a straightforward batch of buttermilk biscuits. I had my grandmother’s recipe memorized, the butter was cubed and cold, and I was already picturing a basket of them on the counter for a weekend brunch with friends. Then I reached into the pantry, grabbed what I thought was the all-purpose flour, and dumped a full cup into the bowl before I realized my mistake. It was whole wheat pastry flour. And somewhere in that moment of panic, I spotted the can of pumpkin puree leftover from a pie I’d made weeks ago. Honestly, I almost threw the whole thing out. But I was already running late, and the idea of starting over felt like giving up. So I just kept going. I added the pumpkin, swapped the sugar for brown, and crossed my fingers. What came out of the oven was nothing like the plan — and better.
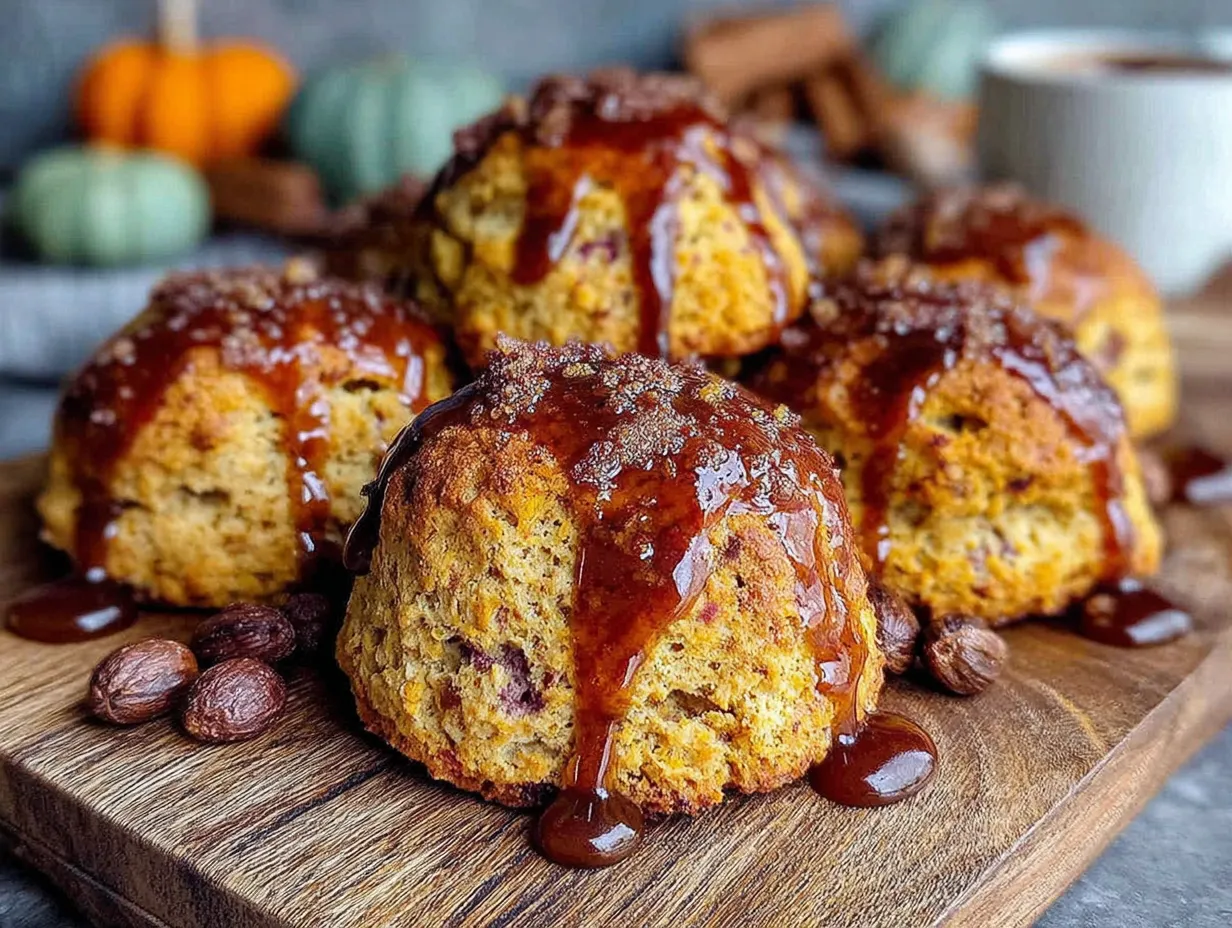
The scones were tender, not tough. They had this almost cake-like crumb that I’d never managed with a traditional biscuit recipe. And the smell? Let me tell you, it filled the whole apartment with this warm, spiced aroma that made my neighbor knock on the door asking what I was baking. I drizzled a quick brown butter glaze over the top because, well, I had butter browning on the stove and it seemed like a shame to waste it. That first bite was a genuine surprise. The glaze had this nutty, toasty depth that cut right through the sweetness of the pumpkin. I stood there in my messy kitchen, spatula in hand, and just laughed. Maybe you’ve been there — that moment when a mistake turns into something you actually want to brag about.
These pumpkin scones have become my go-to for every fall gathering since. They’re the dish I bring to Friendsgiving, the one I make when I’m hosting book club, the recipe that gets texted around after every party. They look impressive on a platter — all golden brown with that glossy glaze — but they’re secretly forgiving to make. And honestly, that’s the kind of recipe I love most. The one that doesn’t punish you for being distracted or running late. The one that works even when you mess up. That’s why I keep making them, and why I think you will too.
Why You’ll Love This Recipe
These pumpkin scones aren’t just another fall baking project. They’re the kind of recipe that makes you look like a hero without the stress. Here’s why they work so well, especially when you’re cooking for a crowd:
- Quick & Easy: From start to finish, these come together in about 35 minutes. No chilling the dough, no complicated folding — just mix, shape, bake, and glaze.
- Simple Ingredients: You probably have most of these in your pantry already. Pumpkin puree, flour, butter, sugar, and spices. Nothing weird or hard to find.
- Perfect for Hosting: These scones are made for a brunch table or dessert spread. They hold up well on a platter, look gorgeous, and everyone reaches for one.
- Crowd-Pleaser: I’ve served these to kids, grandparents, and picky eaters. They disappear every single time. The texture is soft enough for little ones but sophisticated enough for adults.
- Unbelievably Delicious: That brown butter glaze is the real star here. It adds a nutty, caramelized flavor that plain powdered sugar glaze just can’t touch.
What makes these different from every other pumpkin scone recipe out there? It’s the technique. I blend cold butter into the dry ingredients until it looks like coarse meal, then add the pumpkin and buttermilk just until combined. No overmixing. That’s the secret to that tender, almost fluffy interior. And the brown butter glaze isn’t just a drizzle — it’s a thick, glossy coating that soaks into the top of the warm scone and creates this incredible crust. I’ve tested this recipe a dozen times, tweaking the flour ratio and the spice blend, and this version is the one that gets the most “can I have the recipe?” texts. It’s tested, it’s trusted, and it’s family-approved.
These scones are the kind of thing that makes you close your eyes after the first bite. That warm, spiced pumpkin flavor mixed with the nutty brown butter — it’s comfort food reimagined. Perfect for impressing guests without stress, or turning a simple Saturday morning into something memorable. Honestly, they’re the recipe I’m most proud of, and I think you’ll feel the same way.
What Ingredients You Will Need
This recipe uses simple, wholesome ingredients to deliver that cozy pumpkin flavor and tender texture. Most of these are pantry staples, especially if you do any fall baking. Here’s what you’ll need, plus a few notes from my own kitchen trials.
For the Scones
- 2 cups all-purpose flour (I use King Arthur Flour for consistent results — it has a higher protein content that gives these scones a nice structure)
- 1/3 cup packed light brown sugar (adds moisture and a subtle molasses flavor that pairs beautifully with pumpkin)
- 1 tablespoon baking powder (make sure it’s fresh — old baking powder won’t give you that nice rise)
- 1 teaspoon ground cinnamon
- 1/2 teaspoon ground nutmeg (freshly grated if you have it, but pre-ground works fine)
- 1/2 teaspoon ground ginger
- 1/4 teaspoon ground cloves
- 1/2 teaspoon salt
- 1/2 cup cold unsalted butter, cut into small cubes (keep it cold — this is key for flaky scones)
- 1/2 cup pumpkin puree (not pumpkin pie filling — make sure you grab the plain stuff)
- 1/3 cup buttermilk, cold (adds tanginess and helps the scones rise)
- 1 large egg
- 1 teaspoon vanilla extract
For the Brown Butter Glaze
- 1/4 cup unsalted butter
- 1 1/2 cups powdered sugar, sifted
- 2-3 tablespoons milk (whole milk gives the creamiest texture, but any kind works)
- 1/2 teaspoon vanilla extract
- Pinch of salt
A few ingredient tips I’ve learned along the way. For the pumpkin puree, I prefer Libby’s brand — it’s consistently thick and not watery, which matters for the texture. If your pumpkin puree looks loose, blot it with a paper towel before adding it to the dough. For the buttermilk, you can make your own by adding 1 tablespoon of lemon juice or white vinegar to a 1/3 cup of regular milk and letting it sit for 5 minutes. I’ve done this plenty of times when I forgot to buy buttermilk, and it works perfectly. And for the brown butter, use a light-colored pan so you can actually see the butter change color as it browns. Trust me on that one — I’ve burned more batches than I’d like to admit.
Equipment Needed
You don’t need a lot of fancy tools for these scones, which is part of why I love making them. Here’s what you’ll need:
- Large mixing bowl (for combining dry ingredients)
- Pastry cutter or two forks (for cutting butter into flour — I prefer a pastry cutter because it’s faster, but forks work in a pinch)
- Small bowl (for whisking together the wet ingredients)
- Baking sheet (lined with parchment paper — makes cleanup so much easier)
- Parchment paper (prevents sticking and helps the bottoms brown evenly)
- Small saucepan (for browning the butter — use a light-colored pan so you can see the color change)
- Whisk (for the glaze)
- Cooling rack (lets air circulate so the glaze sets properly)
- Bench scraper or sharp knife (for cutting the scones into wedges)
If you don’t have a pastry cutter, honestly, just use your hands. Rub the cold butter into the flour with your fingertips until it looks like coarse crumbs. It’s a little messy, but it works. And if you don’t have a bench scraper, a regular chef’s knife does the job. I’ve used a pizza cutter in a pinch too — not traditional, but it gets the scones cut evenly.
Preparation Method
Let me walk you through this step by step. I’ve made these scones more times than I can count, so I’ll share all the little tricks I’ve picked up along the way.
- Preheat your oven to 400°F (200°C). Line a baking sheet with parchment paper. Getting the oven hot before you start is important — you want that initial blast of heat to help the scones rise tall.
- In a large bowl, whisk together the flour, brown sugar, baking powder, cinnamon, nutmeg, ginger, cloves, and salt. Make sure there are no lumps in the brown sugar. I like to break it up with my fingers if it feels clumpy. The spices should be evenly distributed throughout the flour mixture.
- Add the cold butter cubes to the flour mixture. Using a pastry cutter or two forks, cut the butter into the flour until the mixture looks like coarse meal with some pea-sized butter pieces remaining. This takes about 2-3 minutes. Don’t overdo it — those little butter pieces are what create flaky layers. I’ve learned this the hard way after making hockey puck scones from overmixing.
- In a small bowl, whisk together the pumpkin puree, buttermilk, egg, and vanilla extract. Whisk until smooth and fully combined. The mixture should be a uniform orange color.
- Pour the wet ingredients into the dry ingredients. Use a spatula or wooden spoon to stir until just combined. The dough will be shaggy and a little sticky — that’s exactly what you want. Do not overmix or the scones will be tough. Stop when you can’t see any more dry flour.
- Turn the dough out onto a lightly floured surface. Gently bring it together with your hands, patting it into a 3/4-inch thick circle, about 8 inches in diameter. Don’t knead it — just pat it gently. If the dough is too sticky, dust your hands with a little flour.
- Use a bench scraper or sharp knife to cut the circle into 8 wedges. Cut straight down — don’t drag the knife through the dough or you’ll seal the edges and they won’t rise as well. Place the wedges on the prepared baking sheet, spacing them about 2 inches apart.
- Bake for 15-18 minutes, until the scones are golden brown on the bottom and the edges are just starting to brown. The tops should look set and a toothpick inserted into the center should come out clean. Let them cool on the baking sheet for 5 minutes, then transfer to a cooling rack.
- While the scones are cooling, make the brown butter glaze. In a small saucepan over medium heat, melt the butter. Swirl the pan occasionally as it melts. The butter will foam up, then the foam will subside, and you’ll see brown specks forming at the bottom. This takes about 4-5 minutes. Once the butter smells nutty and is a golden brown color, remove it from the heat immediately. Pour it into a heatproof bowl to stop the cooking.
- Add the sifted powdered sugar, milk, vanilla extract, and salt to the brown butter. Whisk until smooth and glossy. If the glaze is too thick, add more milk a teaspoon at a time. If it’s too thin, add more powdered sugar. You want it thick enough to coat the back of a spoon but still pourable.
- Drizzle the glaze over the warm scones. I like to use a spoon and let it drip naturally over the tops. The warmth of the scones will help the glaze soak in slightly, creating that beautiful crust. Let the glaze set for about 10 minutes before serving.
A few notes from my kitchen. When cutting in the butter, work quickly — warm hands can melt the butter, and you want it to stay cold. If your kitchen is warm, pop the flour mixture in the fridge for 10 minutes before adding the butter. And when you’re cutting the scones, dip your knife in flour between cuts to prevent sticking. These little things make a real difference.
Cooking Tips & Techniques
After making these scones more times than I care to count, I’ve picked up a few tricks that make the process smoother and the results more consistent. Let me share what I’ve learned.
Keep everything cold. This is the number one rule for tender, flaky scones. The butter should be straight from the fridge, and I even chill my flour mixture for 10 minutes if the kitchen is warm. Cold butter creates steam pockets as it melts in the oven, which gives you those lovely layers. Warm butter just gets absorbed into the flour and makes dense scones. I learned this after a particularly sad batch that looked more like biscuits.
Don’t overwork the dough. This is the mistake I made most often when I started baking scones. You want to mix until the dough just comes together — no more. Overmixing develops the gluten, and that makes the scones tough and chewy instead of tender. Shaggy dough is good dough. Trust the process.
Watch the brown butter carefully. Brown butter goes from perfect to burnt in about 30 seconds. Once you see those brown specks forming and smell that nutty aroma, pull it off the heat. I recommend using a light-colored saucepan so you can actually see the color change. I’ve ruined more batches than I’d like to admit by walking away for “just a second.”
Bake from frozen for last-minute guests. This is my favorite hosting hack. You can freeze the unbaked scone wedges on a baking sheet, then transfer them to a freezer bag. When guests are coming over, just bake them straight from frozen — add 2-3 minutes to the baking time. Fresh scones with zero morning-of effort. Honestly, this has saved me more than once.
Let the glaze set before stacking. If you stack warm glazed scones, the glaze will slide right off and make a sticky mess. Give them at least 10 minutes on a cooling rack. If you’re transporting them, let the glaze set completely, then layer parchment paper between the scones.
Variations & Adaptations
One of the best things about this recipe is how easily it adapts. Here are some variations I’ve tried and loved.
Gluten-Free Version: Substitute the all-purpose flour with a 1:1 gluten-free baking flour blend. I’ve had good results with Bob’s Red Mill Gluten-Free 1-to-1 Baking Flour. The texture is slightly more crumbly, but the flavor is still spot-on. Add an extra tablespoon of buttermilk if the dough seems too dry.
Vegan Adaptation: Use cold vegan butter (I like Miyoko’s) and replace the egg with a flax egg (1 tablespoon ground flaxseed mixed with 3 tablespoons water, let sit for 5 minutes). For the buttermilk, add 1 teaspoon of lemon juice to 1/3 cup of oat milk. The vegan version is a bit more delicate, so handle the dough gently. The brown butter glaze won’t work with vegan butter, so use a simple powdered sugar glaze with melted coconut oil instead.
Spice It Up: If you love a stronger spice flavor, add 1/4 teaspoon of cardamom or allspice to the flour mixture. I did this once when I ran out of nutmeg, and honestly, I liked it even better. The cardamom adds this floral note that pairs beautifully with the brown butter.
Add Mix-Ins: Fold in 1/2 cup of dried cranberries, chopped pecans, or white chocolate chips after you’ve combined the wet and dry ingredients. I’ve done a cranberry-pecan version for Thanksgiving that was a huge hit. Just be gentle when folding — you don’t want to overmix.
Maple Glaze Variation: Replace the vanilla extract in the glaze with 1 tablespoon of maple syrup and reduce the milk by 1 tablespoon. The maple flavor with the brown butter is incredible — it tastes like fall in a bite.
Serving & Storage Suggestions
These scones are best served warm, about 10-15 minutes after glazing. The glaze will be set but still soft, and the scones will be tender and fragrant. I like to arrange them on a wooden board or a simple white platter — they look gorgeous with the golden glaze catching the light.
For a brunch spread, serve these alongside a fruit salad, scrambled eggs, and some crispy bacon. They also pair beautifully with a hot cup of coffee or a chai latte. If you’re serving them for dessert, a dollop of whipped cream or a scoop of vanilla ice cream takes them over the top. I’ve even crumbled leftover scones over vanilla ice cream for a quick pumpkin bread pudding — it’s amazing.
Storage: Store leftover scones in an airtight container at room temperature for up to 3 days. The glaze will soften slightly, but they’ll still be delicious. Do not refrigerate them — the fridge dries out baked goods and makes them stale faster.
Freezing: These freeze beautifully. Freeze the unglazed, baked scones in a single layer on a baking sheet, then transfer to a freezer bag for up to 3 months. When you’re ready to serve, thaw them at room temperature, then reheat in a 300°F oven for 5-7 minutes. Make the glaze fresh and drizzle it over the warm scones. It’s almost like having freshly baked scones with zero effort.
Reheating: The best way to reheat a single scone is in the microwave for 15-20 seconds. For a whole batch, pop them in a 300°F oven for 5-7 minutes. The glaze will get slightly melty again, which is honestly the best way to eat them.
One thing I’ve noticed — the flavors actually deepen after a day or two. The spices meld together, and the brown butter glaze soaks into the scone slightly, creating this incredible texture. So if you’re making these a day ahead for a party, they’ll still be fantastic.
Nutritional Information & Benefits
Here’s the estimated nutritional breakdown for one scone (with glaze):
- Calories: 320
- Fat: 16g
- Carbohydrates: 42g
- Protein: 4g
- Fiber: 2g
- Sugar: 22g
These scones are a treat, no doubt about it. But they do have some redeeming qualities. Pumpkin is packed with vitamin A and fiber, which supports eye health and digestion. The cinnamon and ginger have anti-inflammatory properties, and the brown butter actually contains conjugated linoleic acid, which has been linked to some health benefits. Plus, making them at home means you control the ingredients — no preservatives or artificial flavors.
If you’re watching your sugar intake, you can reduce the brown sugar to 1/4 cup and use a lighter hand with the glaze. For a lower-fat version, substitute half the butter with Greek yogurt. The texture will be a bit more cake-like, but still delicious. And for a dairy-free option, use coconut oil instead of butter and a plant-based milk in the glaze.
As always, these values are estimates and will vary based on your specific ingredients and portion sizes. But honestly, scones are meant to be enjoyed, not analyzed. I say make them, share them, and savor every bite.
Conclusion
These pumpkin scones with brown butter glaze have become a staple in my kitchen for good reason. They’re forgiving enough for a beginner baker but impressive enough to steal the show at any gathering. The tender, spiced crumb paired with that nutty, caramelized glaze is a combination that just works. And honestly, the fact that they started as a mistake makes me love them even more.
I hope you give these a try, whether you’re hosting a fall brunch, bringing a dish to a Friendsgiving, or just treating yourself on a cozy Saturday morning. Don’t be afraid to make them your own — add your favorite mix-ins, play with the spice blend, or try the maple glaze variation. The best recipes are the ones that evolve with you.
If you make these, I’d love to hear how they turn out. Drop a comment below and let me know if you tried any variations, or tag me in your photos on social media. And if you’re looking for more hosting-friendly recipes, check out my easy pumpkin bread or these brown butter cinnamon rolls — they’re both crowd-pleasers that never last long on the table.
Happy baking, friends. May your butter be cold, your glaze be glossy, and your kitchen smell like autumn.
Frequently Asked Questions
Can I use pumpkin pie filling instead of pumpkin puree?
No, I wouldn’t recommend it. Pumpkin pie filling has added sugar and spices, which will throw off the balance of the recipe. Stick with plain pumpkin puree for the best results.
Why did my scones turn out dry?
Dry scones usually come from overmixing the dough or overbaking them. Mix until just combined and check them a few minutes early — ovens vary, and those last 2 minutes can make a big difference.
Can I make the dough ahead of time?
Absolutely. You can shape the scones, place them on a baking sheet, and refrigerate them for up to 24 hours. Bake them straight from the fridge, adding 1-2 minutes to the baking time.
How do I know when the brown butter is done?
Watch for the butter to turn a golden amber color and smell nutty and toasty. You’ll see brown specks forming at the bottom of the pan. Once you see that, pull it off the heat immediately — it burns fast.
Can I skip the glaze?
You can, but the glaze really makes these scones special. If you want a lighter option, just dust them with powdered sugar or brush them with melted butter and sprinkle with cinnamon sugar while they’re still warm.
Pin This Recipe!
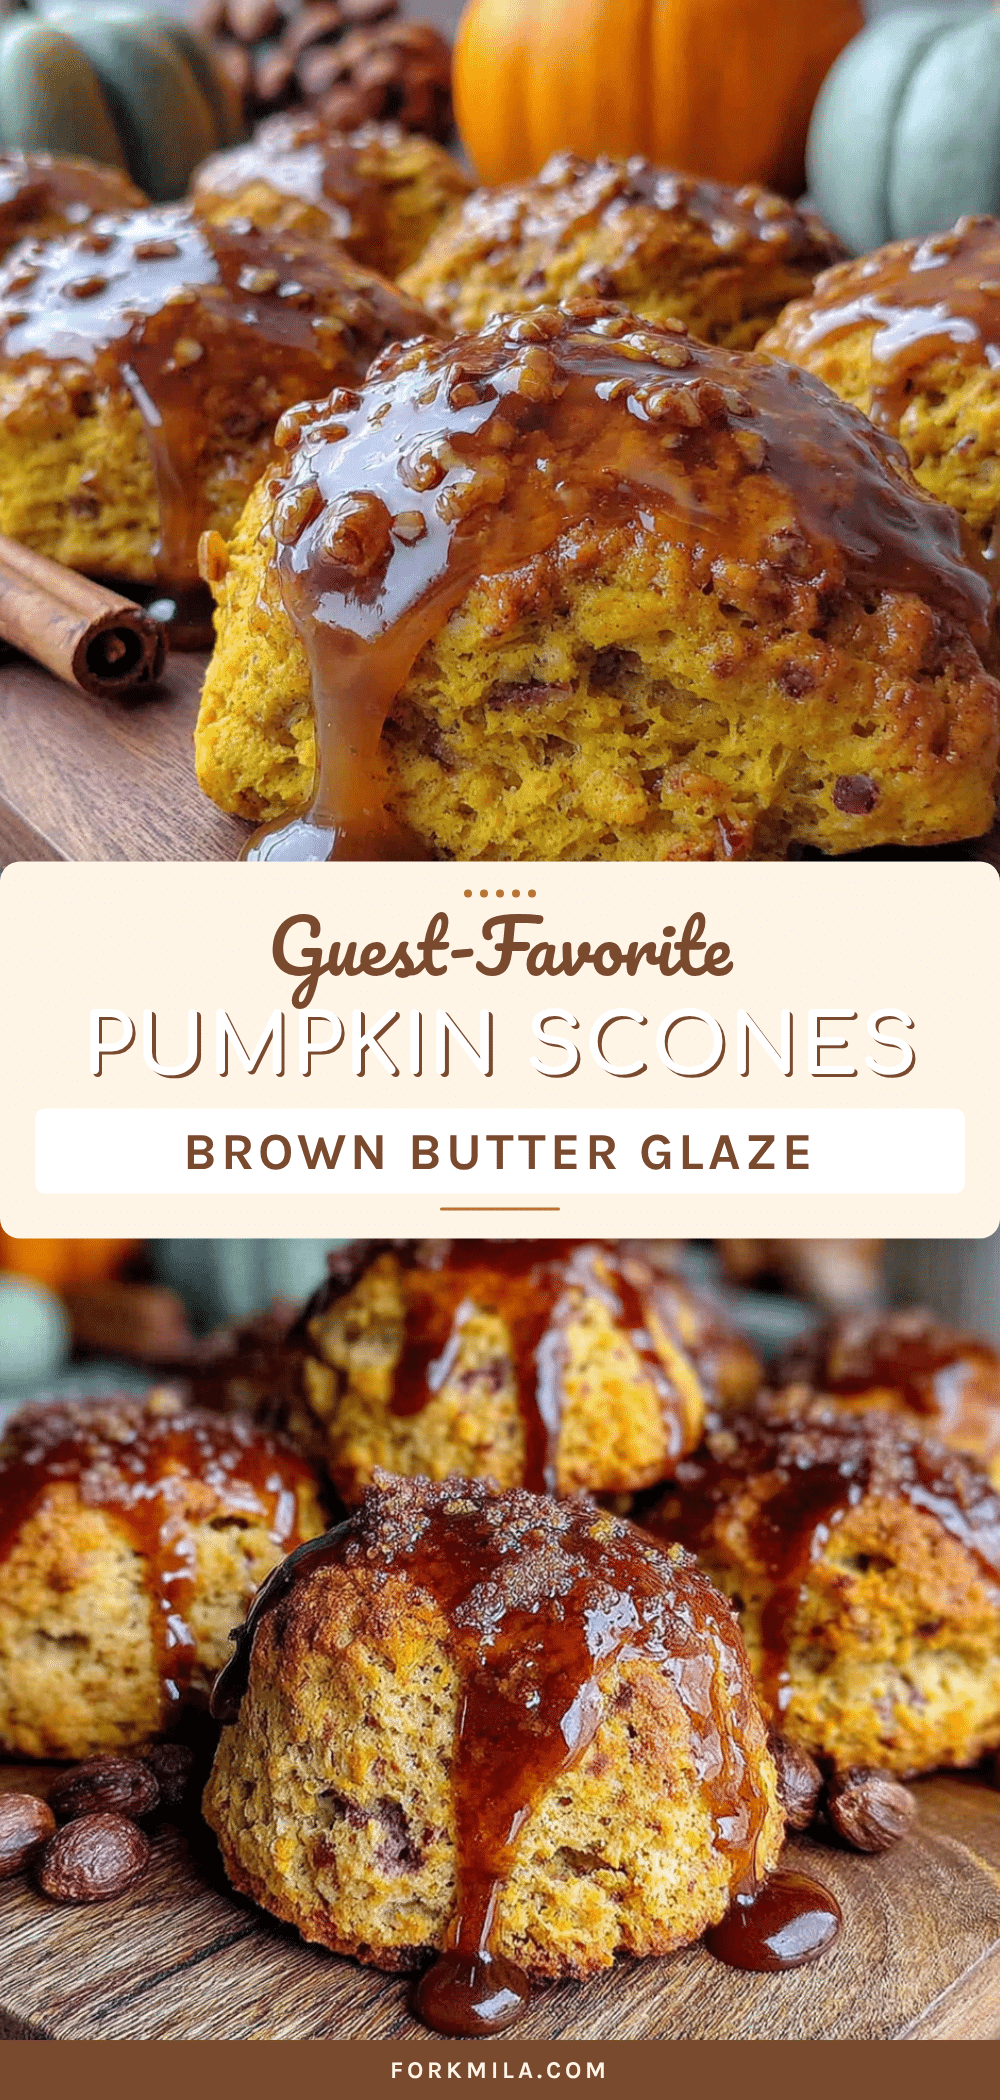
Best Pumpkin Scones Recipe with Brown Butter Glaze
Tender, spiced pumpkin scones with a nutty brown butter glaze that started as a happy accident. These forgiving, crowd-pleasing scones come together in about 35 minutes and are perfect for fall brunches, Friendsgiving, or cozy weekends.
- Prep Time: 15 minutes
- Cook Time: 18 minutes
- Total Time: 35 minutes
- Yield: 8 servings 1x
- Category: Breakfast, Brunch, Dessert
- Cuisine: American
Ingredients
- 2 cups all-purpose flour
- 1/3 cup packed light brown sugar
- 1 tablespoon baking powder
- 1 teaspoon ground cinnamon
- 1/2 teaspoon ground nutmeg
- 1/2 teaspoon ground ginger
- 1/4 teaspoon ground cloves
- 1/2 teaspoon salt
- 1/2 cup cold unsalted butter, cut into small cubes
- 1/2 cup pumpkin puree (not pumpkin pie filling)
- 1/3 cup buttermilk, cold
- 1 large egg
- 1 teaspoon vanilla extract
- 1/4 cup unsalted butter (for glaze)
- 1 1/2 cups powdered sugar, sifted
- 2–3 tablespoons milk
- 1/2 teaspoon vanilla extract (for glaze)
- Pinch of salt (for glaze)
Instructions
- Preheat your oven to 400°F (200°C). Line a baking sheet with parchment paper.
- In a large bowl, whisk together the flour, brown sugar, baking powder, cinnamon, nutmeg, ginger, cloves, and salt.
- Add the cold butter cubes to the flour mixture. Using a pastry cutter or two forks, cut the butter into the flour until the mixture looks like coarse meal with some pea-sized butter pieces remaining.
- In a small bowl, whisk together the pumpkin puree, buttermilk, egg, and vanilla extract until smooth.
- Pour the wet ingredients into the dry ingredients. Stir with a spatula or wooden spoon until just combined. The dough will be shaggy and slightly sticky.
- Turn the dough out onto a lightly floured surface. Gently bring it together with your hands, patting it into a 3/4-inch thick circle, about 8 inches in diameter.
- Use a bench scraper or sharp knife to cut the circle into 8 wedges. Place the wedges on the prepared baking sheet, spacing them about 2 inches apart.
- Bake for 15-18 minutes, until the scones are golden brown on the bottom and the edges are just starting to brown. Let them cool on the baking sheet for 5 minutes, then transfer to a cooling rack.
- While the scones are cooling, make the brown butter glaze. In a small saucepan over medium heat, melt the butter. Swirl the pan occasionally. The butter will foam, then the foam will subside, and brown specks will form at the bottom. Once the butter smells nutty and is a golden brown color (about 4-5 minutes), remove from heat immediately. Pour into a heatproof bowl.
- Add the sifted powdered sugar, milk, vanilla extract, and salt to the brown butter. Whisk until smooth and glossy. Adjust consistency with more milk or powdered sugar as needed.
- Drizzle the glaze over the warm scones. Let the glaze set for about 10 minutes before serving.
Notes
Keep all ingredients cold for flaky scones. Do not overmix the dough. Watch the brown butter carefully as it burns quickly. Scones can be frozen unbaked and baked straight from frozen (add 2-3 minutes). Store leftovers in an airtight container at room temperature for up to 3 days. Do not refrigerate.
Nutrition
- Serving Size: 1 scone with glaze
- Calories: 320
- Sugar: 22
- Sodium: 320
- Fat: 16
- Saturated Fat: 10
- Carbohydrates: 42
- Fiber: 2
- Protein: 4
Keywords: pumpkin scones, brown butter glaze, fall baking, brunch recipe, easy scones, pumpkin recipe, homemade scones


