My neighbor Carol wasn’t trying to impress anyone. I’d stopped by to borrow a garden rake—mine had snapped mid-project—and the smell hit me before I even knocked. Something warm, spicy, and deeply cozy was drifting through her screen door. She opened it with flour on her cheek and a spatula in her hand, completely nonchalant, like this was just a regular Tuesday.
“Oh, those are just pumpkin oatmeal cups,” she said when I asked. “I make them for the week.”
Just. Just pumpkin oatmeal cups. I mean, she said it like it was nothing. Like she hadn’t created little portable clouds of fall comfort that smelled like my grandmother’s kitchen had merged with a bakery. I stood there holding the rake, honestly a little jealous of how casually she’d made something so good. She handed me one warm from the pan, and let me tell you—that first bite stopped me mid-sentence. The texture was soft but sturdy, the pumpkin flavor was there but not overwhelming, and the spices were perfectly balanced. I asked for the recipe on the spot, and she scribbled it on a scrap of envelope while I balanced the rake against her porch railing.
I’ve been making them ever since, and they’ve become my fall meal prep secret weapon. Maybe you’ve been there—standing in someone’s kitchen (or doorway, in my case) and realizing that the best recipes come from people who don’t think they’re doing anything special. That’s this recipe. It’s the kind you’ll make on a Sunday afternoon, then thank yourself for all week long.
Why You’ll Love This Recipe
These cozy baked pumpkin oatmeal cups are honestly the best thing to happen to my meal prep routine. I’ve tested this recipe at least a dozen times—tweaking the spice ratio, trying different mix-ins, even burning a batch when I got distracted by a phone call. Through all those trials, I landed on a version that’s foolproof, forgiving, and genuinely delicious.
- Quick & Easy: From mixing bowl to oven in under 15 minutes. Perfect for busy mornings when you need grab-and-go breakfasts.
- Simple Ingredients: No fancy grocery trips needed. You probably have most of these in your pantry right now.
- Perfect for Meal Prep: Make a batch on Sunday and enjoy breakfast all week. They reheat beautifully in under a minute.
- Crowd-Pleaser: Kids love them, adults love them, and they’re great for fall brunches or Thanksgiving mornings.
- Unbelievably Delicious: The texture is the real star—soft in the middle, slightly golden on top, with that warm pumpkin-spice flavor that just feels like a hug.
What makes these different from other baked oatmeal recipes? It’s the texture. I tested this with different ratios of pumpkin to oats until I found the sweet spot—enough pumpkin to keep them moist and flavorful, but not so much that they get soggy. The result is a cup that holds its shape, travels well, and tastes like a cozy morning even when you’re eating it at your desk.
This isn’t just another oatmeal recipe. It’s the kind that makes you close your eyes after the first bite. Honestly, it’s comfort food reimagined—healthier, faster, and with the same soul-soothing satisfaction. Perfect for impressing guests without stress, or turning a simple breakfast into something memorable.
What Ingredients You Will Need
This recipe uses simple, wholesome ingredients to deliver bold flavor and satisfying texture without the fuss. Most of these are pantry staples, especially during fall, and they’re easy to find at any grocery store.
- Rolled oats, 2 cups (use old-fashioned rolled oats, not quick oats—they give the best texture; I prefer Bob’s Red Mill for consistency)
- Pumpkin puree, 1 cup (canned is fine; look for 100% pure pumpkin, not pumpkin pie filling; Libby’s is my go-to brand)
- Milk, 1 cup (any milk works—dairy, almond, oat, or coconut; I’ve used all of them with great results)
- Eggs, 2 large (room temperature if you remember; if not, cold eggs work fine too—I’ve tested both ways)
- Maple syrup, 1/3 cup (pure maple syrup adds the best flavor; honey or agave also work in a pinch)
- Pumpkin pie spice, 2 teaspoons (store-bought or homemade; I make my own with cinnamon, nutmeg, ginger, and cloves)
- Cinnamon, 1 teaspoon (adds extra warmth; I use Ceylon cinnamon for a milder, sweeter flavor)
- Baking powder, 1 teaspoon (helps the cups rise slightly and stay fluffy)
- Vanilla extract, 1 teaspoon (pure vanilla extract makes a difference; avoid imitation vanilla if possible)
- Salt, 1/4 teaspoon (balances the sweetness and enhances the spices)
- Optional mix-ins: 1/2 cup chocolate chips, dried cranberries, or chopped pecans (I love adding dark chocolate chips for a little indulgence)
For the topping (optional but recommended):
- Pepitas (pumpkin seeds), 2 tablespoons (adds a nice crunch on top)
- Brown sugar, 1 tablespoon (sprinkle on top before baking for a slightly caramelized finish)
Substitution guidance: If you’re gluten-free, use certified gluten-free rolled oats. For a vegan version, swap the eggs with flax eggs (2 tablespoons ground flaxseed mixed with 6 tablespoons water) and use plant-based milk. The texture will be slightly denser but still delicious. I’ve tried both versions, and honestly, the flax egg version holds together surprisingly well.
Equipment Needed
You don’t need fancy equipment for these pumpkin oatmeal cups, which is part of why I love them. Here’s what you’ll need:
- Muffin tin, 12-cup standard size (this is non-negotiable; you need the cups to hold their shape)
- Muffin liners or silicone baking cups (paper liners work fine; silicone ones are reusable and make cleanup even easier)
- Large mixing bowl (any medium-to-large bowl works)
- Whisk (for combining the wet ingredients smoothly)
- Spatula or wooden spoon (for folding everything together)
- Measuring cups and spoons (accuracy matters for the oats-to-pumpkin ratio)
- Cooking spray or oil (to grease the liners if using paper)
If you don’t have a muffin tin, you can bake this as a single dish in an 8×8 inch baking pan—just increase the baking time by about 10 minutes. I’ve done this when my muffin tin was in use, and it works great as a pumpkin baked oatmeal casserole. Just cut it into squares instead of cups.
One tip I learned the hard way: use liners. I tried greasing the tin directly once, and the oatmeal cups stuck like glue. Paper liners or silicone cups make life so much easier. Budget-friendly silicone cups from Amazon work just as well as expensive ones.
Preparation Method
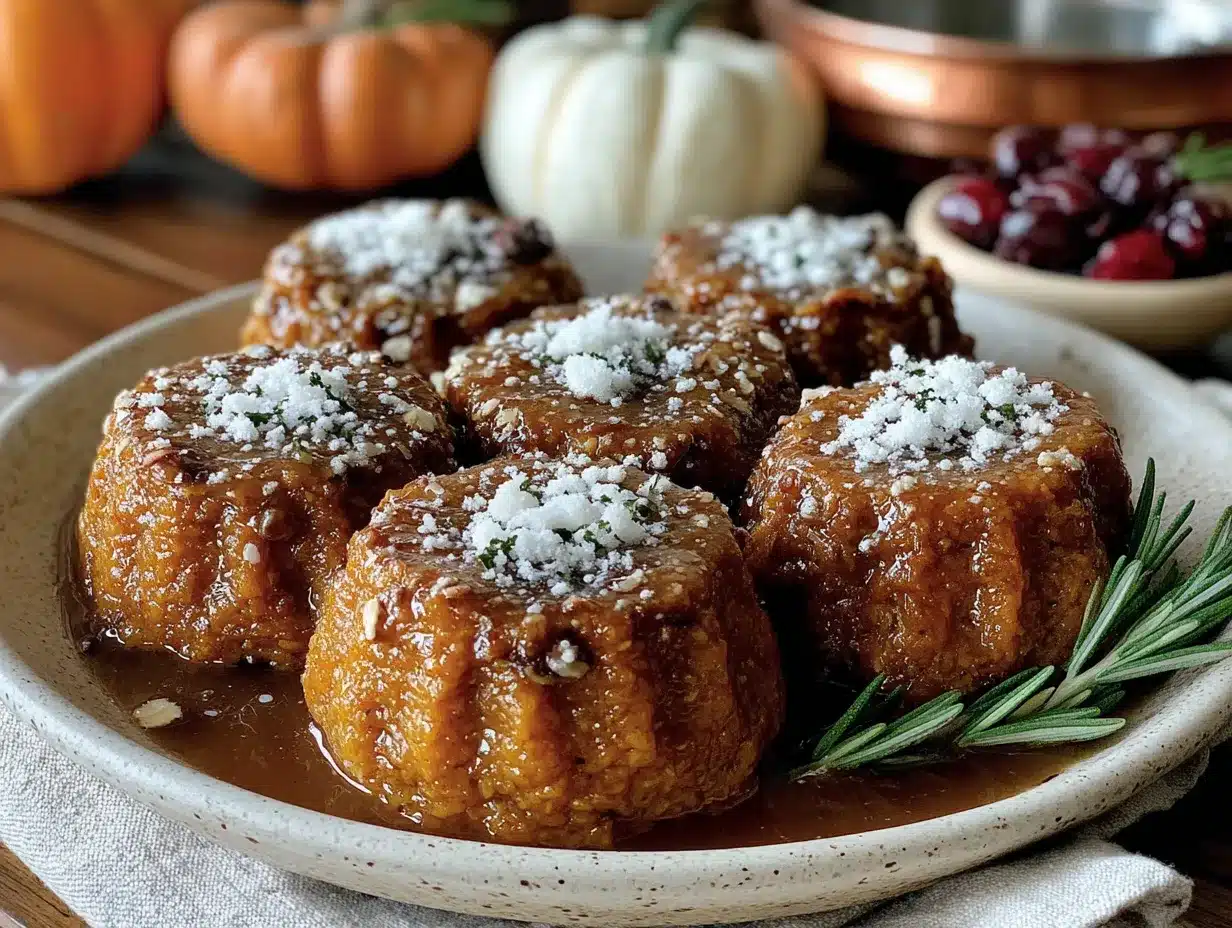
Let me walk you through this step by step. I’ve made these so many times that I could do it with my eyes closed, but I’ll share all the little details I’ve learned along the way.
- Preheat your oven to 350°F (175°C). Line your muffin tin with paper liners or silicone cups. If using paper liners, give them a quick spray with cooking spray—this prevents any sticking. I forgot to do this once and spent 15 minutes peeling paper off oatmeal cups. Learn from my mistake.
- In a large mixing bowl, whisk together the wet ingredients: the pumpkin puree, milk, eggs, maple syrup, and vanilla extract. Whisk until everything is smooth and well combined. The mixture should look like a thick, creamy orange liquid. It’s okay if there are a few small lumps of pumpkin—they’ll smooth out as you mix.
- In the same bowl (or a separate one if you prefer), add the dry ingredients: rolled oats, pumpkin pie spice, cinnamon, baking powder, and salt. Stir everything together with a spatula or wooden spoon until the oats are evenly coated. Don’t overmix—just stir until you don’t see any dry patches. The batter will look thick and almost like a loose cookie dough. That’s exactly what you want.
- Fold in your mix-ins if using. I usually add 1/2 cup of dark chocolate chips at this point. If you’re adding dried cranberries or pecans, fold them in gently. The batter will be thick, so take your time to distribute everything evenly.
- Spoon the mixture into the prepared muffin cups. Fill each cup almost to the top—about 3/4 full. I use a cookie scoop for this; it makes the process faster and gives you evenly sized cups. You should get exactly 12 cups from this batter. If you have a little extra, just distribute it evenly among the cups.
- Sprinkle the tops with pepitas and a pinch of brown sugar if desired. This step is optional, but it adds a lovely crunch and a slightly caramelized top. I always do it because it makes them look prettier and adds texture.
- Bake for 20-25 minutes. The cups are done when the tops are set and lightly golden, and a toothpick inserted into the center comes out clean or with just a few moist crumbs. My oven runs hot, so I check at 20 minutes. If the tops are browning too quickly, tent loosely with foil for the last 5 minutes.
- Let them cool in the pan for 5 minutes. This is important—if you try to remove them immediately, they might fall apart. After 5 minutes, transfer them to a wire rack to cool completely. The smell at this point is absolutely incredible. Honestly, it’s the best part of making them.
One thing I’ve learned: don’t skip the cooling step. I was impatient once and tried to eat one straight out of the oven. It was delicious, but it fell apart in my hands. Letting them set for those 5 minutes makes all the difference in texture.
Cooking Tips & Techniques
After making these pumpkin oatmeal cups more times than I can count, I’ve gathered a few tips that make the process smoother and the results more consistent.
Don’t overmix the batter. I know it’s tempting to keep stirring until everything looks perfectly smooth, but overmixing can make the oats release too much starch and create a gummy texture. Stir just until the ingredients are combined. A few lumps are totally fine.
Use room temperature ingredients if you can. Eggs and milk at room temperature blend more evenly into the batter. But honestly, I’ve used cold ingredients plenty of times and the cups still turned out great. Don’t stress about this if you’re short on time.
Check your pumpkin puree. Make sure you’re using 100% pure pumpkin, not pumpkin pie filling. The pie filling has added sugar and spices that will throw off the recipe. I made this mistake once and the cups were way too sweet and had a weird texture. Learn from my failure.
Toast your pepitas first. If you’re adding pepitas on top, toast them in a dry pan for 2-3 minutes before sprinkling. It brings out their nutty flavor and makes them extra crunchy. I do this while the oven is preheating.
Let them cool completely before storing. If you put warm oatmeal cups into an airtight container, they’ll release steam and get soggy on top. Let them cool on a wire rack for at least 30 minutes before transferring to a storage container.
Double the recipe for meal prep. These freeze beautifully, so I often make a double batch. I keep one batch in the fridge for the week and freeze the other for later. It’s a game-changer for busy mornings.
Variations & Adaptations
One of the best things about this recipe is how adaptable it is. I’ve tried several variations, and they’ve all been delicious in their own way.
- Chocolate Chip Pumpkin Oatmeal Cups: Add 1/2 cup of dark chocolate chips or white chocolate chips to the batter. The chocolate melts into little pockets of sweetness that pair perfectly with the pumpkin spice. This is my personal favorite variation.
- Apple Pumpkin Oatmeal Cups: Fold in 1/2 cup of finely diced apple (I use Honeycrisp or Granny Smith). The apple adds little bursts of freshness and a slight tartness that balances the sweetness. You might need to add an extra tablespoon of milk if the batter seems too thick.
- Vegan Version: Replace the eggs with flax eggs (2 tablespoons ground flaxseed mixed with 6 tablespoons water, let sit for 5 minutes) and use plant-based milk. The texture will be slightly denser, but they’re still incredibly good. I’ve made these for a vegan friend and she couldn’t tell the difference.
- Gluten-Free Version: Use certified gluten-free rolled oats. Everything else in the recipe is naturally gluten-free. Make sure your baking powder is also gluten-free—some brands contain wheat starch.
- Lower Sugar Version: Reduce the maple syrup to 1/4 cup and add an extra 1/4 cup of unsweetened applesauce. The applesauce adds moisture and natural sweetness without the extra sugar. I’ve tested this and the cups are still plenty sweet.
I also tried a version with chopped pecans and dried cranberries for a holiday twist. It tasted like Thanksgiving in a muffin cup. My family devoured them before I could even freeze any.
Serving & Storage Suggestions
These pumpkin oatmeal cups are incredibly versatile when it comes to serving. I love them warm, straight from the oven, with a pat of butter melting on top. But they’re just as good at room temperature, which makes them perfect for grab-and-go breakfasts.
For a cozy presentation, serve them in a basket lined with a cloth napkin. They look beautiful on a fall brunch table alongside other dishes like cinnamon apple baked oatmeal or a simple yogurt parfait. A drizzle of maple syrup or a dollop of Greek yogurt on top takes them to the next level.
Storage is simple:
- Refrigerator: Store in an airtight container for up to 5 days. Place a paper towel at the bottom of the container to absorb any excess moisture. I’ve kept them for a full week and they were still good on day 7.
- Freezer: These freeze beautifully for up to 3 months. Arrange them in a single layer on a baking sheet and freeze until solid, then transfer to a freezer-safe bag or container. This prevents them from sticking together.
- Reheating: Microwave for 20-30 seconds for a quick warm breakfast. For a crispier top, reheat in a toaster oven or air fryer at 350°F for 3-4 minutes. I actually prefer them reheated in the air fryer—the edges get slightly crispy while the inside stays soft.
The flavors actually develop and deepen after a day or two in the fridge. I honestly think they taste even better on day two. The spices meld together and the texture becomes more cohesive. It’s like they need a little time to become their best selves.
Nutritional Information & Benefits
These pumpkin oatmeal cups are a nutritious breakfast option that doesn’t sacrifice flavor. Here’s the estimated nutritional breakdown per cup (based on the basic recipe without mix-ins):
- Calories: 180-200
- Protein: 6g
- Carbohydrates: 32g
- Fiber: 4g
- Sugar: 12g (naturally occurring from maple syrup and pumpkin)
- Fat: 4g
- Vitamin A: 70% of daily value (from pumpkin)
Pumpkin is packed with vitamin A, which supports eye health and immune function. Oats provide soluble fiber that helps maintain steady blood sugar levels and keeps you full until lunch. The eggs add high-quality protein, and the maple syrup offers natural sweetness without refined sugar.
These cups are naturally dairy-free if you use plant-based milk, and they’re easily adaptable for gluten-free and vegan diets. They’re also nut-free (unless you add nuts as a mix-in), making them a safe option for school lunches or nut-free households.
From my personal wellness perspective, these oatmeal cups are the breakfast I turn to when I want something that feels indulgent but is actually good for me. They satisfy my fall cravings without the sugar crash that comes from store-bought pastries.
Conclusion
These cozy baked pumpkin oatmeal cups have become a staple in my kitchen, and I have a feeling they’ll become one in yours too. They’re the kind of recipe that feels special enough for a weekend brunch but practical enough for a Tuesday morning when you’re running late. The best part? They come together with minimal effort and maximum reward.
I love that this recipe is forgiving. If you forget an ingredient or need to make a substitution, it still works. It’s not finicky or demanding. It just delivers warm, spiced, comforting oatmeal cups that make your kitchen smell incredible and your mornings a little brighter.
I’d love to hear how these turn out for you. Did you add chocolate chips? Try a vegan version? Serve them with a dollop of yogurt? Drop a comment below and let me know your favorite variation. And if you’re looking for another easy breakfast idea, check out our sweet potato breakfast casserole—it’s another meal prep favorite that’s perfect for fall mornings.
Happy baking, friends. Here’s to cozy mornings and breakfasts that feel like a hug.
Frequently Asked Questions
Can I use quick oats instead of rolled oats?
I wouldn’t recommend it. Quick oats are more finely processed and will absorb liquid differently, resulting in a mushier texture. Rolled oats give the cups a nice chewy texture and help them hold their shape. If you only have quick oats, reduce the milk by 2 tablespoons and expect a softer, less structured cup.
Can I make these ahead of time for the week?
Absolutely! That’s the whole point of this recipe. Make a batch on Sunday, let them cool completely, and store them in an airtight container in the fridge. They’ll stay fresh for up to 5 days. Reheat in the microwave for 20-30 seconds, and you’ve got a warm breakfast in under a minute.
Can I freeze these pumpkin oatmeal cups?
Yes, they freeze beautifully. Freeze them in a single layer on a baking sheet, then transfer to a freezer-safe bag or container. They’ll keep for up to 3 months. To reheat, microwave from frozen for 45-60 seconds, or thaw in the fridge overnight and reheat as usual.
Why did my oatmeal cups turn out dry?
This usually happens if they’re overbaked or if the oat-to-liquid ratio is off. Make sure you’re using exactly 2 cups of rolled oats and 1 cup of pumpkin puree. Also, check your oven temperature—some ovens run hot. Start checking at 20 minutes and remove them as soon as a toothpick comes out clean.
Can I add protein powder to make them more filling?
You can, but you’ll need to adjust the liquid. Add 1-2 scoops of your favorite protein powder and increase the milk by 2-3 tablespoons to compensate for the extra dry ingredients. I’ve tried this with vanilla protein powder and it worked well, though the texture was slightly denser. Start with 1 scoop and see how you like it.
Pin This Recipe!
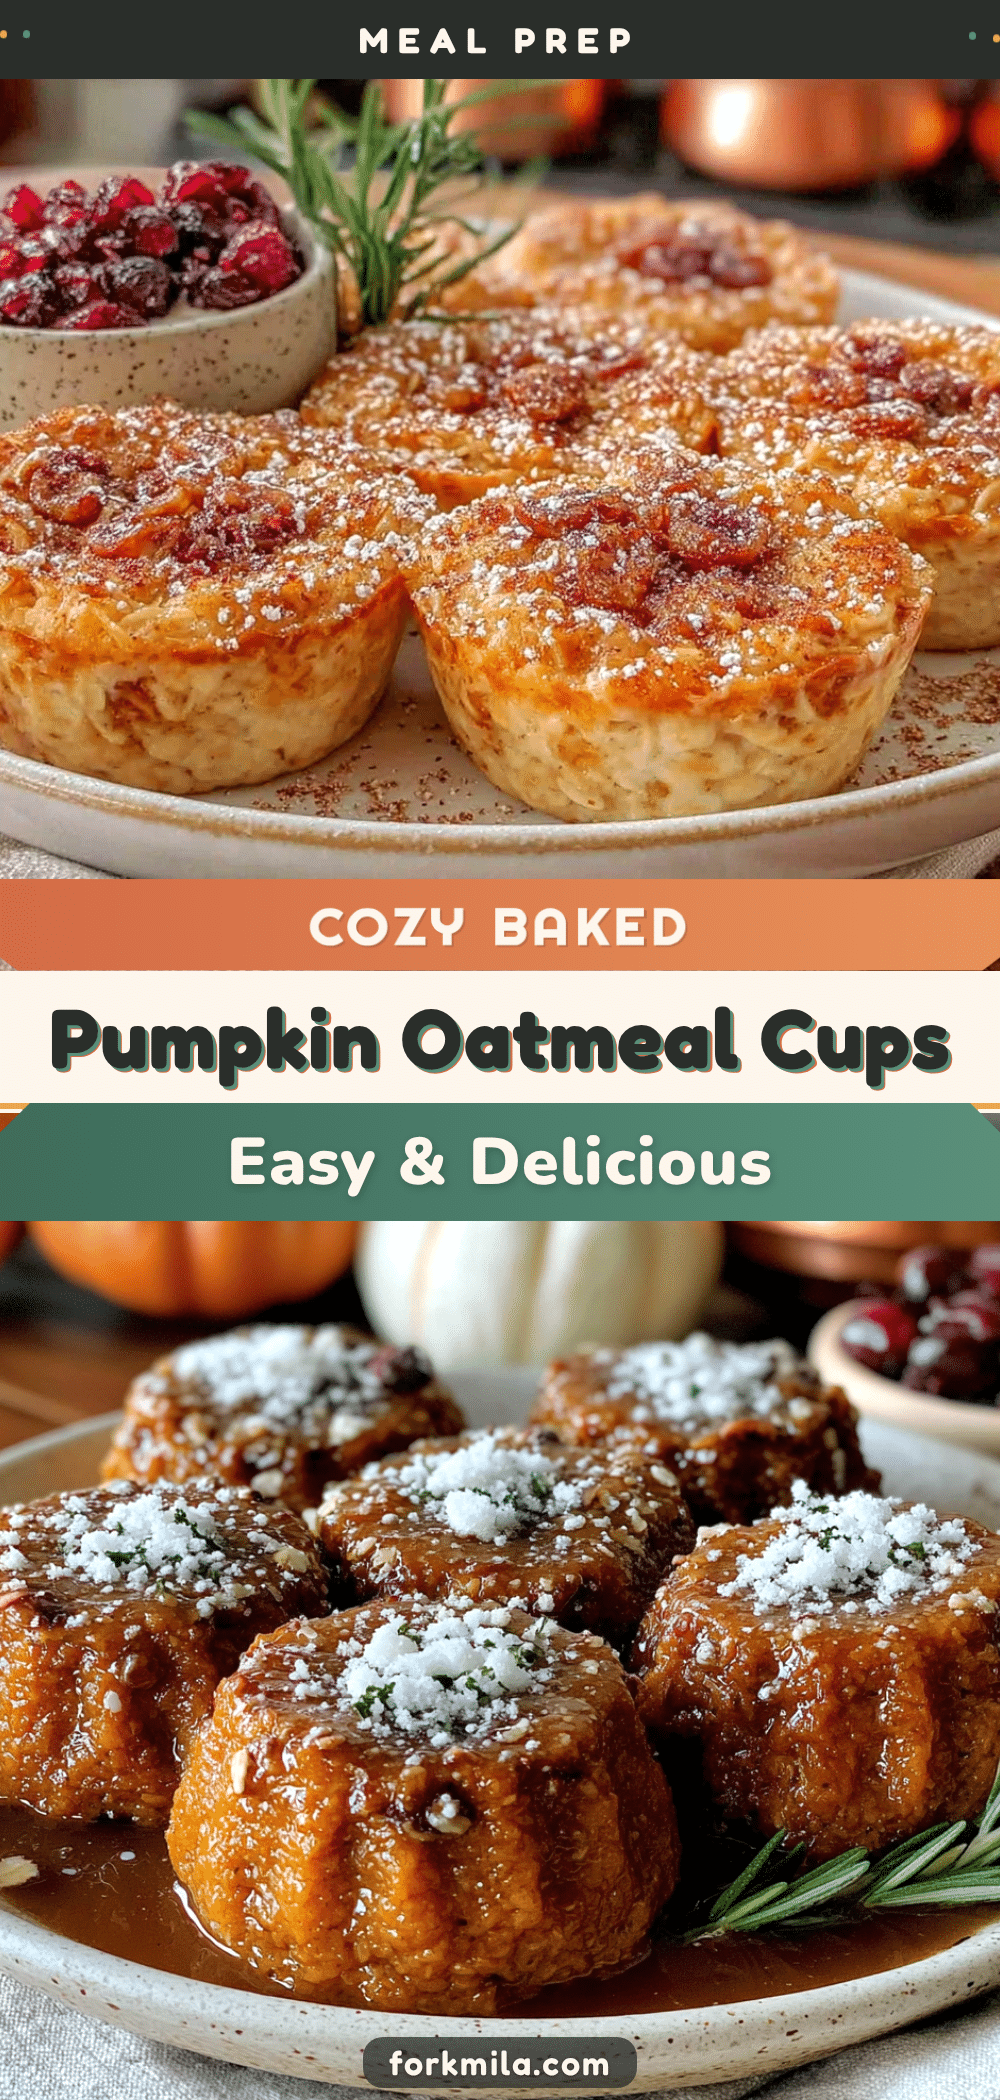
Cozy Baked Pumpkin Oatmeal Cups

These cozy baked pumpkin oatmeal cups are the perfect meal prep breakfast—soft, spiced, and portable. Made with simple ingredients, they reheat beautifully and taste like fall in every bite.
- Prep Time: 15 minutes
- Cook Time: 25 minutes
- Total Time: 40 minutes
- Yield: 12 servings 1x
- Category: Breakfast
- Cuisine: American
Ingredients
- 2 cups rolled oats (old-fashioned, not quick oats)
- 1 cup pumpkin puree (100% pure pumpkin, not pie filling)
- 1 cup milk (dairy, almond, oat, or coconut)
- 2 large eggs (room temperature preferred)
- 1/3 cup maple syrup (pure maple syrup; honey or agave work too)
- 2 teaspoons pumpkin pie spice
- 1 teaspoon cinnamon (Ceylon cinnamon recommended)
- 1 teaspoon baking powder
- 1 teaspoon vanilla extract (pure vanilla extract preferred)
- 1/4 teaspoon salt
- 1/2 cup chocolate chips, dried cranberries, or chopped pecans (optional mix-ins)
- 2 tablespoons pepitas (pumpkin seeds, optional topping)
- 1 tablespoon brown sugar (optional topping)
Instructions
- Preheat your oven to 350°F (175°C). Line a 12-cup muffin tin with paper liners or silicone baking cups. If using paper liners, spray them lightly with cooking spray to prevent sticking.
- In a large mixing bowl, whisk together the wet ingredients: pumpkin puree, milk, eggs, maple syrup, and vanilla extract until smooth and well combined.
- Add the dry ingredients to the same bowl: rolled oats, pumpkin pie spice, cinnamon, baking powder, and salt. Stir with a spatula or wooden spoon until the oats are evenly coated and no dry patches remain. The batter will be thick, like loose cookie dough.
- Fold in any optional mix-ins (e.g., chocolate chips, dried cranberries, or chopped pecans) gently until evenly distributed.
- Spoon the mixture into the prepared muffin cups, filling each about 3/4 full. A cookie scoop helps ensure even sizing. You should get exactly 12 cups.
- If desired, sprinkle the tops with pepitas and a pinch of brown sugar for added crunch and caramelization.
- Bake for 20-25 minutes, until the tops are set and lightly golden, and a toothpick inserted into the center comes out clean or with a few moist crumbs. If tops brown too quickly, tent loosely with foil for the last 5 minutes.
- Let the cups cool in the pan for 5 minutes—this is crucial for them to hold their shape. Then transfer to a wire rack to cool completely.
Notes
Don’t overmix the batter to avoid a gummy texture. Use room temperature ingredients if possible, but cold works too. Ensure you use 100% pure pumpkin, not pumpkin pie filling. Toast pepitas in a dry pan for 2-3 minutes before adding for extra crunch. Let cups cool completely before storing to prevent sogginess. For a single dish, bake in an 8×8 inch pan for about 30-35 minutes. Double the recipe for meal prep; freeze for up to 3 months.
Nutrition
- Serving Size: 1 oatmeal cup
- Calories: 180200
- Sugar: 12
- Sodium: 150
- Fat: 4
- Saturated Fat: 1
- Carbohydrates: 32
- Fiber: 4
- Protein: 6
Keywords: pumpkin oatmeal cups, baked oatmeal, meal prep breakfast, fall breakfast, pumpkin spice, healthy breakfast, grab-and-go breakfast


