There used to be a tiny bakery tucked between a laundromat and a dusty antiques shop on the edge of town that made a gingerbread cheesecake bar that changed how I thought about dessert. When they closed their doors three winters ago, I literally stood outside the locked gate for a minute, just staring. That first bite of their bar had this unexpected warmth—the tangy cream cheese cutting through the deep, spicy molasses crust in a way that felt like a secret handshake between sweet and savory. After seventeen tries—seventeen, let me tell you, some of them were downright sad—I finally got it. I remember the Tuesday night it happened. My kitchen looked like a gingerbread bomb went off, and I had molasses on the doorknob, but that first bite of these cozy gingerbread cheesecake bars made me actually laugh out loud. Maybe you’ve been there, chasing a flavor memory that feels just out of reach. This is the one that finally stopped running.
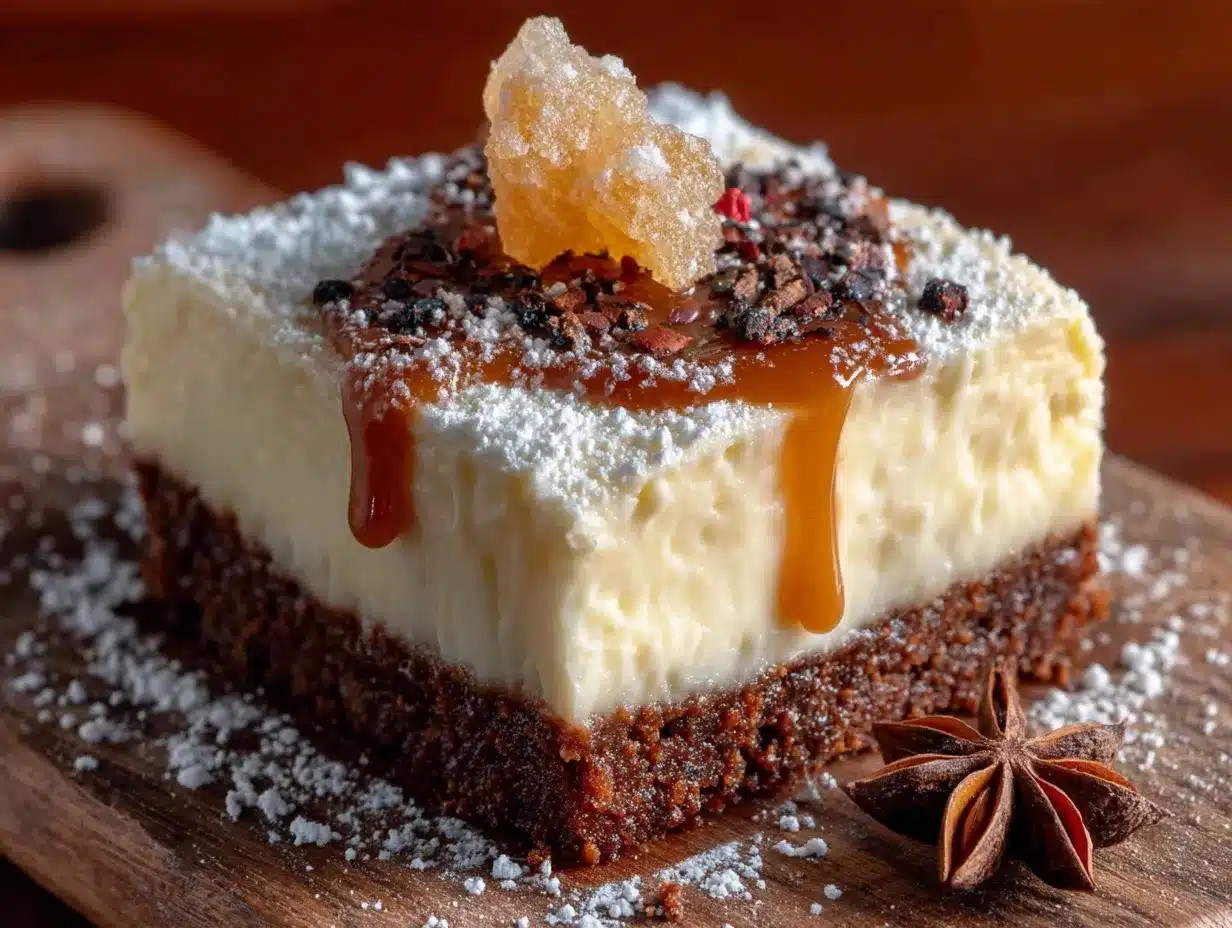
These bars are the kind of dessert that makes you slow down. You take a bite, and suddenly you’re not thinking about your to-do list or the email you forgot to send. You’re just tasting. The crust is this beautiful deep amber color from the molasses, and it has that slight chewiness that gives way to the silkiest, most luscious cheesecake layer. Honestly, I spent a good hour just staring at the pan after I pulled it from the oven that first successful time. My neighbor knocked on the door because she smelled it through the wall, and I handed her a piece still warm. She didn’t say anything for a full thirty seconds. That’s how I knew.
The beauty of this recipe is that it doesn’t try to be fancy. It’s not pretending to be a five-star restaurant dessert. It’s the thing you bring to a friend’s house when they’ve had a rough week. It’s the thing you make on a Sunday afternoon when the air gets cold and you just want to be in your kitchen with the oven on. It’s comfort, plain and simple, but comfort that took some work to get right. And now I get to share it with you.
Why You’ll Love This Recipe
Let me be straight with you—I’ve tested this recipe more times than I care to admit, and each time I learned something new. These cozy gingerbread cheesecake bars are the result of all those trials, and they’ve become my most-requested holiday dessert. Here’s why they’ll win you over too.
- Quick & Easy: Unlike a full cheesecake that needs a water bath and hours of cooling, these bars come together in about 45 minutes of active time. They’re perfect for when you want something impressive without the stress.
- Simple Ingredients: You probably have most of these in your pantry already. No hunting down obscure spices or specialty flours. Just good, honest ingredients that work together beautifully.
- Perfect for Holiday Gatherings: Whether it’s a cookie exchange, a Friendsgiving, or just a cozy night in, these bars fit right in. They’re sturdy enough to travel, elegant enough to impress, and familiar enough to comfort.
- Crowd-Pleaser: I’ve served these to kids, grandparents, and everyone in between. The combination of spicy gingerbread and creamy cheesecake is basically universal. People who say they don’t like cheesecake? They like these bars.
- Unbelievably Delicious: The texture is what gets me every time. That molasses crust has this slight crackle on the outside and a soft, almost cookie-like interior. Then you hit the cheesecake layer, and it’s like velvet. The whole thing just melts together.
What makes these different from other gingerbread desserts is the balance. I’ve had gingerbread cheesecake that was so heavy with molasses it tasted like burnt sugar, and I’ve had versions where the cheesecake was so thin you wondered why they bothered. This recipe nails the ratio. The crust is substantial enough to hold its own, but the cheesecake layer is thick and luscious. It’s the kind of dessert that makes you close your eyes after the first bite. Honestly, it’s comfort food at its finest—warm, spiced, creamy, and exactly what you need on a cold day.
What Ingredients You Will Need
This recipe uses simple, wholesome ingredients to create something truly special. Most of these are pantry staples, especially during the holiday season, which makes these bars perfect for spontaneous baking cravings.
For the Molasses Crust
- 2 cups (250g) all-purpose flour (I prefer King Arthur for consistent results, but any brand works fine)
- 1/2 cup (100g) packed dark brown sugar (light brown works too, but dark gives deeper flavor)
- 1 teaspoon baking soda
- 1 1/2 teaspoons ground ginger
- 1 teaspoon ground cinnamon
- 1/2 teaspoon ground cloves
- 1/4 teaspoon ground nutmeg (freshly grated if you have it—it makes a difference)
- 1/2 teaspoon salt
- 1/2 cup (113g) unsalted butter, cold and cubed
- 1/3 cup (113g) molasses (use unsulphured, not blackstrap—blackstrap is too bitter for this)
- 1 large egg
For the Cheesecake Layer
- 16 ounces (452g) cream cheese, softened (full-fat is best for texture, but reduced-fat works in a pinch)
- 1/2 cup (100g) granulated sugar
- 1/4 cup (50g) packed light brown sugar
- 2 large eggs, room temperature
- 1 teaspoon vanilla extract
- 1/2 teaspoon ground ginger
- 1/4 teaspoon ground cinnamon
- 1/4 teaspoon salt
- 1/4 cup (60ml) heavy cream (this makes the cheesecake extra silky—don’t skip it)
I recommend using Philadelphia cream cheese for the best texture. I’ve tried store brands, and they tend to be a bit grainier. Also, make sure your cream cheese is truly softened—leave it out for at least an hour, or microwave it in short bursts if you’re in a hurry. Cold cream cheese will give you lumpy cheesecake, and nobody wants that.
For the molasses, Grandma’s Molasses is my go-to. It has that perfect balance of sweetness and depth without being overpowering. If you only have blackstrap, you can use it, but reduce the amount to 1/4 cup and add an extra tablespoon of brown sugar to compensate for the bitterness.
Equipment Needed
You don’t need a fancy kitchen to make these bars, which is part of their charm. Here’s what you’ll need:
- 9×13-inch baking pan (glass or metal both work—I prefer metal for more even browning)
- Parchment paper (for easy removal—trust me on this one)
- Electric mixer (handheld or stand mixer both work fine)
- Large mixing bowls (one for the crust, one for the cheesecake)
- Food processor or pastry cutter (for cutting butter into the flour—a fork works too, but a food processor is faster)
- Spatula (for spreading the cheesecake layer evenly)
- Cooling rack (for even cooling)
- Sharp knife (for clean cuts—use a chef’s knife, not a butter knife)
If you don’t have a food processor, don’t worry. You can cut the cold butter into the flour mixture using a pastry cutter or even two forks. It takes a bit more elbow grease, but the result is the same. I’ve done it both ways, and honestly, sometimes the hand-mixed crust has a nicer texture—more rustic and crumbly.
Preparation Method
Let’s get baking. I’ve broken this down into clear steps with all the little details I wish someone had told me the first time.
Step 1: Prepare the Pan and Preheat
Preheat your oven to 350°F (175°C). Line your 9×13-inch baking pan with parchment paper, leaving some overhang on the long sides. This creates handles that make lifting the bars out so much easier. Lightly grease the parchment with butter or cooking spray.
Step 2: Make the Crust
In a large bowl or food processor, combine the flour, brown sugar, baking soda, ginger, cinnamon, cloves, nutmeg, and salt. If using a food processor, pulse a few times to combine. Add the cold, cubed butter and pulse (or cut in with a pastry cutter) until the mixture looks like coarse sand with some pea-sized butter pieces remaining. You want some texture here—don’t overdo it.
In a small bowl, whisk together the molasses and egg until smooth. Pour this into the flour mixture and mix until a dough forms. It will be sticky—that’s normal. Press the dough evenly into the bottom of your prepared pan. I use my fingers, but you can use the bottom of a measuring cup if you want a smoother surface. Bake for 12 minutes, then remove from the oven and let cool while you make the filling. The crust should be just set and slightly puffed.
Step 3: Make the Cheesecake Filling
In a large bowl, beat the softened cream cheese with an electric mixer on medium speed until smooth and creamy, about 2 minutes. Scrape down the sides and bottom of the bowl. Add both sugars and beat for another 2 minutes until light and fluffy. Add the eggs one at a time, beating on low speed after each addition just until combined. Overmixing at this stage can incorporate too much air, which leads to cracks in the cheesecake.
Add the vanilla, ginger, cinnamon, and salt, and mix on low until combined. Finally, pour in the heavy cream and mix until smooth. The batter should be silky and pourable. If it looks curdled, your cream cheese was probably too cold—don’t panic, it will still bake up fine.
Step 4: Assemble and Bake
Pour the cheesecake filling over the pre-baked crust and spread it evenly with a spatula. Give the pan a gentle tap on the counter to release any air bubbles. Bake for 30-35 minutes, until the edges are set and the center jiggles slightly when you shake the pan. It will continue to set as it cools, so don’t overbake. The top should be pale golden, not brown.
Step 5: Cool and Chill
Let the bars cool completely on a wire rack, about 1 hour. Then refrigerate for at least 4 hours, preferably overnight. This is the hardest part, I know. But chilling is essential for clean slices. The cheesecake needs time to firm up, and the flavors meld together beautifully overnight.
Step 6: Slice and Serve
Once fully chilled, use the parchment overhang to lift the entire block out of the pan. Place on a cutting board and use a sharp knife to slice into bars. Wipe the knife clean between cuts for the neatest edges. I cut mine into 24 bars, but you can go bigger or smaller depending on your crowd.
Cooking Tips & Techniques
After seventeen batches, I’ve learned a few things the hard way. Here are the tips that made the biggest difference.
- Don’t overmix the crust. When you add the molasses mixture, mix just until it comes together. Overworking the dough will make the crust tough instead of tender. You want it to be soft and slightly sticky.
- Room temperature ingredients matter. I cannot stress this enough. Cold eggs and cream cheese will give you a lumpy, curdled batter. Leave everything out for at least an hour before starting. I’ve forgotten this step and ended up with a cheesecake that had little cream cheese chunks in it—not the end of the world, but not as smooth as it should be.
- Use a water bath if you want extra insurance against cracks. I don’t always do this for bars, but if you’re nervous, place your pan inside a larger roasting pan and pour hot water halfway up the sides. This creates a gentle, even heat that prevents the cheesecake from puffing and cracking.
- Let the bars cool gradually. After baking, turn off the oven and crack the door open. Let the bars sit in the warm oven for 30 minutes before removing to the counter. This gradual cooling prevents the sudden temperature change that causes cracking.
- Use a hot knife for clean slices. Run your knife under hot water, dry it off, and make your cut. Repeat for each slice. It takes a bit more time, but the results are worth it.
I once forgot to add the heavy cream to my cheesecake filling. The bars still tasted good, but they were denser and less luxurious. That cream really does make a difference in the texture. Learn from my mistake!
Variations & Adaptations
One of the best things about this recipe is how adaptable it is. Here are some variations I’ve tried and loved.
Gluten-Free Version
Substitute the all-purpose flour with a 1:1 gluten-free baking flour blend. I’ve used Bob’s Red Mill with great results. The crust will be slightly more crumbly, but the flavor is just as good. Make sure your baking soda is gluten-free too.
Vegan Adaptation
Use vegan cream cheese (I like Miyoko’s) and a flax egg (1 tablespoon ground flaxseed mixed with 3 tablespoons water) for the crust. For the cheesecake, use a commercial vegan cream cheese and replace the eggs with 1/4 cup cornstarch mixed with 1/2 cup plant-based milk. The texture won’t be exactly the same, but it’s surprisingly close.
Spiced-Up Version
Add 1/4 teaspoon of black pepper to the crust for a subtle heat that plays beautifully with the ginger. Or throw in a pinch of cardamom for a more complex spice profile. I did this for a holiday party once, and people couldn’t stop asking what the secret ingredient was.
Chocolate Gingerbread Version
Add 1/4 cup cocoa powder to the crust mixture and reduce the flour by 2 tablespoons. The chocolate and gingerbread combination is absolutely divine. Top with a drizzle of melted dark chocolate for extra decadence.
Pumpkin Cheesecake Bars
Swap the gingerbread crust for a graham cracker crust and add 1/2 cup pumpkin puree to the cheesecake filling. Reduce the heavy cream to 2 tablespoons. This is my go-to for fall when I want something a little different.
Serving & Storage Suggestions
These bars are versatile when it comes to serving. Here’s how to make the most of them.
Serving Temperature: I prefer these bars cold, straight from the fridge. The cheesecake is firm and the crust has a nice snap. But if you like a softer texture, let them sit at room temperature for 15-20 minutes before serving. Both ways are delicious.
Presentation Ideas: Dust the tops with powdered sugar just before serving for a snowy effect. A dollop of whipped cream and a sprinkle of cinnamon never hurts either. For a more elegant presentation, drizzle with caramel sauce and top with candied ginger.
Pairing Suggestions: These bars pair beautifully with a cup of hot coffee or spiced chai. For a dessert spread, serve them alongside vanilla ice cream or poached pears. They also work well on a holiday cookie platter—just cut them smaller.
Storage: Store the bars in an airtight container in the refrigerator for up to 5 days. Layer them with parchment paper between layers to prevent sticking. They actually taste better on day two, after the flavors have had time to meld.
Freezing: These freeze beautifully. Wrap individual bars in plastic wrap, then place in a freezer-safe bag. They’ll keep for up to 3 months. Thaw in the refrigerator overnight before serving. I always keep a stash in my freezer for unexpected guests or late-night cravings.
Nutritional Information & Benefits
Let’s be real—these are a treat, not a health food. But that doesn’t mean they don’t have some redeeming qualities.
- Calories: Approximately 280 per bar (based on 24 servings)
- Protein: 5g
- Carbohydrates: 32g
- Fat: 15g
- Sugar: 20g
- Sodium: 220mg
Ginger, the star of this recipe, has anti-inflammatory properties and can help with digestion. Molasses is a good source of iron, calcium, and magnesium—it’s actually one of the more nutrient-dense sweeteners out there. And cream cheese provides calcium and protein, though let’s not pretend we’re eating this for the nutrients.
If you’re watching your sugar intake, you can reduce the sugar in the cheesecake layer by 2 tablespoons without affecting the texture too much. For a lower-fat option, use reduced-fat cream cheese, but know that the texture will be slightly less creamy.
These bars are not gluten-free, dairy-free, or vegan, but I’ve included adaptations above for those with dietary restrictions. Always check your ingredient labels if you’re cooking for someone with allergies.
Conclusion
These cozy gingerbread cheesecake bars are more than just a dessert—they’re a little piece of warmth you can hold in your hand. They’re the recipe I turn to when I need comfort, when I want to impress without stress, and when I just want to fill my kitchen with the smell of ginger and molasses. After all those failed attempts, this version finally captures what I was chasing: that perfect balance of spicy, sweet, creamy, and crunchy that makes you take a second bite before you’ve even swallowed the first.
I hope you give these a try and make them your own. Maybe you’ll add a little extra cinnamon, or skip the cloves if you’re not a fan. That’s the beauty of baking—it’s meant to be adapted. Let me know in the comments how yours turn out. Did you try a variation? Did you serve them at a party? I genuinely love hearing about your baking adventures.
Thanks for stopping by, and happy baking. May your kitchen be warm, your molasses be sticky, and your cheesecake be perfectly creamy.
Frequently Asked Questions
Can I use blackstrap molasses instead of regular molasses?
You can, but I wouldn’t recommend it. Blackstrap molasses has a much stronger, more bitter flavor that can overpower the other spices. If that’s all you have, use 1/4 cup instead of 1/3 and add an extra tablespoon of brown sugar to balance the bitterness.
Why did my cheesecake layer crack?
Cracks usually happen from overbaking or sudden temperature changes. Make sure you take the bars out when the center is still slightly jiggly, and let them cool gradually in the oven with the door cracked open. Using a water bath can also help prevent cracking.
Can I make these bars ahead of time?
Absolutely! In fact, they’re better when made a day ahead. The flavors meld together overnight, and the texture firms up perfectly. Store them in the refrigerator and slice just before serving.
How do I get clean, neat slices?
Chill the bars thoroughly—at least 4 hours, preferably overnight. Use a sharp knife and wipe it clean between each cut. For extra clean edges, run the knife under hot water and dry it off before each slice.
Can I freeze these bars?
Yes! They freeze beautifully for up to 3 months. Wrap individual bars in plastic wrap, then place them in a freezer-safe bag. Thaw overnight in the refrigerator before serving. They taste just as good as fresh.
Pin This Recipe!
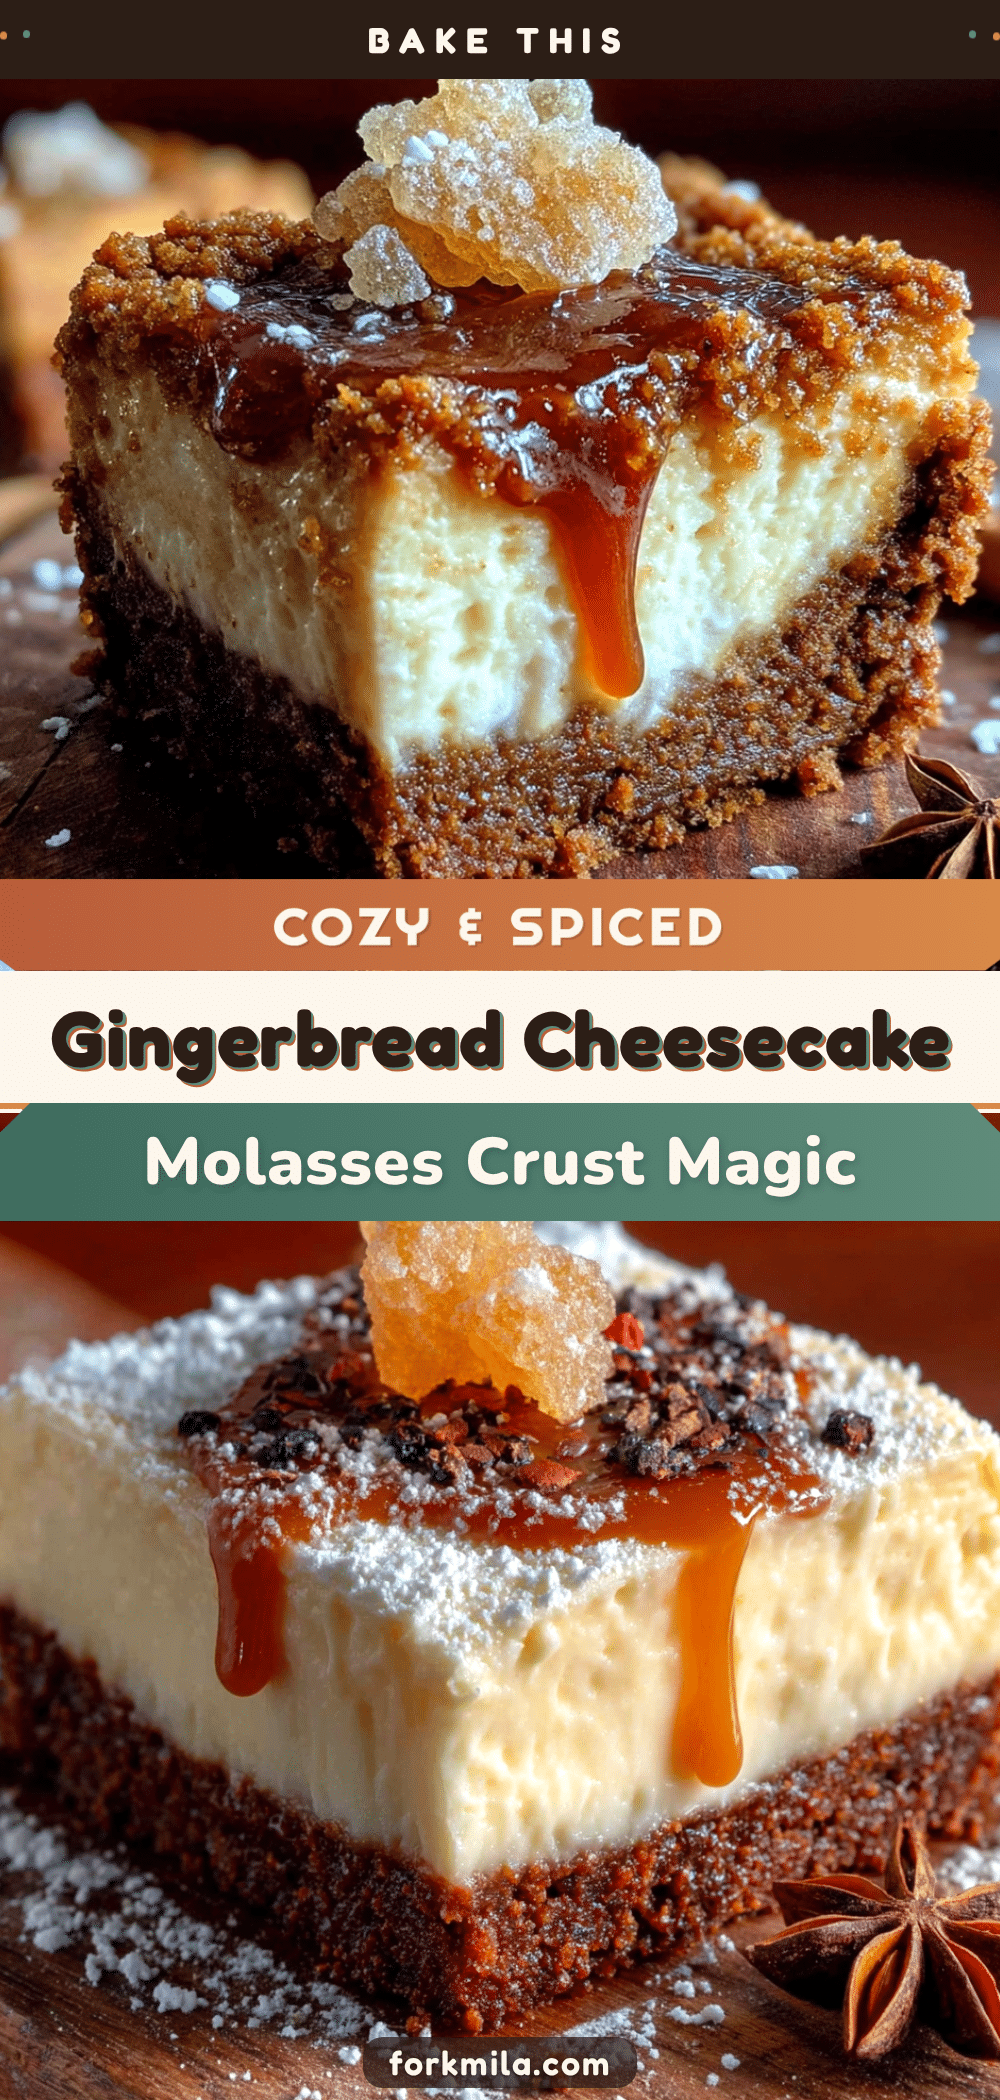
Cozy Gingerbread Cheesecake Bars: Easy Holiday Dessert
These cozy gingerbread cheesecake bars feature a spicy molasses crust and a silky cream cheese layer, creating the perfect balance of sweet and savory. They’re an easy, crowd-pleasing holiday dessert that comes together in about 45 minutes of active time.
- Prep Time: 45 minutes
- Cook Time: 30 minutes
- Total Time: 5 hours 15 minutes (includes chilling)
- Yield: 24 bars 1x
- Category: Dessert
- Cuisine: American
Ingredients
- 2 cups (250g) all-purpose flour
- 1/2 cup (100g) packed dark brown sugar
- 1 teaspoon baking soda
- 1 1/2 teaspoons ground ginger
- 1 teaspoon ground cinnamon
- 1/2 teaspoon ground cloves
- 1/4 teaspoon ground nutmeg
- 1/2 teaspoon salt
- 1/2 cup (113g) unsalted butter, cold and cubed
- 1/3 cup (113g) molasses (unsulphured, not blackstrap)
- 1 large egg
- 16 ounces (452g) cream cheese, softened
- 1/2 cup (100g) granulated sugar
- 1/4 cup (50g) packed light brown sugar
- 2 large eggs, room temperature
- 1 teaspoon vanilla extract
- 1/2 teaspoon ground ginger
- 1/4 teaspoon ground cinnamon
- 1/4 teaspoon salt
- 1/4 cup (60ml) heavy cream
Instructions
- Preheat oven to 350°F (175°C). Line a 9×13-inch baking pan with parchment paper, leaving overhang on the long sides. Lightly grease the parchment.
- Make the crust: In a large bowl or food processor, combine flour, dark brown sugar, baking soda, ginger, cinnamon, cloves, nutmeg, and salt. Add cold cubed butter and pulse or cut in until mixture resembles coarse sand with some pea-sized butter pieces.
- In a small bowl, whisk together molasses and egg until smooth. Pour into flour mixture and mix until a sticky dough forms. Press dough evenly into prepared pan. Bake for 12 minutes, then remove and let cool.
- Make the cheesecake filling: In a large bowl, beat softened cream cheese with an electric mixer on medium speed until smooth, about 2 minutes. Add both sugars and beat for another 2 minutes until light and fluffy.
- Add eggs one at a time, beating on low after each addition just until combined. Add vanilla, ginger, cinnamon, and salt; mix on low until combined. Pour in heavy cream and mix until smooth.
- Pour cheesecake filling over pre-baked crust and spread evenly. Tap pan gently on counter to release air bubbles. Bake for 30-35 minutes until edges are set and center jiggles slightly.
- Cool completely on a wire rack (about 1 hour), then refrigerate for at least 4 hours, preferably overnight.
- Use parchment overhang to lift bars out of pan. Slice into 24 bars using a sharp knife, wiping clean between cuts.
Notes
Use full-fat cream cheese for best texture. Let cream cheese and eggs come to room temperature before starting. For cleaner slices, chill bars thoroughly and use a hot knife. Bars can be frozen for up to 3 months.
Nutrition
- Serving Size: 1 bar
- Calories: 280
- Sugar: 20
- Sodium: 220
- Fat: 15
- Saturated Fat: 9
- Carbohydrates: 32
- Fiber: 1
- Protein: 5
Keywords: gingerbread cheesecake bars, holiday dessert, easy cheesecake bars, gingerbread dessert, cream cheese bars, molasses crust


