I used to think pumpkin pie was a bit of a one-trick pony. Honestly, for years, I’d pass it by at the Thanksgiving table in favor of something chocolate or a slice of apple crisp. It always felt like a lot of oven time for a pie that, in my opinion, could be a little… flat. Then my neighbor, this lovely woman named Clara who gardens like a pro, brought over a pan of these creamy no-bake pumpkin pie cheesecake bars last fall. She just set them on the counter, said “try one,” and left. I was skeptical, I mean, really skeptical. But I took a bite, and let me tell you, I had to stop myself from eating the whole pan right there on the spot. It was a total ambush of flavor.
The texture was this incredible thing—silky, rich, and impossibly creamy without being heavy. It had all the warm, spiced pumpkin flavor I loved but in a form that felt more like a decadent mousse than a custard. I asked Clara for the recipe, and she just shrugged and said it was “no big deal.” But it was a big deal. It was the kind of dessert that made me rethink my entire stance on pumpkin. Maybe you’ve been there, where one specific version of a dish completely changes your mind about a whole category of food. That was these bars for me. The power went out in my house a few weeks later, and I made them again just for myself, by candlelight, and that’s when I knew this recipe was a keeper.
Why You’ll Love These Creamy No-Bake Pumpkin Pie Cheesecake Bars
These bars aren’t just another pumpkin dessert. They are the result of a lot of testing in my own kitchen to get that perfect, melt-in-your-mouth texture without turning on the oven. Here is why I think you will absolutely love them:
- No Oven Required: This is a huge win, especially during the busy holiday season. It frees up your oven for the turkey or a casserole, and it is perfect for those unseasonably warm fall days.
- Simple Ingredients: You won’t need any fancy or hard-to-find ingredients. Most of these are pantry staples, especially if you have a well-stocked spice cabinet. It is a recipe you can decide to make on a whim.
- Perfect for Make-Ahead Desserts: These bars need time to set in the fridge, which makes them the ultimate make-ahead dessert. You can prep them the day before your gathering, and just slice and serve when you’re ready.
- Crowd-Pleaser: I have brought these to potlucks, family dinners, and even a casual book club meeting. They get devoured every single time. The combination of a buttery crust, creamy pumpkin cheesecake, and a dollop of whipped cream is just irresistible.
- Unbelievably Creamy Texture: The secret is in the blend of cream cheese and a little bit of heavy cream. It creates a filling that is light, airy, and incredibly luxurious, not dense or gluey like some no-bake cheesecakes can be.
This recipe is my best version of a classic fall flavor. It’s comfort food that feels a little bit special without any of the stress. It is the kind of dessert that makes you close your eyes after the first bite, and honestly, that is exactly what you want.
What Ingredients You Will Need
This recipe uses simple, wholesome ingredients to deliver that bold pumpkin spice flavor and satisfying creamy texture without the fuss of baking. Most of these are things you probably already have in your kitchen.
- For the Crust:
- 1 ½ cups (150g) graham cracker crumbs (about 10-12 full sheets). You can also use digestive biscuits or even vanilla wafers for a different flavor.
- ¼ cup (50g) granulated sugar. This adds a touch of sweetness to help the crust hold together.
- 6 tablespoons (85g) unsalted butter, melted. I use unsalted so I can control the salt level, but salted butter works in a pinch—just skip adding any extra salt.
- For the Pumpkin Cheesecake Filling:
- 16 ounces (450g) full-fat block cream cheese, softened to room temperature. This is crucial. Cold cream cheese will give you a lumpy filling. Let it sit on the counter for at least an hour.
- 1 cup (200g) packed light brown sugar. The molasses in brown sugar adds a deep, caramel-like flavor that pairs perfectly with pumpkin.
- 1 cup (240g) pumpkin puree. Make sure you are using 100% pure pumpkin puree, not pumpkin pie filling, which has added sugar and spices.
- 1 teaspoon vanilla extract. A good quality vanilla makes a difference.
- 2 teaspoons pumpkin pie spice. You can use a store-bought blend or make your own (see note below).
- ½ teaspoon ground cinnamon. For an extra layer of warm spice.
- ¼ teaspoon salt. This balances the sweetness and enhances all the flavors.
- 1 cup (240ml) heavy whipping cream, cold. This is the key to that light, mousse-like texture. Do not substitute with half-and-half or milk.
- For the Topping (Optional but Recommended):
- 1 cup (240ml) heavy whipping cream, cold.
- 2 tablespoons powdered sugar.
- ½ teaspoon vanilla extract.
- Ground cinnamon or pumpkin pie spice, for dusting.
A Note on Pumpkin Pie Spice: If you don’t have any on hand, it is super easy to make. Just mix together 1 teaspoon ground cinnamon, ½ teaspoon ground ginger, ¼ teaspoon ground nutmeg, and ¼ teaspoon ground cloves. I always make a big batch at the start of fall!
Equipment Needed
You don’t need a lot of fancy gadgets for this recipe, which is part of its charm. Here is what you will need:
- 9×9-inch square baking pan. An 8×8-inch pan will also work, but your bars will be a little thicker. You will also need one that is at least 2 inches deep.
- Parchment paper. This is a lifesaver for lifting the bars out of the pan cleanly. I like to leave some overhang on two opposite sides to create “handles.”
- Electric hand mixer or stand mixer. While you can whisk the filling by hand, a mixer will make the process much faster and ensure a super smooth, airy texture.
- Large mixing bowls. You will need one for the crust and one for the filling.
- Medium mixing bowl. For whipping the cream.
- Rubber spatula. For scraping down the sides of the bowl and folding in the whipped cream.
- Measuring cups and spoons. For accurate measurements.
- Plastic wrap or aluminum foil. For covering the pan while it chills.
If you don’t have a 9×9 pan, you could use a 9-inch springform pan for a more traditional cheesecake look. Just be aware that the bars will be a bit shorter. A food processor is great for making graham cracker crumbs, but you can also crush them by hand in a sealed plastic bag using a rolling pin.
Preparation Method
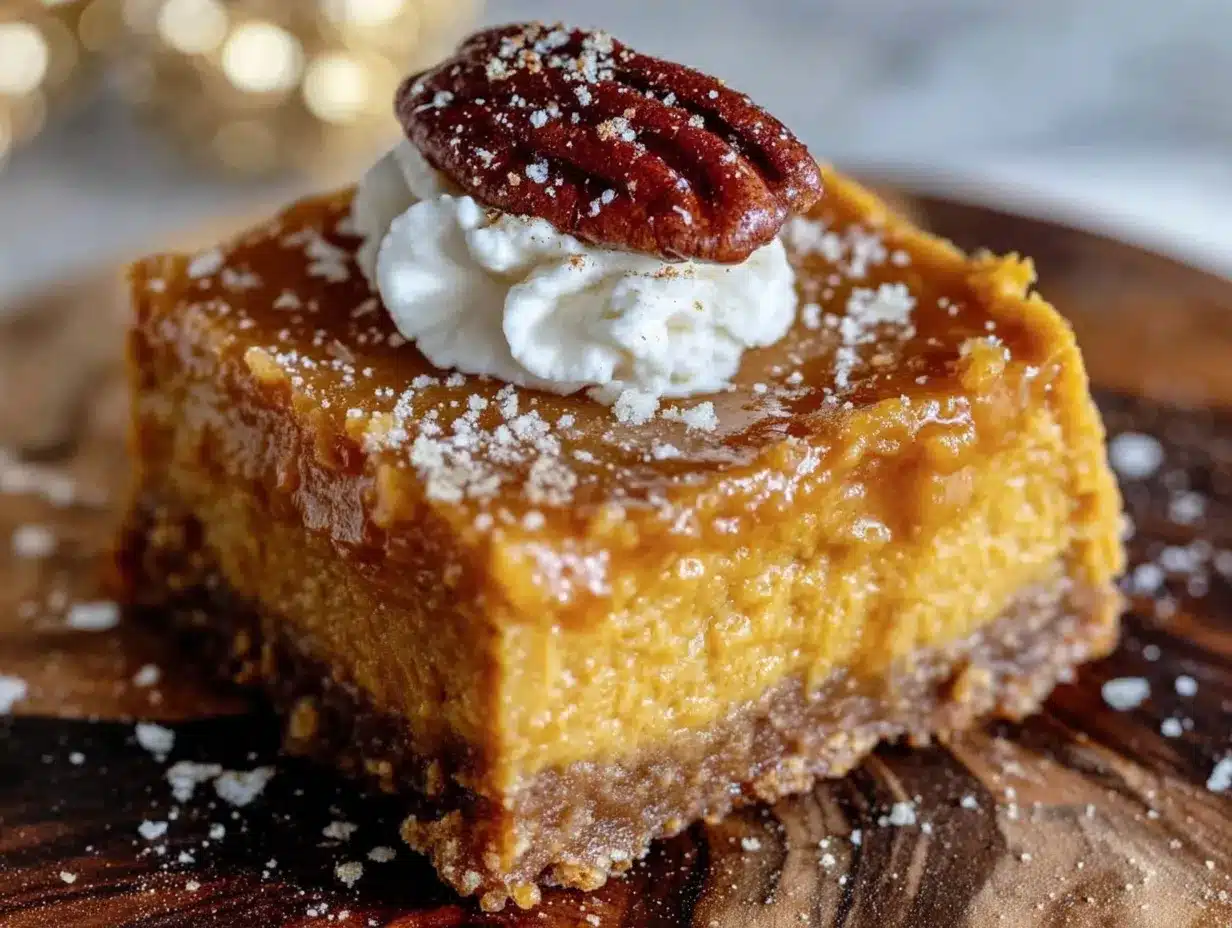
Let’s get to the fun part. This recipe is broken down into simple steps to make it foolproof. Take your time, and you will be rewarded with the most incredible dessert.
- Prepare the Pan: Line your 9×9-inch baking pan with two long sheets of parchment paper, crisscrossing them so there is overhang on all four sides. This will make it super easy to lift the bars out later. Set it aside.
- Make the Crust: In a medium bowl, combine the graham cracker crumbs and granulated sugar. Pour the melted butter over the top and stir with a fork until the mixture looks like wet sand and all the crumbs are evenly moistened. It should clump together when you squeeze a bit in your hand.
- Press the Crust: Transfer the crumb mixture to your prepared pan. Use the bottom of a flat measuring cup or a glass to press it down firmly and evenly. Really pack it in there—a tight crust will hold together better after slicing. Pop the pan into the refrigerator to chill while you make the filling. This helps the butter set.
- Whip the Cream: In a clean, medium mixing bowl, pour the cold heavy whipping cream. Using your electric mixer with the whisk attachment, beat the cream on medium-high speed until it forms stiff peaks. This means when you lift the beaters, the cream stands up straight and doesn’t flop over. Be careful not to over-whip it into butter! Set the bowl aside in the fridge.
- Make the Filling Base: In a large mixing bowl, beat the softened cream cheese with an electric mixer on medium speed until it is completely smooth and creamy, about 2 minutes. Scrape down the sides and bottom of the bowl with your spatula. Add the packed brown sugar and beat again until it is light and fluffy, about 2 more minutes.
- Add Pumpkin & Spices: Add the pumpkin puree, vanilla extract, pumpkin pie spice, cinnamon, and salt to the cream cheese mixture. Beat on low speed until everything is just combined. Scrape the bowl again. You want to avoid incorporating too much air at this stage.
- Fold in the Whipped Cream: This is the most important step for getting that light, airy texture. Remove the bowl of whipped cream from the fridge. Add about one-third of the whipped cream to the pumpkin mixture. Use your rubber spatula to gently fold it in. Start by cutting down through the center of the mixture, then scrape along the bottom of the bowl and bring the spatula up and over the top. Rotate the bowl a quarter turn and repeat. Once that first third is mostly incorporated, add the rest of the whipped cream and fold it in gently until no white streaks remain. The mixture should be thick, smooth, and luscious.
- Assemble the Bars: Remove the crust from the refrigerator. Spoon the creamy pumpkin filling onto the crust and spread it into an even layer using your spatula. Give the pan a few gentle taps on the counter to release any air bubbles.
- Chill: Cover the pan tightly with plastic wrap or aluminum foil. Refrigerate for at least 6 hours, but overnight is best. This gives the filling plenty of time to set up and become perfectly sliceable. Don’t rush this step!
- Make the Whipped Topping (Optional): When you are ready to serve, make the topping. In a clean bowl, beat the cold heavy cream, powdered sugar, and vanilla extract until stiff peaks form. You can do this just before serving.
- Slice and Serve: When the bars are fully set, use the parchment paper handles to lift the entire block out of the pan. Place it on a cutting board. Use a large, sharp knife to slice it into 9 or 16 squares. For clean slices, wipe the knife clean between each cut. Top each bar with a dollop of whipped cream and a light dusting of cinnamon.
Cooking Tips & Techniques
I have made these bars more times than I can count, and I’ve definitely learned a thing or two along the way. Here are my best tips for perfect results every time.
The Most Important Tip: Room Temperature Cream Cheese. I cannot stress this enough. If your cream cheese is cold, you will end up with a lumpy filling, no matter how long you beat it. Let it sit on the counter for at least an hour. If you are in a hurry, you can cut it into cubes and microwave it at 10-second intervals on low power until it is soft to the touch, but be careful not to melt it.
Don’t Over-Whip the Cream. You want stiff peaks, but if you keep beating, you will end up with a grainy, buttery mess. Once you see the cream starting to hold its shape, slow down your mixer and watch it closely. It is better to stop a little early than a second too late.
Patience is a Virtue. I know it is tempting to dig in after a few hours, but the 6-hour minimum chill time is non-negotiable for clean slices. Overnight is truly best. The filling needs that time to firm up and for the flavors to meld together beautifully.
Pressing the Crust. Use a flat-bottomed glass or a measuring cup to really pack the crust down. A loose crust will crumble and fall apart when you try to cut the bars. I once used my fingers, and it was a disaster. The measuring cup method is a game-changer.
Variations & Adaptations
One of the best things about this recipe is how easy it is to adapt. Here are some ways I have played around with it in my own kitchen.
- Gluten-Free Version: Simply swap the graham crackers for your favorite gluten-free graham crackers or use crushed gluten-free ginger snaps for a spicy kick. The rest of the ingredients are naturally gluten-free.
- Bourbon Pumpkin Version: For an adult twist, add 1 to 2 tablespoons of good bourbon to the filling along with the vanilla extract. It adds a lovely warmth that pairs perfectly with the pumpkin and spices. I tried this one Thanksgiving, and it was a huge hit with the adults.
- Chocolate Lover’s Dream: Melt ½ cup of dark chocolate chips and drizzle it over the top of the set bars before adding the whipped cream. You can also add a layer of chocolate ganache between the crust and the filling for a double-chocolate pumpkin experience.
- Vegan-Friendly Option: You can make a vegan version by using a plant-based cream cheese (like Kite Hill or Tofutti), a vegan butter stick for the crust, and a can of full-fat coconut cream (chilled overnight, scooping only the solid part) in place of the heavy cream. The texture will be slightly different, but still very delicious.
- Spiced-Up Crust: Add ½ teaspoon of ground ginger or cinnamon to the graham cracker crumbs before adding the butter. It gives the entire bar a more cohesive spice profile.
Serving & Storage Suggestions
Serving: These bars are best served very cold, straight from the refrigerator. The cold temperature helps them hold their shape perfectly. I like to add a generous dollop of freshly whipped cream and a light dusting of cinnamon or pumpkin pie spice right before serving. They are fantastic on their own, but they also pair beautifully with a warm cup of coffee, a spiced chai latte, or even a scoop of vanilla bean ice cream on the side for an extra indulgent treat.
Storage: Store any leftover bars in an airtight container in the refrigerator. They will keep well for up to 5 days. In fact, the flavors often deepen and become even more pronounced on the second day. The texture stays perfectly creamy.
Freezing: These bars freeze like a dream! Once the bars are fully set and sliced, place them on a baking sheet lined with parchment paper and freeze for about an hour, or until they are solid. Then, transfer the frozen bars to a freezer-safe bag or container, placing a piece of parchment paper between each layer to prevent sticking. They can be frozen for up to 3 months. To serve, simply thaw them in the refrigerator for a few hours or overnight. You can add the whipped cream topping after they have thawed for the best presentation.
Flavor Development: Honestly, I think these taste even better the next day. The spices have time to meld with the pumpkin and cream cheese, creating a more complex and harmonious flavor. So don’t be afraid to make them a day ahead!
Nutritional Information & Benefits
While these are definitely a treat, there are a few nutritional highlights worth mentioning. Please note that the following values are estimates and will vary based on the specific ingredients and portion sizes you use. This is based on 9 generous servings.
| Nutrient | Approximate Amount (per serving) |
|---|---|
| Calories | 480 |
| Total Fat | 34g |
| Saturated Fat | 20g |
| Cholesterol | 115mg |
| Sodium | 320mg |
| Total Carbohydrates | 40g |
| Dietary Fiber | 2g |
| Sugars | 30g |
| Protein | 5g |
| Vitamin A | 120% DV |
Health Benefits: The star ingredient, pumpkin, is packed with Vitamin A, which is fantastic for your immune system and eye health. It is also a good source of fiber. The cream cheese and heavy cream provide calcium and protein. Of course, this is a dessert meant to be enjoyed in moderation, but it is nice to know it has a few redeeming qualities!
Dietary Considerations: As written, this recipe contains gluten (from the graham crackers) and dairy. For a gluten-free option, use gluten-free graham crackers. For a dairy-free option, see the variations section above.
Conclusion
These creamy no-bake pumpkin pie cheesecake bars are more than just a simple dessert. They are a testament to the fact that you don’t need an oven or a ton of complicated techniques to create something truly spectacular. They have that same soul-soothing satisfaction of a classic holiday pie, but with a lighter, more indulgent texture that is just impossible to resist. I love that they take the stress out of entertaining, allowing me to spend more time with my family and less time worrying about a complicated dessert.
I really hope you give these a try. They are perfect for a cozy weekend treat, a Thanksgiving potluck, or just because you deserve something beautiful and delicious. Don’t be afraid to make them your own—swap the spices, try a different crust, or add a drizzle of caramel. I would love to hear how they turn out for you! Please leave a comment below and let me know what you think, or share your own creative twist. Happy no-baking!
Frequently Asked Questions
Can I use a different size pan?
Yes, you can. A 9×9-inch pan is ideal, but an 8×8-inch pan will work. Your bars will just be a little thicker, and you may need to increase the chill time by an hour or two. A 9×13-inch pan will result in much thinner bars, so you would need to reduce the chill time slightly.
Can I use low-fat cream cheese?
I do not recommend it. The full-fat block cream cheese is essential for the rich, creamy texture and structure of the bars. Low-fat or Neufchâtel cheese has a higher water content, which can result in a softer, less stable filling that might not set up properly.
Can I use canned pumpkin pie filling instead of pumpkin puree?
No, please do not. Pumpkin pie filling is pre-sweetened and pre-spiced. Using it will throw off the sugar and spice balance in the recipe, and you will likely end up with a filling that is too sweet and dense. Always use 100% pure pumpkin puree.
My filling came out lumpy. What went wrong?
The most common reason for a lumpy filling is that the cream cheese was not fully softened to room temperature. Cold cream cheese does not blend smoothly into the other ingredients. Make sure to let it sit out for at least an hour before you start. If you do get small lumps, you can try beating the mixture for a longer time on medium speed, but the best fix is prevention.
Can I skip the homemade whipped cream topping?
Absolutely! The bars are delicious on their own. The whipped cream is a lovely, light addition that balances the richness of the cheesecake, but it is not required. You could also use a store-bought whipped topping, like Cool Whip, if you are short on time, but the homemade version is far superior in taste and texture.
Pin This Recipe!
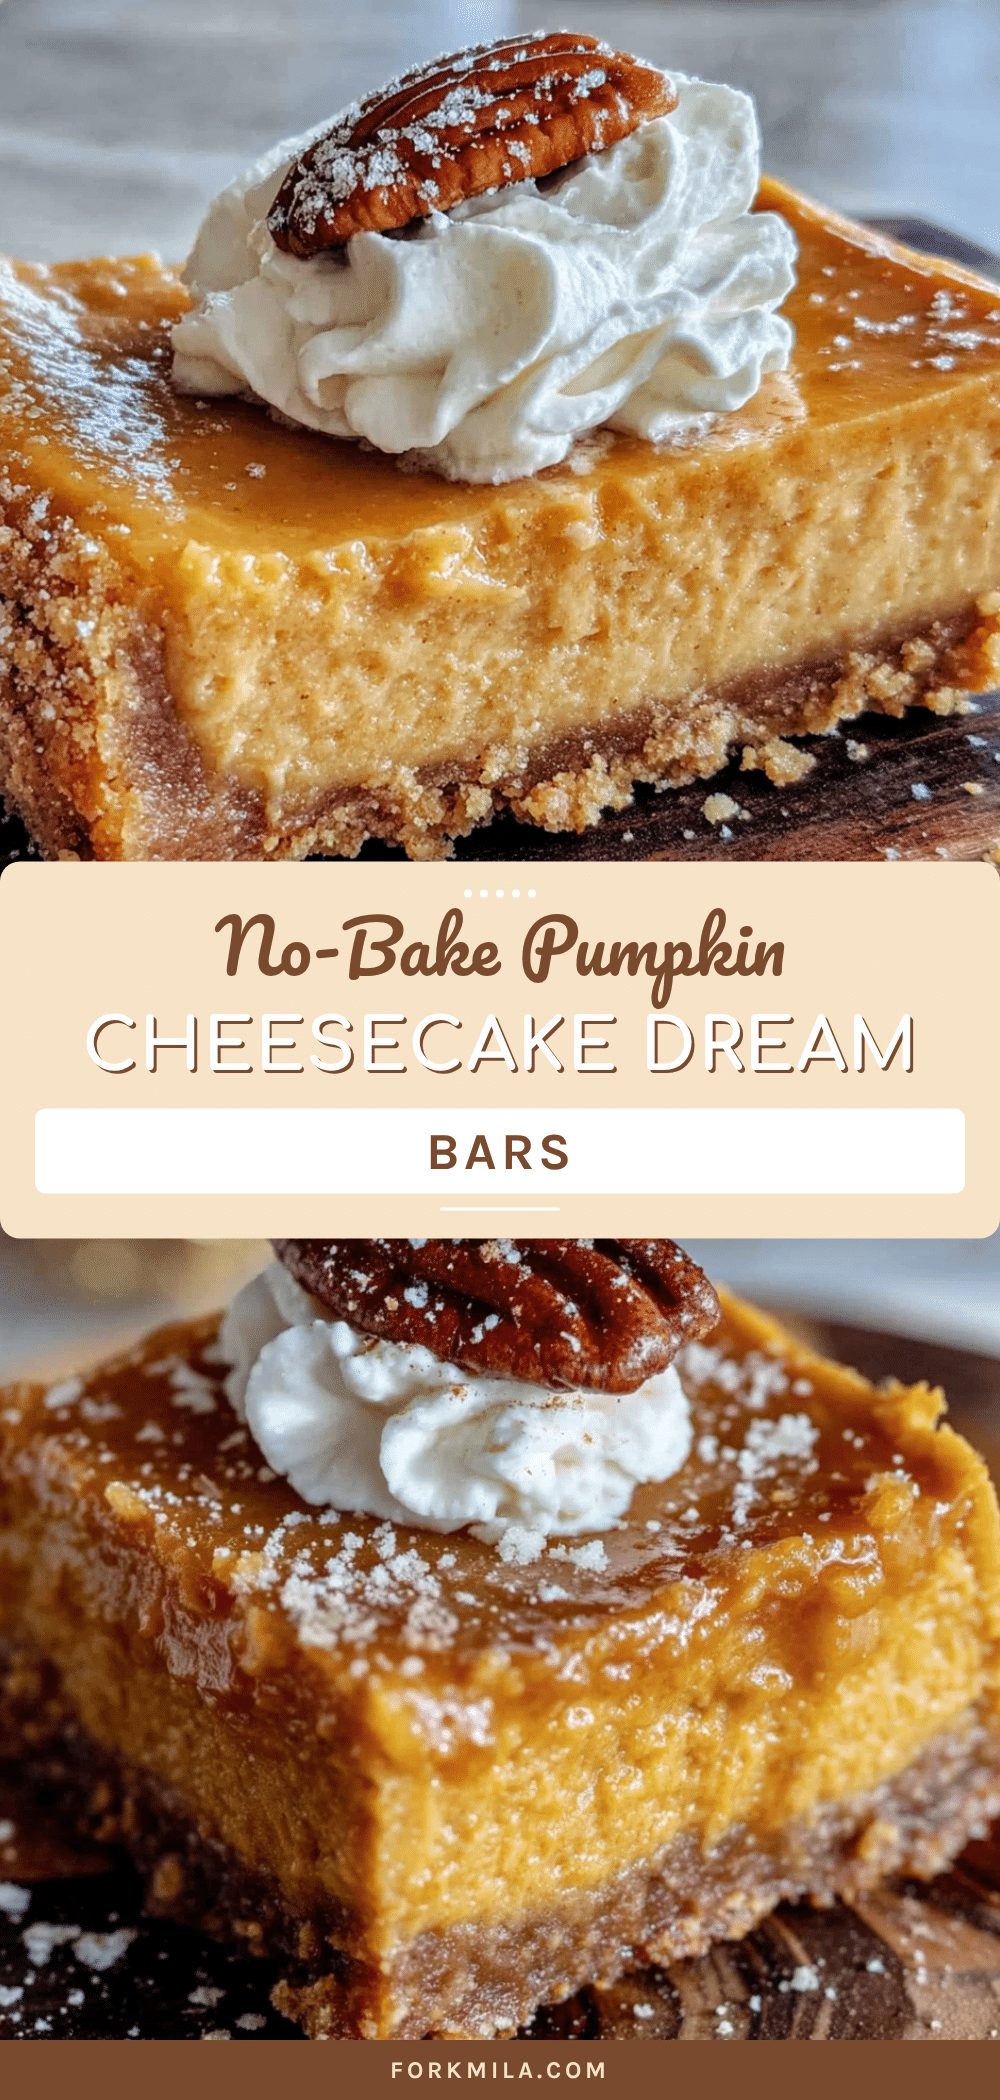
Creamy No-Bake Pumpkin Pie Cheesecake Bars (Easy Fall Dessert)
These creamy no-bake pumpkin pie cheesecake bars are a decadent, melt-in-your-mouth fall dessert with a buttery graham cracker crust and a light, mousse-like pumpkin cheesecake filling. No oven required, perfect for make-ahead holiday entertaining.
- Prep Time: 20 minutes
- Cook Time: 0 minutes
- Total Time: 6 hours 20 minutes (includes chilling)
- Yield: 9 servings 1x
- Category: Dessert
- Cuisine: American
Ingredients
- 1 ½ cups (150g) graham cracker crumbs (about 10–12 full sheets)
- ¼ cup (50g) granulated sugar
- 6 tablespoons (85g) unsalted butter, melted
- 16 ounces (450g) full-fat block cream cheese, softened to room temperature
- 1 cup (200g) packed light brown sugar
- 1 cup (240g) pumpkin puree (100% pure, not pumpkin pie filling)
- 1 teaspoon vanilla extract
- 2 teaspoons pumpkin pie spice
- ½ teaspoon ground cinnamon
- ¼ teaspoon salt
- 1 cup (240ml) heavy whipping cream, cold
- 1 cup (240ml) heavy whipping cream, cold (for topping)
- 2 tablespoons powdered sugar (for topping)
- ½ teaspoon vanilla extract (for topping)
- Ground cinnamon or pumpkin pie spice, for dusting (for topping)
Instructions
- Line a 9×9-inch baking pan with two long sheets of parchment paper, crisscrossing them so there is overhang on all four sides. Set aside.
- In a medium bowl, combine graham cracker crumbs and granulated sugar. Pour melted butter over the top and stir with a fork until the mixture looks like wet sand and all crumbs are evenly moistened.
- Transfer the crumb mixture to the prepared pan. Use the bottom of a flat measuring cup or a glass to press it down firmly and evenly. Refrigerate the crust while you make the filling.
- In a clean, medium mixing bowl, pour the cold heavy whipping cream. Using an electric mixer with the whisk attachment, beat the cream on medium-high speed until stiff peaks form. Set aside in the fridge.
- In a large mixing bowl, beat the softened cream cheese with an electric mixer on medium speed until completely smooth and creamy, about 2 minutes. Scrape down the sides and bottom of the bowl.
- Add the packed brown sugar and beat again until light and fluffy, about 2 more minutes.
- Add the pumpkin puree, vanilla extract, pumpkin pie spice, cinnamon, and salt. Beat on low speed until just combined. Scrape the bowl again.
- Remove the bowl of whipped cream from the fridge. Add about one-third of the whipped cream to the pumpkin mixture. Gently fold it in using a rubber spatula. Add the remaining whipped cream and fold gently until no white streaks remain.
- Remove the crust from the refrigerator. Spoon the creamy pumpkin filling onto the crust and spread it into an even layer. Give the pan a few gentle taps on the counter to release any air bubbles.
- Cover the pan tightly with plastic wrap or aluminum foil. Refrigerate for at least 6 hours, but overnight is best.
- When ready to serve, make the topping: In a clean bowl, beat the cold heavy cream, powdered sugar, and vanilla extract until stiff peaks form.
- Use the parchment paper handles to lift the entire block out of the pan. Place on a cutting board. Use a large, sharp knife to slice into 9 or 16 squares. Top each bar with a dollop of whipped cream and a light dusting of cinnamon.
Notes
Cream cheese must be at room temperature to avoid lumps. Do not over-whip the cream. Chill for at least 6 hours (overnight is best) for clean slices. For gluten-free, use gluten-free graham crackers. For a dairy-free version, use plant-based cream cheese, vegan butter, and coconut cream.
Nutrition
- Serving Size: 1 bar (based on 9 se
- Calories: 480
- Sugar: 30
- Sodium: 320
- Fat: 34
- Saturated Fat: 20
- Carbohydrates: 40
- Fiber: 2
- Protein: 5
Keywords: no-bake pumpkin cheesecake bars, pumpkin pie bars, easy fall dessert, no-bake cheesecake, pumpkin dessert, Thanksgiving dessert, make-ahead dessert


