The school fundraiser flyer had been stuck to my refrigerator for three weeks, held up by a magnet shaped like a slice of pizza. I kept meaning to throw it away, but every time I reached for it, something else demanded my attention—a forgotten lunchbox, a permission slip that needed signing, the eternal question of what to make for dinner. It was a Tuesday afternoon, and I was standing in my kitchen, staring into the open fridge like it might magically produce a meal plan, when my neighbor Carol knocked on the door. She was holding a foil-covered baking dish and wearing the kind of satisfied smile that usually means someone just made something really, really good.
“These are for you,” she said, pushing the warm dish into my hands. “I made too many. Again.” Carol is in her seventies, a retired home economics teacher who gardens like it’s an Olympic sport and bakes like she’s feeding a small army every single day. I wasn’t expecting cooking advice from my elderly neighbor who still calls the internet “the Google,” but there I was, standing in my doorway, listening to her describe exactly how to make these cheeseburger sliders. She’d scribbled the recipe on the back of an old envelope—her handwriting looping and confident—and told me they freeze beautifully, which honestly felt like she was speaking my love language.
I baked them that night for a crowd of hungry kids and adults who showed up for a last-minute game night. Let me tell you, the silence that fell over the room when those sliders came out of the oven was the kind of quiet you only hear when food is really, really good. The sweet Hawaiian rolls, the savory beef, the melty cheese—it was comfort in every bite. I’ve made these cheeseburger sliders at least a dozen times since that evening, tweaking the seasoning and perfect the technique until they became my go-to for busy weeknights, potlucks, and emergency dinners. Maybe you’ve been there—standing in your kitchen, wondering what to feed everyone, wishing for something that tastes like you spent hours but actually comes together in minutes. These sliders are that answer.
Why You’ll Love This Recipe
These cheeseburger sliders aren’t just another dinner idea—they’re the kind of recipe that makes you look like a kitchen hero without breaking a sweat. I’ve tested this recipe more times than I can count, tweaking the meat-to-cheese ratio and experimenting with different roll brands until I landed on the perfect combination. As someone who’s been cooking for over a decade and has fed everything from picky toddlers to judgmental in-laws, I can tell you with confidence: these sliders deliver every single time.
- Quick & Easy: From start to finish, these sliders come together in about 30 minutes. Perfect for those nights when you walk in the door at 5:30 and need dinner on the table by 6.
- Simple Ingredients: Ground beef, cheese, Hawaiian rolls, and a few pantry staples. No fancy grocery trips needed—you probably already have everything in your kitchen.
- Perfect for Any Occasion: Game day, potlucks, birthday parties, busy weeknights, or lazy Sundays. These sliders fit every scenario.
- Crowd-Pleaser: I’ve yet to meet someone who doesn’t love these. Kids devour them, adults go back for seconds, and they disappear faster than almost anything I make.
- Unbelievably Delicious: The sweet-savory combo of Hawaiian rolls with seasoned beef and melty cheese is next-level comfort food.
- Freezer-Friendly: Make a batch, freeze them, and have dinner ready whenever you need it. This is the real game-changer for meal prep.
What makes these sliders different from every other recipe out there? It’s the little things—the perfect seasoning blend, the way the butter topping soaks into the rolls, and the technique for keeping the meat juicy instead of dry. I’ve tried versions that use too much ketchup or skip the mustard altogether, and they just don’t hit the same. This version is balanced, tested, and absolutely foolproof.
Honestly, this recipe is the kind that makes you close your eyes after the first bite. It’s comfort food at its finest—familiar, satisfying, and somehow even better than the classic cheeseburger it’s inspired by. Whether you’re feeding a crowd or just want something cozy for yourself, these sliders deliver that soul-soothing satisfaction we all crave.
What Ingredients You Will Need
This recipe uses simple, everyday ingredients to create something truly special. The magic happens when these humble components come together—the sweet rolls, the savory beef, the gooey cheese, and that irresistible butter topping. Here’s everything you need:
For the Sliders
- 1 package (12-count) Hawaiian sweet rolls (I prefer King’s Hawaiian for the perfect softness and sweetness)
- 1 pound ground beef (80/20 blend works best for juicy sliders—leaner meat can dry out)
- 1 tablespoon olive oil (for browning the meat)
- 1 small yellow onion, finely diced (about 1/2 cup)
- 2 cloves garlic, minced
- 1 teaspoon salt
- 1/2 teaspoon black pepper
- 1 teaspoon onion powder
- 1 teaspoon garlic powder
- 1 tablespoon Worcestershire sauce (adds that deep, savory umami flavor)
- 2 tablespoons ketchup
- 1 tablespoon yellow mustard
- 8 slices American cheese (or cheddar, if you prefer—I like the meltability of American)
For the Butter Topping
- 4 tablespoons unsalted butter, melted
- 1 tablespoon sesame seeds (optional, but adds a nice touch)
- 1/2 teaspoon garlic powder
- 1/2 teaspoon dried parsley
- 1 tablespoon brown sugar (this is my secret ingredient—it caramelizes beautifully)
A few notes on ingredient selection: I’ve tried this recipe with ground turkey and it works okay, but beef really gives the best flavor. If you’re using leaner meat, add a tablespoon of butter to the pan while cooking to keep things moist. For the cheese, pre-sliced American cheese melts like a dream, but sharp cheddar adds a nice kick. Feel free to mix it up!
For the Hawaiian rolls, don’t skimp here. The sweetness of the rolls is what makes these sliders special. I’ve tried regular dinner rolls and it’s just not the same. King’s Hawaiian is my go-to brand, but any sweet roll will work. If you can find the slider-sized ones, even better—they’re already the perfect size.
As for substitutions, you can easily make these gluten-free by using gluten-free Hawaiian rolls (they exist!) and checking your Worcestershire sauce label. For a dairy-free version, use dairy-free cheese and butter alternatives. The texture might be slightly different, but the flavor will still be amazing.
Equipment Needed
You don’t need a fancy kitchen to make these sliders. Here’s what you’ll need:
- 9×13-inch baking dish (or any similar-sized dish that fits the rolls snugly)
- Large skillet (for browning the beef)
- Sharp knife (for slicing the rolls in half)
- Cutting board
- Small bowl (for mixing the butter topping)
- Pastry brush (or a spoon, if you don’t have one)
- Aluminum foil (for covering while baking and for freezing)
- Meat chopper or spatula (for breaking up the ground beef)
If you don’t have a 9×13 dish, a 10×10 or even a rimmed baking sheet will work in a pinch. I’ve used a cast iron skillet before and it turned out great—just make sure the rolls fit snugly so the filling doesn’t spill out. For the pastry brush, I honestly use a silicone one I got from the dollar store and it works perfectly. No need to spend a lot!
One tip: if you’re planning to freeze these, invest in some heavy-duty aluminum foil and a few freezer-safe containers. I like to use disposable foil pans for easy cleanup and stacking in the freezer.
Preparation Method
Let’s get cooking! Follow these steps carefully, and you’ll have the best cheeseburger sliders of your life.
- Preheat your oven to 350°F (175°C). While it’s heating up, grab your 9×13 baking dish and set it aside. You’ll thank me later for doing this first.
- Cook the ground beef. Heat the olive oil in a large skillet over medium-high heat. Add the ground beef and cook, breaking it up with a meat chopper or spatula, until it’s browned and no longer pink—about 6-8 minutes. Don’t drain all the fat! Leave about a tablespoon in the pan for flavor. If your beef is super greasy, drain most of it, but leave a little behind.
- Add the aromatics. Toss in the diced onion and cook for 2-3 minutes until it starts to soften. Add the minced garlic and cook for another 30 seconds until fragrant. Your kitchen should smell amazing at this point.
- Season the meat. Sprinkle in the salt, pepper, onion powder, and garlic powder. Stir everything together. Then add the Worcestershire sauce, ketchup, and yellow mustard. Stir until everything is well combined. Let it cook for another minute so the flavors meld together. Taste it—seriously, taste it! Adjust the seasoning if needed. I always add a little extra Worcestershire because I love that savory depth.
- Prepare the rolls. Without separating the individual rolls, carefully slice the entire block of Hawaiian rolls in half horizontally. You should have one top half and one bottom half. Place the bottom half in your baking dish, cut side up. If the rolls are stuck together, use a serrated knife and saw gently—they’ll come apart.
- Assemble the first layer. Spread the cooked beef mixture evenly over the bottom layer of rolls. Make sure it’s distributed well so every slider gets plenty of filling. Press it down gently with a spatula.
- Add the cheese. Layer the cheese slices over the beef. I like to tear the slices in half and arrange them so they cover the meat completely. Don’t leave any gaps—melty cheese is non-negotiable here.
- Top with the roll tops. Place the top half of the rolls over the cheese, cut side down. Gently press down so everything sticks together.
- Make the butter topping. In a small bowl, whisk together the melted butter, sesame seeds (if using), garlic powder, dried parsley, and brown sugar. Mix until the sugar is mostly dissolved.
- Brush the tops. Using a pastry brush, generously brush the butter mixture over the tops of the rolls. Don’t be shy—this is what gives them that golden, glossy, irresistible finish. Make sure you get the edges too.
- Bake. Cover the dish with aluminum foil and bake for 15 minutes. Then remove the foil and bake for another 5-7 minutes, until the tops are golden brown and the cheese is bubbly. The smell at this point is absolutely intoxicating.
- Rest and serve. Let the sliders rest for 5 minutes before slicing. This allows the cheese to set slightly so everything stays together. Use a sharp knife to cut between the rolls. Serve warm and watch them disappear!
A few visual cues: the meat should be browned but not burnt, the onions should be translucent, and the cheese should be fully melted and slightly golden on the edges. If the tops are browning too quickly, tent with foil for the last few minutes.
For efficiency, I like to prep the butter topping while the meat is cooking. It saves a few minutes and keeps the workflow smooth. Also, if you’re making these for a crowd, you can assemble them up to a day ahead and bake just before serving. Just keep them covered in the fridge.
Cooking Tips & Techniques
After making these sliders more times than I can count, I’ve learned a few things the hard way. Here are my best tips for perfect results every time.
Don’t overwork the meat. When browning the beef, let it sit in the pan for a minute or two before breaking it up. This creates better browning and deeper flavor. I used to stir constantly, and the meat would steam instead of brown. Big difference!
Season in layers. Add some salt and pepper while the meat is cooking, then add more with the other seasonings. Building flavor at each step makes the final dish taste more complex. I learned this from a chef friend who always says, “Season from the pan to the plate.”
Watch the cheese. American cheese melts beautifully, but it can get greasy if overcooked. Keep an eye on the sliders during the last few minutes of baking. You want the cheese bubbly and the tops golden, but not burnt around the edges.
Let them rest. I know it’s hard to wait, but those 5 minutes of resting time are crucial. If you cut into them too soon, the cheese will ooze everywhere and the sliders will fall apart. Patience pays off!
Use a serrated knife for slicing. A sharp serrated knife cuts through the rolls cleanly without squishing them. I’ve made the mistake of using a dull knife and ended up with flattened, messy sliders. Learn from my failure!
Make extra topping. If you have leftover butter topping, brush it on the sliders after baking for extra shine and flavor. I always double the topping recipe because it’s just that good.
One of my biggest failures? I once forgot to add the Worcestershire sauce and the sliders were so bland. Nobody said anything, but I could tell something was off. Now I double-check my ingredients before I start cooking. Lesson learned!
Variations & Adaptations
One of the best things about this recipe is how versatile it is. Here are some of my favorite variations:
Bacon Cheeseburger Sliders: Cook 6 slices of bacon until crispy, crumble them, and sprinkle over the beef before adding the cheese. The smoky, salty crunch takes these to another level. I made these for a Super Bowl party and they were gone in 10 minutes.
Spicy Jalapeño Sliders: Add 2 tablespoons of pickled jalapeños (chopped) to the beef mixture, and top with pepper jack cheese instead of American. For extra heat, drizzle with sriracha before baking. My husband’s favorite version!
Mushroom Swiss Sliders: Sauté 8 ounces of sliced mushrooms with the onions, then use Swiss cheese instead of American. The earthy mushrooms and nutty Swiss are a sophisticated twist. Perfect for when you want something a little fancier.
BBQ Sliders: Swap the ketchup and mustard for 1/4 cup of your favorite BBQ sauce. Top with cheddar cheese and a few slices of red onion. These taste like summer cookouts year-round.
Turkey Sliders: Use ground turkey instead of beef, and add an extra tablespoon of olive oil to keep it moist. Season with poultry seasoning in addition to the regular spices. A lighter option that still satisfies.
Low-Carb Option: Skip the Hawaiian rolls and use large portobello mushroom caps as the “buns.” Roast them for 10 minutes first to remove excess moisture. It’s a completely different dish, but delicious in its own right.
I’ve tried the BBQ version multiple times and it’s become my go-to for summer gatherings. The sweetness of the sauce pairs perfectly with the Hawaiian rolls. Just be careful not to add too much liquid, or the sliders will get soggy.
Serving & Storage Suggestions
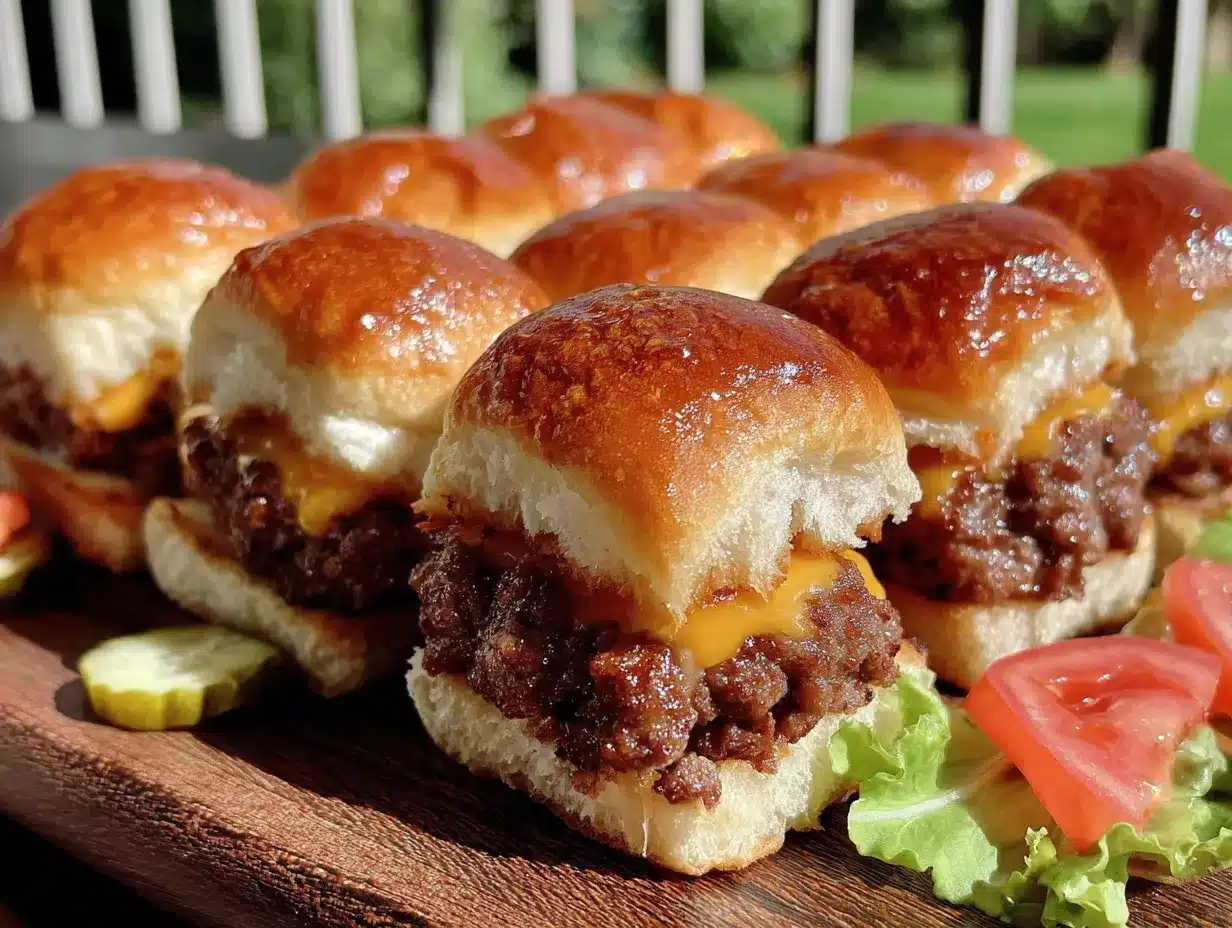
These sliders are best served warm, right out of the oven. The cheese should be melty, the tops golden, and the filling piping hot. I like to arrange them on a platter with a small bowl of extra ketchup or ranch dressing for dipping.
What to serve with them: These sliders are hearty enough to be a meal on their own, but they pair beautifully with simple sides. A crisp green salad, coleslaw, sweet potato fries, or a bowl of fresh fruit all work wonderfully. For game day, serve them with loaded nachos or buffalo wings for the ultimate spread.
Beverage pairings: A cold beer (lager or pale ale) is perfect with these sliders. For non-alcoholic options, try a root beer float or a tangy lemonade. The sweetness of the rolls plays nicely with both.
Storage instructions: Leftover sliders can be stored in an airtight container in the refrigerator for up to 4 days. To reheat, pop them in a 350°F oven for 10-15 minutes, or microwave for 30-60 seconds. The oven method keeps the rolls from getting soggy.
Freezer instructions (the best part!): These sliders freeze beautifully. Assemble the sliders completely (but don’t bake them), wrap the dish tightly in plastic wrap, then a layer of aluminum foil. Freeze for up to 3 months. To bake from frozen, remove the plastic wrap, cover with foil, and bake at 350°F for 25 minutes. Remove the foil and bake for another 10 minutes until golden and bubbly. You can also freeze baked sliders—just cool completely, wrap well, and reheat in the oven.
One thing I love about these sliders is that the flavors actually get better after a day in the fridge. The seasonings meld together and the rolls soak up all that buttery goodness. If you can resist eating them all right away, leftovers are a treat.
Nutritional Information & Benefits
Here’s the approximate nutritional breakdown for one slider (based on 12 sliders per batch):
| Nutrient | Amount per Slider |
|---|---|
| Calories | 290 |
| Total Fat | 16g |
| Saturated Fat | 8g |
| Cholesterol | 55mg |
| Sodium | 520mg |
| Total Carbohydrates | 22g |
| Dietary Fiber | 1g |
| Sugars | 8g |
| Protein | 15g |
While these sliders aren’t exactly health food, they do offer some nutritional benefits. The ground beef provides high-quality protein, iron, and B vitamins. Onions and garlic add antioxidants and anti-inflammatory compounds. And hey, everything in moderation, right?
If you’re watching your sodium, you can use low-sodium cheese and reduce the added salt. For a lower-calorie option, use lean ground beef and skip the butter topping (though you’ll miss out on that amazing flavor). These sliders can fit into most diets as an occasional treat—they’re comfort food, after all!
Potential allergens include wheat (rolls), dairy (cheese, butter), and soy (Worcestershire sauce). Be sure to check labels if you’re cooking for someone with allergies.
Conclusion
These cheeseburger sliders on Hawaiian rolls have become a staple in my kitchen for good reason. They’re quick, easy, incredibly delicious, and freezer-friendly—everything a busy cook could ask for. Whether you’re feeding a crowd on game day, prepping meals for a busy week, or just craving something comforting, these sliders deliver every single time.
I love that this recipe is so adaptable. You can make it your own with different cheeses, add-ins, or toppings. Don’t be afraid to experiment—that’s where the magic happens! And honestly, even if you mess up a little, they’ll still be delicious. That’s the beauty of a recipe this forgiving.
I’d love to hear how these turn out for you! Drop a comment below and let me know if you tried any variations, or tag me in your photos on social media. Your feedback and creativity keep this community going strong. Happy cooking, friends—may your sliders always be golden, your cheese always melty, and your kitchen always full of good smells.
Frequently Asked Questions
Can I make these sliders ahead of time?
Absolutely! You can assemble the sliders up to 24 hours in advance and keep them covered in the refrigerator. Just add the butter topping right before baking. You may need to add 5 extra minutes to the baking time since they’ll be cold from the fridge.
Can I use a different type of roll?
You can, but the sweet Hawaiian rolls really make this recipe special. If you can’t find them, try brioche slider buns or even regular dinner rolls. Just know that the flavor profile will change—the sweetness of the Hawaiian rolls is what balances the savory beef so perfectly.
How do I prevent the sliders from getting soggy?
The key is not to overdo the wet ingredients. Don’t add too much ketchup or mustard to the meat mixture, and make sure the beef isn’t too greasy before assembling. Also, toasting the bottom layer of rolls for 2-3 minutes in the oven before adding the filling can help create a barrier against moisture.
Can I use ground chicken or pork instead of beef?
Yes! Ground chicken works well, though it’s leaner so you’ll want to add a tablespoon of olive oil or butter to keep it moist. Ground pork is also delicious and adds a slightly sweeter flavor. Just make sure to cook it to the proper internal temperature (165°F for chicken, 160°F for pork).
How long do these sliders last in the freezer?
Properly wrapped and stored, these sliders will stay fresh in the freezer for up to 3 months. For best quality, use them within 2 months. I like to freeze them in individual portions so I can pull out just what I need. Just wrap each slider in plastic wrap, then place them all in a freezer bag.
Pin This Recipe!
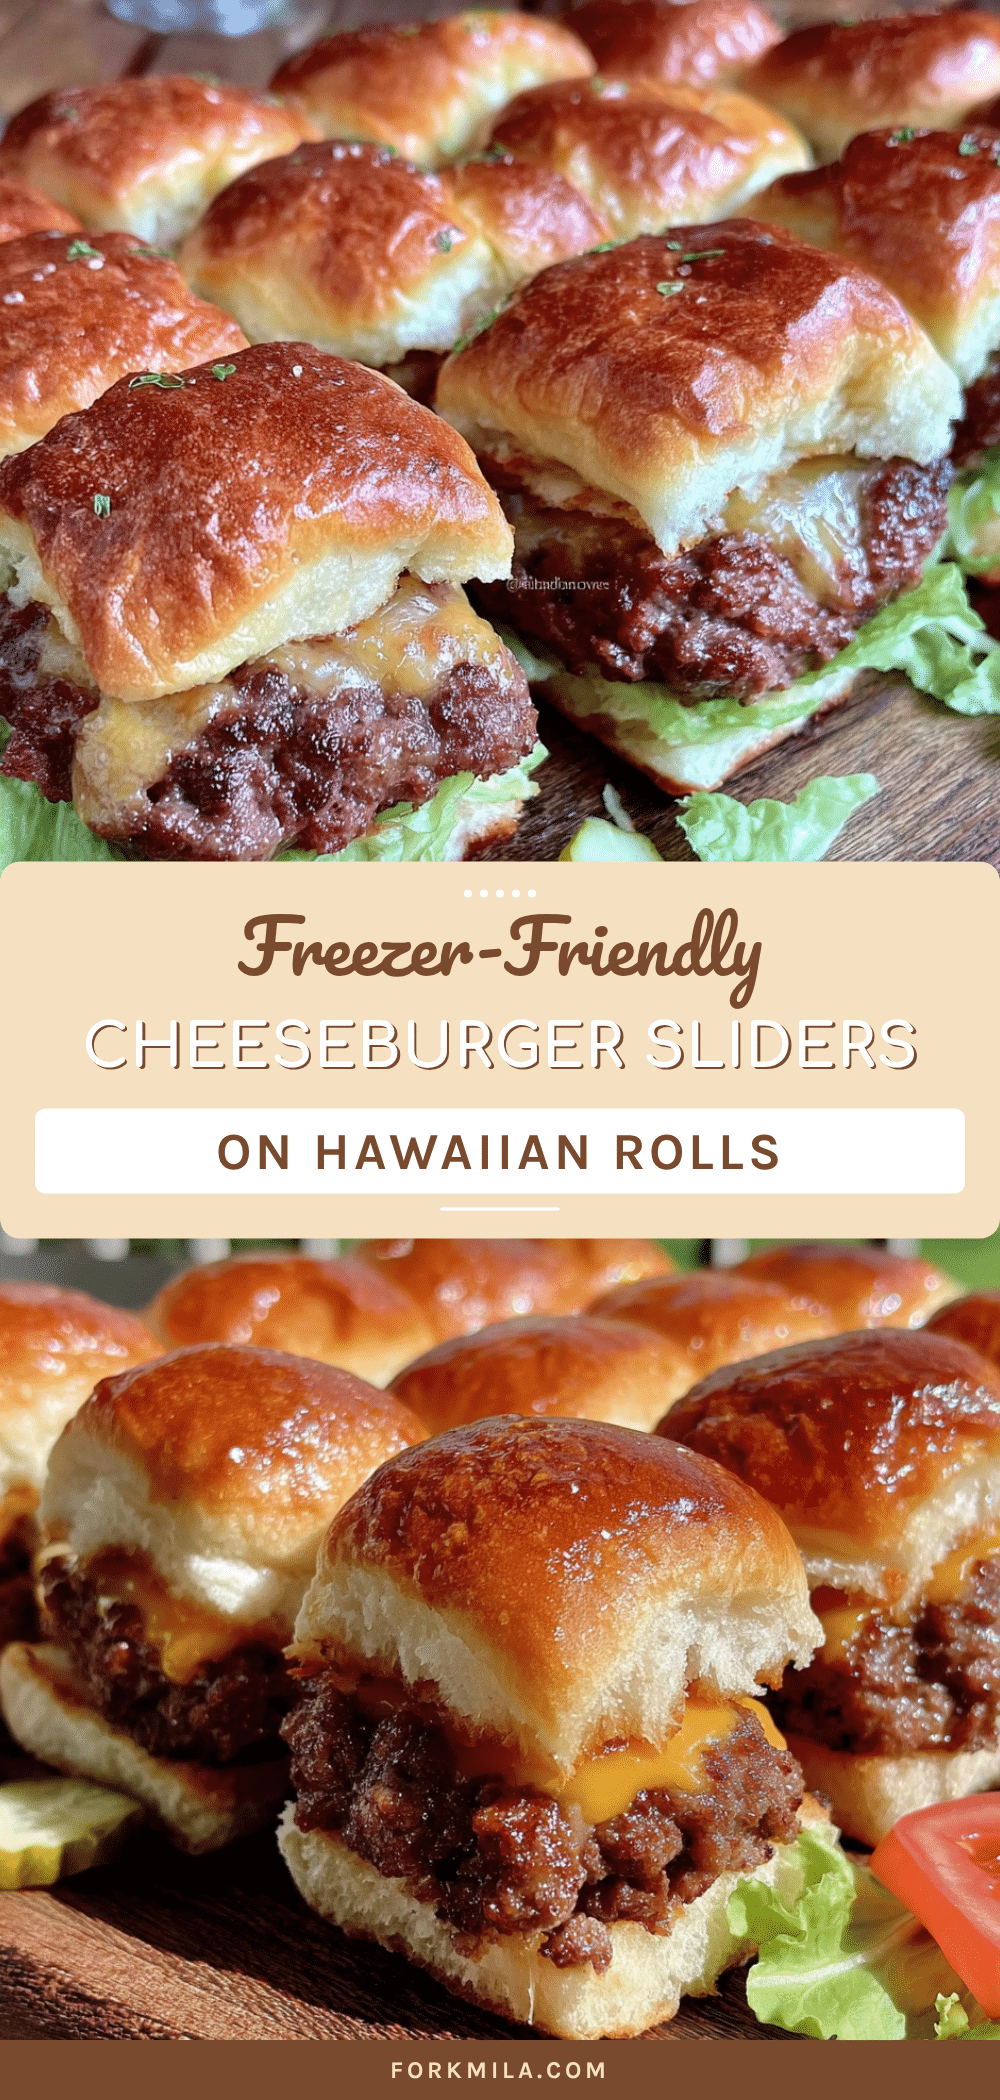
Easy Cheeseburger Sliders: Best Freezer-Friendly Hawaiian Roll Recipe
These cheeseburger sliders on sweet Hawaiian rolls are quick, easy, and freezer-friendly. Perfect for busy weeknights, game day, or potlucks, they deliver savory beef, melty cheese, and a buttery, golden topping in every bite.
- Prep Time: 15 minutes
- Cook Time: 30 minutes
- Total Time: 45 minutes
- Yield: 12 sliders 1x
- Category: Main Course
- Cuisine: American
Ingredients
- 1 package (12-count) Hawaiian sweet rolls
- 1 pound ground beef (80/20 blend)
- 1 tablespoon olive oil
- 1 small yellow onion, finely diced (about 1/2 cup)
- 2 cloves garlic, minced
- 1 teaspoon salt
- 1/2 teaspoon black pepper
- 1 teaspoon onion powder
- 1 teaspoon garlic powder
- 1 tablespoon Worcestershire sauce
- 2 tablespoons ketchup
- 1 tablespoon yellow mustard
- 8 slices American cheese
- 4 tablespoons unsalted butter, melted
- 1 tablespoon sesame seeds (optional)
- 1/2 teaspoon garlic powder
- 1/2 teaspoon dried parsley
- 1 tablespoon brown sugar
Instructions
- Preheat your oven to 350°F (175°C).
- Heat olive oil in a large skillet over medium-high heat. Add ground beef and cook, breaking it up, until browned (6-8 minutes). Leave about 1 tablespoon of fat in the pan.
- Add diced onion and cook for 2-3 minutes until softened. Add minced garlic and cook for 30 seconds until fragrant.
- Season with salt, pepper, onion powder, and garlic powder. Stir in Worcestershire sauce, ketchup, and yellow mustard. Cook for 1 minute. Taste and adjust seasoning.
- Without separating the rolls, slice the entire block of Hawaiian rolls in half horizontally. Place the bottom half in a 9×13-inch baking dish, cut side up.
- Spread the cooked beef mixture evenly over the bottom layer of rolls. Press down gently.
- Layer cheese slices over the beef, covering completely.
- Place the top half of the rolls over the cheese, cut side down. Press gently.
- In a small bowl, whisk together melted butter, sesame seeds (if using), garlic powder, dried parsley, and brown sugar until sugar is mostly dissolved.
- Brush the butter mixture generously over the tops of the rolls, including the edges.
- Cover the dish with aluminum foil and bake for 15 minutes. Remove foil and bake for another 5-7 minutes until tops are golden brown and cheese is bubbly.
- Let sliders rest for 5 minutes before slicing between the rolls. Serve warm.
Notes
For best results, use 80/20 ground beef for juiciness. Let sliders rest 5 minutes before slicing to keep them intact. To freeze, assemble completely (without baking), wrap tightly in plastic wrap and foil, and freeze up to 3 months. Bake from frozen at 350°F for 25 minutes covered, then 10 minutes uncovered. Leftovers keep in the fridge for up to 4 days.
Nutrition
- Serving Size: 1 slider
- Calories: 290
- Sugar: 8
- Sodium: 520
- Fat: 16
- Saturated Fat: 8
- Carbohydrates: 22
- Fiber: 1
- Protein: 15
Keywords: cheeseburger sliders, Hawaiian roll sliders, freezer-friendly sliders, easy slider recipe, ground beef sliders, game day appetizer, potluck recipe, comfort food


