I wasn’t expecting baking advice from a plumber, but there I was, knee-deep in a kitchen renovation disaster, listening to Frank explain exactly how to make banana bread. He was fixing a leak under my sink, saw the sad, brown bananas on my counter, and just started talking. “You know,” he said, wiping his hands on a rag, “my wife makes the best banana bread, and she doesn’t even use a mixer. Just a pot. A big, heavy pot.” I thought he was joking. A pot? For bread? But he was dead serious. He sketched the method on a scrap of drywall paper, and honestly, I was too distracted by the pile of dust in my living room to argue.
The next day, with the sink fixed and the house smelling like sawdust, I gave it a shot. I mashed the bananas, stirred in the sugar, and dumped the whole sticky mess into my Dutch oven. No stand mixer to wash. No loaf pan to grease. It felt almost too simple. When I pulled the lid off an hour later, the top was this deep, crackled gold, and the inside was so tender it barely held together. I mean, I actually yelped when I cut into it. The plumber’s wife knew what she was doing.
That was three years ago, and I haven’t made banana bread any other way since. This easy no-knead Dutch oven banana bread is the kind of recipe you keep in your back pocket for those days when you need something warm and sweet without the fuss. Maybe you’ve been there—staring at overripe bananas, wanting to bake, but dreading the cleanup. This one’s for you. It’s rustic, it’s forgiving, and it turns out perfect every single time. Let’s get into it.
Why You’ll Love This Recipe
I’ve tested this recipe more times than I can count, and it always delivers. It’s the kind of bread that makes you look like a hero with almost zero effort. Here’s why it’s become my go-to:
- No Kneading Required: You don’t need to be a bread expert. No stretching, folding, or waiting for dough to double. Just stir and bake.
- One-Pot Wonder: The Dutch oven does all the work. It traps steam, creates a soft crumb, and gives you that gorgeous, crusty top without any special skills.
- Simple Pantry Ingredients: You probably have everything already. Bananas, flour, sugar, eggs, butter. No trips to a specialty store.
- Perfect for Busy Days: It comes together in about 10 minutes of active prep. The oven does the rest. It’s practically a set-it-and-forget-it situation.
- Always a Crowd-Pleaser: I’ve brought this to brunches, potlucks, and even a book club meeting. It disappears fast. Kids and adults both go for seconds.
- Unbelievably Moist: The Dutch oven creates a steamy environment that keeps the bread incredibly tender. It’s not dry or crumbly—it’s the texture you dream about.
This isn’t just another banana bread recipe. It’s the one that solves the problem of a messy kitchen and a dry loaf. The technique is foolproof, and the result is consistently amazing. I’ve had friends text me photos of their first attempts, and every single one came out beautifully. It’s the kind of recipe that makes you feel like you actually know what you’re doing in the kitchen, even on a lazy Sunday morning.
What Ingredients You Will Need
This recipe uses simple, wholesome ingredients to deliver bold flavor and satisfying texture without the fuss. Most of these are pantry staples, so you can whip this up whenever those bananas start to spot.
- Ripe Bananas (3 large, about 1 ½ cups mashed): The riper, the better. Look for bananas with lots of brown spots—they’re sweeter and easier to mash. If they’re still a bit yellow, you can speed up the process by baking them at 300°F for 15 minutes.
- All-Purpose Flour (2 cups / 240g): This gives the bread structure. I’ve used white whole wheat flour before, and it works, but the texture is a bit denser. For the fluffiest result, stick with all-purpose.
- Granulated Sugar (¾ cup / 150g): Adds sweetness and helps with browning. You can reduce it to ½ cup if your bananas are very sweet, but I like the balance here.
- Unsalted Butter (½ cup / 113g, melted): Melted butter gives the bread a rich flavor and tender crumb. I use salted butter in a pinch and just skip the added salt.
- Large Eggs (2, room temperature): Eggs bind everything together and add moisture. Let them sit out for 10 minutes before using if you can.
- Vanilla Extract (1 teaspoon): Enhances the banana flavor. Pure vanilla is best, but imitation works fine too.
- Baking Soda (1 teaspoon): This is the main leavening agent. Make sure it’s fresh—test it by dropping a bit into vinegar; it should fizz.
- Salt (½ teaspoon): Balances the sweetness and brings out the banana flavor.
- Optional Mix-ins (½ cup): Chocolate chips, chopped walnuts, or dried cranberries are all great. I’m partial to dark chocolate chips—they melt into little pockets of goodness.
For the best results, I recommend using a good quality butter like Kerrygold or Plugrà. It really does make a difference in flavor. And if you’re out of vanilla, you can substitute with a pinch of cinnamon or nutmeg for a warm, spicy note.
Equipment Needed
You don’t need a fancy kitchen for this recipe. Here’s what you’ll need:
- Dutch Oven (5 to 6-quart): This is the star of the show. A heavy cast-iron pot with a lid creates the perfect steamy environment. If you don’t have one, you can use a deep oven-safe pot with a tight-fitting lid.
- Large Mixing Bowl: For mashing bananas and mixing the batter. Any bowl will do.
- Wooden Spoon or Spatula: For stirring. Nothing fancy needed.
- Parchment Paper: Lining the Dutch oven makes lifting the bread out super easy. You can also grease the pot well with butter.
- Cooling Rack: Helps the bread cool evenly so the bottom doesn’t get soggy.
- Measuring Cups and Spoons: For accuracy. I always level off my flour with a knife.
If you’re new to baking with a Dutch oven, don’t be intimidated. It’s incredibly forgiving. I’ve used an old, scratched-up one for years, and it works perfectly. You can find affordable options at most kitchen stores or even secondhand shops. Just make sure the lid fits snugly.
Preparation Method
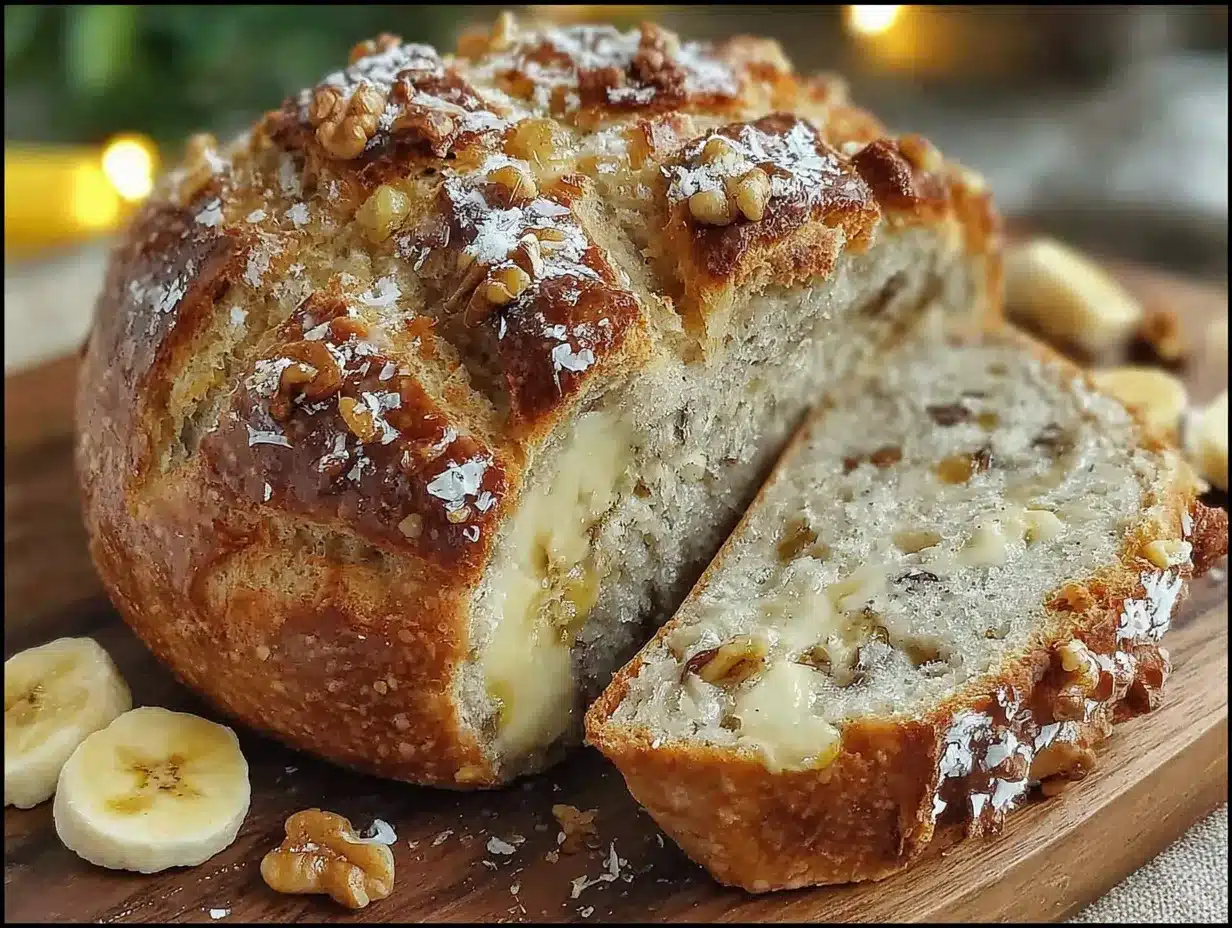
This is the easy part. Follow these steps, and you’ll have a beautiful loaf in no time.
- Preheat Your Oven and Dutch Oven: Place your Dutch oven (with the lid on) in the cold oven. Then preheat to 350°F (175°C). Let it heat for at least 30 minutes. This step is crucial—the hot pot creates instant steam when the batter hits it, giving you that soft, tender crumb.
- Mash the Bananas: While the oven heats, peel the bananas and put them in a large mixing bowl. Mash them with a fork until they’re mostly smooth, with a few small lumps for texture. You want about 1 ½ cups of mashed banana.
- Mix the Wet Ingredients: Add the melted butter, sugar, eggs, and vanilla extract to the mashed bananas. Stir until everything is well combined. It will look a bit lumpy—that’s fine.
- Add the Dry Ingredients: Sprinkle the flour, baking soda, and salt over the wet mixture. Stir gently with a wooden spoon until just combined. Do not overmix! A few streaks of flour are okay. Overmixing will make the bread tough.
- Fold in Mix-ins (Optional): If you’re using chocolate chips or nuts, gently fold them in now. I usually save a handful to sprinkle on top before baking.
- Prepare the Dutch Oven: Carefully remove the hot Dutch oven from the oven. Remove the lid. Line the bottom with a circle of parchment paper, or grease it well with butter. Be careful—the pot is extremely hot.
- Pour in the Batter: Scrape the batter into the hot Dutch oven. It will sizzle slightly—that’s the sound of steam starting to form. Smooth the top with a spatula. If you reserved any mix-ins, sprinkle them on top now.
- Bake Covered: Put the lid back on and place the Dutch oven in the oven. Bake for 30 minutes. The lid traps steam, which keeps the bread moist.
- Bake Uncovered: After 30 minutes, carefully remove the lid. Bake for another 20 to 25 minutes, until the top is deep golden brown and a toothpick inserted into the center comes out clean or with a few moist crumbs.
- Cool and Serve: Remove the Dutch oven from the oven. Let the bread cool in the pot for 10 minutes. Then, lift it out using the parchment paper and transfer it to a cooling rack. Let it cool completely before slicing—about 1 hour. I know it’s hard to wait, but it really does taste better when it’s fully cooled.
One tip: if the top is browning too quickly during the uncovered phase, you can tent a piece of foil over it. This happened to me once when my oven ran hot, and it saved the loaf.
Cooking Tips & Techniques
I’ve made this recipe more times than I care to admit, and I’ve learned a few things along the way. Here are my best tips:
- Don’t Skip Preheating the Dutch Oven: I know it feels like an extra step, but it’s non-negotiable. The hot pot creates a burst of steam that gives the bread its soft, bakery-style texture. I once forgot to preheat it, and the bread came out dense and flat.
- Use a Kitchen Scale for Flour: If you have one, weigh your flour. Scooping flour with a measuring cup can pack it down, leading to a dry loaf. 240 grams is the sweet spot.
- Check for Doneness Early: Every oven is different. Start checking the bread at the 45-minute mark. If the toothpick comes out with wet batter, give it 5 more minutes. If it comes out clean, it’s done.
- Let It Cool Completely: I know the smell is intoxicating, but slicing into warm banana bread can make it gummy and fall apart. Patience pays off here. I usually make it in the evening so it’s ready by morning.
- Room Temperature Eggs Matter: Cold eggs can seize the melted butter, making the batter lumpy. Just let them sit on the counter for 10 minutes before cracking them.
One of my biggest failures? I once used baking powder instead of baking soda. The bread rose beautifully, then collapsed into a sad, flat pancake. Check your labels, folks. Baking soda is the key here.
Variations & Adaptations
This recipe is a great base for experimentation. Here are some ways to switch it up:
- Gluten-Free Version: Substitute the all-purpose flour with a 1:1 gluten-free baking blend. I’ve used King Arthur’s measure-for-measure blend, and it works perfectly. Add an extra tablespoon of milk to keep the batter moist.
- Vegan Adaptation: Replace the eggs with two flax eggs (2 tablespoons ground flaxseed + 6 tablespoons water) and use melted coconut oil instead of butter. The texture will be slightly denser, but still delicious.
- Chocolate Swirl: Melt ¼ cup of dark chocolate chips and swirl it into the batter before baking. It creates a gorgeous marbled effect and adds a rich, chocolaty punch.
- Spiced Banana Bread: Add 1 teaspoon of cinnamon and ½ teaspoon of nutmeg to the dry ingredients. It gives the bread a warm, cozy flavor that’s perfect for fall.
- Nutty Crunch: Toast ½ cup of chopped pecans or walnuts in a dry skillet for 3 minutes, then fold them into the batter. The toasting step really brings out their flavor.
I’ve tried all of these, and my personal favorite is the chocolate swirl version. It feels like a dessert, but it’s still simple enough for a weekday treat.
Serving & Storage Suggestions
This banana bread is wonderful on its own, but here are some ways to make it even better:
- Serving Temperature: Serve it at room temperature or slightly warm. If you want to reheat a slice, pop it in a 300°F oven for 5 minutes, or microwave it for 15 seconds.
- Toppings: Spread a slice with salted butter, cream cheese, or a dollop of Greek yogurt. For a sweeter treat, drizzle with honey or a simple glaze made from powdered sugar and milk.
- Pairings: It goes beautifully with a cup of black coffee, a chai latte, or a cold glass of milk. For brunch, serve it alongside scrambled eggs and fresh fruit.
- Storage: Wrap the cooled bread tightly in plastic wrap or store it in an airtight container at room temperature. It will stay fresh for up to 4 days.
- Freezing: This bread freezes beautifully. Wrap it in plastic wrap, then in foil, and freeze for up to 3 months. Thaw overnight in the fridge or at room temperature for a few hours.
- Flavor Development: Honestly, this bread tastes even better on day two. The flavors meld together, and the texture becomes even more moist. So don’t be afraid to make it a day ahead.
I’ve stored slices in the freezer for last-minute guests, and no one ever knows it wasn’t freshly baked. Just reheat and serve.
Nutritional Information & Benefits
Here’s an estimated breakdown per slice (based on 10 slices):
- Calories: ~280
- Fat: 12g
- Carbohydrates: 40g
- Fiber: 2g
- Sugar: 18g
- Protein: 5g
This recipe offers some nutritional perks. Bananas are packed with potassium and vitamin B6, which support heart health and energy levels. The eggs provide high-quality protein, and if you use whole wheat flour, you’ll get extra fiber. For a lower-sugar option, you can reduce the sugar to ½ cup or use a sugar substitute like monk fruit.
If you’re watching your fat intake, you can substitute the butter with unsweetened applesauce (use a 1:1 ratio). The texture will be a bit more cake-like, but it’s still delicious. This recipe is also naturally nut-free if you skip the mix-ins, making it a safe option for lunchboxes.
I personally love that this bread gives me a little energy boost without the crash. It’s not health food, but it’s a whole lot better than a store-bought muffin.
Conclusion
This easy no-knead Dutch oven banana bread is the kind of recipe that feels like a secret weapon. It’s simple, forgiving, and produces a loaf that looks and tastes like it came from a fancy bakery. The best part? You don’t need any special skills or equipment—just a Dutch oven and a few pantry staples.
I encourage you to make this recipe your own. Throw in some chocolate chips, add a pinch of cinnamon, or keep it classic. Whatever you do, I promise it’ll be delicious. Honestly, I make this bread at least once a month, and it never gets old. It’s comfort in a slice.
If you give this recipe a try, I’d love to hear about it. Leave a comment below and let me know how it turned out. Did you add any fun mix-ins? Did the plumber’s wife method work for you? Share your photos and tag me on social media—I can’t wait to see your creations. Happy baking!
Frequently Asked Questions
Can I use frozen bananas for this recipe?
Yes, absolutely! Thaw them completely, then drain off any excess liquid before mashing. The texture will be slightly softer, but the flavor is even more concentrated.
Why is my banana bread dense?
This usually happens from overmixing the batter or using too much flour. Stir just until the flour disappears, and use a kitchen scale if you have one. Also, make sure your baking soda is fresh.
Can I bake this in a regular loaf pan instead of a Dutch oven?
You can, but the texture will be different. The Dutch oven creates steam that keeps the bread moist. If using a loaf pan, bake at 350°F for 50-60 minutes, and place a pan of water on the lower rack to add moisture.
How do I know when the banana bread is done?
Insert a toothpick into the center. If it comes out clean or with a few moist crumbs, it’s done. If it’s wet with batter, bake for another 5 minutes and check again.
Can I make this recipe dairy-free?
Yes! Substitute the butter with melted coconut oil or a dairy-free butter alternative. The flavor will be slightly different, but the texture will remain soft and tender.
Pin This Recipe!
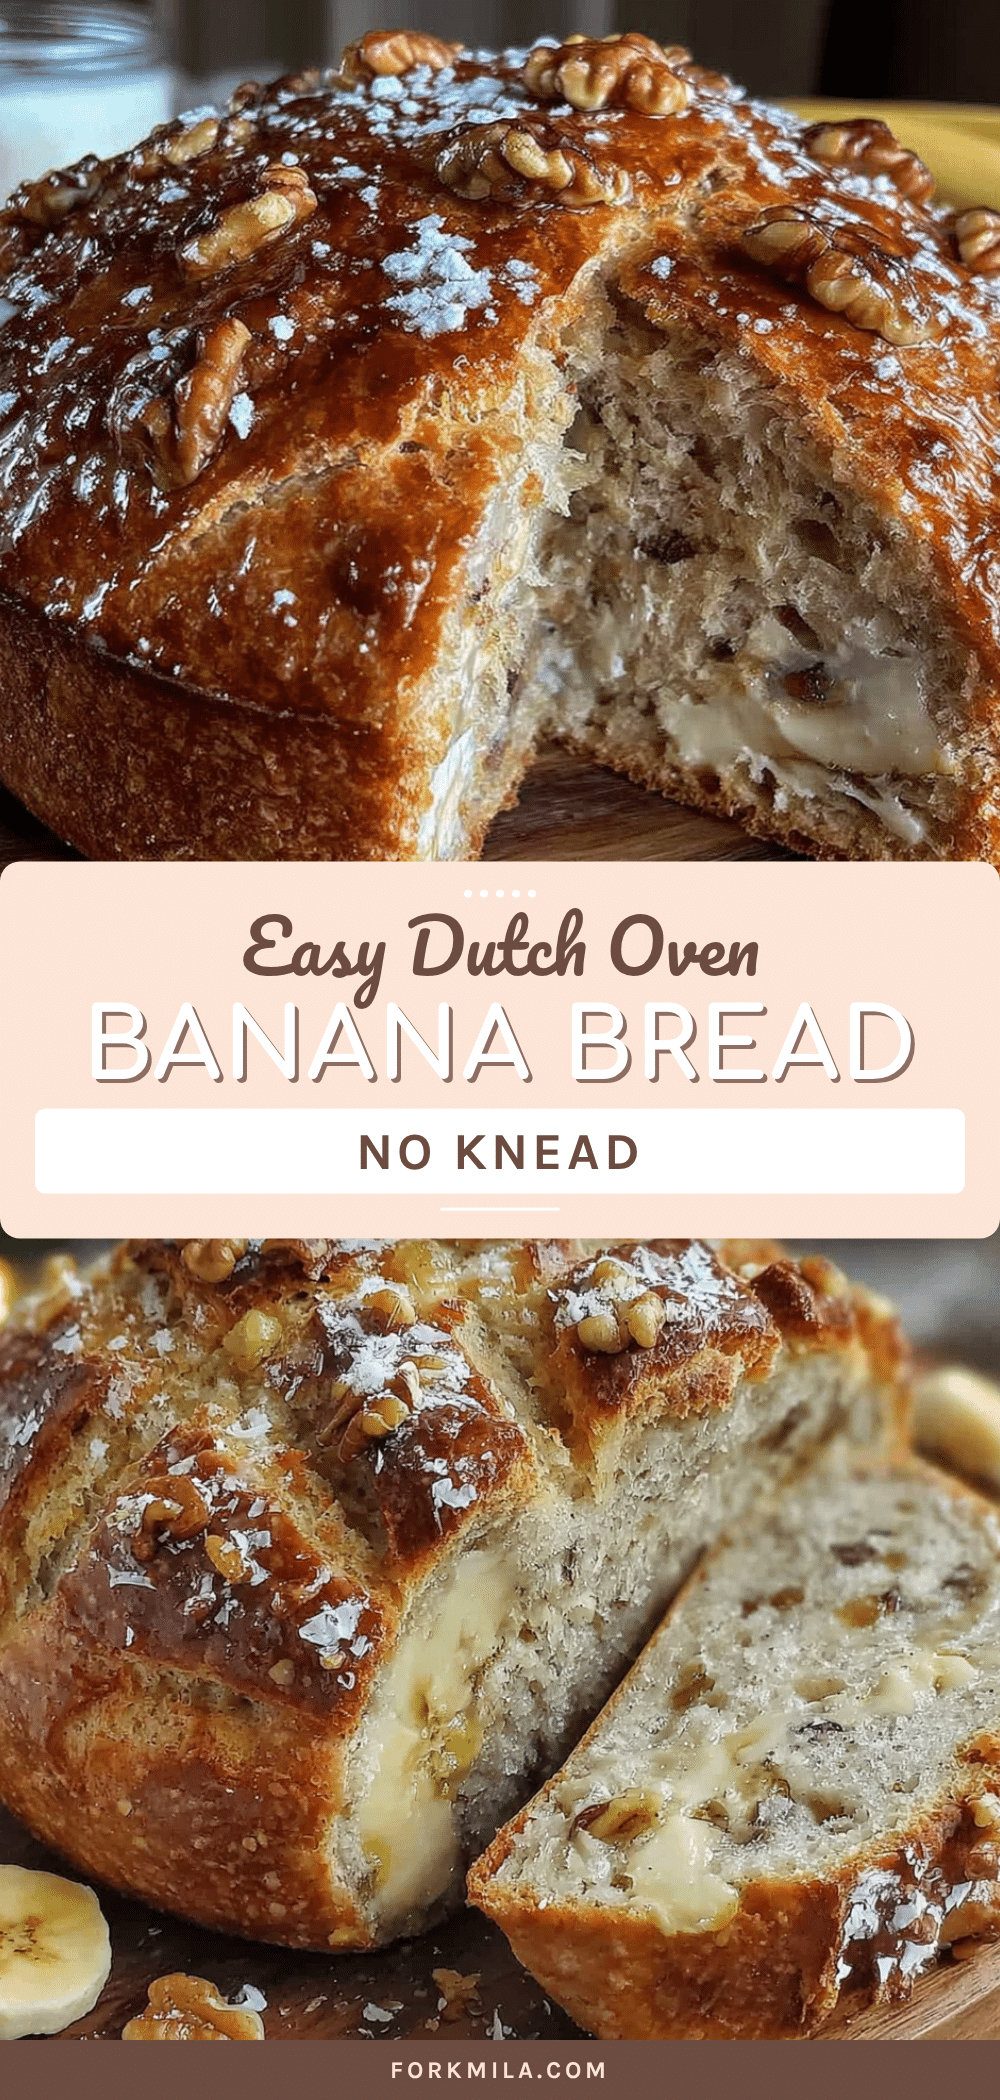
Easy No-Knead Dutch Oven Banana Bread Recipe
This easy no-knead Dutch oven banana bread is the kind of recipe you keep in your back pocket for those days when you need something warm and sweet without the fuss. It’s rustic, forgiving, and turns out perfect every single time.
- Prep Time: 10 minutes
- Cook Time: 50-55 minutes
- Total Time: 1 hour 5 minutes to 1 hour 10 minutes
- Yield: 10 servings 1x
- Category: Dessert
- Cuisine: American
Ingredients
- 3 large ripe bananas (about 1 ½ cups mashed)
- 2 cups all-purpose flour (240g)
- ¾ cup granulated sugar (150g)
- ½ cup unsalted butter, melted (113g)
- 2 large eggs, room temperature
- 1 teaspoon vanilla extract
- 1 teaspoon baking soda
- ½ teaspoon salt
- ½ cup optional mix-ins (chocolate chips, chopped walnuts, or dried cranberries)
Instructions
- Preheat your oven to 350°F (175°C). Place your Dutch oven (with the lid on) in the cold oven and let it heat for at least 30 minutes.
- While the oven heats, peel the bananas and mash them in a large mixing bowl with a fork until mostly smooth, with a few small lumps. You should have about 1 ½ cups.
- Add the melted butter, sugar, eggs, and vanilla extract to the mashed bananas. Stir until well combined.
- Sprinkle the flour, baking soda, and salt over the wet mixture. Stir gently with a wooden spoon until just combined. Do not overmix; a few streaks of flour are okay.
- If using mix-ins, gently fold them in now. Reserve a handful to sprinkle on top if desired.
- Carefully remove the hot Dutch oven from the oven and remove the lid. Line the bottom with a circle of parchment paper or grease well with butter.
- Pour the batter into the hot Dutch oven. It will sizzle slightly. Smooth the top with a spatula and sprinkle reserved mix-ins on top if using.
- Put the lid back on and bake for 30 minutes.
- After 30 minutes, carefully remove the lid and bake for another 20 to 25 minutes, until the top is deep golden brown and a toothpick inserted into the center comes out clean or with a few moist crumbs.
- Remove the Dutch oven from the oven. Let the bread cool in the pot for 10 minutes, then lift it out using the parchment paper and transfer to a cooling rack. Let cool completely before slicing, about 1 hour.
Notes
Don’t skip preheating the Dutch oven; it creates steam for a soft crumb. Use a kitchen scale for flour to avoid a dry loaf. Check for doneness early; ovens vary. Let the bread cool completely before slicing to avoid a gummy texture. Room temperature eggs are important to prevent the butter from seizing. This bread tastes even better on day two.
Nutrition
- Serving Size: 1 slice
- Calories: 280
- Sugar: 18
- Sodium: 280
- Fat: 12
- Saturated Fat: 7
- Carbohydrates: 40
- Fiber: 2
- Protein: 5
Keywords: banana bread, Dutch oven banana bread, no-knead banana bread, easy banana bread, one-pot banana bread, moist banana bread


