The garden club meeting had just wrapped up, and I was packing up my leftover lemon bars when Margaret, who’s been tending the plot next to mine for years, finally spoke up. She’d watched me struggle all spring with a patch of mint that refused to behave, and I’d watched her coax the most beautiful heirloom apples from a tree I’d assumed was ornamental. “You know,” she said, wiping soil off her hands with a towel that had seen better days, “the best thing I ever made with those apples didn’t involve any baking at all.” She pulled a crumpled recipe card from her apron pocket, the edges soft and stained with what I later learned was pomegranate juice. “My grandmother used to make this for every family gathering. It’s not fancy, but people always remember it.”
That card sat on my counter for three weeks before I finally tried it. Honestly, I was skeptical. A mimosa bar with apple cider? It sounded like something that would either be incredible or a total letdown. I grabbed a bottle of decent bubbles from the corner store, picked up some fresh-pressed cider from the farmer’s market, and gave it a shot on a random Tuesday night. My partner came home to find the kitchen counter covered in little dishes of garnishes, a bottle of something sparkling chilling in a bucket, and me looking slightly overwhelmed but very excited. I mean, let me tell you, the first sip was a revelation. That crisp, clean fizz with the warmth of the apple—it was like autumn had decided to throw a party in a glass.
Maybe you’ve been there, standing in the middle of your kitchen, wondering how to make a simple get-together feel a little more special without spending a fortune or stressing yourself out. This sparkling apple cider mimosa bar is the answer. It’s the kind of thing that looks impressive but takes almost no effort, which is honestly my favorite kind of recipe. It’s become my go-to for everything from lazy Sunday brunches to holiday mornings when I want something festive but not fussy. And every time I make it, I think about Margaret and her grandmother, and how the best recipes are really just stories waiting to be shared.
Why You’ll Love This Recipe
Let’s be real for a second. I’ve tested a lot of mimosa recipes over the years, and most of them fall into one of two camps: either they’re boring (just orange juice and cheap bubbly) or they’re way too complicated (infusions that take three days, syrups that require a candy thermometer). This sparkling apple cider mimosa bar hits that sweet spot where it feels special but takes almost no effort. Here’s why I keep coming back to it:
- Quick & Easy: Comes together in under 10 minutes. Seriously. You’re just setting out bottles and bowls. The hardest part is deciding which garnish to try first.
- Simple Ingredients: No fancy grocery trips needed. You can find everything at your regular store, and you probably already have some of the garnishes in your fridge.
- Perfect for Any Occasion: Great for brunch, baby showers, New Year’s Day, Thanksgiving morning, or just a random Saturday when you want to feel fancy. It’s versatile like that.
- Crowd-Pleaser: Both kids and adults love it. The non-alcoholic version is just as delicious, so everyone can join in.
- Unbelievably Delicious: The combination of crisp bubbles, sweet-tart apple cider, and fresh garnishes creates this layered flavor that’s way more interesting than a standard mimosa. It’s comfort food in a glass, honestly.
What makes this recipe different from the rest? It’s the balance. Most apple cider mimosas are either too sweet or too tart, but this one hits that perfect middle ground. The trick is using a good quality dry sparkling wine or non-alcoholic bubbly, which lets the natural sweetness of the apple cider shine without being cloying. Plus, the garnish bar adds texture and visual appeal that makes it feel like a proper event, not just a drink thrown together.
This recipe isn’t just good—it is the kind that makes you close your eyes after the first sip. It’s comfort food reimagined, perfect for impressing guests without stress, or turning a simple morning into something memorable. And for health-minded folks, it’s a great option because you control what goes in. Fresh fruit, no added syrups, and a light, refreshing profile that doesn’t leave you feeling weighed down.
What Ingredients You Will Need
This recipe uses simple, wholesome ingredients to deliver bold flavor and satisfying texture without the fuss. Most of these are pantry staples or easy to find at any grocery store. The beauty of a mimosa bar is that you can customize it endlessly, but here are the essentials to get you started.
For the Base
- Sparkling Wine or Non-Alcoholic Bubbly: 1 bottle (750 ml), chilled. I recommend a dry Prosecco or Cava for the best balance. If you’re going non-alcoholic, look for a crisp sparkling apple cider or a quality non-alcoholic brut. I’ve had great luck with Martinelli’s for a non-alcoholic option.
- Apple Cider: 2 cups, chilled. Look for fresh-pressed, unfiltered apple cider if you can find it. It has more depth and a slightly tangy edge that works beautifully. In a pinch, good quality apple juice works, but the flavor will be sweeter and less complex.
For the Garnish Bar
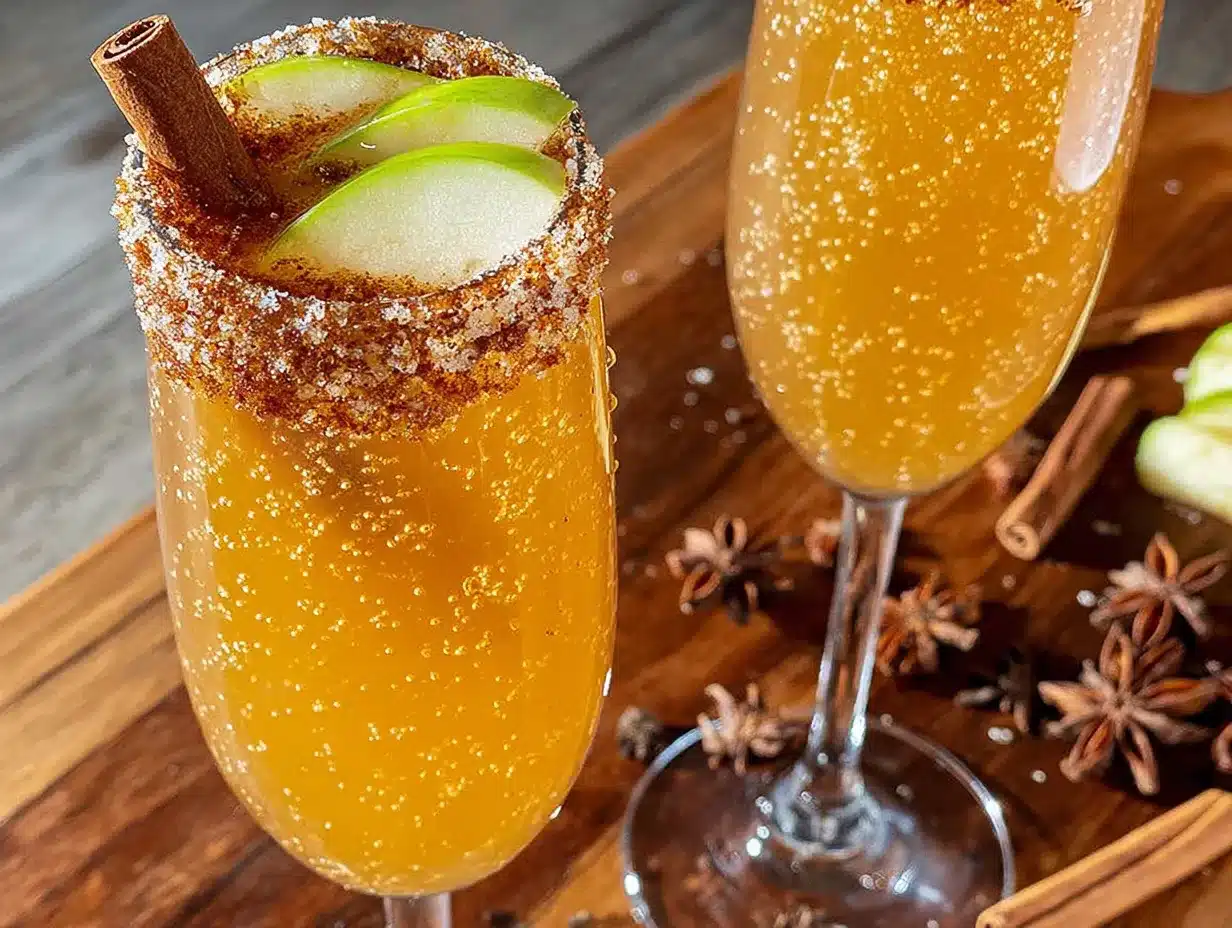
- Fresh Apple Slices: 1-2 apples, thinly sliced. Honeycrisp, Fuji, or Granny Smith all work well. Toss them in a little lemon juice to prevent browning if you’re prepping ahead.
- Cinnamon Sticks: 4-6, for stirring and flavor.
- Fresh Rosemary Sprigs: 4-6 sprigs. The piney, herbal note pairs surprisingly well with apple.
- Pomegranate Seeds: 1/2 cup. They add a pop of color and a little burst of tartness.
- Orange Slices: 1 orange, thinly sliced into rounds.
- Honey or Maple Syrup: A small dish for those who want a little extra sweetness.
- Ice Cubes: Optional, but if you’re serving this in warmer weather, a few cubes won’t hurt. I prefer large, clear ice cubes that melt slowly.
Optional Add-Ins
- Cranberries: Fresh or frozen, for a tart, festive touch.
- Pear Slices: Thinly sliced Bosc or Anjou pears add a delicate sweetness.
- Ginger Beer or Ginger Ale: For a spicy kick, offer this as an alternative mixer alongside the sparkling wine.
- Vanilla Extract: Just a drop in each glass adds a warm, cozy note. Trust me on this one.
Ingredient Selection Tips: For the best flavor, use a dry sparkling wine. Sweet bubbles plus sweet cider can be cloying. I prefer the crispness of a Brut Cava or Prosecco. If you’re using non-alcoholic bubbly, look for one that’s labeled “brut” or “dry” to mimic that balance. For the apple cider, avoid anything with added sugar or preservatives if possible. The real stuff has a shorter shelf life but way more personality.
Substitution Guidance: For a completely non-alcoholic version, use sparkling apple cider or a non-alcoholic sparkling wine. For a low-sugar option, use a dry sparkling wine and a sugar-free apple cider (or dilute regular cider with sparkling water). For a gluten-free option, most sparkling wines are naturally gluten-free, but always check the label. For a vegan version, use maple syrup instead of honey.
Equipment Needed
You don’t need much for this recipe, which is part of its charm. Here’s what I use and what you can substitute if you don’t have the fancy stuff.
- Champagne Flutes or Wine Glasses: Flutes keep the bubbles longer, but wine glasses work perfectly fine. I actually prefer wide-rimmed wine glasses because they show off the garnishes better.
- Small Bowls or Ramekins: For holding the garnishes. You’ll need about 5-6 small bowls. I use a mix of little ceramic dishes and small glass bowls I’ve collected over the years.
- Pitcher or Carafe: For the apple cider, so guests can pour their own. A simple glass pitcher works great. If you don’t have one, just leave the cider in its original bottle.
- Ice Bucket or Cooler: If you’re serving the sparkling wine chilled (which you should be), an ice bucket is nice but not essential. A simple bowl filled with ice works too.
- Cutting Board and Sharp Knife: For slicing apples, oranges, and any other fruit.
- Measuring Cups: For the apple cider, though honestly, you can eyeball it. The standard ratio is about 1 part cider to 2 parts bubbly, but everyone has their preference.
- Small Tongs or Cocktail Picks: For grabbing garnishes. It keeps things tidy and prevents sticky fingers.
Budget-Friendly Options: Don’t have champagne flutes? Use whatever glasses you have. Mason jars actually look really cute for a rustic feel. No small bowls? Use teacups or even small plates. No ice bucket? A large mixing bowl filled with ice works perfectly. Honestly, I’ve set this up using a cutting board as a serving tray and it looked great.
Preparation Method
Here’s how to put this sparkling apple cider mimosa bar together. It’s almost embarrassingly simple, but I’ll walk you through it step by step so you don’t miss anything.
- Chill Everything: About 2 hours before serving, put your sparkling wine (or non-alcoholic bubbly) and apple cider in the refrigerator. You want them thoroughly chilled. If you’re short on time, pop the bottles in an ice bath for 30 minutes. Warm bubbles are sad bubbles.
- Prep the Garnishes: While everything is chilling, wash and prep your garnishes. Slice the apples and oranges into thin rounds. A mandoline makes this super quick, but a sharp knife works fine. Aim for slices about 1/4 inch thick. If you’re using Granny Smith apples, toss them in a little lemon juice to keep them from browning. Pick the rosemary sprigs and rinse them. If you’re using fresh cranberries, rinse those too. Measure out the pomegranate seeds.
- Set Up the Garnish Bar: Arrange your small bowls on a tray or directly on the counter. I like to group them by color for visual appeal—greens together (rosemary, apple slices), reds together (pomegranate seeds, cranberries, orange slices), and neutrals (cinnamon sticks, honey) in the middle. Place small tongs or cocktail picks in each bowl so guests can serve themselves.
- Prepare the Cider and Sparkling Wine: Pour the chilled apple cider into a pitcher or carafe. Leave the sparkling wine in its bottle—it stays bubbly longer that way. If you’re using non-alcoholic bubbly, same deal. Keep both bottles in an ice bucket or cooler if you’re serving over an extended period.
- Set Out the Glasses: Place your glasses near the garnish bar. I usually set out a stack of 6-8 glasses, depending on how many guests I’m expecting. If you’re serving a crowd, you might want to set out more. Let guests grab their own glass and build their drink.
- Build Your Mimosa: Here’s the fun part. Each guest starts by adding a few ice cubes if they want them (I usually skip ice in winter but add it in summer). Then they fill their glass about 1/3 full with apple cider. Top it off with sparkling wine, leaving a little room for garnishes. The classic ratio is 1 part cider to 2 parts bubbly, but I’ve seen people do half and half, or even mostly cider with just a splash of bubbles. It’s totally personal preference.
- Add Garnishes: Now the creative part. Drop in a cinnamon stick for stirring. Add a sprig of rosemary for aroma. Float a few apple slices and an orange round. Sprinkle in some pomegranate seeds or cranberries. If they want a touch of sweetness, a drizzle of honey or maple syrup stirred in at the end. The garnishes aren’t just for looks—they actually infuse flavor as you sip.
- Serve Immediately: Mimosas are best enjoyed right away, while the bubbles are still lively. If you’re making a batch for a crowd, you can pre-mix a pitcher (using the same ratio) but add the sparkling wine just before serving to preserve the fizz.
Troubleshooting Tip: If your mimosa tastes flat, the sparkling wine might have been warm when you poured it, or it’s been open too long. Always start with a fresh, cold bottle. If it’s too sweet, use more sparkling wine and less cider. If it’s too tart, add a drizzle of honey or maple syrup.
Sensory Cues: You’ll know you’ve got the balance right when you take a sip and the bubbles dance on your tongue, followed by the crisp, slightly tannic note of the apple cider, and then the subtle sweetness of the garnish. The cinnamon stick adds a warm, spicy aroma that mingles with the fresh scent of rosemary. It should smell like autumn in a glass.
Cooking Tips & Techniques
Over the years, I’ve made a few mistakes with this recipe so you don’t have to. Here are the lessons I’ve learned the hard way.
Don’t Skimp on the Sparkling Wine: I once tried to save money by buying the cheapest bottle of sparkling wine I could find. Big mistake. It was harsh and the bubbles died within minutes. You don’t need to spend a fortune, but get something decent. A $10-15 bottle of Cava or Prosecco is usually a safe bet. The quality of the bubbles matters more here than in a cocktail with lots of mixers.
Temperature is Everything: I cannot stress this enough. Warm sparkling wine will foam over when you open it and go flat almost immediately. I once forgot to chill the bottle and ended up with a sad, flat mimosa that tasted like slightly sweet apple juice. Not my finest moment. Chill everything for at least 2 hours, preferably overnight.
Prep Garnishes in Advance: The one time I didn’t prep ahead, I was frantically slicing apples while guests were already pouring their drinks. It was chaotic and I ended up with uneven slices that looked messy. Now I always prep the garnishes the night before and store them in airtight containers in the fridge. The only thing I do day-of is arrange them on the bar.
Don’t Overfill the Glasses: Leave room for the garnishes. I’ve seen guests fill their glasses to the brim with cider and bubbles, only to realize they have nowhere to put the cinnamon stick or apple slices. They end up trying to balance everything on top, which inevitably leads to spills. Fill the glass about 3/4 full, then add garnishes.
Use a Dry Sparkling Wine: This is the most common mistake I see. People grab a sweet Moscato or a sweet sparkling wine, combine it with sweet apple cider, and end up with a drink that’s cloyingly sweet. A dry Brut or Extra Brut sparkling wine provides the necessary acidity to balance the natural sweetness of the apple cider. Trust me on this one.
Multitasking Strategy: While the bottles are chilling, prep all your garnishes. While you’re arranging the garnish bar, set out the glasses. This way, everything is ready at the same time and you’re not running around at the last minute.
Variations & Adaptations
One of the best things about this sparkling apple cider mimosa bar is how adaptable it is. Here are a few variations I’ve tried and loved.
Seasonal Variations
- Fall Harvest Mimosa: Add a splash of pear nectar to the mix and garnish with fresh figs, sliced pears, and a sprig of thyme. It’s like a farmers market in a glass.
- Winter Spice Mimosa: Use spiced apple cider (the kind with cloves and cinnamon already in it) and garnish with star anise, a cinnamon stick, and a slice of blood orange. So festive.
- Spring Blossom Mimosa: Swap the apple cider for a floral apple juice (some brands make one with elderflower) and garnish with edible flowers, fresh mint, and thin slices of green apple.
- Summer Berry Mimosa: Use a lighter, crisper apple juice and load up on fresh berries—raspberries, blackberries, and sliced strawberries. A sprig of basil adds a surprising but delicious twist.
Dietary Adaptations
- Low-Sugar Version: Use a dry sparkling wine (Brut Nature has almost no residual sugar) and a sugar-free apple cider. Garnish with tart fruits like green apple slices and fresh cranberries. Skip the honey or maple syrup.
- Vegan Version: Use maple syrup instead of honey for sweetening. Most sparkling wines are vegan, but some are fined with animal products, so check the label if that’s a concern.
- Gluten-Free Version: Most sparkling wines are naturally gluten-free, but always verify. All the garnishes I’ve listed are gluten-free.
Flavor Twists
- Caramel Apple Mimosa: Rim the glasses with caramel sauce and crushed graham crackers. Use a sweet apple cider and garnish with a thin slice of fresh apple. It’s decadent but amazing.
- Herbal Apple Mimosa: Muddle a few fresh sage leaves or thyme sprigs in the bottom of the glass before adding the cider and bubbles. The herbal notes complement the apple beautifully.
- Spiced Rum Apple Mimosa: Add a splash of spiced rum to the mix for an boozier, more complex flavor. It’s like a hot buttered rum but cold and bubbly.
I once tried a version with a splash of bourbon and a cinnamon stick, and honestly, it was dangerous how good it was. That’s become my go-to for cozy winter evenings when I want something a little stronger.
Serving & Storage Suggestions
This sparkling apple cider mimosa bar is best served immediately, but there are a few things you can do to make it work for a crowd.
Serving Temperature: Everything should be thoroughly chilled. I serve the sparkling wine and cider straight from the refrigerator, and I keep the garnishes cool by placing the bowls on a bed of ice. If you’re serving outdoors, an ice bucket for the bottles is essential.
Presentation: I like to arrange the garnish bar on a large wooden board or a marble slab. It looks beautiful and makes it easy for guests to see everything. Group the garnishes by color or type. I put the cinnamon sticks and rosemary together because they’re both aromatic, and the fruit slices together because they’re visually similar. A small dish of honey or maple syrup with a tiny spoon completes the setup.
Complementary Dishes: This mimosa bar pairs beautifully with light, fresh brunch dishes. Think fruit salad, yogurt parfaits, avocado toast, or a simple frittata. For a sweeter spread, serve it alongside pancakes, waffles, or a coffee cake. The crisp, bubbly drink cuts through rich, buttery foods perfectly.
Storage: If you have leftover sparkling wine, it will keep in the refrigerator for 1-2 days, but the bubbles will be significantly diminished. Use it for cooking or in a cocktail that doesn’t rely on fizz. Leftover apple cider will keep for up to a week in the refrigerator. Store garnishes separately in airtight containers. Apple slices will brown, so use them within a day or two.
Reheating: This is a cold drink, so no reheating needed! But if you want to use leftover sparkling wine for cooking, it works great in risottos or sauces where you need a little acidity.
Flavor Development: Unlike some recipes that get better with time, this one is best fresh. The bubbles are the star, and they don’t last. That said, if you’re making a non-alcoholic version with sparkling apple cider, the bubbles last a bit longer, so you can pre-mix a pitcher up to an hour before serving.
Nutritional Information & Benefits
I’m not a nutritionist, but I do pay attention to what goes into my body. Here’s a rough breakdown for a standard serving (about 6 oz) made with dry sparkling wine and unsweetened apple cider.
Estimated Nutritional Values (per serving):
- Calories: 120-150 (depending on the wine and cider)
- Carbohydrates: 15-20g (mostly from the apple cider)
- Sugar: 12-16g (natural sugars from the apple cider)
- Alcohol: About 10-12g (if using sparkling wine)
- Fat: 0g
- Protein: 0g
Health Benefits of Key Ingredients:
- Apple Cider: Contains antioxidants, particularly polyphenols, which may help reduce inflammation. It also provides a small amount of vitamin C. Unfiltered cider has more beneficial compounds than filtered juice.
- Pomegranate Seeds: Packed with antioxidants and vitamin C. They add fiber and a pop of color.
- Cinnamon: May help regulate blood sugar and has anti-inflammatory properties. Plus, it makes everything taste like the holidays.
- Fresh Herbs (Rosemary): Contains antioxidants and anti-inflammatory compounds. It also aids digestion.
Dietary Considerations: This recipe is naturally vegetarian and can be made vegan (use maple syrup instead of honey). For a low-sugar option, use a dry sparkling wine and a sugar-free apple cider. For gluten-free, most sparkling wines are safe, but always check labels. This recipe is dairy-free and nut-free as written.
Potential Allergens: Some sparkling wines may contain sulfites, which can be an issue for some people. If you’re sensitive, look for a sulfite-free option. The garnishes are generally allergen-free, but always check if you’re serving someone with specific allergies.
From a wellness perspective, I love that this drink feels indulgent without being heavy. It’s a great option for health-minded folks who still want to enjoy a festive beverage. You control the sweetness, you choose the quality of ingredients, and you get the benefits of fresh fruit and herbs. It’s a win-win in my book.
Conclusion
This sparkling apple cider mimosa bar has become a staple in my kitchen for good reason. It’s the kind of recipe that proves you don’t need to spend hours in the kitchen to create something special. With just a few simple ingredients and a little bit of planning, you can put together a drink station that feels festive, looks gorgeous, and tastes incredible. Whether you’re hosting a holiday brunch, a baby shower, or just a quiet Saturday morning with someone you love, this recipe delivers.
I love how customizable it is. You can make it as simple or as elaborate as you want. Some days I just set out a bottle of bubbly, some cider, and a few apple slices, and it’s perfect. Other days I go all out with every garnish I can find. There’s no wrong way to do it. That’s the beauty of a mimosa bar—it meets you where you are.
So go ahead, give it a try. Raid your fridge for garnishes, grab a bottle of something bubbly, and see what you come up with. I’d love to hear about your creations. Drop a comment below and let me know what garnishes you used, or tag me in your photos if you share them online. Happy sipping!
Frequently Asked Questions
Can I make this non-alcoholic?
Absolutely! Simply swap the sparkling wine for a non-alcoholic sparkling wine, sparkling apple cider, or even sparkling water. The flavor will be slightly different, but it’s still delicious and refreshing. I’ve served it this way for pregnant friends and designated drivers, and they loved it.
What’s the best ratio of cider to sparkling wine?
The classic ratio is 1 part apple cider to 2 parts sparkling wine. But honestly, it’s personal preference. Some people like it more cider-forward (half and half), while others prefer just a splash of cider for a hint of flavor. I recommend starting with the 1:2 ratio and adjusting from there.
Can I prep the garnish bar the night before?
Yes, with a few caveats. Slice the apples and toss them in lemon juice to prevent browning. Store all garnishes in separate airtight containers in the refrigerator. Arrange them on the bar just before serving so they look fresh. The rosemary and cinnamon sticks can be left out, but the fruit will look better if it’s freshly arranged.
What kind of sparkling wine should I use?
I recommend a dry Brut or Extra Brut sparkling wine. Prosecco, Cava, or a dry Champagne all work well. The key is to avoid sweet sparkling wines, which will make the drink cloying when combined with the apple cider. A $10-15 bottle is usually a safe bet for quality and flavor.
How do I keep the bubbles from going flat?
Start with a thoroughly chilled bottle of sparkling wine. Warm bubbles go flat faster. Don’t shake the bottle before opening. Pour gently and avoid letting the wine splash too much. Serve immediately after pouring. If you’re pre-mixing a pitcher, add the sparkling wine just before serving, not ahead of time.
Pin This Recipe!
Easy Sparkling Apple Cider Mimosa Bar Recipe
A quick and easy mimosa bar featuring crisp apple cider and sparkling wine, with a customizable garnish bar for any occasion. Perfect for brunch, holidays, or a festive gathering.
- Prep Time: 10 minutes
- Cook Time: 0 minutes
- Total Time: 10 minutes (plus 2 hours chilling time)
- Yield: 4-6 servings 1x
- Category: Beverage
- Cuisine: American
Ingredients
- 1 bottle (750 ml) dry sparkling wine (Prosecco or Cava), chilled
- 2 cups apple cider, chilled (preferably fresh-pressed, unfiltered)
- 1–2 apples (Honeycrisp, Fuji, or Granny Smith), thinly sliced
- 4–6 cinnamon sticks
- 4–6 fresh rosemary sprigs
- 1/2 cup pomegranate seeds
- 1 orange, thinly sliced into rounds
- Honey or maple syrup, for serving
- Ice cubes (optional)
- Fresh or frozen cranberries (optional)
- Pear slices (optional)
- Ginger beer or ginger ale (optional)
- Vanilla extract (optional)
Instructions
- Chill the sparkling wine and apple cider in the refrigerator for at least 2 hours, or place in an ice bath for 30 minutes if short on time.
- Wash and prep the garnishes: slice apples and oranges into thin rounds (about 1/4 inch thick). Toss apple slices in lemon juice to prevent browning if desired. Rinse rosemary sprigs and cranberries. Measure out pomegranate seeds.
- Arrange small bowls on a tray or counter for the garnish bar. Group garnishes by color for visual appeal. Place small tongs or cocktail picks in each bowl.
- Pour the chilled apple cider into a pitcher or carafe. Keep the sparkling wine in its bottle to preserve bubbles. Place both in an ice bucket or cooler if serving over an extended period.
- Set out glasses (champagne flutes or wine glasses) near the garnish bar.
- To build a mimosa: Add a few ice cubes if desired. Fill the glass about 1/3 full with apple cider. Top with sparkling wine, leaving room for garnishes. The classic ratio is 1 part cider to 2 parts bubbly.
- Add garnishes: drop in a cinnamon stick, a rosemary sprig, apple slices, an orange round, and pomegranate seeds or cranberries. Drizzle with honey or maple syrup if desired.
- Serve immediately while bubbles are lively. For a crowd, pre-mix a pitcher using the same ratio but add sparkling wine just before serving.
Notes
Use a dry Brut or Extra Brut sparkling wine to balance the sweetness of the apple cider. Chill everything thoroughly for best bubbles. Prep garnishes the night before and store in airtight containers. Don’t overfill glasses; leave room for garnishes. For a non-alcoholic version, use non-alcoholic sparkling wine or sparkling apple cider.
Nutrition
- Serving Size: 6 oz
- Calories: 120150
- Sugar: 1216
- Carbohydrates: 1520
Keywords: mimosa, apple cider, brunch, cocktail, non-alcoholic, sparkling wine, garnish bar, fall, holiday


