My neighbor, an older Italian woman named Rosa, watched me wrestling with a sticky, uncooperative dough on my patio table last spring. She didn’t say anything at first. Then she walked over, dipped her fingers in the olive oil I had out, and gently pressed them into the dough, creating those signature dimples. “Too tight,” she said, shaking her head with a small smile. “You are fighting it. The dough wants to breathe.” That moment changed how I approach baking forever.
Honestly, I had been trying to perfect a fluffy sourdough focaccia with rosemary for weeks. My attempts were either too dense, like a bread hockey puck, or they had the texture of a sad, deflated balloon. Rosa’s simple lesson—to be gentle, to trust the fermentation—was the missing piece. She shared her starter with me, a bubbly, tangy beast that had been in her family for decades, and showed me how to coax the best out of it.
This recipe is the result of that afternoon, mixed with my own trials and a few happy accidents. I mean, who knew that a slightly over-proofed dough could turn into the most ethereally airy crumb? The rosemary comes from my own scraggly herb plant, which I nearly killed twice. Maybe you have a similar plant that refuses to give up, or a starter that feels more like a pet than a pantry staple. You know that feeling when you are finally rewarded with something that smells like a Tuscan bakery? That is this focaccia.
It is the kind of bread that makes you close your eyes after pulling it from the oven, the kitchen filled with the scent of olive oil and herbs. It stayed with me because it taught me to slow down. Every time I make it, I remember Rosa’s oil-dipped fingers and the simple act of pressing, not punching.
Why You’ll Love This Recipe
This fluffy sourdough focaccia with rosemary is not just another bread recipe. It has become my go-to for everything from lazy Sunday afternoons to dinner parties where I want to look like I tried harder than I actually did. The process is forgiving, which is huge for a sourdough recipe. You do not need to be a professional baker to nail it.
- Incredibly Fluffy Texture: The long, cold fermentation creates an airy, pillowy crumb that is pure satisfaction. It has that perfect chew without being tough.
- Simple, Everyday Ingredients: Flour, water, salt, olive oil, and your sourdough starter. That is it. No commercial yeast, no fancy add-ins required.
- Perfect for Beginners and Experts: The high hydration dough is a great challenge for seasoned bakers, but the hands-off method makes it totally accessible for someone just getting into sourdough.
- Unbelievably Versatile: It works as a side for soups and salads, the base for sandwiches, or just ripped apart and dipped in balsamic vinegar. It disappears every single time.
- Make-Ahead Friendly: Most of the work happens in the refrigerator overnight. You get fresh, bakery-quality bread with just a little bit of active time the next day.
What makes this version different is the hydration level. I push the water content higher than most recipes, which sounds scary, but it is the secret to that fluffy, open crumb. The cold ferment also deepens the sourdough tang, balancing perfectly with the floral, piney notes of fresh rosemary. This isn’t just another focaccia—it is the one that will make you text your friends a picture before you even cut into it.
What Ingredients You Will Need
This recipe relies on a handful of high-quality ingredients to deliver that signature flavor and texture. The magic really happens with the fermentation, so using good flour and a happy starter makes all the difference. Here is what you will need to gather.
For the Dough
- Bread Flour: 500 grams (about 4 cups). I recommend King Arthur Baking Company for its high protein content, which builds the strong gluten network needed for that fluffy rise. You can use all-purpose flour, but the texture will be slightly less chewy.
- Water: 400 grams (about 1 ¾ cups), lukewarm. The high hydration is key. If your tap water is heavily chlorinated, let it sit out for an hour or use filtered water, as chlorine can slow down your starter’s activity.
- Active Sourdough Starter: 150 grams (about ¾ cup), bubbly and fed. Make sure your starter is at its peak—doubled in size and full of bubbles. A sluggish starter will lead to a dense focaccia.
- Extra Virgin Olive Oil: 40 grams (about 3 tablespoons) for the dough, plus a generous amount for the pan and topping. Use a good quality oil here, as its flavor really shines through. I like California Olive Ranch for a consistent, fruity taste.
- Fine Sea Salt: 10 grams (about 2 teaspoons). Salt is crucial for flavor and for controlling fermentation. Do not skip it or reduce it too much, or your dough might over-proof and collapse.
- Fresh Rosemary: 2 tablespoons, finely chopped. Fresh is non-negotiable here. Dried rosemary can be woody and overpowering. I have a plant on my windowsill that I snip from, but grocery store bunches work perfectly.
- Flaky Sea Salt: For finishing, like Maldon. This adds a wonderful crunch and pop of salt that contrasts with the olive oil.
Ingredient Notes & Substitutions
- Flour Swap: For a whole wheat version, replace 100 grams of the bread flour with whole wheat flour. The crumb will be denser, but the flavor will be more nutty and complex.
- Herb Variations: If you do not have rosemary, fresh thyme or a mix of dried oregano and basil works beautifully. I have also added chopped kalamata olives and sun-dried tomatoes to the dough for a Mediterranean twist.
- Gluten-Free Option: This recipe is not naturally gluten-free due to the high hydration. I have had success using a 1:1 gluten-free baking flour blend, but you must add 1 teaspoon of xanthan gum if your blend does not include it. The texture will be more cake-like.
Equipment Needed
You do not need a fancy stand mixer for this. In fact, I prefer doing it by hand. Here is what you will need to make this fluffy sourdough focaccia with rosemary.
- Large Mixing Bowl: A glass or ceramic bowl works best. I use my grandmother’s old Pyrex bowl. Avoid metal if you can, as it can sometimes react with the dough during long ferments.
- 9×13-inch Baking Pan: A metal or dark non-stick pan is ideal. Darker pans absorb heat better and give you a crispier, more golden bottom crust. Glass pans can work, but you might need to bake it a few minutes longer.
- Digital Kitchen Scale: Honestly, this is the most important tool. Measuring flour by volume (cups) is incredibly inconsistent. A scale ensures you get the hydration right every single time. I have a cheap OXO scale that has lasted for years.
- Bench Scraper: This little tool is a lifesaver for handling the sticky, high-hydration dough. It helps you fold the dough without it sticking to your hands. A plastic one is gentler on your bowl.
- Plastic Wrap or a Shower Cap: You need something to cover the bowl during the long rise. A reusable shower cap is actually perfect for this—it stretches over any bowl and keeps the dough from drying out.
Preparation Method
This process is spread over two days, but the active work is minimal. The cold ferment does the heavy lifting. I promise, the wait is worth it for that fluffy sourdough focaccia with rosemary.
- Mix the Dough (Day 1, Morning): In your large bowl, combine the lukewarm water and active sourdough starter. Whisk them together until the starter is mostly dissolved. It will look a little milky. Then, add the bread flour. Use your hands or a wooden spoon to mix until no dry bits of flour remain. It will be a shaggy, sticky mess. That is exactly what you want. Cover the bowl with plastic wrap and let it rest for 30 minutes. This is called autolyse, and it starts building the gluten structure.
- Add the Salt and Oil: After the rest, sprinkle the fine sea salt over the top of the dough. Pour the 40 grams of olive oil over the salt. Now, use your fingers to pinch and squeeze the dough. It will feel weird and slippery at first. Do this for about 2-3 minutes until the salt is fully incorporated and the dough starts to feel a bit stronger and more cohesive.
- Perform the Stretch and Folds: This is the secret to a strong, airy dough. Over the next 2 hours, you will perform 4 sets of “stretch and folds” every 30 minutes. To do this, wet your hand slightly to prevent sticking. Grab one side of the dough, stretch it up as high as it will go without tearing, and fold it over the top of the dough. Rotate the bowl 90 degrees and repeat. Do this 4 times total (one full rotation). Cover the bowl between sets. After the last set, the dough should feel smooth, elastic, and puffy.
- Bulk Fermentation: Cover the bowl tightly with plastic wrap and place it in the refrigerator. Let it cold ferment for at least 12 hours, and up to 48 hours. The longer it sits, the more complex the sourdough flavor will be. I usually aim for about 18 hours. The dough will have grown significantly, but it might not have doubled.
- Pan the Dough (Day 2, Morning): Pour a generous 2-3 tablespoons of olive oil into your 9×13-inch baking pan. Use your fingers to spread it all over the bottom and up the sides. Gently scrape the cold dough out of the bowl and into the pan. It will be cold and stiff, which makes it easier to handle. Do not punch it down. Just let it sit in the pan. Cover the pan with plastic wrap and let it sit at room temperature for 1 hour.
- Dimple and Proof: After an hour, the dough will have softened and started to spread. Now, oil your fingers again. Gently press and stretch the dough to fill the corners of the pan. If it resists, let it rest for 10 minutes and try again. Once it fills the pan, dimple the entire surface by pressing your fingertips straight down to the bottom of the pan. This is the fun part. Drizzle another tablespoon of olive oil over the top, making sure it pools in the dimples. Sprinkle the chopped fresh rosemary and a generous pinch of flaky sea salt over the top. Cover it again and let it proof at room temperature for another 2-3 hours. It should look very puffy, jiggly, and full of air bubbles when it is ready.
- Bake: About 30 minutes before you are ready to bake, place a rack in the middle of your oven and preheat it to 450°F (230°C). If you have a baking stone or steel, place it on the rack to preheat too. Bake the focaccia on the middle rack for 25-30 minutes. It is done when the top is deeply golden brown and the bottom sounds hollow when you tap it. If the top is browning too fast, tent it loosely with foil for the last 5 minutes.
- Cool: This is the hardest part. Let the focaccia cool in the pan for 10 minutes. Then, transfer it to a wire rack. If you cut into it while it is piping hot, the steam will escape and the crumb will be gummy. Let it cool for at least 20 minutes before slicing. The anticipation builds the flavor, I swear.
Cooking Tips & Techniques
I have made this fluffy sourdough focaccia with rosemary at least twenty times, and I have learned a few things the hard way. Here are the tricks that make the difference between a good loaf and a legendary one.
Do Not Skip the Cold Ferment. I once tried to rush this by proofing at room temperature for only 6 hours. The result was a flat, one-dimensional bread with barely any sourdough tang. The cold ferment is not just for convenience; it is for flavor and texture. It gives the enzymes time to break down the flour, creating a more digestible and flavorful bread.
Use Enough Oil. You might look at the amount of olive oil in the pan and think it is excessive. It is not. The oil fries the bottom of the dough as it bakes, creating a crispy, almost cracker-like crust that is the hallmark of great focaccia. Skimping on the oil leads to a dry, pale bottom. Let it pool in the dimples. That is flavor.
Trust Your Senses, Not Just the Timer. Every kitchen is different. My oven runs a little hot, so I start checking my focaccia at the 22-minute mark. Look for a deep amber color, not just a light tan. Smell it. That intoxicating mix of toasted flour and rosemary should fill your kitchen. If it smells done, it probably is.
The “Jiggle Test”: Before baking, give the pan a gentle shake. The dough should wobble like Jell-O. If it is stiff and does not move, it needs more time to proof. If it looks deflated and has large surface bubbles that have popped, it might be over-proofed and will not rise much in the oven. You want a happy, jiggly dough.
Variations & Adaptations
Once you master the base recipe, the possibilities are endless. This fluffy sourdough focaccia with rosemary is a fantastic canvas for other flavors.
- Roasted Garlic & Thyme: Before mixing the dough, roast a whole head of garlic until soft and caramelized. Squeeze the cloves out and mash them into a paste. Swirl this paste into the dough during the last set of stretch and folds. Top with fresh thyme instead of rosemary. It is insanely savory.
- Everything Bagel Focaccia: After dimpling and oiling the dough, sprinkle a generous amount of everything bagel seasoning over the top. The sesame seeds, poppy seeds, garlic, and onion will toast beautifully in the oven. This version is a breakfast game-changer.
- Caramelized Onion & Gorgonzola: While the dough is doing its cold ferment, slowly caramelize 2 large sliced onions in butter and olive oil for about 45 minutes. After you dimple the dough, scatter the onions and crumbled gorgonzola cheese over the top before baking. The salty, sweet, and funky flavors are incredible.
Serving & Storage Suggestions
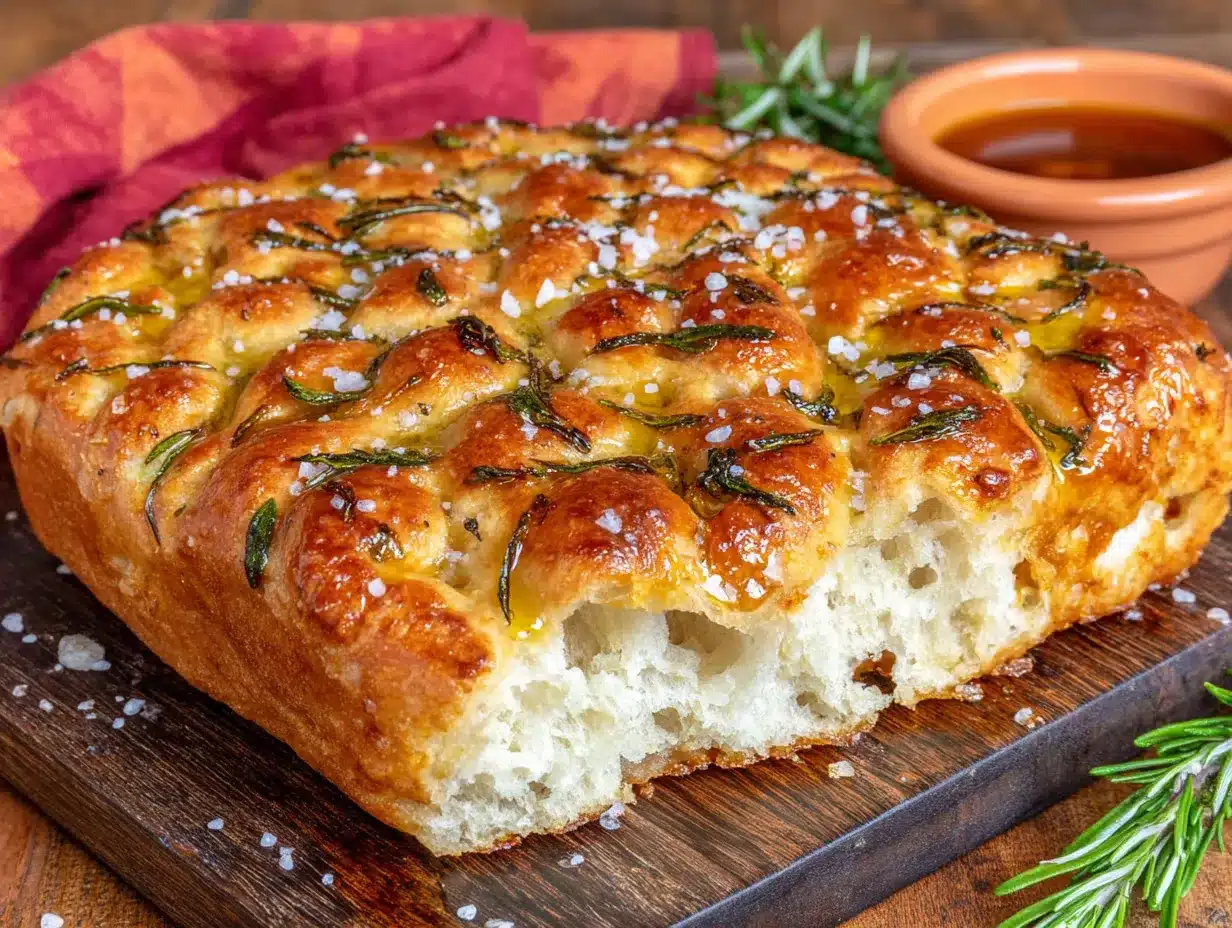
This bread is best enjoyed the day it is made, still warm from the oven. The contrast between the crispy, oil-crusted bottom and the fluffy, airy interior is a textural masterpiece.
Serving: I love serving it as a side to a big bowl of hearty minestrone soup or a simple classic Italian salad. It is also phenomenal split in half and used for a sandwich with prosciutto, fresh mozzarella, and roasted peppers. For a simple appetizer, just cut it into squares and serve with a dish of high-quality balsamic vinegar for dipping.
Storage: If you have leftovers (which is rare in my house), store them in an airtight container or a paper bag at room temperature for up to 2 days. Do not refrigerate it. The fridge will dry it out and make it stale very quickly.
Reheating: The best way to revive day-old focaccia is to pop it in a 350°F (175°C) oven or toaster oven for 5-7 minutes. It will crisp the crust back up and soften the interior. I have also had success reheating slices in a dry skillet over medium heat for a minute per side. The flavor actually deepens a little on the second day, becoming more pronounced and tangy.
Nutritional Information & Benefits
While bread is a treat, this sourdough version has some distinct advantages. The long fermentation process breaks down phytic acid, a compound in grains that can block the absorption of minerals like zinc and magnesium. This makes the nutrients in the flour more bioavailable for your body. Sourdough is also often better tolerated by people with mild gluten sensitivities, as the fermentation partially breaks down the gluten proteins.
Estimated per serving (1/8 of the recipe):
- Calories: 290
- Fat: 10g
- Carbohydrates: 44g
- Protein: 7g
- Fiber: 2g
Dietary Notes: This recipe is dairy-free, nut-free, and egg-free. To make it vegan, just ensure your starter is fed with plant-based flour and water (which it usually is). It is not gluten-free, but the sourdough process does make it easier to digest for many people.
Conclusion
This fluffy sourdough focaccia with rosemary is more than just a recipe; it is a little ritual. It forces you to slow down, to get your hands dirty, and to trust a process that takes time. The reward is a loaf of bread that looks like it came from a fancy bakery but was made in your own kitchen with ingredients you already had.
I love this recipe because it is forgiving. I have forgotten to do a stretch and fold, I have let it proof a little too long, and it still turns out amazing. It has become my signature dish to bring to gatherings, and it always sparks a conversation. Please, make this your own. Add your favorite herbs, throw in some olives, or just keep it classic with the rosemary. I would love to hear how it turns out for you. Drop a comment below and tell me about your focaccia adventure, or share a picture on Pinterest! Happy baking, friend.
Frequently Asked Questions
Can I use active dry yeast instead of a sourdough starter?
Yes, you can. This will turn it into a classic yeasted focaccia. Omit the sourdough starter and use 1 teaspoon of active dry yeast dissolved in the warm water. Let it sit for 5 minutes until foamy, then proceed with the recipe. You will not get the same tangy flavor, but it will still be fluffy and delicious. You can also skip the cold ferment if using commercial yeast and just let it rise at room temperature for about 2 hours.
Why is my focaccia dough so sticky?
Do not panic! This is a high-hydration dough, meaning it has a lot of water. It is supposed to be sticky. The key is to use wet hands or a wet bench scraper when handling it. As the gluten develops through the stretch and folds, it will become more manageable. If it feels like batter, you might have added too much water. Next time, hold back 20-30 grams of water and add it only if the dough feels stiff.
My focaccia did not get those big air bubbles. What happened?
Big air bubbles come from a strong fermentation and gentle handling. You might have been too rough when pressing the dough into the pan, deflating all the gas. When you transfer the dough, be as gentle as possible. Also, make sure your sourdough starter is very active and bubbly before you begin. If your starter is sluggish, the dough will not produce enough gas to create that open crumb.
Can I freeze this sourdough focaccia?
Absolutely. It freezes beautifully. Let the baked focaccia cool completely. Wrap it tightly in plastic wrap, then a layer of aluminum foil. It will keep in the freezer for up to 3 months. To thaw, leave it on the counter for a few hours, then reheat it in a 350°F oven for 10 minutes to crisp it back up. I often bake two and freeze one for a busy week.
How do I know when my sourdough starter is ready to use?
Your starter is ready when it has at least doubled in size, is full of bubbles, and has a pleasant, tangy smell (like yogurt or overripe fruit). It should pass the “float test” – drop a small spoonful of the starter into a glass of water. If it floats, it is full of gas and ready to use. If it sinks, it needs more time to feed and ferment. Feed it a 1:1:1 ratio (starter:flour:water) and check it again in 4-6 hours.
Pin This Recipe!

Fluffy Sourdough Focaccia with Rosemary

This fluffy sourdough focaccia with rosemary is the result of a neighbor’s gentle lesson and my own trials. It has an incredibly airy crumb, a deep sourdough tang, and a crispy, oil-crusted bottom.
- Prep Time: 30 minutes
- Cook Time: 30 minutes
- Total Time: 13 hours (including overnight fermentation)
- Yield: 8 servings 1x
- Category: Bread
- Cuisine: Italian
Ingredients
- 500 grams bread flour (about 4 cups)
- 400 grams lukewarm water (about 1 ¾ cups)
- 150 grams active sourdough starter (about ¾ cup), bubbly and fed
- 40 grams extra virgin olive oil (about 3 tablespoons), plus more for pan and topping
- 10 grams fine sea salt (about 2 teaspoons)
- 2 tablespoons fresh rosemary, finely chopped
- Flaky sea salt for finishing (like Maldon)
Instructions
- Mix the Dough (Day 1, Morning): In a large bowl, combine the lukewarm water and active sourdough starter. Whisk until the starter is mostly dissolved. Add the bread flour and mix with your hands or a wooden spoon until no dry bits remain. Cover with plastic wrap and let rest for 30 minutes (autolyse).
- Add the Salt and Oil: Sprinkle the fine sea salt over the dough and pour the 40 grams of olive oil over the salt. Use your fingers to pinch and squeeze the dough for 2-3 minutes until the salt is fully incorporated and the dough feels stronger.
- Perform Stretch and Folds: Over the next 2 hours, perform 4 sets of stretch and folds every 30 minutes. Wet your hand slightly, grab one side of the dough, stretch it up, and fold it over the top. Rotate the bowl 90 degrees and repeat 4 times total. Cover between sets.
- Bulk Fermentation: Cover the bowl tightly with plastic wrap and refrigerate for at least 12 hours, up to 48 hours.
- Pan the Dough (Day 2, Morning): Pour 2-3 tablespoons of olive oil into a 9×13-inch baking pan and spread it all over. Gently scrape the cold dough into the pan. Cover with plastic wrap and let sit at room temperature for 1 hour.
- Dimple and Proof: After 1 hour, oil your fingers and gently press and stretch the dough to fill the corners. Dimple the entire surface by pressing your fingertips straight down. Drizzle another tablespoon of olive oil over the top, sprinkle with chopped rosemary and flaky sea salt. Cover and proof at room temperature for 2-3 hours until very puffy and jiggly.
- Bake: Preheat oven to 450°F (230°C) about 30 minutes before baking. Bake on the middle rack for 25-30 minutes until deeply golden brown and the bottom sounds hollow when tapped. Tent with foil if browning too fast.
- Cool: Let cool in the pan for 10 minutes, then transfer to a wire rack. Cool for at least 20 minutes before slicing.
Notes
The cold ferment is crucial for flavor and texture. Use enough olive oil for a crispy bottom. Trust the jiggle test before baking. For best results, use a digital scale for accuracy.
Nutrition
- Serving Size: 1/8 of the recipe
- Calories: 290
- Sodium: 390
- Fat: 10
- Saturated Fat: 1.5
- Carbohydrates: 44
- Fiber: 2
- Protein: 7
Keywords: sourdough focaccia, fluffy focaccia, rosemary focaccia, homemade bread, Italian bread, sourdough recipe


