My neighbor Carol watched me fumbling with a pastry cutter one October afternoon, flour dusting my counter like the first snow we hadn’t seen yet. She didn’t say anything at first—just leaned against my doorway, arms crossed, a little smile playing on her lips. Then she walked over, gently took the cutter from my hand, and said, “You know, for years I tried to make my grandmother’s pumpkin pie from scratch. The crust always cracked. The filling always weeped. Then one day I just stopped fighting it.”
That’s how I ended up with a sticky note on my fridge that simply read: “No oven. No stress. Just cream cheese and pumpkin.” Carol had moved on from traditional pumpkin pie years ago, and honestly, she’d never looked back. She’d figured out that the best fall dessert wasn’t the one that required blind baking or precise temperature control—it was the one you could throw together while the kids did homework and the dog begged for scraps under the table.
I’ll be real with you: the first time I made these no-bake pumpkin cheesecake bars, I forgot to soften the cream cheese properly. The filling had little lumps, and I almost scrapped the whole thing. But Carol told me to chill it anyway, and you know what? Those lumps disappeared overnight. The texture was so velvety, so perfectly pumpkin-spiced, that I actually cried a little. (Okay, maybe that’s dramatic, but it had been a long week.)
These no-bake pumpkin pie cheesecake bars with caramel drizzle have become my fall signature. They’re the dessert I bring to Friendsgiving, the one my sister requests for her birthday every November, and the treat I make just for me on a quiet Sunday afternoon. They taste like autumn in a pan—but without turning on the oven. And honestly, isn’t that what we all need?
Why You’ll Love This Recipe
Let me tell you why these no-bake pumpkin cheesecake bars have earned a permanent spot in my dessert rotation. I’ve tested this recipe at least a dozen times, tweaking the ratios, swapping ingredients, and even accidentally using Greek yogurt instead of cream cheese once (don’t ask). What I landed on is foolproof, and I mean that sincerely.
- No Oven Required: This is the dessert for hot fall days when you want pumpkin flavor but can’t stand the thought of heating up your kitchen. It’s also perfect for dorm rooms, camping trips, or anyone without reliable oven access.
- Simple Ingredients: You probably have most of these in your pantry right now. Graham crackers, cream cheese, pumpkin puree—nothing weird or hard to find. No specialty stores required.
- Perfect for Thanksgiving: These bars travel beautifully, can be made days ahead, and don’t take up precious oven space. They’re a lifesaver when you’re juggling turkey, stuffing, and three kinds of potatoes.
- Crowd-Pleaser: I’ve served these to pumpkin purists, cheesecake snobs, and people who claim they don’t like dessert. Every single person has asked for the recipe. Every. Single. One.
- Unbelievably Creamy: The texture is what gets people. It’s not too dense like traditional cheesecake, not too light like mousse—it’s that perfect in-between that melts on your tongue.
What makes these bars different from every other no-bake pumpkin dessert out there? It’s the caramel drizzle, honestly. That salty-sweet finish takes the whole thing from “pretty good” to “I need this in my life forever.” Plus, I use a trick of blooming the gelatin in cold water first, which gives the cheesecake layer a stability that most no-bake recipes lack. No watery slices here, my friend.
This is comfort food that doesn’t require effort. It’s the kind of dessert that makes you close your eyes after the first bite, that makes your guests go quiet for a second before the compliments start rolling in. And the best part? You can make it in your pajamas.
What Ingredients You Will Need
This recipe relies on simple, wholesome ingredients that work together to create something truly special. Most of these are fall pantry staples, and I’ve included substitution notes where they actually work.
For the Crust
- 2 cups graham cracker crumbs (about 14-16 full sheets, crushed finely)
- ½ cup unsalted butter, melted (use salted butter and reduce added salt if that’s what you have)
- ¼ cup granulated sugar
- ¼ teaspoon salt (skip if using salted butter)
- ½ teaspoon ground cinnamon (adds warmth to the crust)
For the Pumpkin Cheesecake Filling
- 16 ounces cream cheese, softened to room temperature (I prefer Philadelphia for consistent texture)
- 1 cup canned pumpkin puree (not pumpkin pie filling—make sure it’s 100% pumpkin)
- ¾ cup packed light brown sugar (dark brown sugar works too, for deeper flavor)
- 1 teaspoon vanilla extract
- 1½ teaspoons pumpkin pie spice (or make your own: ½ tsp cinnamon, ¼ tsp nutmeg, ¼ tsp ginger, ⅛ tsp cloves)
- ½ teaspoon ground cinnamon (extra, because we’re not messing around)
- 1 tablespoon unflavored gelatin powder (this is the secret to sliceable no-bake cheesecake)
- 3 tablespoons cold water (for blooming the gelatin)
- 1 cup heavy cream, cold (whipped to stiff peaks—don’t use whipped topping here)
For the Caramel Drizzle
- ½ cup granulated sugar
- 3 tablespoons unsalted butter, cut into pieces
- ¼ cup heavy cream, at room temperature
- ½ teaspoon flaky sea salt (like Maldon—regular salt works but use half the amount)
- ½ teaspoon vanilla extract
For Garnish (Optional but Recommended)
- ¼ cup toasted pecans, chopped (toast at 350°F for 5-7 minutes until fragrant)
- Extra caramel drizzle (because you can never have too much)
- Flaky sea salt (for that sweet-salty finish)
Ingredient Notes: For the best texture, use full-fat cream cheese and heavy cream. Low-fat versions contain more water and can make the filling runny. I’ve tested this with Neufchâtel cheese (the one in the green box) and it works, but the texture is slightly less creamy. For a dairy-free version, use vegan cream cheese and coconut cream, but note that the texture will be different—still delicious, just not as firm.
When choosing pumpkin puree, look for Libby’s or store brands that list only pumpkin as the ingredient. Avoid pumpkin pie filling, which has sugar and spices already added—you want control over your own flavor profile.
Equipment Needed
You don’t need fancy tools for these no-bake pumpkin cheesecake bars, which is part of their charm. Here’s what you’ll actually use:
- 9×9-inch square baking pan (an 8×8 works too, bars will be slightly thicker—adjust chilling time by 30 minutes)
- Parchment paper (for easy removal—let it hang over the edges like handles)
- Food processor or zip-top bag and rolling pin (for crushing graham crackers)
- Electric hand mixer or stand mixer (you can do this by hand with a whisk, but your arm will be tired)
- Medium saucepan (for the caramel—light-colored metal helps you see color changes)
- Small microwave-safe bowl (for blooming gelatin)
- Rubber spatula (for scraping every last bit of filling)
- Measuring cups and spoons
- Sharp knife (for clean slices—run it under hot water between cuts)
If you don’t have a food processor, no worries. Put the graham crackers in a zip-top bag, seal it, and go to town with a rolling pin or even a heavy skillet. It’s oddly satisfying and takes about two minutes. I’ve done it while watching the news—multitasking at its finest.
For the caramel, a silicone spatula is your best friend. It won’t scratch your pan and it scrapes the sides clean, which is important because sugar crystals on the sides can cause your caramel to seize up. Learned that one the hard way, let me tell you.
Preparation Method
Let’s make these no-bake pumpkin cheesecake bars step by step. I’ve included timings and sensory cues so you know exactly what to look for.
Step 1: Prepare the Pan
Line your 9×9-inch baking pan with parchment paper, leaving about 2 inches of overhang on two opposite sides. This creates handles that let you lift the entire block of cheesecake out later. Lightly grease the parchment with butter or cooking spray—just a thin layer.
Step 2: Make the Crust
In a medium bowl, combine 2 cups graham cracker crumbs, ¼ cup sugar, ¼ teaspoon salt, and ½ teaspoon cinnamon. Pour in ½ cup melted butter and stir with a fork until every crumb is moistened. The mixture should look like wet sand and hold together when you squeeze it in your fist. Press this mixture firmly into the bottom of your prepared pan. I use the bottom of a measuring cup to really pack it down—flat, even, no loose spots. Pop it in the fridge while you make the filling.
Step 3: Bloom the Gelatin
In a small microwave-safe bowl, sprinkle 1 tablespoon gelatin powder over 3 tablespoons cold water. Don’t stir—just let it sit. Let it rest for 5-10 minutes until it looks like a firm, jiggly blob. This is called blooming, and it’s crucial for smooth, sliceable cheesecake. After it blooms, microwave it for 10 seconds, stir, then another 5 seconds until it’s liquid and clear. Set aside to cool slightly while you work.
Step 4: Make the Cheesecake Filling
In a large bowl, beat 16 ounces softened cream cheese with an electric mixer on medium speed until completely smooth—about 2 minutes. Scrape the bowl well. Add ¾ cup brown sugar, 1 teaspoon vanilla, 1½ teaspoons pumpkin pie spice, and ½ teaspoon cinnamon. Beat until combined, about 1 minute. Add 1 cup pumpkin puree and mix on low until incorporated. The mixture should be smooth and uniformly orange.
Now for the gelatin: With the mixer running on low, slowly pour the cooled liquid gelatin into the cream cheese mixture. Mix until fully incorporated, about 30 seconds. Scrape the bowl again. The mixture will look slightly thinner—that’s normal.
Step 5: Whip the Cream
In a separate cold bowl, beat 1 cup cold heavy cream on medium-high speed until stiff peaks form. This takes about 3-4 minutes with a hand mixer. You’re looking for peaks that stand straight up when you lift the beaters—not droopy, not grainy. Be careful not to over-whip, or you’ll end up with butter. (Ask me how I know.)
Step 6: Fold Everything Together
Take about a third of the whipped cream and stir it into the pumpkin mixture to lighten it up. Then gently fold in the remaining whipped cream using a rubber spatula. Use a cutting motion down through the center, then scrape up the sides and fold over. Repeat until no white streaks remain. The final mixture should be light, airy, and a beautiful pale orange color.
Step 7: Assemble and Chill
Pour the filling over the chilled crust and spread it evenly with an offset spatula or the back of a spoon. Give the pan a few gentle taps on the counter to release any air bubbles. Cover with plastic wrap and refrigerate for at least 6 hours, but overnight is better. I know it’s hard to wait, but this is where the magic happens. The gelatin needs time to set, and the flavors need time to meld.
Step 8: Make the Caramel Drizzle
While the cheesecake chills, make your caramel. In a medium saucepan over medium heat, melt ½ cup sugar, stirring occasionally with a silicone spatula. The sugar will clump at first—don’t panic, just keep stirring. After about 5-7 minutes, it will melt into a deep amber liquid. Watch it carefully; it goes from perfect to burnt in seconds. Once it reaches a rich copper color, remove from heat and immediately whisk in 3 tablespoons butter (it will bubble up vigorously). Then slowly drizzle in ¼ cup heavy cream while whisking constantly. Stir in ½ teaspoon salt and ½ teaspoon vanilla. Let it cool in the pan, then transfer to a jar or squeeze bottle. It will thicken as it cools.
Step 9: Slice and Serve
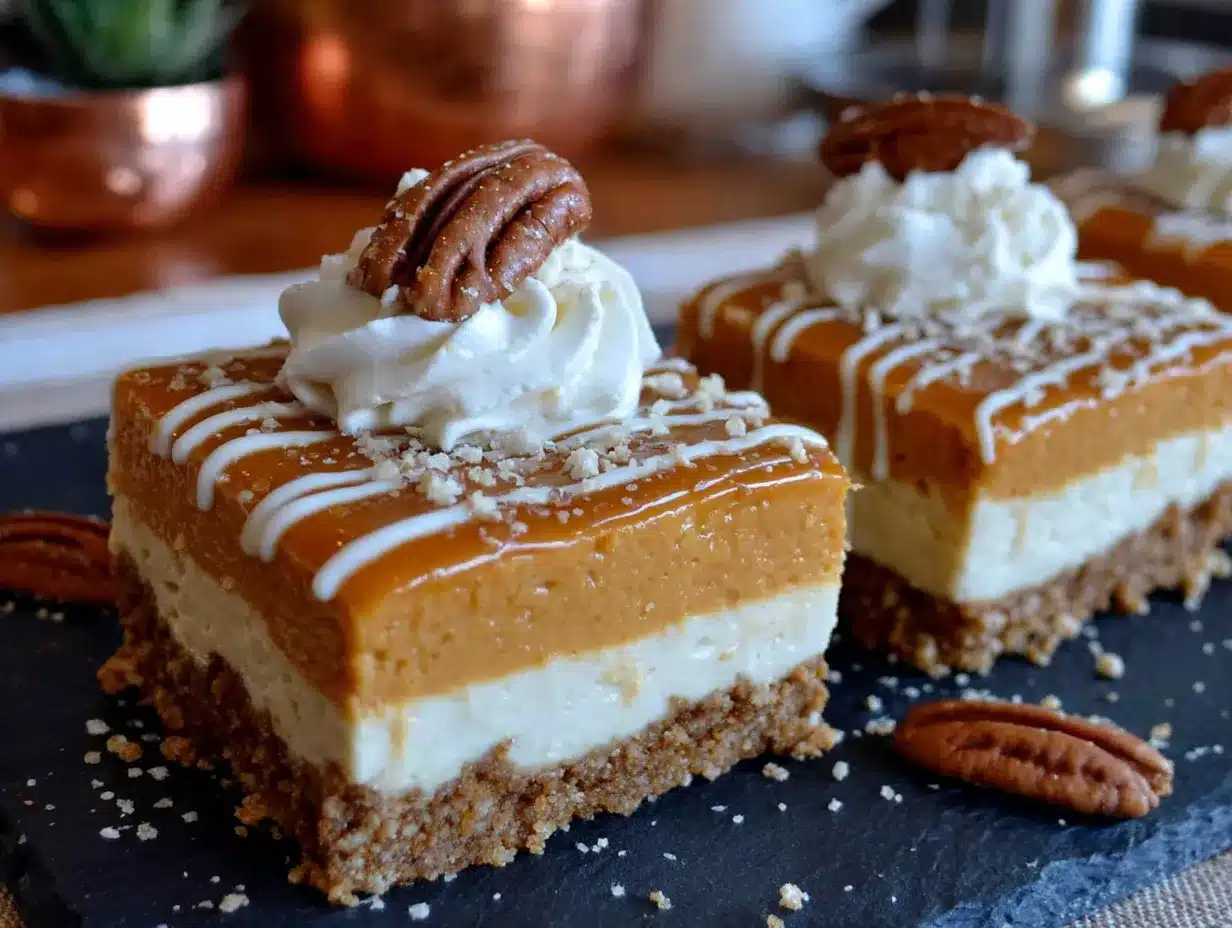
Once the cheesecake is fully set (it should feel firm to the touch), lift it out of the pan using the parchment handles. Place it on a cutting board. Use a sharp knife to slice into 9 or 16 bars, wiping the blade clean between cuts. Drizzle with caramel, sprinkle with toasted pecans and flaky salt, and serve cold.
Cooking Tips & Techniques
I’ve made these no-bake pumpkin cheesecake bars more times than I can count, and I’ve learned a few things the hard way. Here’s what I wish someone had told me.
Room temperature cream cheese is non-negotiable. I know, I know—you’re in a hurry. But cold cream cheese creates lumps that no amount of beating will fix. Leave it on the counter for at least an hour. If you forgot, unwrap it, cut it into cubes, and microwave at 50% power in 10-second bursts until it’s soft but not warm. This takes about 30-40 seconds total.
Don’t skip the gelatin. Some no-bake cheesecake recipes rely solely on whipped cream for structure, and they end up more like mousse—delicious but not sliceable. Gelatin gives these bars that clean, sharp edge that makes them feel like real cheesecake. Just make sure you bloom it properly in cold water first. Hot water will make it clump.
Patience with the caramel. The first time I made caramel, I stirred it constantly and ended up with grainy, crystallized sugar. The trick is to let it melt mostly on its own, stirring only occasionally. If sugar crystals form on the sides of the pan, brush them down with a wet pastry brush. And for heaven’s sake, don’t taste it straight out of the pan—it’s basically napalm at that temperature.
Timing is everything. Make the crust and filling one day, then slice and serve the next. This dessert actually improves after 24 hours in the fridge—the flavors deepen and the texture firms up perfectly. It’s the ultimate make-ahead dessert for busy holidays.
Clean cuts every time. For those Instagram-worthy slices, run your knife under hot water and dry it between cuts. The heat helps the blade glide through the cheesecake without dragging or smearing. Wipe the blade clean after each slice.
Variations & Adaptations
One of the things I love about these no-bake pumpkin cheesecake bars is how adaptable they are. Here are some variations I’ve tried and loved.
Gluten-Free Version: Swap the graham crackers for gluten-free graham crackers or crushed gluten-free shortbread cookies. I’ve used Pamela’s brand and they work beautifully. The texture is slightly more delicate, so press the crust firmly and chill it well.
Vegan Option: Use vegan cream cheese (Kite Hill or Violife work best), coconut cream instead of heavy cream, and a vegan butter substitute. For the gelatin, use 1½ teaspoons agar agar powder mixed with 3 tablespoons water—bloom and heat the same way. The texture will be slightly less creamy but still delicious. I tested this for a friend’s vegan Thanksgiving and it disappeared faster than the traditional desserts.
Pumpkin-Chocolate Swirl: Melt ½ cup dark chocolate chips and drizzle it over the filling before chilling. Use a knife to swirl it into the pumpkin mixture for a marbled effect. The chocolate and pumpkin combo is unexpectedly amazing—trust me on this.
Maple Pecan Twist: Replace the caramel drizzle with maple syrup mixed with a splash of bourbon (or vanilla if you’re keeping it alcohol-free). Top with extra toasted pecans. This version feels more rustic and cozy, perfect for a casual fall gathering.
Mini Version: Press the crust into a 12-cup muffin tin lined with paper liners. Divide the filling evenly and chill for 4 hours. These mini bars are perfect for parties or portion control—though I can’t promise you’ll stop at one.
Spice It Up: Add ¼ teaspoon cayenne pepper or chipotle powder to the pumpkin filling for a subtle heat that plays beautifully with the caramel. It’s not spicy—it’s just interesting. My brother-in-law, who claims to hate pumpkin desserts, ate three of these before I told him about the cayenne.
Serving & Storage Suggestions
These no-bake pumpkin cheesecake bars are best served cold, straight from the fridge. The texture is firm but creamy, and the caramel drizzle should be at room temperature so it flows nicely over the top.
Presentation Ideas: Arrange the bars on a white platter for contrast. Drizzle caramel in a zigzag pattern, then sprinkle with toasted pecans and a pinch of flaky sea salt. For extra drama, add a dollop of whipped cream and a dusting of cinnamon on each bar. I like to serve them on small plates with a fork and a napkin—they’re rich enough that a little goes a long way.
What to Serve With Them: A hot cup of coffee or spiced chai is perfect alongside these bars. For a full dessert spread, pair them with apple cider donuts, a warm apple crisp, or a simple vanilla panna cotta. They also work beautifully on a Thanksgiving dessert table alongside pecan pie and apple cake.
Storage Instructions: Store leftover bars in an airtight container in the refrigerator for up to 5 days. The caramel can be stored separately in a jar at room temperature for up to 2 weeks—if it doesn’t get eaten first. To freeze the bars, place them on a baking sheet in the freezer until solid (about 2 hours), then wrap each bar individually in plastic wrap and store in a freezer bag for up to 3 months. Thaw in the refrigerator overnight before serving.
Reheating Note: These are meant to be served cold, so no reheating needed. If you want a warm caramel drizzle, gently rewarm the caramel in the microwave in 10-second bursts, stirring between each, until pourable.
Flavor Development: Here’s something interesting—the flavor of these bars actually improves after a day or two in the fridge. The spices meld with the cream cheese, the pumpkin flavor deepens, and the texture becomes even more velvety. So don’t feel bad if you make them ahead of time. They’re actually better for it.
Nutritional Information & Benefits
While these no-bake pumpkin cheesecake bars are definitely a treat, they do offer some nutritional perks, especially compared to traditional baked cheesecake.
Estimated Per Serving (based on 9 servings):
- Calories: 420
- Fat: 28g
- Saturated Fat: 17g
- Carbohydrates: 38g
- Sugar: 30g
- Fiber: 2g
- Protein: 6g
- Sodium: 320mg
Health Highlights: Pumpkin is packed with vitamin A (over 200% of your daily needs per cup), fiber, and antioxidants like beta-carotene. It’s also low in calories naturally—the richness here comes from the cream cheese and cream, not the pumpkin. The pecans add healthy fats, vitamin E, and magnesium. And hey, you’re getting some calcium from the cream cheese, so that counts for something, right?
Dietary Considerations: This recipe contains dairy, gluten (from graham crackers), and tree nuts (pecans). For a gluten-free version, use gluten-free graham crackers. For a dairy-free version, see the vegan adaptation above. The recipe is naturally egg-free and can be made nut-free by omitting the pecans.
My Take: Look, I’m not going to tell you these are health food. They’re dessert, and they’re meant to be enjoyed. But compared to a slice of traditional pumpkin cheesecake with a buttery crust, these bars have less sugar, less saturated fat, and actual vegetables in them. Plus, no-bake means no butter-heavy crust to blind bake. Everything in moderation, including moderation—that’s my philosophy.
Conclusion
These no-bake pumpkin cheesecake bars with caramel drizzle have become my most-requested fall dessert for good reason. They’re ridiculously easy to make, they look impressive on a plate, and they taste like autumn in every single bite. No oven required, no stress involved, and no special skills needed—just a little patience while they chill.
What I love most about this recipe is how forgiving it is. You can swap ingredients, adjust the spices, change up the toppings, and it still works. It’s the kind of dessert that makes you look like a hero even when you’re just throwing things together. And honestly, isn’t that the best kind of recipe?
I’d love to hear how these turn out for you. Did you add the cayenne? Swirl in some chocolate? Drizzle extra caramel because you couldn’t help yourself? Drop a comment below and let me know your twist on these bars. And if you share them on Pinterest or Instagram, tag me—I want to see your beautiful creations. Happy fall baking, my friend. You’ve got this.
Frequently Asked Questions
Can I use pumpkin pie filling instead of pumpkin puree?
I wouldn’t recommend it. Pumpkin pie filling already has sugar and spices added, which will throw off the sweetness and spice balance of this recipe. You’ll end up with a much sweeter, more heavily spiced filling that might not set properly. Stick with 100% pure pumpkin puree—it gives you control over the final flavor.
How long do these bars need to chill?
At least 6 hours, but overnight is ideal. The gelatin needs time to fully set, and the flavors need time to meld together. If you’re in a hurry, you can try freezing them for 3 hours, but the texture won’t be quite as creamy. Trust me on this—patience pays off.
Can I make the caramel ahead of time?
Absolutely. The caramel can be made up to 2 weeks in advance and stored in an airtight jar at room temperature. Just give it a gentle warm-up in the microwave (10-second bursts, stirring between each) before drizzling over the bars. It will thicken as it sits, so you might need to thin it with a splash of warm cream.
Why did my cheesecake filling turn out runny?
There are a few possible culprits. Your cream cheese might not have been softened enough, creating a lumpy mixture that didn’t set properly. Your gelatin might not have bloomed correctly—make sure you use cold water and let it sit for the full 5-10 minutes. Or your whipped cream might have been under-whipped; it needs to be stiff enough to hold its shape when folded in. If all else fails, pop the pan in the freezer for an hour to help things along.
Can I double this recipe for a 9×13 pan?
Yes! Double all the ingredients and use a 9×13-inch pan. The baking time stays the same, but you’ll need to chill it for at least 8 hours or overnight to ensure it sets properly. You’ll get about 15-20 bars depending on how you slice them. This is my go-to for large gatherings—it feeds a crowd without any extra effort.
Pin This Recipe!
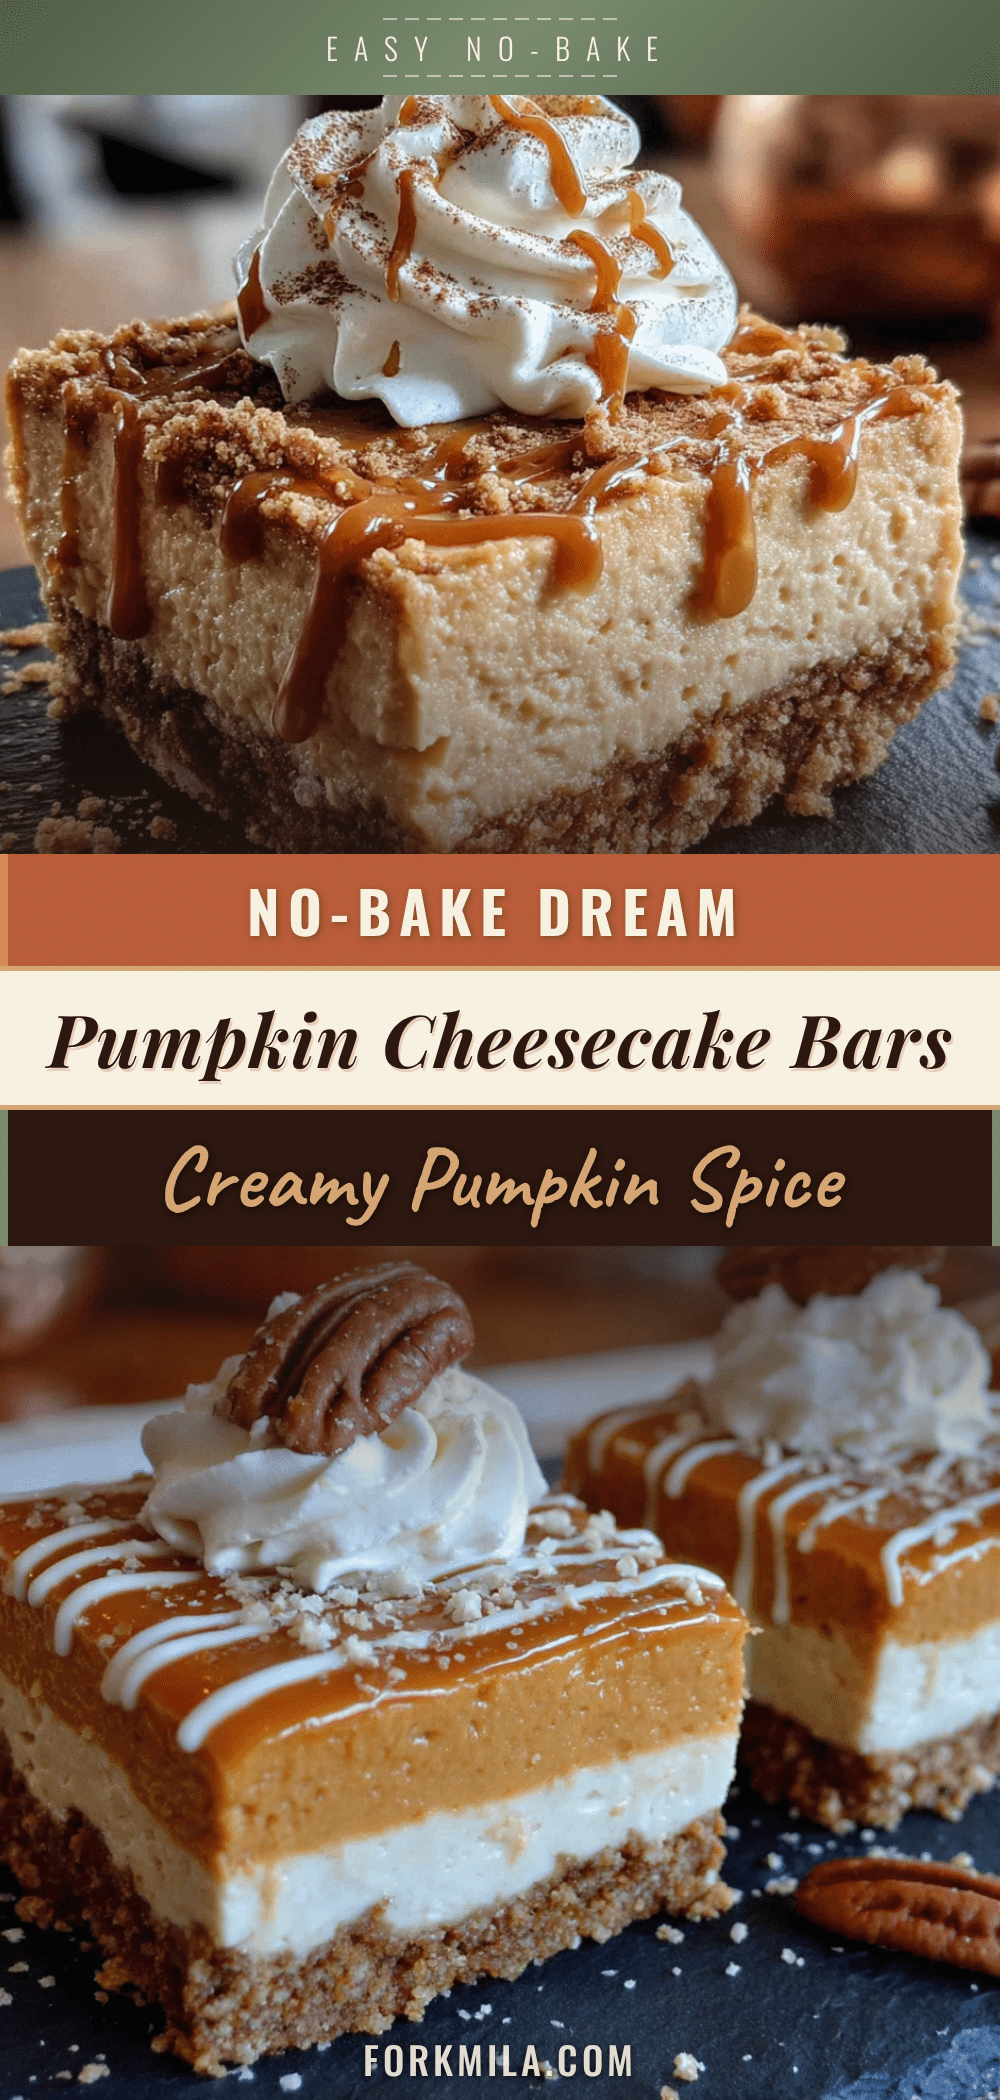
No-Bake Pumpkin Cheesecake Bars with Caramel Drizzle
These no-bake pumpkin cheesecake bars with caramel drizzle are the ultimate fall dessert—creamy, spiced, and made without turning on the oven. Perfect for Thanksgiving, Friendsgiving, or a cozy weekend treat.
- Prep Time: 30 minutes
- Cook Time: 10 minutes
- Total Time: 6 hours 40 minutes (includes chilling)
- Yield: 9 servings 1x
- Category: Dessert
- Cuisine: American
Ingredients
- 2 cups graham cracker crumbs (about 14–16 full sheets, crushed finely)
- ½ cup unsalted butter, melted
- ¼ cup granulated sugar
- ¼ teaspoon salt
- ½ teaspoon ground cinnamon
- 16 ounces cream cheese, softened to room temperature
- 1 cup canned pumpkin puree (not pumpkin pie filling)
- ¾ cup packed light brown sugar
- 1 teaspoon vanilla extract
- 1½ teaspoons pumpkin pie spice
- ½ teaspoon ground cinnamon
- 1 tablespoon unflavored gelatin powder
- 3 tablespoons cold water
- 1 cup heavy cream, cold
- ½ cup granulated sugar (for caramel)
- 3 tablespoons unsalted butter, cut into pieces (for caramel)
- ¼ cup heavy cream, at room temperature (for caramel)
- ½ teaspoon flaky sea salt (for caramel)
- ½ teaspoon vanilla extract (for caramel)
- ¼ cup toasted pecans, chopped (optional garnish)
- Extra caramel drizzle (optional garnish)
- Flaky sea salt (optional garnish)
Instructions
- Line a 9×9-inch baking pan with parchment paper, leaving overhang on two sides. Lightly grease the parchment.
- In a medium bowl, combine graham cracker crumbs, ¼ cup sugar, ¼ teaspoon salt, and ½ teaspoon cinnamon. Pour in melted butter and stir until every crumb is moistened. Press firmly into the bottom of the prepared pan. Refrigerate while making the filling.
- In a small microwave-safe bowl, sprinkle gelatin over 3 tablespoons cold water. Let sit for 5-10 minutes until firm and jiggly. Microwave for 10 seconds, stir, then another 5 seconds until liquid and clear. Set aside to cool slightly.
- In a large bowl, beat cream cheese on medium speed until smooth, about 2 minutes. Add brown sugar, 1 teaspoon vanilla, pumpkin pie spice, and ½ teaspoon cinnamon. Beat until combined. Add pumpkin puree and mix on low until incorporated.
- With mixer running on low, slowly pour cooled gelatin into cream cheese mixture. Mix until fully incorporated, about 30 seconds.
- In a separate cold bowl, beat cold heavy cream on medium-high speed until stiff peaks form, about 3-4 minutes.
- Stir one-third of the whipped cream into the pumpkin mixture to lighten. Gently fold in the remaining whipped cream until no white streaks remain.
- Pour filling over chilled crust and spread evenly. Tap pan gently on counter to release air bubbles. Cover with plastic wrap and refrigerate for at least 6 hours, preferably overnight.
- For the caramel: In a medium saucepan over medium heat, melt ½ cup sugar, stirring occasionally, until deep amber (about 5-7 minutes). Remove from heat and whisk in 3 tablespoons butter (it will bubble). Slowly drizzle in ¼ cup heavy cream while whisking. Stir in ½ teaspoon salt and ½ teaspoon vanilla. Let cool.
- Once cheesecake is fully set, lift out using parchment handles. Slice into 9 or 16 bars with a sharp knife, wiping blade clean between cuts. Drizzle with caramel, sprinkle with toasted pecans and flaky salt. Serve cold.
Notes
Room temperature cream cheese is essential for a smooth filling. Don’t skip the gelatin—it ensures sliceable bars. The flavor improves after 24 hours in the fridge. For clean cuts, run the knife under hot water and dry between slices.
Nutrition
- Serving Size: 1 bar (based on 9 se
- Calories: 420
- Sugar: 30
- Sodium: 320
- Fat: 28
- Saturated Fat: 17
- Carbohydrates: 38
- Fiber: 2
- Protein: 6
Keywords: no-bake pumpkin cheesecake bars, pumpkin cheesecake bars, no-bake pumpkin dessert, pumpkin bars with caramel, fall dessert, Thanksgiving dessert, easy pumpkin cheesecake


