This was supposed to be a standard pumpkin cake roll — the kind you see on every holiday table, perfectly swirled and dusted with powdered sugar. I had the recipe memorized, the cream cheese softened, and my grandmother’s rolling pin ready. But somewhere between the flour sifting and the egg separating, I grabbed the wrong measuring cup. Instead of the usual half-cup of granulated sugar, I dumped in almost a full cup of brown sugar. By the time I realized my mistake, the batter was already in the pan.
Honestly, I almost threw it out. I stood there staring at the oven, convinced I’d just ruined a perfectly good batch of ingredients. But I’d already greased the pan, preheated the oven, and honestly, I was too tired to start over. So I let it bake, expecting a dense, overly sweet disaster. What came out of the oven was nothing like the plan — and better.
The color was deeper, almost amber. The texture was somehow more tender, more forgiving. And when I rolled it — that part I was terrified of — it didn’t crack. Not one single fissure. The brown sugar had done something magical, adding moisture and flexibility that the original recipe never had. I nearly cried right there in my flour-dusted kitchen.
You know that feeling when something goes wrong but ends up being exactly right? That’s this pumpkin roll. It’s the recipe I never meant to create, but now I can’t imagine making any other way. Every Thanksgiving, every fall gathering, someone asks for the recipe, and I have to admit — it started with a mistake and a moment of stubbornness. Maybe you’ve been there too, staring at a kitchen mishap and wondering if it’s worth saving. Trust me on this one — it is.
Why You’ll Love This Recipe
After testing this recipe more times than I care to count (and yes, a few cracked failures along the way), I can confidently say this is the most forgiving pumpkin roll you’ll ever make. The brown sugar isn’t just a happy accident — it’s the secret to that no-crack guarantee. Here’s why this recipe deserves a permanent spot in your fall baking rotation:
- No-Crack Guarantee : The higher moisture content from brown sugar creates a flexible cake that rolls like a dream. I’ve tested it in dry winter kitchens and humid fall afternoons — it works every time.
- Simple Ingredients : You probably have everything in your pantry right now. No fancy extracts, no specialty flours, no trips to three different stores.
- Perfect for Entertaining : This roll looks incredibly impressive — those beautiful spiral slices — but it’s actually one of the easiest desserts to make ahead.
- Crowd-Pleaser : I’ve brought this to potlucks, family dinners, and office parties. It disappears faster than anything else on the table. Kids love the cream cheese filling, adults love the pumpkin spice.
- Freezer-Friendly : Make it weeks ahead and pull it out when you need a showstopper. The flavor actually gets better after a day in the fridge.
What makes this version different from all the other pumpkin roll recipes out there? It’s the texture. That brown sugar mistake taught me something important — pumpkin rolls need more moisture than standard cake recipes account for. The combination of brown sugar, pumpkin puree, and the right rolling technique creates a cake that bends without breaking. No special equipment needed, no complicated steps. Just a better, more forgiving way to make a classic.
This isn’t just another pumpkin roll recipe. It’s the one that makes you close your eyes after that first bite — the creamy filling, the spiced cake, the perfect swirl. It’s comfort food reimagined, with the same soul-soothing satisfaction but none of the stress.
What Ingredients You Will Need
This recipe uses simple, wholesome ingredients to deliver that perfect pumpkin roll texture. Most of these are pantry staples, especially during fall baking season. Let me walk you through each one and why it matters.
For the Pumpkin Cake
- ¾ cup all-purpose flour — Standard all-purpose works best here. I’ve tested with whole wheat pastry flour in a pinch, but the texture is slightly denser. Spoon and level your flour for accuracy.
- 1 cup packed light brown sugar — This is the star of the show. The molasses in brown sugar adds moisture and that deep, caramel-like flavor. Don’t substitute granulated sugar here — I learned that lesson the hard way.
- 1 teaspoon baking powder — Make sure it’s fresh. Expired baking powder is the #1 reason cakes don’t rise properly.
- 2 teaspoons pumpkin pie spice — I prefer the McCormick brand for consistency, but homemade works too. If you’re mixing your own, use 1 teaspoon cinnamon, ½ teaspoon ginger, ¼ teaspoon nutmeg, and ¼ teaspoon cloves.
- ½ teaspoon salt — Just regular table salt. It balances the sweetness.
- 3 large eggs — Room temperature is crucial here. Cold eggs can make the batter seize up. Leave them on the counter for 30 minutes, or place them in warm water for 5 minutes.
- ⅔ cup pumpkin puree — Not pumpkin pie filling. I use Libby’s canned pumpkin puree. Fresh pumpkin puree has too much water and will make your cake soggy.
- 1 teaspoon vanilla extract — Pure vanilla extract, not imitation. It makes a difference in the overall flavor.
- Powdered sugar for dusting — You’ll need about ¼ cup for the kitchen towel and more for the final garnish.
For the Cream Cheese Filling
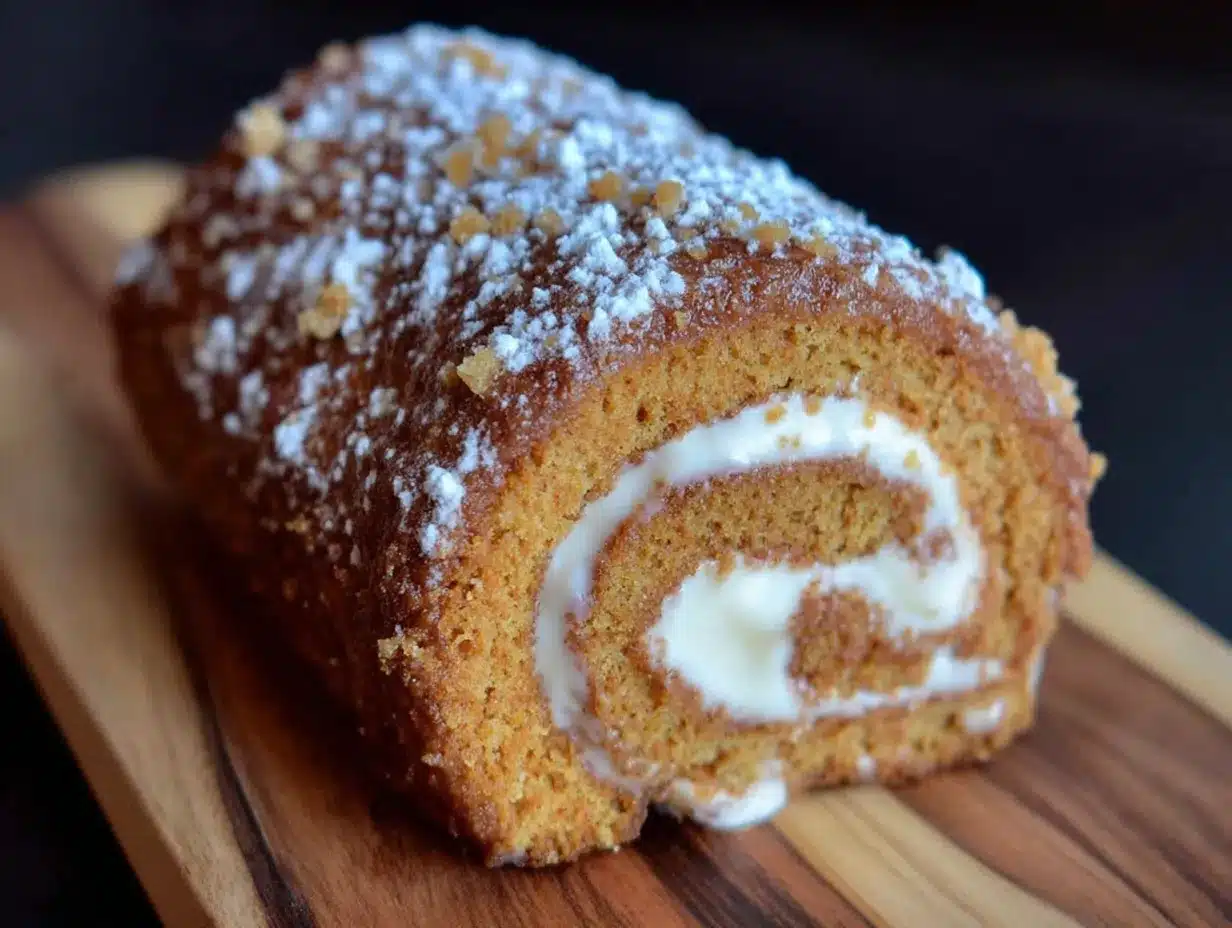
- 8 ounces cream cheese — Full-fat, block-style cream cheese. Don’t use the spreadable kind in a tub — it has too much water and will make your filling runny. Let it come to room temperature.
- ¼ cup unsalted butter — Room temperature. Salted butter works if you reduce the added salt, but unsalted gives you more control.
- 1 cup powdered sugar — Sift it if it’s lumpy. Nobody wants a gritty filling.
- 1 teaspoon vanilla extract — Same rule applies — use the good stuff.
- Pinch of salt — Just a tiny pinch to balance the sweetness.
Ingredient Selection Tips : When buying pumpkin puree, look for cans that are BPA-free if that matters to you. For the cream cheese, Philadelphia is my go-to brand. It has the right fat content and stabilizers for a smooth, stable filling. If you’re dairy-free, Kite Hill makes a decent cream cheese alternative, but the texture won’t be quite as firm.
Substitution Guidance : For a gluten-free version, use a 1:1 gluten-free flour blend that contains xanthan gum. I’ve had good results with King Arthur’s Measure for Measure. For a lower-sugar option, you can reduce the brown sugar to ¾ cup, but the cake will be slightly less moist and more prone to cracking. For the filling, neufchâtel cheese (⅓ less fat cream cheese) works fine — just make sure it’s fully softened.
Equipment Needed
You don’t need a professional bakery setup for this recipe, but a few specific tools make the process much smoother.
- 15×10-inch jelly roll pan — This is non-negotiable. A standard cookie sheet is too shallow, and a 9×13 pan is too small. The thin layer of batter needs this exact size to roll properly.
- Parchment paper — Don’t skip this. You’ll line the pan and leave overhang on the sides for easy lifting. I prefer unbleached parchment.
- Clean kitchen towel — A thin, lint-free towel works best. Fluffy towels leave fuzz on the cake. I use an old flour sack towel.
- Electric mixer — Hand mixer or stand mixer both work. You’ll need it for the cake batter and the filling. A whisk works in a pinch, but your arm will get tired.
- Rubber spatula — For spreading the batter evenly in the pan. An offset spatula is even better if you have one.
- Cooling rack — Helps the cake cool evenly. You can use a cutting board in a pinch.
- Sifter or fine-mesh strainer — For dusting powdered sugar. A spoon works, but it won’t be as pretty.
- Sharp knife — For clean slices. A serrated knife works well, but a chef’s knife is fine too.
Budget-Friendly Options : If you don’t have a jelly roll pan, check thrift stores — they’re always there. A rimmed baking sheet with similar dimensions can work if you adjust the baking time slightly. For the mixer, a good whisk and some elbow grease will get the job done, just make sure your eggs are really well beaten.
Personal Note : I’ve made this recipe with a $15 hand mixer from the grocery store and a $300 stand mixer. The result was the same. Don’t let fancy equipment stop you from trying this.
Preparation Method
Let me walk you through this step by step. I’ve included all the little details that make the difference between a cracked mess and a perfect swirl.
- Preheat and Prep (5 minutes) — Preheat your oven to 350°F (175°C). Line your jelly roll pan with parchment paper, leaving about 2 inches of overhang on the short sides. Lightly spray the parchment with non-stick spray. This extra step prevents sticking.
- Mix Dry Ingredients (2 minutes) — In a medium bowl, whisk together the flour, baking powder, pumpkin pie spice, and salt. Set aside. Make sure there are no lumps — pumpkin pie spice can clump sometimes.
- Beat Eggs and Sugar (3-4 minutes) — In a large bowl, beat the eggs and brown sugar together with an electric mixer on medium-high speed. This is important — beat for a full 3 to 4 minutes until the mixture is thick, pale, and falls in ribbons when you lift the beaters. It should look like thick pancake batter. Under-beating here leads to a dense cake.
- Add Pumpkin and Vanilla (1 minute) — Beat in the pumpkin puree and vanilla extract on low speed until just combined. Don’t overmix — you don’t want to deflate all that air you just beat in.
- Fold in Dry Ingredients (2 minutes) — Add the dry ingredients in two additions, folding gently with a rubber spatula. Fold until you can’t see any more white streaks. A few small lumps are okay — overmixing creates a tough cake.
- Spread Batter (2 minutes) — Pour the batter into the prepared pan and spread it evenly with a spatula. It will be a thin layer — that’s normal. Make sure the corners are filled and the surface is level. Give the pan a gentle tap on the counter to release any air bubbles.
- Bake (12-15 minutes) — Bake for 12 to 15 minutes. The cake is done when the top springs back when lightly touched and the edges start to pull away from the pan. Don’t overbake — this is the most common cause of cracking. The cake should be golden brown and smell amazing.
- Prepare the Rolling Surface (2 minutes) — While the cake bakes, lay your clean kitchen towel flat on the counter. Dust it generously with powdered sugar. Use a sifter for even coverage — about 2 tablespoons.
- Roll While Warm (3 minutes) — This is the most critical step. As soon as the cake comes out of the oven, run a knife around the edges to loosen it. Invert the pan onto the prepared towel. Peel off the parchment paper carefully. Starting from a short end, roll the cake and towel together into a tight log. Don’t press too hard — let the cake guide the roll. Place the rolled cake seam-side down on a cooling rack. Let it cool completely — at least 1 hour. Do not skip this cooling step. Rolling while warm trains the cake to hold that shape without cracking.
- Make the Filling (5 minutes) — While the cake cools, make the filling. Beat the cream cheese and butter together on medium speed until smooth and fluffy — about 2 minutes. There should be no lumps. Add the powdered sugar, vanilla, and salt. Beat on low speed until combined, then increase to medium and beat for another 2 minutes until light and creamy. Don’t overbeat or the filling will become too soft.
- Unroll and Fill (5 minutes) — Once the cake is completely cool, gently unroll it. It might try to curl back up — that’s normal. Spread the filling evenly over the cake, leaving a ½-inch border around the edges. Don’t spread too close to the edges or the filling will squeeze out when you roll.
- Roll Again (3 minutes) — Re-roll the cake, this time without the towel. Use the parchment paper or the towel to help lift and guide the roll. Roll it as tightly as you can without squeezing the filling out. Wrap the finished roll tightly in plastic wrap. Refrigerate for at least 2 hours, or overnight. Chilling sets the filling and makes slicing much easier.
- Slice and Serve (5 minutes) — To slice, use a sharp knife and wipe it clean between each cut. This gives you those beautiful, clean spirals. Dust with powdered sugar just before serving.
Sensory Cues : When the cake is done, your kitchen will smell like a fall candle — warm spices and caramel. The cake should feel springy, not spongy. When you roll it, you’ll hear a slight crackling sound — that’s normal, it’s just the surface. If you hear a loud snap, you’ve rolled too fast. Slow down.
Cooking Tips & Techniques
I’ve made this recipe at least twenty times, and I’ve learned a few things the hard way. Here are the tips that will save you from my mistakes.
The Temperature Trap — The biggest reason pumpkin rolls crack is temperature shock. If the cake is too hot when you roll it, it tears. If it’s too cold, it cracks. The sweet spot is warm — about 5 minutes out of the oven. I once got distracted by a phone call and let the cake cool for 20 minutes before rolling. It cracked in three places. Learn from my distraction.
The Towel Technique — Not all kitchen towels are created equal. I ruined my first attempt using a fluffy bath towel — the cake surface stuck to the terry cloth and ripped apart. Use a thin, smooth towel. If you don’t have one, a clean, flat-weave dish towel works. Some bakers use a clean pillowcase in a pinch. Also, make sure the towel is completely dry before you dust it with powdered sugar.
The Parchment Paper Trick — Here’s a tip I wish I’d known sooner: when you invert the cake onto the towel, leave the parchment paper on for the first 30 seconds of rolling. Then peel it off as you go. This prevents the cake from sticking to itself during the initial roll. It’s a game-changer.
The Filling Temperature — Cold filling on a room-temperature cake creates a weird texture contrast. Let your filling sit at room temperature for 10 minutes before spreading. It will spread more evenly and won’t tear the cake surface.
Timing and Multitasking — Make the filling while the cake cools. This saves time and keeps you in the flow. I also like to measure all my ingredients before I start baking — mise en place style. It sounds fussy, but it prevents those “oops, I’m out of powdered sugar” moments.
The Slice Secret — For the prettiest slices, chill the rolled cake for at least 4 hours. Overnight is even better. Use a long, sharp knife and run it under hot water before each cut. Wipe it dry and slice. The heat helps the knife glide through without squishing the filling. This is the trick professional bakeries use.
Variations & Adaptations
Once you’ve mastered the basic recipe, there are so many ways to make it your own. Here are some variations I’ve tried and loved.
Chocolate Pumpkin Roll — Replace ¼ cup of the flour with unsweetened cocoa powder. The chocolate and pumpkin flavors are surprisingly good together. Add ¼ cup mini chocolate chips to the filling for extra texture. My niece requests this version every year.
Maple Pecan Variation — Add ½ teaspoon maple extract to the cake batter and ¼ cup finely chopped pecans to the filling. Drizzle the finished roll with a simple maple glaze (½ cup powdered sugar mixed with 2 tablespoons maple syrup). This tastes like autumn in every bite.
Dairy-Free Version — Use dairy-free cream cheese (Kite Hill or Violife work well) and vegan butter. The filling will be slightly softer, so chill it for an extra hour before serving. The cake itself is naturally dairy-free — no butter or milk in the batter.
Gluten-Free Adaptation — Substitute the all-purpose flour with a 1:1 gluten-free baking flour. I’ve had the best results with King Arthur’s Measure for Measure. Add ¼ teaspoon xanthan gum if your blend doesn’t already include it. The texture will be slightly more delicate, so handle the cake gently when rolling.
Spice It Up — Not a fan of pumpkin pie spice? Try chai spice blend instead. Or make your own with extra ginger and a pinch of black pepper for a more savory edge. I once added a teaspoon of orange zest to the batter — it brightened the whole flavor profile.
Mini Pumpkin Rolls — Use a quarter-sheet pan and cut the recipe in half. These smaller rolls are perfect for holiday cookie trays or gifts. They also freeze beautifully.
Serving & Storage Suggestions
This pumpkin roll is versatile enough for any occasion, but a few serving tips will make it shine.
Serving Temperature — Serve chilled or at room temperature. I prefer it straight from the fridge — the filling is firmer and the slices hold their shape better. If you prefer room temperature, let it sit out for 15-20 minutes before slicing. The flavors are more pronounced when it’s not ice-cold.
Presentation Ideas — Dust with powdered sugar just before serving. For a more dramatic look, drizzle with caramel sauce and sprinkle with toasted pecans. A dollop of whipped cream on the side never hurts. I like to arrange the slices on a platter with fresh cranberries and rosemary sprigs for a holiday look.
Complementary Dishes — This pumpkin roll pairs beautifully with a cup of hot apple cider or a spiced chai latte. For a dessert spread, serve it alongside pecan pie bars or chocolate chip cookies. It’s also wonderful with a simple vanilla ice cream — the cold creaminess balances the spiced cake.
Storage Instructions — Wrap the un-sliced roll tightly in plastic wrap, then in aluminum foil. Store in the refrigerator for up to 5 days. The flavor actually improves after a day — the spices meld with the filling. For longer storage, freeze the wrapped roll for up to 3 months. Thaw in the refrigerator overnight before serving.
Reheating Tips — This is best served cold or at room temperature, but if you want a warm dessert, microwave individual slices for 10-15 seconds. Don’t overheat or the filling will melt. A warm slice with cold ice cream is a wonderful contrast.
Flavor Development — Here’s something I’ve noticed: the pumpkin roll tastes even better on day two. The spices have time to deepen, and the filling sets into a perfect creamy texture. If you’re making this for a holiday dinner, make it a day ahead. Your future self will thank you.
Nutritional Information & Benefits
Let’s be honest — this is a dessert, not a health food. But that doesn’t mean it can’t have some redeeming qualities. Here’s what you need to know.
Estimated Nutritional Values (per slice, based on 10 slices) :
- Calories: 285
- Total Fat: 14g
- Saturated Fat: 8g
- Cholesterol: 85mg
- Sodium: 220mg
- Total Carbohydrates: 36g
- Dietary Fiber: 1g
- Sugars: 26g
- Protein: 5g
Health Benefits of Key Ingredients : Pumpkin is packed with vitamin A (in the form of beta-carotene), which supports eye health and immune function. It’s also a good source of fiber, which aids digestion. The eggs provide high-quality protein and choline, which is important for brain health. Even the cinnamon in the pumpkin pie spice has anti-inflammatory properties.
Dietary Considerations : This recipe contains gluten, dairy, and eggs. For gluten-free and dairy-free adaptations, see the variations section above. It’s naturally nut-free (unless you add the pecan variation), making it safe for school events.
Potential Allergens : Wheat (gluten), dairy (cream cheese, butter), eggs. Always check labels if you’re serving someone with allergies.
Personal Wellness Perspective : I believe in balance. This pumpkin roll is a treat, meant to be enjoyed in moderation. I make it for special occasions and savor every bite. Life is too short to skip dessert — just don’t eat the whole roll in one sitting. (Though I won’t judge you if you do.)
Conclusion
This pumpkin roll started as a mistake — a wrong measuring cup, a moment of distraction, and a leap of faith that turned into my most requested recipe. It’s proof that sometimes the best things in life come from things not going according to plan. The brown sugar gives it that no-crack guarantee, the cream cheese filling is pure comfort, and the whole thing comes together with less stress than you’d expect.
I want you to try this recipe. Not because it’s perfect (though it is), but because it’s forgiving. It’s the kind of recipe that builds confidence in the kitchen. Even if your first roll isn’t picture-perfect, it will still taste amazing. And honestly, that’s what matters most.
Make it your own — add extra spice, swap the filling, experiment with toppings. That’s the beauty of baking. And when you make it, come back and tell me how it went. Did it crack? Did you try a variation? I’d love to hear your story. Leave a comment below, share a photo, or tag me on social media. Happy baking, friends — you’ve got this.
Frequently Asked Questions
Why does my pumpkin roll crack when I roll it?
The most common reason is overbaking. A dry cake is brittle and won’t bend. Bake just until the top springs back — usually 12-15 minutes. Another culprit is rolling the cake when it’s too cool. Roll it while it’s still warm (about 5 minutes out of the oven) so it’s flexible enough to hold the shape.
Can I make this pumpkin roll ahead of time?
Absolutely. In fact, I recommend it. Make the roll a day ahead and store it tightly wrapped in the refrigerator. The flavors meld overnight and the filling sets perfectly. You can also freeze it for up to 3 months — just thaw in the refrigerator before serving.
Can I use fresh pumpkin instead of canned?
I don’t recommend it. Fresh pumpkin puree has a much higher water content than canned. This extra moisture can make the cake soggy and more prone to cracking. If you really want to use fresh, roast and puree the pumpkin, then strain it through cheesecloth for several hours to remove excess liquid.
How do I get clean slices without squishing the filling?
Chill the roll for at least 4 hours before slicing. Use a long, sharp knife and run it under hot water between cuts. Wipe the knife dry before each slice. The heat helps the blade glide through without pushing the filling out. Also, trim the ends first — they’re never as pretty, but they’re a great cook’s treat.
Can I use a different filling instead of cream cheese?
You can, but the texture and flavor will change. A stabilized whipped cream filling (add gelatin or pudding mix) works well for a lighter option. A buttercream frosting is also delicious but much sweeter. Keep in mind that the filling needs to be sturdy enough to hold up when rolled. Runny fillings will squeeze out and make a mess.
Pin This Recipe!
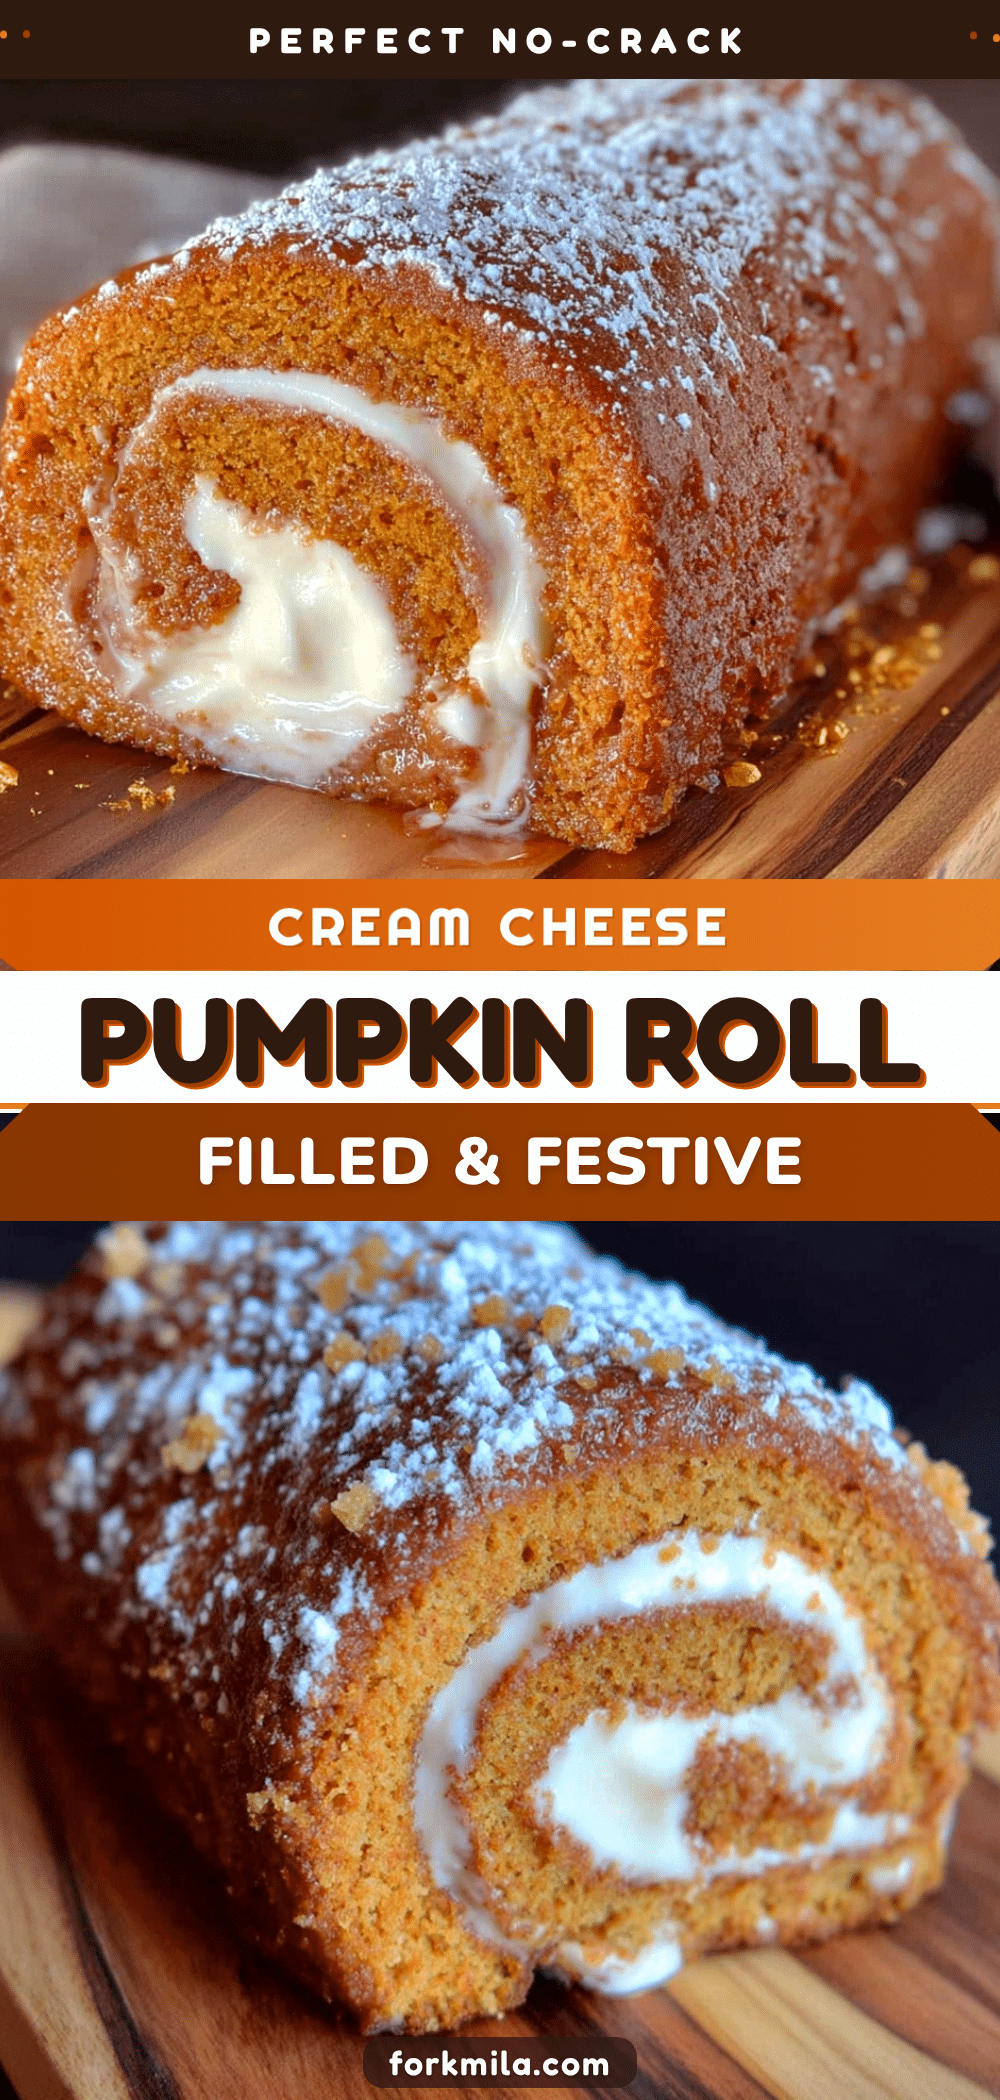
No-Crack Pumpkin Roll with Cream Cheese Filling: Easy, Perfect Recipe

This pumpkin roll started as a mistake—a wrong measuring cup—but the brown sugar creates a moist, flexible cake that rolls without cracking. It’s the most forgiving pumpkin roll you’ll ever make, with a creamy filling and perfect spiral slices.
- Prep Time: 30 minutes
- Cook Time: 15 minutes
- Total Time: 3 hours 45 minutes (includes cooling and chilling)
- Yield: 10 servings 1x
- Category: Dessert
- Cuisine: American
Ingredients
- ¾ cup all-purpose flour
- 1 cup packed light brown sugar
- 1 teaspoon baking powder
- 2 teaspoons pumpkin pie spice
- ½ teaspoon salt
- 3 large eggs, room temperature
- ⅔ cup pumpkin puree (not pumpkin pie filling)
- 1 teaspoon vanilla extract
- ¼ cup powdered sugar (for dusting towel)
- 8 ounces cream cheese, room temperature
- ¼ cup unsalted butter, room temperature
- 1 cup powdered sugar
- 1 teaspoon vanilla extract
- Pinch of salt
Instructions
- Preheat oven to 350°F (175°C). Line a 15×10-inch jelly roll pan with parchment paper, leaving 2 inches overhang on short sides. Lightly spray parchment with non-stick spray.
- In a medium bowl, whisk together flour, baking powder, pumpkin pie spice, and salt. Set aside.
- In a large bowl, beat eggs and brown sugar with an electric mixer on medium-high speed for 3-4 minutes until thick, pale, and ribbon-like.
- Beat in pumpkin puree and vanilla extract on low speed until just combined.
- Fold dry ingredients into wet mixture in two additions using a rubber spatula until no white streaks remain.
- Pour batter into prepared pan and spread evenly with a spatula. Tap pan gently on counter to release air bubbles.
- Bake for 12-15 minutes until top springs back when lightly touched and edges pull away from pan.
- While cake bakes, lay a clean kitchen towel flat on counter and dust generously with powdered sugar (about 2 tablespoons).
- As soon as cake comes out of oven, run a knife around edges to loosen. Invert pan onto prepared towel. Carefully peel off parchment paper.
- Starting from a short end, roll cake and towel together into a tight log. Place seam-side down on a cooling rack and cool completely, at least 1 hour.
- While cake cools, make filling: Beat cream cheese and butter together on medium speed until smooth and fluffy, about 2 minutes. Add powdered sugar, vanilla, and salt; beat on low until combined, then on medium for 2 minutes until light and creamy.
- Once cake is completely cool, gently unroll it. Spread filling evenly over cake, leaving a ½-inch border around edges.
- Re-roll cake without towel, using parchment or towel to help guide. Wrap tightly in plastic wrap and refrigerate for at least 2 hours or overnight.
- To serve, slice with a sharp knife, wiping clean between cuts. Dust with powdered sugar just before serving.
Notes
The brown sugar is key for moisture and flexibility. Roll the cake while warm (about 5 minutes out of the oven) to prevent cracking. For clean slices, chill the roll at least 4 hours and use a hot knife. The flavor improves after a day in the fridge.
Nutrition
- Serving Size: 1 slice
- Calories: 285
- Sugar: 26
- Sodium: 220
- Fat: 14
- Saturated Fat: 8
- Carbohydrates: 36
- Fiber: 1
- Protein: 5
Keywords: pumpkin roll, pumpkin cake roll, no-crack pumpkin roll, cream cheese filling, fall dessert, Thanksgiving dessert, pumpkin dessert, easy pumpkin roll


