I wasn’t expecting cooking advice from a plumber, but there I was, standing in my kitchen with a dripping pipe and an earful about dinner. The plumber—a guy named Dave with a handlebar mustache and a stained t-shirt—had glanced at my cluttered stove while packing up his tools. “You look like you cook,” he said. “You ever make that one-pan garlic butter chicken and rice thing? My wife makes it on Tuesdays. Changed our lives.” I laughed, assuming he meant the convenience of a single dirty dish. But Dave was serious. He scribbled something on a napkin—his napkin, pulled from his truck—and handed it over. “Trust me,” he said. “It’s the butter.”
Honestly, I almost threw that napkin away. I mean, a plumber’s weeknight recipe? But the next Tuesday, with zero dinner plans and a fridge full of chicken thighs, I gave it a shot. And let me tell you, Dave wasn’t wrong. That one-pan garlic butter chicken and rice became my go-to for nights when I need something that feels fancy but takes almost no effort. The rice soaks up all that garlicky, buttery goodness, and the chicken gets this golden, crispy skin that makes you close your eyes after the first bite. Maybe you’ve been there—standing over the stove, wondering how something so simple can taste so ridiculously good.
The best part? It’s one pan. No piles of dishes, no complicated steps. Just a skillet, some patience, and a whole lot of butter. That napkin is now taped inside my recipe binder, stained and splattered, a reminder that sometimes the best recipes come from the most unexpected places. I’ve made this one-pan garlic butter chicken and rice at least twenty times since that day, and it never gets old. It’s the kind of meal that makes you feel like you’ve got your life together, even when you definitely don’t.
Why You’ll Love This Recipe
Let’s be real—weeknight dinners can feel like a chore. But this one-pan garlic butter chicken and rice? It’s the kind of recipe that makes you actually look forward to cooking. I’ve tested this dozens of times (and yes, I burned the first batch learning the hard way), so I can tell you with confidence: this is the version that works. Here’s why it’ll become your new favorite:
- Quick & Easy: It comes together in about 30 minutes, start to finish. Perfect for those nights when you’re staring at the clock and wondering how to feed everyone without ordering pizza.
- Simple Ingredients: No fancy grocery trips needed. Chicken, rice, garlic, butter, a few pantry staples—you probably have everything right now. I mean it.
- Perfect for Busy Weeknights: Whether it’s a Tuesday after soccer practice or a Thursday when you just can’t, this dish delivers comfort without the stress.
- Crowd-Pleaser: My kids devour it. My husband asks for seconds. Even my picky mother-in-law approved (and she never approves).
- Unbelievably Delicious: The rice is fluffy, the chicken is juicy, and that garlic butter sauce seeps into every single grain. It’s next-level comfort food that tastes like you spent hours in the kitchen.
What makes this recipe different from the rest? It’s the technique. Most versions end up with mushy rice or dry chicken. But by searing the chicken first and letting it rest while the rice cooks, you get the perfect texture every time. Plus, I’ve nailed down the exact ratio of liquid to rice so it comes out fluffy, not sticky. This isn’t just another one-pan dinner—it’s the one you’ll make on repeat, the one you’ll text your friends about, the one that makes you feel like a kitchen hero.
What Ingredients You Will Need
This recipe uses simple, wholesome ingredients to deliver bold flavor without the fuss. Most of these are pantry staples, so you can whip this up anytime without a special trip to the store. Here’s what you’ll need:
For the Chicken
- 4 boneless, skinless chicken thighs (about 1.5 lbs or 680g) — I prefer thighs for juiciness, but breasts work too (just adjust cooking time)
- 1 teaspoon salt — I use fine sea salt for even seasoning
- ½ teaspoon black pepper — freshly ground if you’ve got it
- 1 teaspoon paprika — adds color and a subtle smokiness (smoked paprika is even better)
- ½ teaspoon garlic powder — doubles down on the garlic flavor
- 2 tablespoons olive oil — for searing; avocado oil works too
For the Rice
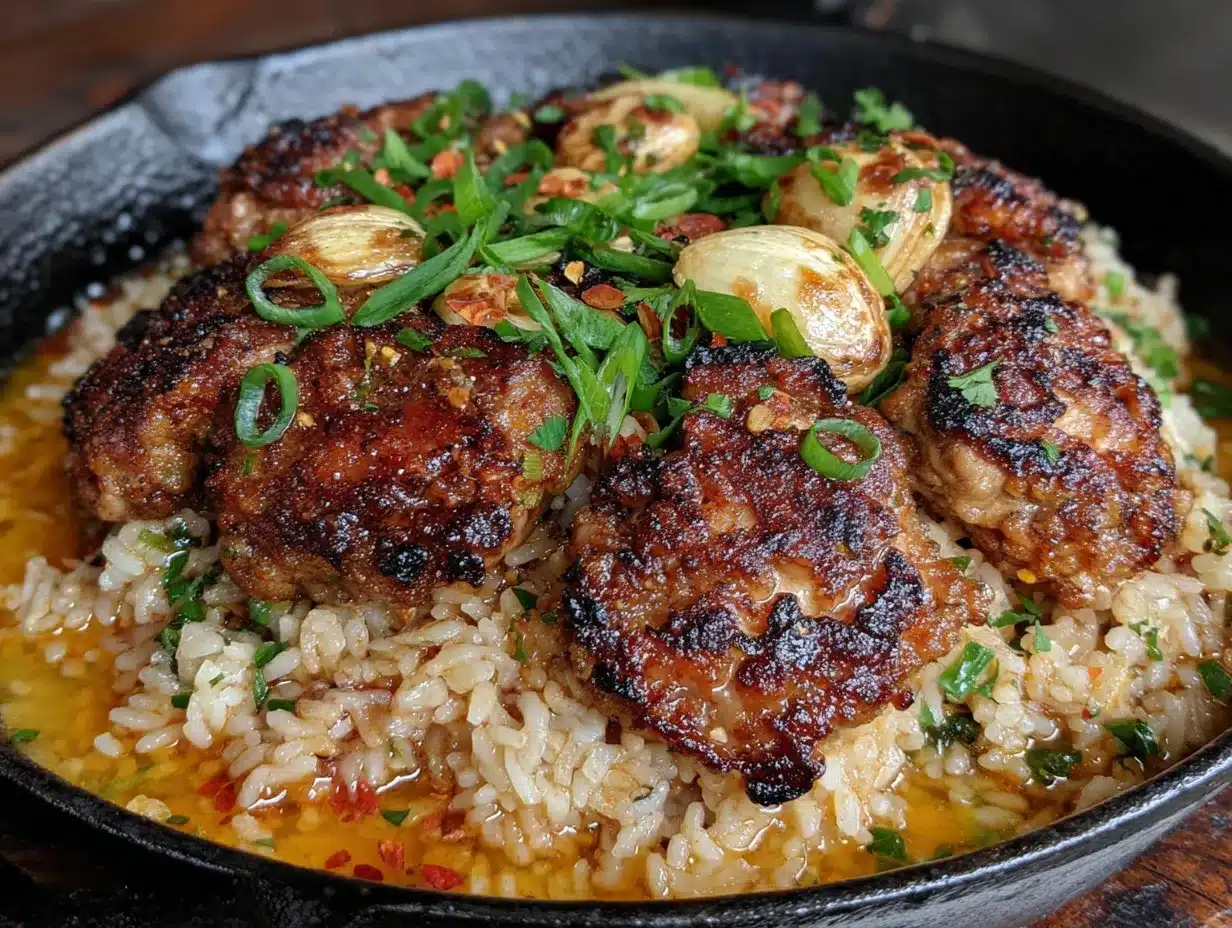
- 1 cup long-grain white rice (200g) — basmati or jasmine are my go-to; avoid short-grain as it gets too sticky
- 1 ½ cups chicken broth (355ml) — low-sodium so you can control the salt; I like Swanson for consistent flavor
- 4 tablespoons unsalted butter (56g) — divided; use salted butter and reduce added salt by ¼ teaspoon
- 6 cloves garlic, minced — about 2 tablespoons; don’t skimp here, garlic is the star
- ½ medium yellow onion, diced (about ¾ cup or 110g) — adds sweetness and depth
- ½ teaspoon dried thyme — or 1 teaspoon fresh thyme leaves
- ¼ teaspoon red pepper flakes — optional, for a tiny kick
For Garnish
- 2 tablespoons fresh parsley, chopped — adds freshness and color
- Lemon wedges — for squeezing over the top; brightens everything up
Ingredient Tips: For the best texture, use chicken thighs with the skin on if you can find them—the skin gets beautifully crispy. If you’re using chicken breasts, pound them to even thickness first so they cook evenly. For the rice, I recommend Lundberg or Tilda basmati for the fluffiest results. And please, use real butter here—margarine or spreads won’t give you that rich, glossy sauce.
Substitutions: Need it gluten-free? Use tamari instead of broth (just watch the salt). Dairy-free? Swap butter with vegan butter or ghee (ghee is technically dairy-free if you’re lactose-intolerant). Low-carb? Serve the chicken and garlic butter sauce over cauliflower rice instead—just cook the cauliflower rice separately and toss it in the pan at the end.
Equipment Needed
You don’t need a fancy kitchen for this one. Here’s what you’ll want:
- A large, deep skillet or Dutch oven (12-inch / 30cm with a lid) — this is non-negotiable; you need room for the chicken and rice without overcrowding. I use my Lodge cast iron skillet, but any heavy-bottomed pan works.
- Sharp chef’s knife — for mincing garlic and dicing onion without tears (well, fewer tears)
- Cutting board — preferably wood or plastic; I keep a separate one for garlic and onion to avoid lingering smells
- Measuring cups and spoons — for accuracy; I’ve eyeballed it before and regretted it
- Wooden spoon or silicone spatula — for stirring the rice without scratching your pan
- Tongs — for flipping the chicken without piercing it (keeps the juices in)
- Lid — your pan needs a tight-fitting lid; if yours is missing, use aluminum foil crimped tightly around the edges
Budget-Friendly Tip: You don’t need a $200 Dutch oven. A $20 non-stick skillet with a lid from a big-box store works just fine. Just make sure it’s oven-safe if you ever want to finish the dish under the broiler (though this recipe doesn’t require it). I’ve used the same cheap skillet for years, and it still gets the job done.
Maintenance Note: If you’re using cast iron, dry it thoroughly after washing and rub a thin layer of oil on the surface to prevent rust. My first cast iron pan rusted because I was lazy—learn from my mistake!
Preparation Method
Let’s get cooking. This one-pan garlic butter chicken and rice comes together in about 30 minutes, but trust the process—every step matters. Here’s how to do it:
Step 1: Prep the Chicken (5 minutes)
Pat the chicken thighs dry with paper towels. This is key—wet chicken won’t sear properly. Season both sides with salt, pepper, paprika, and garlic powder. Let them sit at room temperature for 10 minutes if you have time (helps them cook evenly). If not, move on—it’ll still be delicious.
Step 2: Sear the Chicken (8 minutes)
Heat the olive oil in your skillet over medium-high heat until it shimmers. Carefully place the chicken thighs skin-side down (if using skin-on) or just one side down for boneless. Don’t crowd the pan—cook in batches if needed. Let them cook undisturbed for 4 minutes. You’ll know they’re ready when they release easily from the pan and have a deep golden crust. Flip and cook for another 3-4 minutes. Transfer the chicken to a plate and set aside. Don’t clean the pan—those browned bits are flavor gold.
Step 3: Sauté the Aromatics (3 minutes)
Reduce the heat to medium. Add 2 tablespoons of butter to the pan. Once it melts, add the diced onion and cook for 2 minutes, stirring occasionally, until softened and translucent. Add the minced garlic, dried thyme, and red pepper flakes (if using). Cook for 30 seconds until fragrant—don’t let the garlic burn, or it’ll turn bitter. I’ve done that before, and trust me, it’s not fun.
Step 4: Toast the Rice (2 minutes)
Add the rice to the pan. Stir it around in the butter and aromatics for about 2 minutes. This toasting step is what gives the rice that nutty flavor and keeps it from turning mushy. You’ll notice the rice grains start to look slightly translucent at the edges.
Step 5: Add the Broth and Simmer (15 minutes)
Pour in the chicken broth and stir to combine, scraping up any browned bits from the bottom of the pan. Bring it to a gentle boil. Nestle the seared chicken thighs back into the rice, along with any juices that accumulated on the plate. Reduce the heat to low, cover the pan with a tight-fitting lid, and let it simmer for 15 minutes. Do not lift the lid during this time—I know it’s tempting, but the steam is what cooks the rice perfectly.
Step 6: Rest and Finish (5 minutes)
After 15 minutes, turn off the heat but keep the lid on. Let it rest for 5 minutes. This allows the rice to absorb any remaining liquid and fluff up. Remove the lid, fluff the rice gently with a fork, and add the remaining 2 tablespoons of butter. Stir it in until melted and glossy. Sprinkle with fresh parsley and serve with lemon wedges on the side.
Sensory Cues: The chicken should be golden and crispy on the outside, and the rice should be tender but not mushy. If the rice looks wet, let it sit uncovered for a few minutes. If it’s still firm, add a splash of broth and cook covered for another 3-4 minutes. You’ll smell the garlic butter aroma filling your kitchen—that’s how you know it’s ready.
My Personal Tip: I always use a timer for the simmering step. It’s easy to get distracted (hello, laundry), and overcooked rice is a tragedy. Set it and forget it—your future self will thank you.
Cooking Tips & Techniques
After making this one-pan garlic butter chicken and rice more times than I can count, I’ve learned a few tricks that make all the difference. Here’s the stuff I wish someone had told me the first time:
Don’t skip the sear. I know it’s tempting to just throw everything in the pan and call it a day, but that golden crust on the chicken is where the flavor lives. It also creates those browned bits (called fond) that season the rice. If you rush this step, you’ll end up with pale, sad chicken and bland rice. Trust the process—it’s only 8 minutes.
Use room temperature chicken. Cold chicken straight from the fridge will cool down your pan and steam instead of sear. Let it sit out for 10-15 minutes before cooking. I learned this the hard way when my chicken turned out gray and rubbery. Never again.
Toast the rice properly. That 2-minute toast might seem like a waste of time, but it’s what keeps the rice from turning into a gluey mess. The heat helps the grains absorb liquid evenly. Plus, it adds a subtle nuttiness that makes the dish taste more complex than it is.
Resist the urge to peek. When you lift the lid during simmering, you let out steam and disrupt the cooking process. The rice needs that steam to cook evenly. I once checked on it three times (I was impatient), and the rice was crunchy on top and mushy on the bottom. Just don’t do it.
Let it rest. That 5-minute rest at the end isn’t optional. It allows the rice to absorb any remaining liquid and fluff up. If you serve it right away, you’ll get soupy rice. Patience, my friend.
Multitasking Strategy: While the rice simmers, use that time to wash the cutting board and knife, set the table, or make a quick side salad. By the time the timer goes off, your kitchen is clean and dinner is ready. It’s the little wins that make weeknights bearable.
Variations & Adaptations
This one-pan garlic butter chicken and rice is super flexible. Here are some ways to make it your own:
Dietary Variations
- Gluten-Free: Use tamari or coconut aminos instead of broth (though broth is naturally gluten-free, just double-check labels). The recipe is already gluten-free if you use certified gluten-free broth.
- Dairy-Free: Swap the butter with vegan butter or ghee. I’ve used Miyoko’s vegan butter and it worked beautifully—just watch the salt content.
- Low-Carb: Skip the rice and serve the chicken and garlic butter sauce over cauliflower rice. Cook the cauliflower rice separately in a skillet for 5 minutes, then toss it in the pan with the sauce at the end.
Flavor Twists
- Lemon Herb: Add the zest of one lemon and 1 tablespoon fresh thyme leaves along with the garlic. Squeeze lemon juice over the finished dish for brightness.
- Spicy Version: Double the red pepper flakes and add 1 teaspoon of smoked paprika. For extra heat, stir in a diced jalapeño with the onion.
- Creamy Garlic Butter: Stir in ¼ cup of heavy cream or coconut cream at the end for a richer, creamier sauce. It’s indulgent but worth it.
Cooking Method Adaptations
- Instant Pot: Sear the chicken on sauté mode, then add the rice, broth, and aromatics. Pressure cook on high for 6 minutes with a natural release. Fluff and serve.
- Oven-Baked: After searing the chicken, transfer the skillet to a 375°F (190°C) oven for 20-25 minutes, covered. The rice cooks evenly without any stirring.
Personal Variation: My favorite twist is adding a handful of frozen peas and carrots during the last 5 minutes of simmering. It turns it into a complete meal with built-in veggies, and my kids don’t complain (win-win).
Serving & Storage Suggestions
This dish is best served warm, straight from the pan. Here’s how to make the most of it:
Serving Temperature: Serve the chicken and rice hot, with a squeeze of fresh lemon juice over the top. The acidity cuts through the richness of the butter and brightens everything up. I like to garnish with extra parsley and a sprinkle of flaky sea salt for that chef-y touch.
What to Serve With: A simple green salad with a vinaigrette is perfect—the tangy dressing balances the buttery rice. Steamed broccoli or green beans also work great. For a heartier meal, serve with crusty bread to soak up any leftover garlic butter sauce (and trust me, there will be sauce).
Beverage Pairings: A crisp white wine like Sauvignon Blanc or Pinot Grigio complements the garlic and butter beautifully. For beer drinkers, a light lager or pilsner works well. And if you’re like me and prefer non-alcoholic options, sparkling water with a lemon wedge is perfect.
Storage Instructions: Store leftovers in an airtight container in the refrigerator for up to 4 days. The flavors actually meld together overnight, making it even better the next day. To reheat, add a splash of chicken broth or water to a skillet over medium heat, cover, and warm for 5-7 minutes. You can also microwave it in 30-second bursts, stirring in between.
Freezer Tips: This dish freezes well for up to 3 months. Let it cool completely, then transfer to a freezer-safe container. Thaw overnight in the refrigerator and reheat as above. I often make a double batch and freeze half for emergency dinners—it’s a lifesaver on crazy weeks.
Flavor Development: The rice absorbs more of the garlic butter sauce as it sits, so leftovers are almost better than the fresh version. Just be aware that the rice will soften slightly—it’s still delicious, just not as fluffy.
Nutritional Information & Benefits
Here’s an approximate nutritional breakdown per serving (based on 4 servings):
| Nutrient | Amount |
|---|---|
| Calories | 485 kcal |
| Protein | 32g |
| Carbohydrates | 42g |
| Fat | 20g |
| Saturated Fat | 9g |
| Fiber | 1g |
| Sodium | 780mg |
Health Benefits: This dish is packed with protein from the chicken, which helps keep you full and supports muscle repair. Garlic is known for its immune-boosting properties (hello, cold season). The butter provides vitamin A and healthy fats, while the rice offers quick energy for busy days. It’s not a health food, but it’s a balanced meal that satisfies without weighing you down.
Dietary Considerations: This recipe is naturally gluten-free (check your broth label). For lower sodium, use low-sodium broth and reduce added salt. To make it lighter, use chicken breast instead of thighs and reduce the butter to 2 tablespoons. It’s also easy to adapt for dairy-free diets (see variations above).
Potential Allergens: Dairy (butter). If you’re lactose-intolerant, ghee is usually safe because the milk solids are removed. Always check labels if you’re serving someone with severe allergies.
From my perspective, this is the kind of meal that makes you feel good without overthinking it. It’s nourishing, satisfying, and leaves you with energy for the rest of your evening—not a food coma.
Conclusion: Why This Recipe Deserves a Spot in Your Rotation
Look, I’m not saying this one-pan garlic butter chicken and rice will change your life. But then again, a plumber’s napkin recipe changed mine, so who knows? What I can tell you is this: it’s simple, it’s fast, and it tastes like you tried way harder than you actually did. That’s a rare combo in the dinner world, and it’s worth holding onto.
I love this recipe because it meets me where I am—tired, hungry, and not in the mood for a sink full of dishes. It’s forgiving (I’ve messed up the timing and it still turned out great), and it’s endlessly adaptable to whatever you have on hand. Plus, that moment when you lift the lid and see fluffy rice and golden chicken? It’s pure satisfaction.
Now it’s your turn. Make this one-pan garlic butter chicken and rice your own—add extra veggies, swap in different spices, or keep it exactly as written. I’d love to hear how it goes. Drop a comment below and let me know: did you add a twist? Did your kids ask for seconds? Did you, like me, get a recipe from the most unexpected person? Share your story—I’m all ears. And hey, if you snap a photo, tag me on social media. Nothing makes me happier than seeing this dish in your kitchen.
Happy cooking, friends. You’ve got this.
Frequently Asked Questions
Can I use chicken breasts instead of thighs?
Yes, absolutely. Chicken breasts work well, but they cook faster and can dry out if overcooked. Pound them to even thickness (about ½ inch), and reduce the searing time to 3 minutes per side. Check the internal temperature with a thermometer—165°F (74°C) is your target. I’d also recommend adding a splash of extra broth to keep them moist.
Why is my rice mushy or crunchy?
Mushy rice usually means too much liquid or overcooking. Stick to the 1:1.5 ratio of rice to broth. Crunchy rice means it didn’t cook long enough or you lifted the lid during simmering. If it’s crunchy after 15 minutes, add 2 tablespoons of broth, cover, and cook for 3 more minutes. Don’t stir—just let it steam.
Can I make this in an Instant Pot or slow cooker?
For the Instant Pot, use the sauté function to sear the chicken and cook the aromatics, then add rice and broth. Pressure cook on high for 6 minutes with a natural release. For a slow cooker, sear the chicken first, then add everything and cook on low for 4-5 hours. The rice will be softer, but it’s still delicious.
How do I prevent the garlic from burning?
Garlic burns quickly because of its high sugar content. Always add it after the onion is soft, and keep the heat at medium. Cook it for just 30 seconds until fragrant—if it starts to turn brown, you’ve gone too far. If you accidentally burn it, start over with fresh garlic. Trust me, burnt garlic ruins the whole dish.
Can I double this recipe?
Yes, but you’ll need a larger pan (at least 14 inches) or cook in batches. The key is not overcrowding the pan when searing the chicken—if the pieces are too close together, they’ll steam instead of sear. Double the ingredients but keep the same cooking times. For the rice, use 2 cups rice to 3 cups broth, and add 5 minutes to the simmering time.
Pin This Recipe!
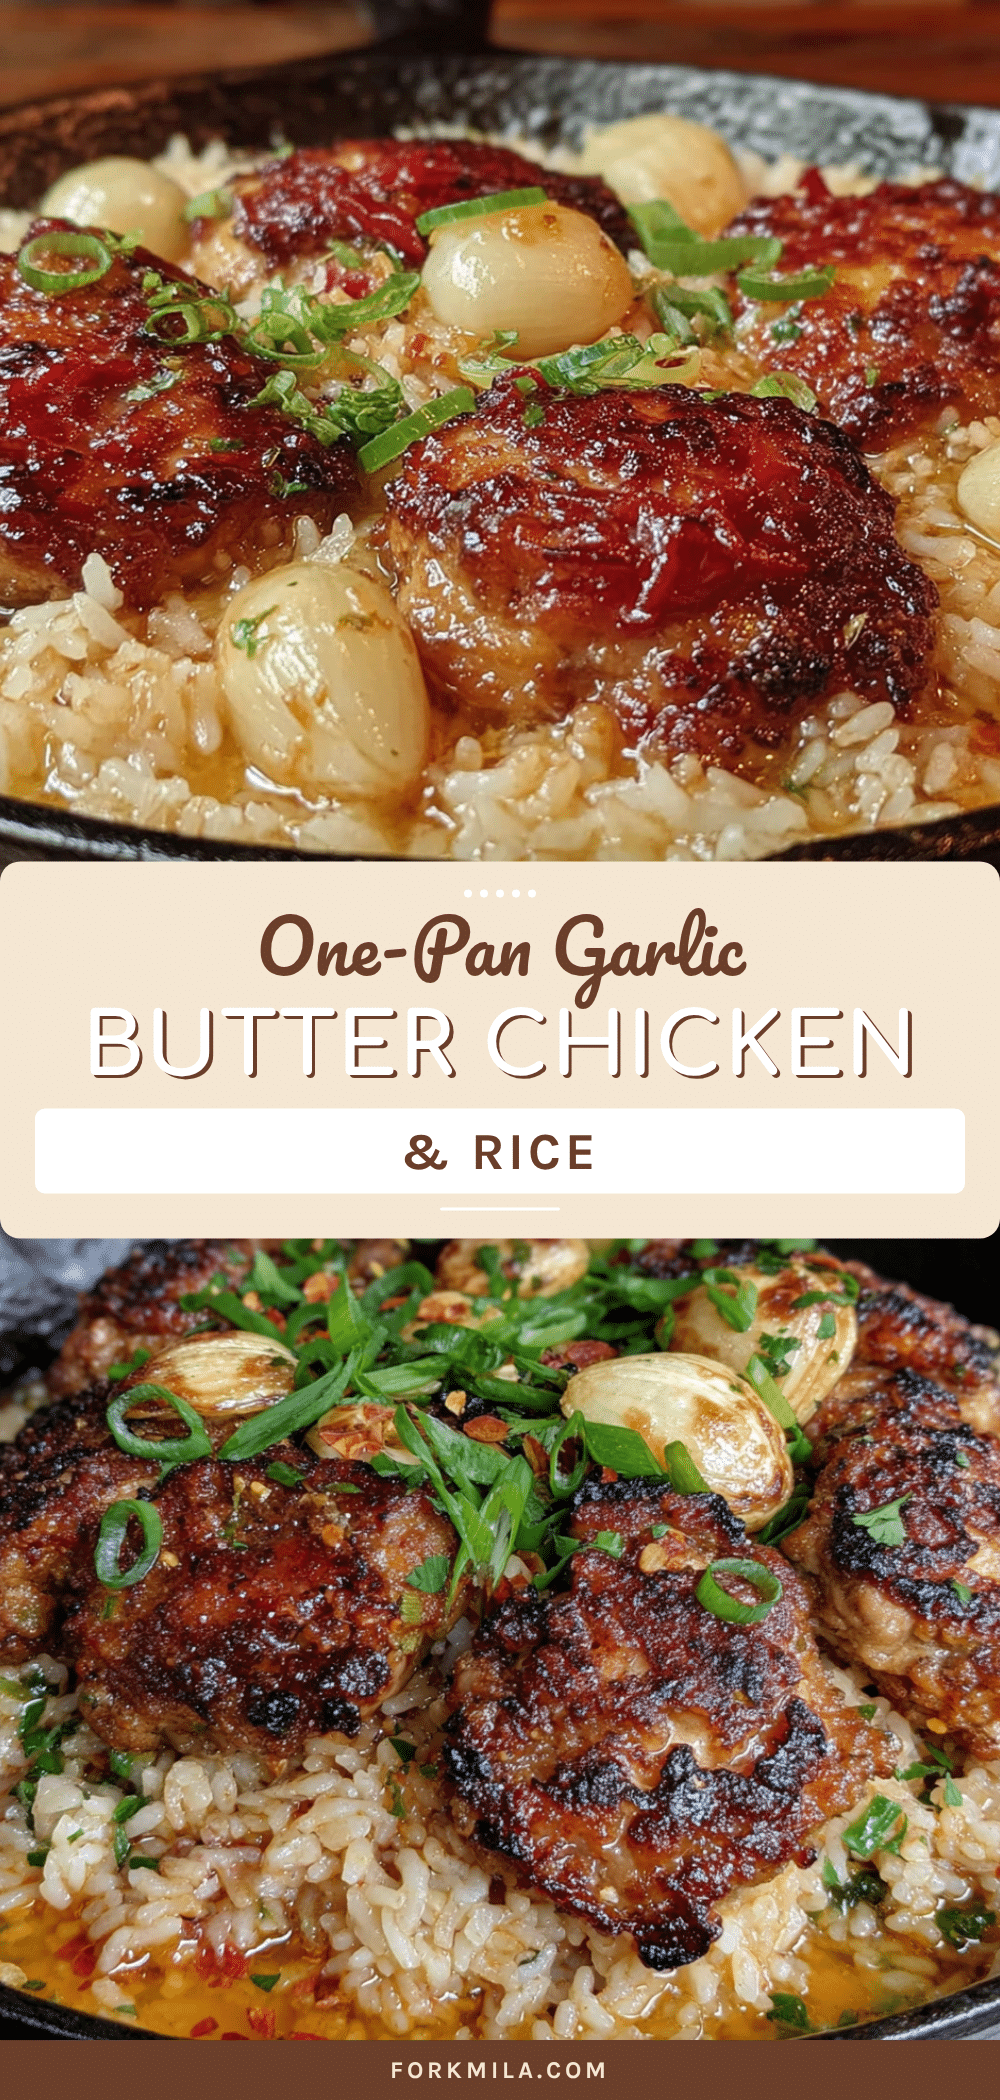
One-Pan Garlic Butter Chicken and Rice: Easy 30-Minute Dinner

A quick and easy one-pan dinner featuring juicy seared chicken thighs and fluffy rice cooked in a rich garlic butter sauce. Perfect for busy weeknights, this 30-minute meal delivers comfort and flavor with minimal cleanup.
- Prep Time: 10 minutes
- Cook Time: 20 minutes
- Total Time: 30 minutes
- Yield: 4 servings 1x
- Category: Main Course
- Cuisine: American
Ingredients
- 4 boneless, skinless chicken thighs (about 1.5 lbs or 680g)
- 1 teaspoon salt
- ½ teaspoon black pepper
- 1 teaspoon paprika
- ½ teaspoon garlic powder
- 2 tablespoons olive oil
- 1 cup long-grain white rice (200g)
- 1 ½ cups chicken broth (355ml)
- 4 tablespoons unsalted butter (56g), divided
- 6 cloves garlic, minced (about 2 tablespoons)
- ½ medium yellow onion, diced (about ¾ cup or 110g)
- ½ teaspoon dried thyme
- ¼ teaspoon red pepper flakes (optional)
- 2 tablespoons fresh parsley, chopped
- Lemon wedges for serving
Instructions
- Pat the chicken thighs dry with paper towels. Season both sides with salt, pepper, paprika, and garlic powder. Let sit at room temperature for 10 minutes if possible.
- Heat olive oil in a large deep skillet or Dutch oven over medium-high heat until shimmering. Sear chicken thighs for 4 minutes per side until golden brown. Transfer to a plate and set aside.
- Reduce heat to medium. Add 2 tablespoons of butter to the pan. Sauté diced onion for 2 minutes until softened. Add minced garlic, dried thyme, and red pepper flakes (if using); cook for 30 seconds until fragrant.
- Add rice to the pan and stir for 2 minutes until the grains are slightly translucent at the edges.
- Pour in chicken broth, scraping up any browned bits from the bottom. Bring to a gentle boil. Nestle the seared chicken thighs back into the rice along with any accumulated juices. Reduce heat to low, cover tightly, and simmer for 15 minutes. Do not lift the lid.
- Turn off the heat and let the pan rest covered for 5 minutes. Remove lid, fluff rice with a fork, and stir in remaining 2 tablespoons of butter until melted. Garnish with fresh parsley and serve with lemon wedges.
Notes
For best results, use chicken thighs with skin on for extra crispiness. Do not lift the lid during simmering to ensure fluffy rice. Leftovers can be stored in an airtight container in the refrigerator for up to 4 days or frozen for up to 3 months.
Nutrition
- Serving Size: 1 serving (about 1 c
- Calories: 485
- Sugar: 2
- Sodium: 780
- Fat: 20
- Saturated Fat: 9
- Carbohydrates: 42
- Fiber: 1
- Protein: 32
Keywords: one-pan dinner, garlic butter chicken, chicken and rice, easy weeknight dinner, 30-minute meal


