The summer I turned thirty, my air conditioner died during a heatwave. I was sprawled on the couch, fan pointed directly at my face, when my phone buzzed. It was my landlord, Frank—a man who communicates exclusively in grunts and has never once fixed anything within a reasonable timeframe. “Got a recipe for you,” he said, which was the last thing I expected. Frank is the kind of guy who eats gas station sandwiches for lunch. But there he was, on the other end of the line, telling me about these caramel apple crisp bars his wife made for a church potluck. “They’re better than pie,” he grunted, and then hung up.
Honestly, I was skeptical. Better than pie? That’s a bold claim. But I was also desperate for something—anything—to distract me from the sweat pooling on my forehead. So I called his wife, Linda, and she walked me through the recipe over the phone while I scribbled notes on a takeout menu. The whole thing felt like a fever dream. Here I was, melting in my apartment, taking baking advice from a woman I’d only ever seen watering her petunias. But let me tell you, the moment those bars came out of the oven, golden and bubbling, I knew I had stumbled onto something special.
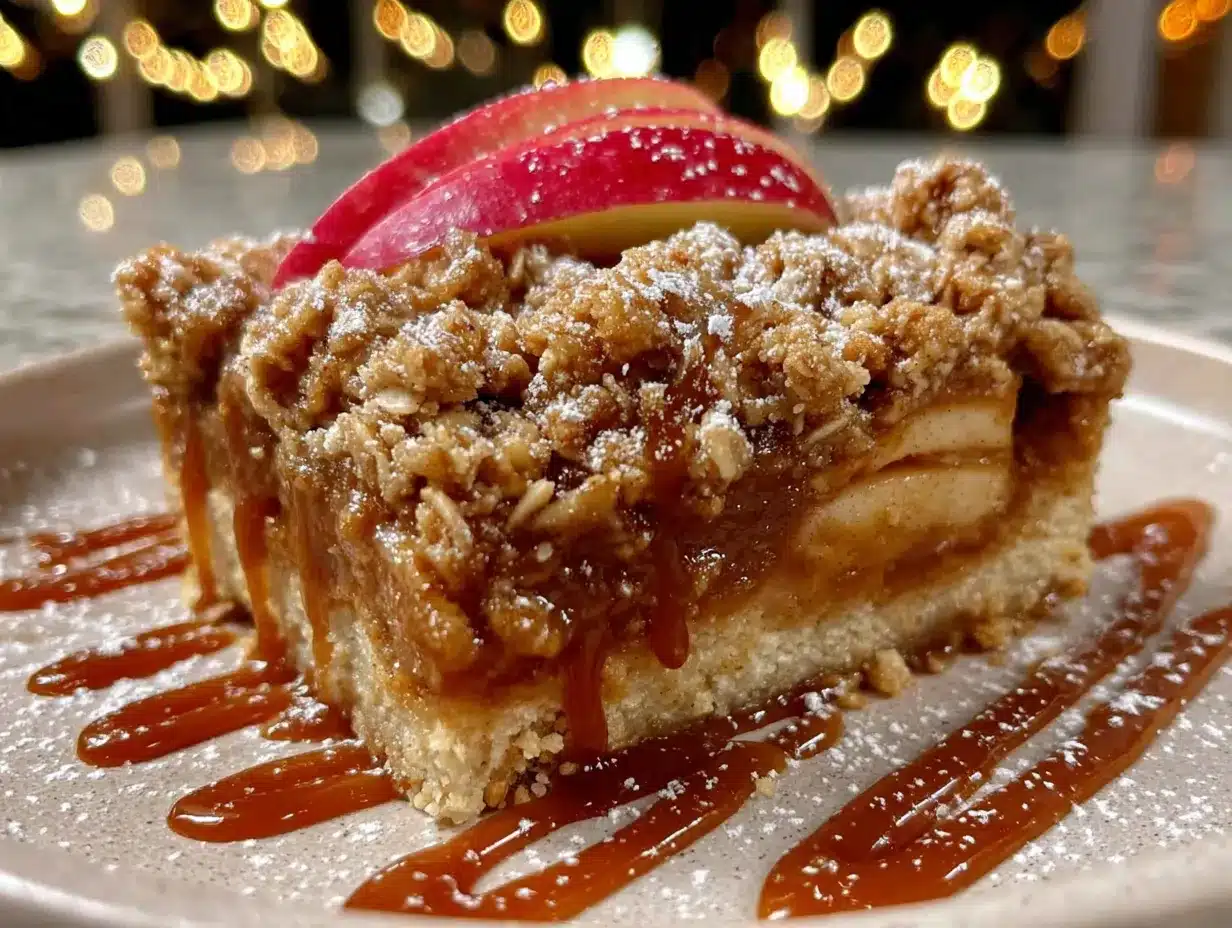
The base is a buttery shortbread crust that honestly tastes like a really good sugar cookie. Then comes a layer of spiced, tender apples—not too sweet, with just a hint of lemon to keep things bright. And on top? A crunchy oat streusel that gets all brown and caramelized in the oven. But the real magic happens after they cool, when you drizzle that silky caramel sauce over everything. It seeps into the cracks and creates these little pockets of gooey goodness. I mean, I’ve made these bars maybe a dozen times since that phone call, and they never last more than two days in my house. Maybe you’ve been there—looking for a dessert that feels impressive but doesn’t require a pastry degree. These bars are exactly that. They’re the reason I now answer when Frank calls.
Why You’ll Love This Recipe
These caramel apple crisp bars have become my go-to for basically every fall gathering, and honestly, they’ve won over some serious pie loyalists. Let me break down exactly why this recipe works and why you’ll find yourself making it on repeat.
- Quick & Easy: You can have these bars in the oven in about 20 minutes. No rolling dough, no chilling time, no fuss. It’s the kind of recipe that comes together while you’re still deciding what to wear to the party.
- Simple Ingredients: Everything on the list is something you probably already have in your pantry. Apples, flour, oats, butter, sugar—no trips to specialty stores required. I’ve made these with whatever apples were sitting in my fruit bowl, and they’ve turned out great every time.
- Perfect for Fall Gatherings: Whether it’s a Thanksgiving potluck, a cozy Friendsgiving, or just a Tuesday night when you need something warm and comforting, these bars fit the bill. They travel well, they slice cleanly, and they look gorgeous on a plate.
- Crowd-Pleaser: I’ve served these to kids who swear they don’t like cooked fruit, to adults who claim they’re “not dessert people,” and to my uncle who only eats pie. Every single person has asked for the recipe. There’s something about that oat streusel and caramel combo that just works.
- Unbelievably Delicious: The texture here is what gets me every time. You’ve got a crunchy, buttery crust, a soft, jammy apple layer, and a crumbly, nutty topping. Then the caramel sauce ties it all together with this rich, buttery sweetness that makes you close your eyes after the first bite.
What makes these bars different from every other apple dessert out there is the layering technique. Instead of mixing everything together, you press the crust, add the apples, sprinkle the streusel, and bake. This creates distinct textures that you can actually taste separately—each bite gives you a little bit of everything. Plus, the caramel sauce isn’t baked in; it’s drizzled on after, so it stays soft and gooey instead of hardening into a sticky mess. It’s comfort food reimagined—simpler, faster, and honestly, more satisfying than a traditional apple pie.
What Ingredients You Will Need
This recipe uses simple, wholesome ingredients to deliver that big, bold apple dessert flavor without any complicated steps. Most of these are pantry staples, but I’ve included a few notes to help you pick the best options for the best results.
For the Shortbread Crust
- All-purpose flour – 1 ½ cups (190g). Provides structure. I’ve used King Arthur Flour for years and love the consistent results.
- Granulated sugar – ½ cup (100g). Adds just enough sweetness to balance the tart apples.
- Unsalted butter – ¾ cup (170g), cold and cubed. Cold butter is key here—it creates that tender, crumbly texture. I prefer Kerrygold for its rich flavor.
- Vanilla extract – 1 teaspoon. Use pure vanilla if you have it; imitation works fine too.
- Salt – ¼ teaspoon. Brings out the buttery flavor.
For the Apple Filling
- Apples – 4 medium (about 600g), peeled, cored, and thinly sliced. I recommend a mix of sweet and tart varieties like Honeycrisp and Granny Smith. The Honeycrisp adds natural sweetness, while the Granny Smith gives that tangy kick. (Avoid Red Delicious—they turn mushy.)
- Granulated sugar – ¼ cup (50g). Adjust based on how sweet your apples are.
- All-purpose flour – 2 tablespoons (16g). Helps thicken the juices so the filling isn’t runny.
- Lemon juice – 1 tablespoon (15ml). Keeps the apples from browning and adds brightness.
- Ground cinnamon – 1 teaspoon. The classic apple spice.
- Ground nutmeg – ¼ teaspoon. Optional but lovely. Freshly grated is best if you have it.
For the Oat Streusel Topping
- Rolled oats – 1 cup (90g). Old-fashioned oats work best; quick oats will work but give a less crunchy texture.
- All-purpose flour – ½ cup (65g).
- Brown sugar – ½ cup (100g), packed. Light or dark both work; dark gives a deeper molasses flavor.
- Unsalted butter – ½ cup (113g), melted. Let it cool slightly so it doesn’t cook the oats.
- Cinnamon – ½ teaspoon.
- Salt – ¼ teaspoon.
For the Caramel Sauce
- Granulated sugar – 1 cup (200g).
- Unsalted butter – 6 tablespoons (85g), cut into pieces, at room temperature.
- Heavy cream – ½ cup (120ml), at room temperature. Don’t use cold cream—it will seize the caramel.
- Salt – 1 teaspoon (for salted caramel) or ¼ teaspoon (for sweet caramel). I prefer salted to cut through the sweetness.
- Vanilla extract – 1 teaspoon.
Substitution Notes: For a gluten-free version, use a 1:1 gluten-free flour blend in the crust and streusel, and certified gluten-free oats. To make it dairy-free, substitute the butter with a plant-based baking stick (like Earth Balance) and use full-fat coconut cream instead of heavy cream. If you’re short on time, you can use a store-bought caramel sauce—just warm it slightly before drizzling.
Equipment Needed
You don’t need a fancy kitchen to pull these bars off, but having the right tools makes the process smoother. Here’s what you’ll need:
- 9×13-inch baking pan – This is the ideal size for getting thick, satisfying bars. A metal pan works best for even browning, but glass or ceramic will also work—just expect the crust to be slightly less crisp.
- Parchment paper – Line your pan with it, leaving overhang on two sides. This makes lifting the bars out a breeze. Trust me, trying to cut these in the pan is a mess.
- Mixing bowls – You’ll need at least three: one for the crust, one for the apples, and one for the streusel.
- Pastry cutter or fork – For cutting cold butter into the flour for the crust. If you don’t have a pastry cutter, two knives or even your fingers work fine—just work quickly so the butter stays cold.
- Sharp chef’s knife and cutting board – For slicing the apples. A dull knife will bruise them.
- Saucepan – For making the caramel. A heavy-bottomed saucepan is best to prevent scorching.
- Whisk – For stirring the caramel as it cooks.
- Candy thermometer (optional) – Helpful for the caramel, but not essential if you watch for color cues.
- Cooling rack – Lets the bars cool evenly so the caramel sets properly.
I’ve made these bars with a cheap baking pan and a wooden spoon, and they still turned out amazing. Don’t stress if you don’t have every tool—use what you’ve got.
Preparation Method
Let’s get baking. This recipe moves quickly, so read through all the steps before you start. I’ve included time estimates and visual cues to help you nail it on your first try.
Step 1: Prep the Pan and Preheat
Preheat your oven to 350°F (175°C). Line your 9×13-inch baking pan with parchment paper, leaving about 2 inches of overhang on the long sides. This will be your “handle” for lifting the bars later. Lightly grease the parchment with butter or non-stick spray.
Step 2: Make the Shortbread Crust (10 minutes)
In a medium bowl, whisk together the flour, sugar, and salt. Add the cold, cubed butter and the vanilla. Use a pastry cutter or your fingertips to work the butter into the flour until the mixture looks like coarse sand with a few pea-sized butter pieces remaining. Don’t overwork it—those little butter chunks create flaky pockets in the crust. Press the mixture evenly into the bottom of your prepared pan. Use the bottom of a measuring cup to get it flat and compact. Bake for 15 minutes, until the edges are just barely golden. Set aside to cool slightly while you prepare the filling.
Step 3: Prepare the Apple Filling (10 minutes)
While the crust bakes, peel, core, and thinly slice your apples. I aim for slices about ⅛-inch thick—thin enough to soften during baking, but thick enough to hold their shape. In a large bowl, toss the apple slices with the sugar, flour, lemon juice, cinnamon, and nutmeg. Make sure every slice is coated. Let them sit for 5 minutes—this draws out some of the juices, which will thicken into a lovely syrup as they bake.
Step 4: Make the Oat Streusel (5 minutes)
In another bowl, combine the rolled oats, flour, brown sugar, cinnamon, and salt. Pour the melted butter over the mixture and stir with a fork until everything is moistened and clumpy. Don’t stir too much—you want those craggy clusters for maximum crunch. Set aside.
Step 5: Assemble the Bars (5 minutes)
Spread the apple mixture evenly over the pre-baked crust. Don’t worry if it looks piled high—the apples will soften and settle during baking. Sprinkle the oat streusel over the top, covering the apples completely. Use your fingers to break up any large clumps so the topping bakes evenly.
Step 6: Bake (35-40 minutes)
Bake the bars for 35 to 40 minutes, until the streusel is deep golden brown and the apple filling is bubbling around the edges. If the streusel is browning too quickly (after about 25 minutes), tent the pan loosely with foil. You’ll know it’s done when you see thick, syrupy bubbles at the edges—that’s the apple juices thickening. Let the bars cool in the pan on a wire rack for at least 30 minutes before adding the caramel.
Step 7: Make the Caramel Sauce (15 minutes)
While the bars cool, make the caramel. In a heavy-bottomed saucepan, spread the sugar in an even layer. Cook over medium heat, whisking occasionally, until the sugar melts and turns a deep amber color—think the color of a copper penny. This takes about 8 to 10 minutes. Don’t walk away; caramel can burn in seconds. Once it’s amber, remove the pan from heat and immediately whisk in the butter. The mixture will bubble violently—that’s normal. Keep whisking until the butter is fully incorporated. Slowly drizzle in the heavy cream while whisking constantly. The caramel will steam and bubble again. Whisk until smooth, then stir in the salt and vanilla. Let it cool in the pan for 10 minutes; it will thicken as it sits.
Step 8: Assemble and Cool (2 hours)
Drizzle the warm caramel sauce over the cooled bars. Use a spoon to spread it evenly, or just let it drip naturally. Let the bars cool completely at room temperature—about 2 hours—before slicing. This allows the caramel to set and the layers to firm up. For cleaner slices, refrigerate for 30 minutes before cutting. Lift the bars out using the parchment overhang and place them on a cutting board. Use a sharp knife to cut into squares. Wipe the knife clean between cuts for neat edges.
Cooking Tips & Techniques
After making these bars more times than I can count, I’ve learned a few things the hard way. Here are my best tips to ensure success every time.
Don’t overwork the crust. The first time I made these, I mixed the crust until it was a smooth dough. Big mistake. The crust came out tough and dense instead of tender and crumbly. You want to stop mixing as soon as the butter is incorporated and the mixture looks like coarse sand. Those little butter pieces are what create that melt-in-your-mouth texture.
Use a mix of apple varieties. I learned this from a failed pie attempt years ago. Using all sweet apples makes the filling one-note and cloying. Using all tart apples leaves you reaching for extra sugar. A 50/50 mix of Honeycrisp and Granny Smith gives you the perfect balance of sweet and tangy, and the different textures hold up better during baking.
Watch the caramel like a hawk. I ruined my first batch of caramel by walking away to answer a text. One minute it was pale gold, the next it was burnt and bitter. Caramel goes from perfect to ruined in about 30 seconds. Stay by the stove, watch for that deep amber color, and have your butter and cream ready to go before you start.
Let the bars cool completely. I know it’s tempting to slice into them while they’re still warm, but patience pays off here. Warm bars will crumble and the caramel will run everywhere. Let them cool for a full 2 hours at room temperature, or speed things up in the fridge for 45 minutes. The texture firms up beautifully, and you’ll get clean, Instagram-worthy slices.
Room temperature ingredients for the caramel. This is non-negotiable. If your butter or cream is cold when you add it to the hot caramel, it will seize up into a grainy, lumpy mess. Let them sit on the counter for at least 30 minutes before you start. Or, if you’re like me and forget, you can gently warm the cream in the microwave for 15 seconds.
Double the streusel. This is a personal preference, but I always make 1.5 times the streusel recipe. I love a thick, crunchy topping that completely covers the apples. If you’re a streusel fan like me, go ahead and pile it on.
Variations & Adaptations
One of the best things about these bars is how adaptable they are. Here are a few variations I’ve tried and loved.
Gluten-Free Version: Substitute the all-purpose flour in the crust and streusel with a 1:1 gluten-free baking flour blend (I like Bob’s Red Mill). Make sure your oats are certified gluten-free. The texture will be slightly more crumbly, but still delicious. I served this version to my gluten-sensitive sister-in-law, and she didn’t even notice the difference.
Vegan Adaptation: Use a plant-based butter stick (not spread) in the crust and streusel. For the caramel, substitute the heavy cream with full-fat coconut cream and use vegan butter. The coconut flavor is subtle and actually complements the apples nicely. I’ve made this for a vegan friend’s birthday, and it was a hit.
Seasonal Fruit Swap: In the summer, swap the apples for an equal amount of sliced peaches or nectarines. Reduce the sugar to 2 tablespoons since stone fruits are sweeter. In the fall, try adding a handful of fresh cranberries to the apple mixture for a tart pop of color. In the winter, use sliced pears and add a pinch of ginger to the filling.
Nutty Streusel: Add ½ cup of chopped pecans or walnuts to the streusel mixture. Toast them first for extra flavor. I did this for a Thanksgiving gathering, and my aunt—who claims to hate nuts in desserts—ate three pieces.
Bourbon Caramel: Add 2 tablespoons of bourbon to the caramel sauce after you remove it from the heat. The alcohol cooks off, leaving behind a warm, smoky flavor that pairs beautifully with the apples. This is my favorite adult version for holiday parties.
Serving & Storage Suggestions
These bars are incredibly versatile when it comes to serving. Here’s how I like to enjoy them.
Serving Temperature: I prefer these bars at room temperature, where the crust is crisp and the caramel is soft and chewy. But honestly, they’re also amazing warm—just microwave a slice for 15 seconds and serve with a scoop of vanilla ice cream. The contrast between the warm apples and cold ice cream is pure magic.
Presentation Ideas: For a casual gathering, I cut the bars into 12 large squares and arrange them on a wooden board. For a more polished look, I cut them into 24 smaller bars and dust them with powdered sugar. A drizzle of extra caramel and a sprinkle of flaky sea salt on top makes them look bakery-worthy.
Complementary Dishes: These bars pair beautifully with a dollop of whipped cream, a scoop of cinnamon ice cream, or even a slice of sharp cheddar cheese (trust me on this one—the salty tang cuts through the sweetness). For drinks, try them with hot apple cider, a spiced chai latte, or a dark roast coffee.
Storage Instructions: Store leftover bars in an airtight container at room temperature for up to 3 days. If your kitchen is warm, refrigerate them to prevent the caramel from getting too soft. They’ll keep in the fridge for up to a week. To freeze, wrap individual bars tightly in plastic wrap, then place them in a freezer-safe bag. They’ll keep for up to 3 months. Thaw at room temperature for about an hour before serving.
Reheating: For that just-baked taste, reheat a single bar in the microwave for 15-20 seconds. For larger batches, warm them in a 300°F (150°C) oven for 5-7 minutes. The flavors actually deepen after a day or two—the spices meld together and the caramel soaks into the crust. Honestly, I think these bars taste even better on day two.
Nutritional Information & Benefits
While these bars are definitely a treat, they do offer some nutritional perks thanks to the wholesome ingredients.
Estimated Nutritional Values (per bar, based on 12 servings):
- Calories: 420
- Total Fat: 22g
- Saturated Fat: 13g
- Cholesterol: 55mg
- Sodium: 210mg
- Total Carbohydrates: 55g
- Dietary Fiber: 3g
- Sugars: 35g
- Protein: 4g
Health Benefits: Apples are a great source of dietary fiber, particularly pectin, which supports digestive health. They also contain vitamin C and antioxidants like quercetin, which may help reduce inflammation. Oats provide beta-glucan, a type of soluble fiber that can help lower cholesterol levels. The butter and cream in the caramel provide vitamin A and healthy fats, though moderation is key.
Dietary Considerations: This recipe contains gluten, dairy, and oats. For a gluten-free version, use certified gluten-free oats and a gluten-free flour blend. For a dairy-free version, substitute plant-based butter and coconut cream. The bars are naturally egg-free and nut-free (unless you add the nutty streusel variation).
My Personal Perspective: I believe in enjoying dessert without guilt. These bars are made with real, recognizable ingredients—no preservatives, no artificial flavors. They’re a celebration of fall flavors, and life is too short to skip dessert. That said, I try to balance things out by serving them with a side of fresh fruit or a big salad for dinner. Everything in moderation, right?
Conclusion
These caramel apple crisp bars are, without exaggeration, one of the best desserts I’ve ever made. They’ve got everything you could want in a fall treat—a buttery crust, tender spiced apples, a crunchy oat topping, and that glorious caramel sauce that ties it all together. They’re simpler than pie, faster than a cobbler, and honestly, more satisfying than both.
What I love most about this recipe is how forgiving it is. You can swap the apples, adjust the spices, or use a store-bought caramel, and they’ll still turn out amazing. It’s the kind of recipe that builds confidence in the kitchen, because it’s hard to mess up. And when you pull that pan out of the oven, golden and bubbling, you’ll feel like a rockstar.
I hope you give these bars a try. Make them for a potluck, make them for a cozy night in, or make them just because it’s Tuesday and you deserve something delicious. And when you do, I’d love to hear about it. Leave a comment below and let me know how they turned out—did you add nuts? Use a different fruit? Forget the caramel and eat them plain? (No judgment here.) Share your photos on Pinterest and tag me so I can see your beautiful creations. Happy baking, friends!
Frequently Asked Questions
Can I use pre-made caramel sauce instead of making it from scratch?
Absolutely. While homemade caramel has a richer flavor, a good-quality store-bought sauce works perfectly. Warm it slightly before drizzling so it spreads easily. Look for brands that use real cream and butter for the best taste.
Why did my crust turn out soggy?
Soggy crust usually happens when the apples release too much liquid during baking. To prevent this, make sure you toss the apples with flour and let them sit for 5 minutes before spreading them on the crust. Also, don’t skip the pre-baking step—that initial bake creates a barrier that helps keep the crust crisp.
Can I make these bars ahead of time?
Yes! These bars actually taste better the next day. You can bake them up to 2 days in advance, but wait to add the caramel until just before serving. Store the cooled bars in an airtight container at room temperature, and keep the caramel in a separate jar in the fridge. Warm the caramel slightly before drizzling.
What’s the best apple for baking?
I recommend a mix of sweet and tart varieties. Honeycrisp, Fuji, or Gala for sweetness, and Granny Smith or Braeburn for tartness. Avoid Red Delicious—they break down into mush when baked. If you only have one type, go with Granny Smith; their tartness balances the sweetness of the caramel and streusel.
How do I get clean, neat slices?
Patience is key. Let the bars cool completely—at least 2 hours at room temperature or 45 minutes in the fridge. Use a sharp chef’s knife and wipe it clean between each cut with a damp paper towel. For the cleanest edges, refrigerate the bars for 30 minutes before slicing. This firms up the caramel and makes cutting a breeze.
Pin This Recipe!
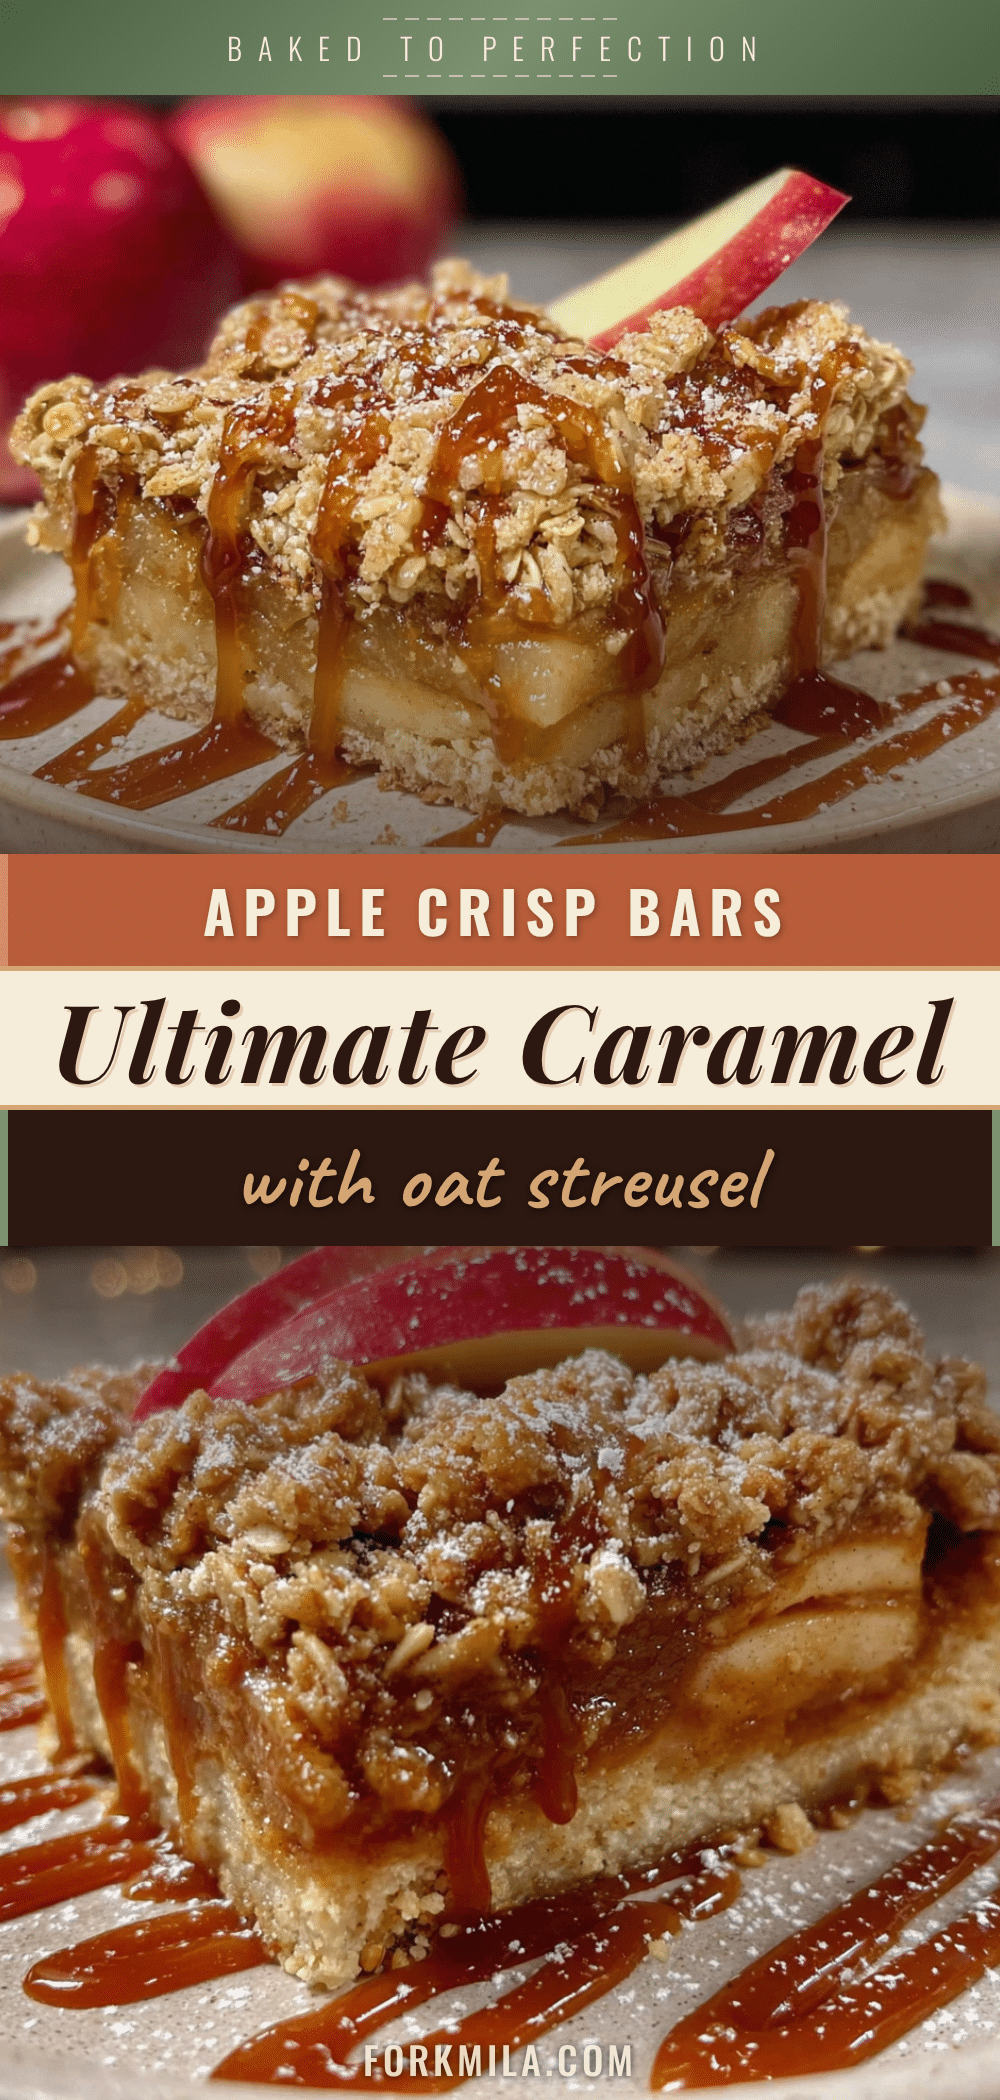
Perfect Caramel Apple Crisp Bars with Easy Oat Streusel

These caramel apple crisp bars feature a buttery shortbread crust, spiced apple filling, crunchy oat streusel, and a silky caramel sauce. They’re simpler than pie, faster than a cobbler, and perfect for fall gatherings.
- Prep Time: 20 minutes
- Cook Time: 35-40 minutes
- Total Time: 2 hours 55 minutes (including cooling)
- Yield: 12 servings 1x
- Category: Dessert
- Cuisine: American
Ingredients
- 1 ½ cups (190g) all-purpose flour
- ½ cup (100g) granulated sugar
- ¾ cup (170g) unsalted butter, cold and cubed
- 1 teaspoon vanilla extract
- ¼ teaspoon salt
- 4 medium apples (about 600g), peeled, cored, and thinly sliced
- ¼ cup (50g) granulated sugar
- 2 tablespoons (16g) all-purpose flour
- 1 tablespoon (15ml) lemon juice
- 1 teaspoon ground cinnamon
- ¼ teaspoon ground nutmeg
- 1 cup (90g) rolled oats
- ½ cup (65g) all-purpose flour
- ½ cup (100g) packed brown sugar
- ½ cup (113g) unsalted butter, melted
- ½ teaspoon ground cinnamon
- ¼ teaspoon salt
- 1 cup (200g) granulated sugar
- 6 tablespoons (85g) unsalted butter, cut into pieces, at room temperature
- ½ cup (120ml) heavy cream, at room temperature
- 1 teaspoon salt (for salted caramel) or ¼ teaspoon (for sweet caramel)
- 1 teaspoon vanilla extract
Instructions
- Preheat oven to 350°F (175°C). Line a 9×13-inch baking pan with parchment paper, leaving overhang on the long sides. Lightly grease the parchment.
- Make the shortbread crust: In a medium bowl, whisk together flour, sugar, and salt. Add cold cubed butter and vanilla. Use a pastry cutter or fingertips to work butter into flour until mixture resembles coarse sand with a few pea-sized butter pieces. Press evenly into prepared pan. Bake for 15 minutes until edges are just golden. Set aside to cool slightly.
- Prepare the apple filling: In a large bowl, toss apple slices with sugar, flour, lemon juice, cinnamon, and nutmeg. Let sit for 5 minutes.
- Make the oat streusel: In another bowl, combine rolled oats, flour, brown sugar, cinnamon, and salt. Pour melted butter over and stir with a fork until moistened and clumpy.
- Assemble the bars: Spread apple mixture evenly over pre-baked crust. Sprinkle oat streusel over the top, covering apples completely.
- Bake for 35-40 minutes until streusel is deep golden brown and filling is bubbling at edges. If browning too quickly, tent with foil after 25 minutes. Cool in pan on wire rack for at least 30 minutes.
- Make the caramel sauce: In a heavy-bottomed saucepan, spread sugar in an even layer. Cook over medium heat, whisking occasionally, until sugar melts and turns deep amber (about 8-10 minutes). Remove from heat and whisk in butter until incorporated. Slowly drizzle in heavy cream while whisking constantly. Stir in salt and vanilla. Let cool in pan for 10 minutes.
- Drizzle warm caramel sauce over cooled bars. Let cool completely at room temperature (about 2 hours) before slicing. For cleaner slices, refrigerate for 30 minutes before cutting. Lift bars out using parchment overhang and cut into squares.
Notes
Don’t overwork the crust; stop when mixture looks like coarse sand. Use a mix of apple varieties (e.g., Honeycrisp and Granny Smith). Watch caramel closely to avoid burning. Let bars cool completely before slicing for clean cuts. For gluten-free, use 1:1 gluten-free flour blend and certified gluten-free oats. For dairy-free, use plant-based butter and coconut cream.
Nutrition
- Serving Size: 1 bar
- Calories: 420
- Sugar: 35
- Sodium: 210
- Fat: 22
- Saturated Fat: 13
- Carbohydrates: 55
- Fiber: 3
- Protein: 4
Keywords: caramel apple crisp bars, apple crisp bars, oat streusel, fall dessert, apple dessert, easy dessert


