My husband had sworn off breaded chicken for years. A decade, actually. He’d order grilled chicken at restaurants, push the breaded cutlets aside at family dinners, and politely decline whenever I suggested a crispy chicken recipe. “Too heavy,” he’d say. “Never cooks right in the middle.” I’d nod and move on, figuring this was just one of those things we’d never agree on.
Then last Tuesday happened. I was testing a batch of crispy baked parmesan chicken cutlets for a friend’s upcoming dinner party, and I honestly wasn’t thinking about him at all. The kitchen smelled incredible—garlic, parmesan, that toasty breadcrumb scent that makes you hungry even when you’ve just eaten. I pulled the tray out of the oven, let the cutlets rest for a minute, and went to answer my phone. When I came back, he was standing at the counter, one cutlet halfway to his mouth, looking like a kid caught with his hand in the cookie jar.
“These are different,” he said, almost defensively. “They’re actually crispy. And juicy.” He finished the cutlet, then reached for another. I didn’t say a word. I just watched him eat three more, standing there in his work clothes, crumbs falling onto the counter. That’s when I knew this recipe was something special. Maybe you’ve been there—when a dish surprises you so completely that you forget every assumption you had about it. These crispy baked parmesan chicken cutlets did that for me, and honestly, they’ve been in regular rotation ever since.
The secret isn’t complicated, and that’s what I love most about it. No deep-frying, no complicated breading stations, no weird ingredients. Just a few smart techniques that turn ordinary chicken breasts into something you’ll crave on a Tuesday night. I keep making them because they work every single time, and because watching someone take that first bite and raise their eyebrows in surprise never gets old.
Why You’ll Love These Crispy Baked Parmesan Chicken Cutlets
Let me tell you why this recipe has become my most-requested dish. It’s not just because it tastes incredible—though it absolutely does. It’s because it solves every problem people have with homemade breaded chicken.
- Quick & Easy: From start to finish, these cutlets come together in about 30 minutes. No marinating overnight, no complicated steps. Perfect for those evenings when you need dinner on the table fast but still want something that feels special.
- Simple Ingredients: You probably have most of these in your kitchen right now. Chicken breasts, breadcrumbs, parmesan cheese, eggs, and a few seasonings. No fancy grocery store trips required.
- Perfect for Busy Weeknights: These cutlets work for everything—quick family dinners, meal prep lunches, or even as a crowd-pleasing appetizer at parties. I’ve made them for potlucks and watched them disappear in minutes.
- Crowd-Pleaser: Kids love them. Adults love them. Even my husband who swore off breaded chicken loves them. The crispy parmesan crust appeals to everyone, and the juicy chicken inside keeps people coming back for seconds.
- Unbelievably Delicious: The texture is what gets people every time. That golden, crunchy exterior gives way to tender, moist chicken that’s perfectly seasoned. It’s comfort food at its finest, but without the guilt of deep-frying.
What makes these cutlets different from every other recipe you’ve tried? It’s the combination of a few smart techniques. First, pounding the chicken to an even thickness ensures every piece cooks at the same rate. Then there’s the parmesan-breadcrumb mixture—I use a mix of panko and regular breadcrumbs for the ultimate crunch. And here’s the trick that took me years to figure out: a light spray of oil on top before baking. That’s what gives you the golden, crispy finish without needing a deep fryer.
These crispy baked parmesan chicken cutlets aren’t just good—they’re the kind of dish that makes you close your eyes after the first bite. It’s comfort food reimagined: healthier, faster, but with the same soul-soothing satisfaction. Perfect for impressing guests without stress, or turning a simple Tuesday dinner into something memorable.
What Ingredients You Will Need
This recipe uses simple, wholesome ingredients that work together to create that perfect crispy crust and juicy interior. Most of these are pantry staples, which makes this dish perfect for last-minute cooking.
- Chicken Breasts: 1.5 pounds (about 680g) boneless, skinless chicken breasts. Look for evenly sized breasts if possible. If they’re huge, you can cut them in half horizontally to create thinner cutlets. I prefer organic chicken when I can find it, but regular works great too.
- Panko Breadcrumbs: 1 cup (about 90g). Panko is key for that extra-crispy texture. They’re lighter and flakier than regular breadcrumbs, which means they crisp up beautifully in the oven. I’ve tried making these with regular breadcrumbs alone, and while they’re still good, the panko really makes a difference.
- Regular Breadcrumbs: 1/2 cup (about 45g). I use plain, unseasoned breadcrumbs here. The combination of panko and regular breadcrumbs gives you the best of both worlds—extra crunch from the panko and a more even coating from the regular crumbs.
- Grated Parmesan Cheese: 1/2 cup (about 50g). Please, please use freshly grated parmesan from a block. The pre-shredded stuff in the bag has anti-caking agents that prevent it from melting properly. I recommend buying a small wedge of Parmigiano-Reggiano—it’s worth the extra few dollars for the flavor.
- Eggs: 2 large eggs, beaten. These help the breadcrumb mixture stick to the chicken. Make sure your eggs are at room temperature for easier mixing.
- All-Purpose Flour: 1/2 cup (about 60g). The flour creates a dry surface that helps the egg wash adhere better. I’ve used gluten-free all-purpose flour blends here with good results.
- Garlic Powder: 1 teaspoon. Not garlic salt—we’ll add salt separately. Garlic powder distributes evenly and gives that savory depth without burning.
- Onion Powder: 1/2 teaspoon. This adds a subtle sweetness that balances the savory flavors.
- Dried Oregano: 1/2 teaspoon. Optional, but I love the Italian-inspired flavor it adds. You can substitute dried basil or thyme.
- Salt: 1 teaspoon kosher salt (use 3/4 teaspoon if using table salt). I season both the flour and the breadcrumb mixture for maximum flavor.
- Black Pepper: 1/2 teaspoon freshly ground black pepper.
- Olive Oil Spray: For spraying the tops of the cutlets before baking. You can use regular olive oil in a mister, or buy a can of avocado oil spray. This is what gives you that golden, crispy finish.
- Fresh Parsley: For garnish (optional). A sprinkle of fresh parsley adds color and freshness.
For the best results, I recommend using Ian’s Panko Breadcrumbs if you can find them—they’re consistently light and crispy. And for parmesan, BelGioioso makes a great wedge that’s available in most grocery stores.
Equipment Needed
You don’t need any fancy equipment for this recipe, which is part of why I love it. Here’s what you’ll need:
- Baking Sheet: A standard half-sheet pan (18×13 inches) works perfectly. Line it with parchment paper or aluminum foil for easy cleanup. I’ve used both, and parchment paper gives slightly better browning.
- Wire Rack: This is optional but highly recommended. Placing a wire rack on your baking sheet allows air to circulate underneath the cutlets, making them crispy on both sides. If you don’t have one, just flip the cutlets halfway through baking.
- Meat Mallet or Rolling Pin: For pounding the chicken to an even thickness. I use a flat meat mallet, but a rolling pin works in a pinch. You can also use a heavy skillet.
- Three Shallow Bowls: For the flour, egg wash, and breadcrumb mixture. I use wide, shallow pasta bowls, but pie plates work great too.
- Tongs: For transferring the chicken between bowls and to the baking sheet. They keep your hands clean and make the process much smoother.
- Chef’s Knife and Cutting Board: For trimming any excess fat from the chicken.
- Plastic Wrap: For covering the chicken while pounding (prevents splatters).
If you’re on a budget, skip the wire rack and just flip the cutlets halfway through. I’ve made these dozens of times without a rack, and they still come out wonderfully crispy. The key is making sure the chicken isn’t sitting in any moisture while it bakes.
Preparation Method
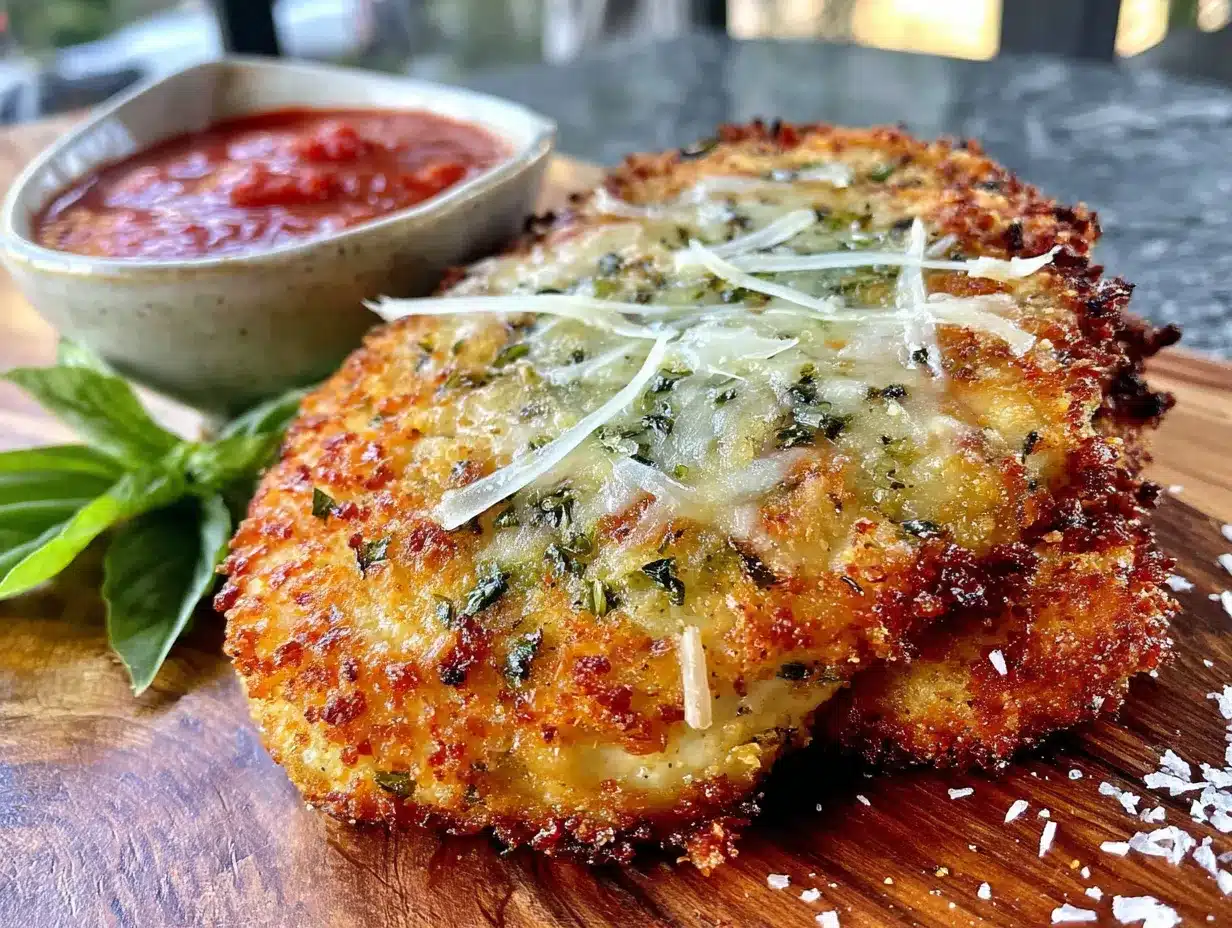
Let me walk you through this step by step. I’ve made these crispy baked parmesan chicken cutlets more times than I can count, and I’ve learned a few things along the way.
- Preheat your oven to 425°F (218°C). Place a wire rack on your baking sheet if you’re using one, or line the sheet with parchment paper. Getting the oven hot is crucial—high heat is what gives you that crispy exterior without drying out the chicken.
- Prepare the chicken. Place each chicken breast between two sheets of plastic wrap. Using a meat mallet or rolling pin, pound the chicken to an even thickness of about 1/2 inch (1.25 cm). Don’t go too thin or the chicken will dry out. I usually start with thicker breasts and pound them gently from the center outward. If your chicken breasts are huge, you can cut them in half horizontally first, then pound them. This ensures even cooking and creates more surface area for that crispy parmesan crust.
- Set up your breading station. Get three shallow bowls ready. In the first bowl, whisk together the flour, 1/2 teaspoon of salt, and 1/4 teaspoon of black pepper. In the second bowl, beat the two eggs with a tablespoon of water until well combined. In the third bowl, mix together the panko breadcrumbs, regular breadcrumbs, grated parmesan cheese, garlic powder, onion powder, dried oregano, remaining 1/2 teaspoon of salt, and remaining 1/4 teaspoon of black pepper. Mix everything with your fingers or a fork to distribute the seasonings evenly.
- Bread the chicken. Working with one piece of chicken at a time, first dredge it in the flour mixture. Shake off any excess—you want a thin, even coating. Then dip it into the egg wash, letting any excess drip off. Finally, press it into the breadcrumb mixture, making sure both sides are well coated. I like to use one hand for the dry ingredients and one for the wet ingredients to keep things from getting too messy. Place the breaded cutlet on your prepared baking sheet or wire rack.
- Spray with oil. Once all the cutlets are breaded and on the baking sheet, lightly spray the tops with olive oil spray. Don’t skip this step—it’s what gives you that golden, crispy finish. I spray from about 8 inches away to get an even mist. You want a light coating, not a soaking.
- Bake for 12-15 minutes. Place the baking sheet in the preheated oven and bake for 12 minutes. At this point, check the cutlets. They should be golden brown and crispy on the outside. If you’re using a wire rack, you don’t need to flip them. If you’re baking directly on parchment, flip the cutlets carefully with tongs and bake for another 3-5 minutes until both sides are crispy.
- Check for doneness. The internal temperature should reach 165°F (74°C) when measured with an instant-read thermometer. Insert the thermometer into the thickest part of the cutlet. If you don’t have a thermometer, cut into one to check—the juices should run clear and there should be no pink in the center.
- Rest before serving. Let the cutlets rest on the baking sheet for 2-3 minutes before serving. This allows the juices to redistribute and keeps the chicken moist. I know it’s tempting to dig in right away, but that short rest makes a real difference.
One thing I learned the hard way: don’t overcrowd the baking sheet. The cutlets need space for air to circulate, which helps them crisp up. If you’re making a double batch, use two baking sheets or work in batches. Trust me on this—crowded cutlets steam instead of crisping, and nobody wants that.
Cooking Tips & Techniques
After making these crispy baked parmesan chicken cutlets probably fifty times, I’ve collected a few tips that make a real difference. Some of these I learned through trial and error, and a few came from actual failures.
The biggest mistake people make is skipping the flour step. I know it seems like an extra, unnecessary step, but the flour creates a dry surface that helps the egg wash stick. Without it, the breading slides right off during baking. I learned this the hard way when I made a batch for company and ended up with naked chicken floating in a pool of breadcrumbs. Not my finest moment.
Temperature matters more than you think. Make sure your oven is fully preheated before the cutlets go in. An oven thermometer is worth its weight in gold here—my oven runs about 25 degrees hot, so I set it to 400°F and get perfect results. If your oven runs cold, you might need to add an extra minute or two.
Don’t skip the resting time. I know I mentioned this already, but it bears repeating. Those few minutes allow the chicken to reabsorb its juices, which means every bite is moist and tender. I once rushed a batch straight from oven to plate, and while they were still good, they weren’t nearly as juicy as when I let them rest.
For extra crispy cutlets, try this trick: after breading, let the cutlets sit on the baking sheet for 5-10 minutes before baking. This allows the breading to adhere better and creates an even crispier crust. I stumbled on this when I got distracted by a phone call, and now I do it intentionally every time.
Timing is everything. I like to prep all my ingredients before I start breading. Having everything measured and ready makes the process smooth and prevents that frantic “where’s the pepper?” moment when your hands are covered in egg. It also means you’re not rushing, which leads to better results.
Variations & Adaptations
One of the best things about this recipe is how adaptable it is. Over the years, I’ve tried several variations, and most of them have been winners.
Gluten-Free Version: Substitute the all-purpose flour with a gluten-free all-purpose blend, and use gluten-free panko breadcrumbs. I’ve had great results with King Arthur Measure for Measure flour and Ian’s gluten-free panko. The texture is slightly different—a bit more delicate—but still wonderfully crispy. Just be gentle when flipping if you’re not using a wire rack.
Spicy Variation: Add 1/2 teaspoon of cayenne pepper to the breadcrumb mixture, and a pinch of red pepper flakes to the flour. This gives the cutlets a nice kick without overwhelming the parmesan flavor. My brother-in-law requests this version every time he visits, and we’ve started calling it “the spicy one.”
Herb-Crusted Version: Add 2 tablespoons of finely chopped fresh herbs to the breadcrumb mixture. I love using a mix of fresh parsley, basil, and thyme. This variation feels especially right in the summer when herbs are abundant in the garden. The fresh herbs add brightness that complements the rich parmesan perfectly.
Air Fryer Adaptation: If you have an air fryer, these cutlets come out incredibly crispy. Preheat the air fryer to 400°F (200°C). Spray the basket with oil, place the breaded cutlets in a single layer (you may need to work in batches), and spray the tops with oil. Cook for 8-10 minutes, flipping halfway through, until golden and cooked through. The air fryer version takes less time and gets even crispier than the oven method.
Dairy-Free Version: Use nutritional yeast in place of the parmesan cheese. It won’t taste exactly the same, but it adds a savory, cheesy flavor that works surprisingly well. I’ve also used dairy-free parmesan-style shreds from brands like Violife, and they melt nicely into the breadcrumb coating.
I once tried a version with crushed potato chips instead of breadcrumbs—it was good, but honestly, it was too salty and the texture wasn’t as even. Stick with the breadcrumb combo for the best results.
Serving & Storage Suggestions
These crispy baked parmesan chicken cutlets are incredibly versatile when it comes to serving. Here’s how I like to enjoy them.
Serving temperature: These are best served hot, straight from the oven. The exterior stays crispy for about 10-15 minutes, so try to time your serving accordingly. If you’re making them for a party, you can keep them warm on a wire rack in a 200°F oven for up to 30 minutes, but they’ll lose some crispiness.
Presentation ideas: I love serving these on a large platter with lemon wedges and fresh parsley scattered around. For a main course, arrange them on a bed of arugula dressed with lemon vinaigrette. The peppery arugula and bright dressing cut through the richness of the chicken perfectly.
What to serve with them: These cutlets pair beautifully with so many sides. I often serve them with a simple green salad, roasted vegetables, or garlic mashed potatoes. They’re also fantastic sliced and served over pasta with marinara sauce, or tucked into sandwiches with fresh mozzarella and basil. For a lighter meal, try them with a side of sautéed spinach or roasted asparagus.
Storage instructions: Leftover cutlets can be stored in an airtight container in the refrigerator for up to 3 days. The key to maintaining crispiness is to let them cool completely before storing. I place them in a single layer with parchment paper between layers to prevent them from sticking together.
Reheating methods: The oven is your best friend here. Reheat cutlets on a wire rack over a baking sheet at 375°F for 8-10 minutes, or until heated through and crispy. The air fryer also works well—350°F for 4-5 minutes. Avoid the microwave at all costs—it turns the crispy coating into sad, soggy mush. I learned that one the hard way.
Freezer instructions: These cutlets freeze beautifully. Place them in a single layer on a baking sheet and freeze until solid, then transfer to a freezer-safe bag or container. They’ll keep for up to 3 months. To reheat, bake directly from frozen at 375°F for 15-18 minutes, flipping halfway through. No need to thaw first.
One thing I’ve noticed: the flavors actually develop a bit overnight. Day-old cutlets, reheated properly, have a deeper, more complex flavor. They’re perfect for meal prep lunches throughout the week.
Nutritional Information & Benefits
Let’s talk numbers. Per serving (about 6 ounces of chicken breast with coating), here’s what you’re looking at:
- Calories: Approximately 380-420
- Protein: 38-42 grams
- Fat: 14-18 grams
- Carbohydrates: 18-22 grams
- Fiber: 1-2 grams
- Sugar: 1-2 grams
- Sodium: 650-750 mg
These numbers will vary based on the exact ingredients and portion sizes you use. If you’re watching your sodium, you can reduce the salt or use low-sodium breadcrumbs.
Health benefits: Chicken breast is an excellent source of lean protein, which supports muscle health and keeps you feeling full. Parmesan cheese adds calcium and protein, while the olive oil provides healthy monounsaturated fats. Compared to traditional fried chicken cutlets, this baked version saves you about 100-150 calories and significantly less saturated fat per serving.
Dietary considerations: This recipe can be made gluten-free, dairy-free, and lower-carb with simple substitutions. For a keto-friendly version, use almond flour instead of breadcrumbs and increase the parmesan. Just note that the texture will be different—more dense and nutty.
I personally love that this recipe lets me enjoy comfort food without the guilt. It’s satisfying enough to feel like a treat, but balanced enough to fit into a regular dinner rotation. That’s a win in my book.
Conclusion
These crispy baked parmesan chicken cutlets have become a staple in my kitchen for good reason. They’re quick enough for a busy weeknight, impressive enough for company, and delicious enough to convert even the most stubborn breaded-chicken skeptics. I mean, if they won over my husband after a decade of resistance, they can win over anyone.
What I love most about this recipe is how forgiving it is. You can customize the seasonings, swap in different cheeses, or adjust the cooking method to fit your schedule. It’s the kind of recipe that rewards experimentation while still delivering perfect results every time. Whether you’re a seasoned cook or someone who’s just starting to find their way around the kitchen, these cutlets will make you look like a pro.
I’d love to hear how these turn out for you. Did you try any variations? Did your family love them as much as mine does? Drop a comment below and let me know—I read every single one, and your feedback helps me create better recipes for all of us. And if you found this helpful, share it with a friend who needs a reliable weeknight dinner in their rotation.
Until next time, happy cooking, and remember: the best recipes are the ones you actually make. These cutlets deserve a spot in your regular lineup, I promise.
Frequently Asked Questions
Can I use chicken thighs instead of breasts?
Absolutely! Chicken thighs work beautifully in this recipe. They’re more forgiving and stay juicy even if you cook them a minute or two too long. Just pound them to an even thickness like you would with breasts, and bake for the same amount of time. The internal temperature should still reach 165°F.
Why did my breading fall off?
This usually happens for one of three reasons: you skipped the flour step, the chicken was too wet when you breaded it, or you didn’t press the breadcrumbs firmly enough. Make sure to pat the chicken dry before starting, don’t skip the flour, and really press those breadcrumbs into the egg wash. Also, letting the breaded cutlets rest for 5-10 minutes before baking helps the coating adhere.
Can I make these ahead of time?
You can bread the cutlets up to 4 hours ahead and keep them covered in the refrigerator. Just add an extra minute or two to the baking time since they’ll be cold. For longer storage, freeze the breaded cutlets on a baking sheet, then transfer to a freezer bag. Bake directly from frozen, adding about 5 minutes to the cooking time.
What’s the best way to reheat leftovers?
The oven or air fryer is your best bet. Reheat in a 375°F oven for 8-10 minutes, or in an air fryer at 350°F for 4-5 minutes. Both methods will restore some of that crispy texture. Please avoid the microwave—it will make the coating soggy and rubbery.
Can I use pre-shredded parmesan cheese?
I really don’t recommend it. Pre-shredded parmesan contains anti-caking agents that prevent it from melting and blending properly into the breadcrumb mixture. You’ll get a much better result by grating a block of parmesan yourself. It takes two extra minutes and makes a noticeable difference in both texture and flavor.
Pin This Recipe!
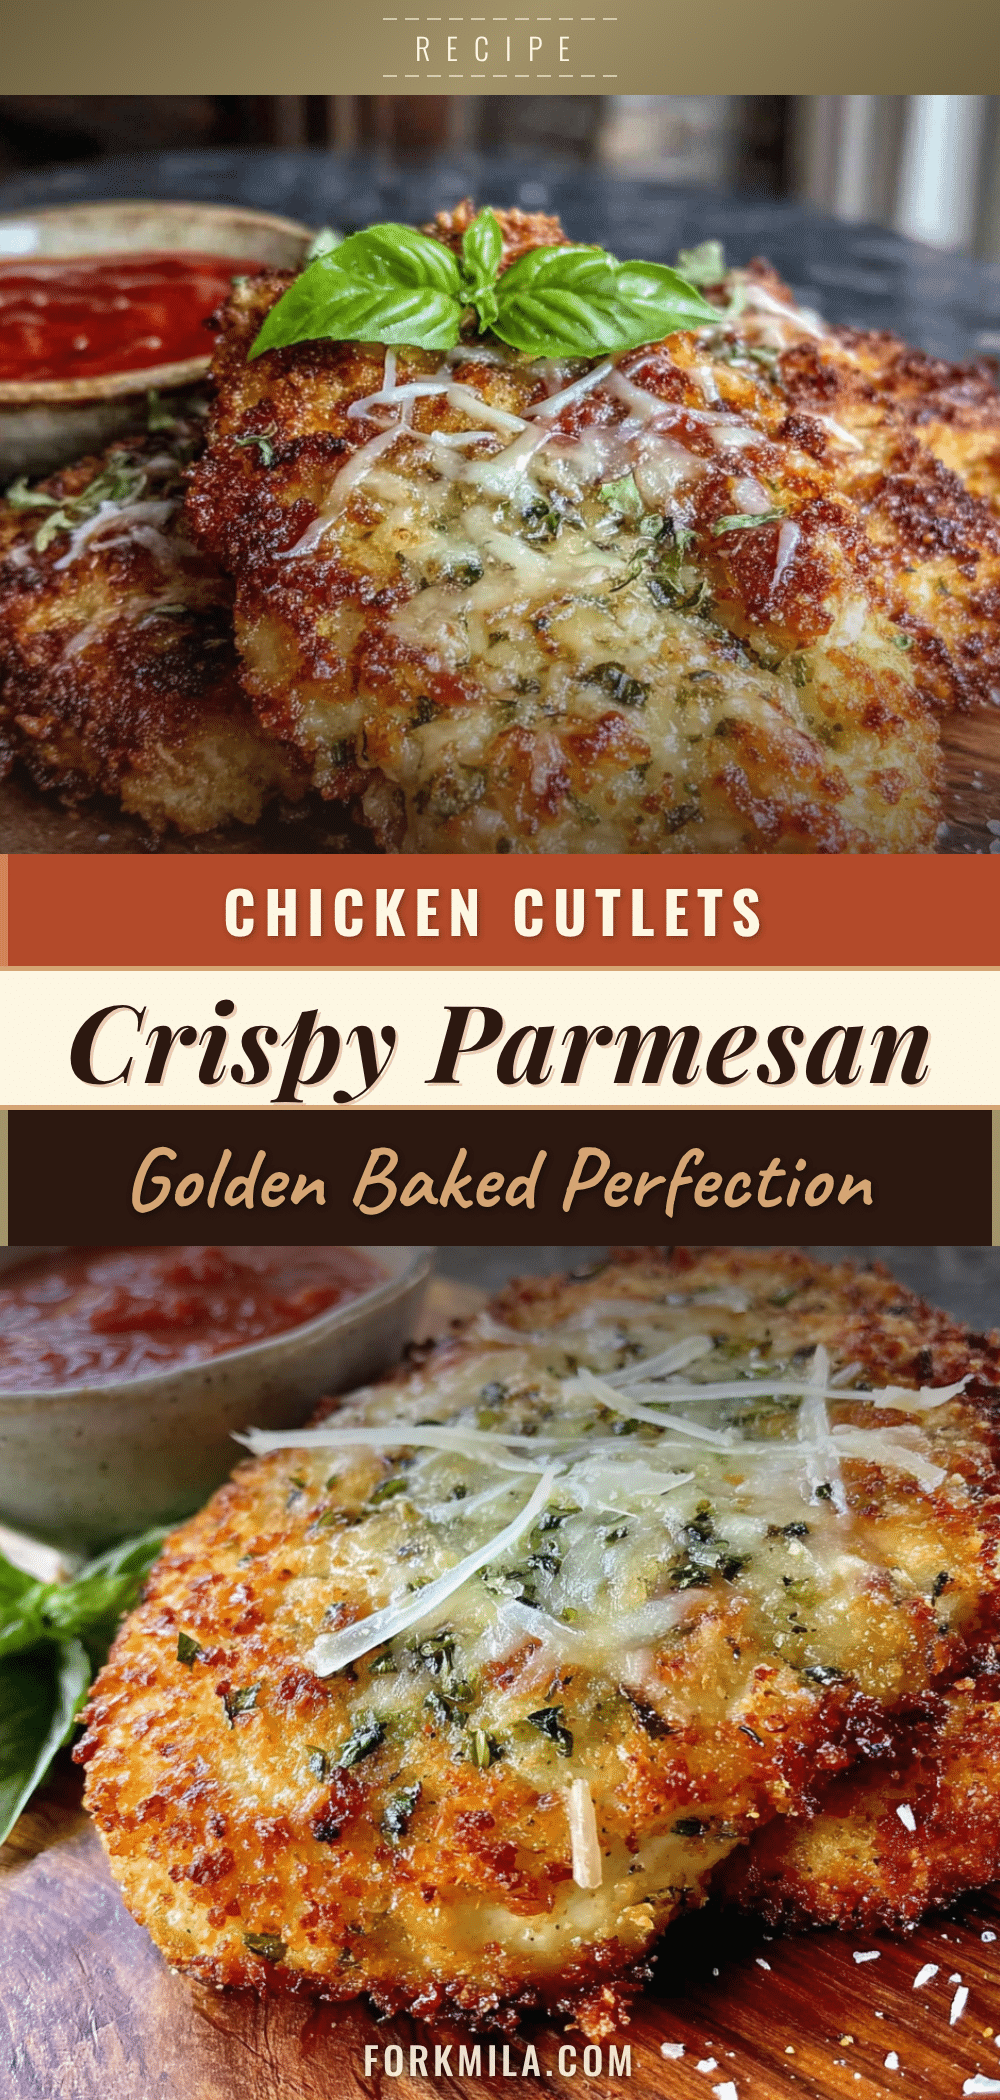
Perfect Crispy Baked Parmesan Chicken Cutlets
These crispy baked parmesan chicken cutlets are quick, easy, and incredibly delicious. With a golden, crunchy exterior and tender, juicy chicken inside, they’re perfect for busy weeknights and crowd-pleasing dinners.
- Prep Time: 15 minutes
- Cook Time: 15 minutes
- Total Time: 30 minutes
- Yield: 4 servings 1x
- Category: Main Course
- Cuisine: Italian-American
Ingredients
- 1.5 pounds (about 680g) boneless, skinless chicken breasts
- 1 cup (about 90g) panko breadcrumbs
- 1/2 cup (about 45g) regular breadcrumbs
- 1/2 cup (about 50g) freshly grated Parmesan cheese
- 2 large eggs, beaten
- 1/2 cup (about 60g) all-purpose flour
- 1 teaspoon garlic powder
- 1/2 teaspoon onion powder
- 1/2 teaspoon dried oregano
- 1 teaspoon kosher salt (or 3/4 teaspoon table salt)
- 1/2 teaspoon freshly ground black pepper
- Olive oil spray (for spraying tops)
- Fresh parsley for garnish (optional)
Instructions
- Preheat your oven to 425°F (218°C). Place a wire rack on your baking sheet if using, or line the sheet with parchment paper.
- Place each chicken breast between two sheets of plastic wrap. Using a meat mallet or rolling pin, pound the chicken to an even thickness of about 1/2 inch (1.25 cm).
- Set up your breading station with three shallow bowls. In the first bowl, whisk together the flour, 1/2 teaspoon salt, and 1/4 teaspoon black pepper. In the second bowl, beat the eggs with a tablespoon of water. In the third bowl, mix together the panko breadcrumbs, regular breadcrumbs, grated Parmesan cheese, garlic powder, onion powder, dried oregano, remaining 1/2 teaspoon salt, and remaining 1/4 teaspoon black pepper.
- Working with one piece of chicken at a time, dredge it in the flour mixture, shaking off excess. Dip into the egg wash, letting excess drip off. Press into the breadcrumb mixture, coating both sides. Place on the prepared baking sheet or wire rack.
- Lightly spray the tops of the breaded cutlets with olive oil spray.
- Bake for 12-15 minutes. If using a wire rack, no need to flip. If baking directly on parchment, flip the cutlets carefully with tongs after 12 minutes and bake for another 3-5 minutes until both sides are crispy.
- Check for doneness: internal temperature should reach 165°F (74°C) when measured with an instant-read thermometer.
- Let the cutlets rest on the baking sheet for 2-3 minutes before serving.
Notes
For extra crispy cutlets, let the breaded cutlets sit on the baking sheet for 5-10 minutes before baking. Do not overcrowd the baking sheet; use two sheets or work in batches if needed. The flour step is crucial to prevent breading from falling off. Resting the cutlets after baking helps keep them moist.
Nutrition
- Serving Size: 1 cutlet (about 6 ou
- Calories: 400
- Sugar: 1.5
- Sodium: 700
- Fat: 16
- Saturated Fat: 4
- Carbohydrates: 20
- Fiber: 1.5
- Protein: 40
Keywords: crispy baked chicken, parmesan chicken cutlets, easy chicken recipe, weeknight dinner, breaded chicken, baked chicken cutlets


