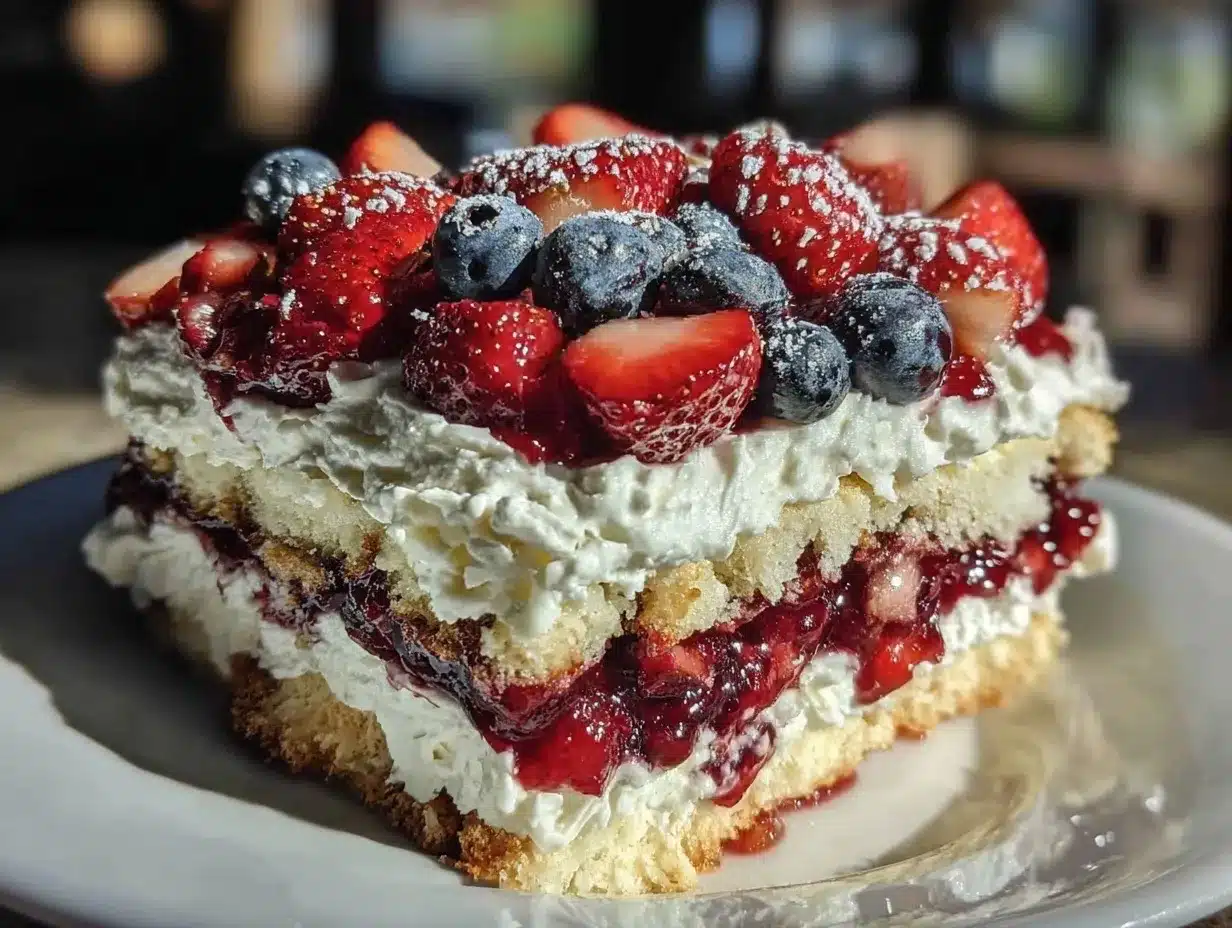
The summer I moved into my new apartment, I wasn’t expecting to meet anyone who could teach me a thing or two about holiday desserts. But there I was, in the laundry room of the building, wrestling with a stubborn dryer when the quietest neighbor—Mr. Jenkins, the retired plumber—started chatting about his favorite 4th of July treat: a no-bake red white and blue icebox cake. Honestly, I never pictured someone with grease-stained hands and a tool belt humming patriotic tunes would be the keeper of such a fun, festive recipe. He described it so vividly—the fluffy layers of whipped cream, the juicy bursts of strawberries and blueberries, and the cool, melt-in-your-mouth cookies—that I had to write it down on the back of a cracked envelope I had in my pocket.
That day, as I tried not to spill my iced tea while listening, I realized this cake wasn’t just about the colors or the convenience of no baking. It was about simple joys—the kind you share between cycles of laundry, or while waiting for fireworks to light up the sky. Maybe you’ve been there, craving a dessert that feels patriotic but doesn’t require hours in a hot kitchen. This red white and blue icebox cake became my go-to ever since. It’s easy, stunning, and honestly, the perfect way to celebrate Independence Day without fuss. Let me tell you, it’s the kind of recipe that sticks with you, especially when it comes from the least expected places.
Why You’ll Love This Recipe
This Perfect No-Bake Red White and Blue Icebox Cake is more than just a pretty face on your 4th of July table. After testing it multiple times (and yes, sampling way more than I should admit), here’s why I keep coming back to it:
- Quick & Easy: Ready in under 30 minutes, with no oven needed—ideal for those scorching summer days when you want dessert without heating up the kitchen.
- Simple Ingredients: You probably have most of these in your pantry or fridge already—nothing fancy or hard to find.
- Perfect for Summer Celebrations: Whether it’s a backyard barbecue, picnic, or 4th of July party, this cake adds a festive touch without the stress.
- Crowd-Pleaser: Kids love the sweet berries and creamy layers, while adults appreciate the light, refreshing finish.
- Unbelievably Delicious: The way the cookies soak up the cream and berry juices creates a texture that’s soft, yet still with a slight crunch—pure magic!
This recipe isn’t just another berry trifle. It uses a clever layering technique with graham crackers that absorb just enough moisture, making each bite luscious but not soggy. Plus, the homemade whipped cream is lightly sweetened and gently folded with cream cheese for a hint of tang—trust me, that twist takes it to a whole new level. It’s comfort food reimagined for summer, and it’s saved me more than once when I needed something impressive but quick. Honestly, after the first bite, you’ll understand why I keep making this no-bake red white and blue icebox cake year after year.
What Ingredients You Will Need
This no-bake red white and blue icebox cake relies on simple, wholesome ingredients that come together to create bold flavor and a satisfying texture without the fuss. Most are pantry staples or fresh summer finds, and substitutions are easy if needed.
- Graham Crackers: About 2 sleeves (roughly 9 oz / 255 g). I recommend using Honey Maid for the best texture—they soak up the cream perfectly without falling apart.
- Heavy Whipping Cream: 2 cups (480 ml), cold. This is key to a fluffy whipped cream layer.
- Cream Cheese: 8 oz (225 g), softened. Adds a slight tang and richness to the whipped cream; you can substitute with mascarpone for a creamier texture.
- Powdered Sugar: ¾ cup (90 g), sifted. Sweetens the cream without any grittiness.
- Vanilla Extract: 1 ½ teaspoons. Use pure vanilla for the best flavor.
- Fresh Strawberries: 1 ½ cups, hulled and sliced. In summer, fresh is best; frozen works in a pinch but drains well first.
- Fresh Blueberries: 1 ½ cups, washed and dried. Look for firm, plump berries for a nice pop.
- Optional: A splash of lemon juice (about 1 tablespoon) to brighten the berry layers.
For a dairy-free version, swap heavy cream with full-fat coconut cream and use dairy-free cream cheese. If gluten is a concern, almond flour crackers or gluten-free graham crackers make a great alternative. This recipe welcomes creativity—feel free to swap berries for raspberries or blackberries depending on what’s fresh or on sale.
Equipment Needed
Here’s what you’ll want on hand to make this Perfect No-Bake Red White and Blue Icebox Cake:
- Mixing Bowls: One large for whipping cream and one medium for cream cheese mixing. Glass or metal bowls work best to keep the cream cold.
- Electric Mixer: A hand mixer or stand mixer with a whisk attachment to whip the cream and cream cheese smoothly. You can whip by hand, but it takes longer and is a workout!
- Spatula: For folding ingredients gently without deflating the whipped cream.
- 9×9-inch (23×23 cm) Square Baking Dish or Glass Pan: Ideal for layering the cake. I’ve also used a trifle bowl for a more rustic look.
- Measuring Cups & Spoons: To keep everything precise and consistent.
If you don’t have a mixer, chilling your bowl and whisk in the freezer for 10 minutes helps the cream whip better by hand. For budget-friendly options, any sturdy glass or ceramic dish works fine instead of a fancy trifle bowl. Just make sure it’s deep enough to hold multiple layers comfortably.
Preparation Method
- Prepare the Cream Cheese Mixture (10 minutes): In a medium bowl, beat the softened cream cheese with the powdered sugar and vanilla extract until smooth and creamy. This ensures no lumps and a perfectly sweetened base.
- Whip the Heavy Cream (5-7 minutes): In a large chilled mixing bowl, whip the cold heavy cream until soft peaks form. Be careful not to over-whip; the cream should hold shape but still be soft and fluffy.
- Combine Cream Cheese and Whipped Cream (2 minutes): Gently fold the whipped cream into the cream cheese mixture using a spatula. Fold slowly to maintain volume and avoid deflating the mixture. The result should be light, smooth, and creamy.
- Prepare the Berries (5 minutes): Rinse and dry the strawberries and blueberries. Slice the strawberries thinly. If you like, toss the berries with a tablespoon of lemon juice to brighten their flavor and reduce sweetness.
- Assemble the Cake (10 minutes): In your 9×9-inch pan, spread a thin layer of the cream mixture on the bottom. Add a single layer of graham crackers, breaking them to fit snugly. Spread a generous layer of cream over the crackers, then scatter a mix of strawberries and blueberries on top. Repeat layering: graham crackers, cream, and berries until you use all ingredients, finishing with a cream layer on top.
- Chill (At least 4 hours or overnight): Cover the dish tightly with plastic wrap and refrigerate. This allows the graham crackers to soften and soak up the cream and berry juices, creating that melt-in-your-mouth texture.
- Serve: Just before serving, you can add extra fresh berries or a sprinkle of crushed graham crackers for a bit of crunch. Cut into squares and enjoy cold.
Tip: If the crackers aren’t soft enough after chilling, let the cake sit an additional hour. Also, keep the cake refrigerated until serving to maintain its perfect texture. I once forgot to chill it overnight and learned the hard way that patience here really pays off!
Cooking Tips & Techniques
Making this no-bake red white and blue icebox cake is straightforward, but a few insider tips can make your life easier and your dessert even better:
- Keep Ingredients Cold: Cold cream whips better, so chill your bowl and whisk beforehand if possible. This helps achieve fluffy peaks without overworking the cream.
- Don’t Over-Whip Cream: Stop whipping once soft peaks form; otherwise, the cream can turn grainy or start turning into butter.
- Fold, Don’t Stir: When combining whipped cream and cream cheese, folding gently preserves the airy texture you want.
- Layer Thoughtfully: Press graham crackers gently but don’t smash. They need room to absorb moisture and soften gradually.
- Use Fresh Berries: Ripe berries add juiciness and flavor—avoid overripe ones that can make the cake soggy.
- Plan Ahead: This dessert tastes best after chilling overnight. It’s a great step to do the day before a party to save yourself stress.
Once, I rushed the chilling step and ended up with a crumbly mess that lacked the signature creaminess. Since then, I always give it at least 4 hours to let the flavors marry. Also, if you find your cream mixture too thick, a splash of milk can loosen it slightly without losing stability.
Variations & Adaptations
This icebox cake is a versatile template you can customize in many ways depending on dietary needs or flavor preferences:
- Seasonal Berry Swap: Use raspberries, blackberries, or even diced peaches for a summer twist. In winter, pomegranate seeds add a festive touch.
- Chocolate Lover’s Version: Add a layer of chocolate ganache or sprinkle mini chocolate chips between layers for extra indulgence.
- Dairy-Free Adaptation: Use coconut cream whipped with a bit of powdered sugar and a dairy-free cream cheese alternative. Works wonderfully for vegan guests.
- Gluten-Free Option: Swap graham crackers for gluten-free cookies or almond flour crackers for similar texture.
- Personal Flavor Boost: I once added a teaspoon of almond extract to the cream mixture for a subtle nutty note that paired beautifully with the berries.
Feel free to experiment with the layering sequence or add a drizzle of honey or maple syrup for extra sweetness. This recipe’s forgiving nature means you can tailor it to fit your taste or occasion easily.
Serving & Storage Suggestions
Serve this Perfect No-Bake Red White and Blue Icebox Cake cold, straight from the fridge. The chilled cream contrasts beautifully with the fresh, juicy berries. For presentation, garnish with a few whole berries or a light dusting of powdered sugar to make it extra festive.
This cake pairs wonderfully with a cold glass of lemonade or iced tea, making it a star dessert for warm-weather gatherings. It’s also a great light finish after a hearty barbeque or picnic.
Store leftovers tightly covered in the refrigerator for up to 3 days. The flavors actually develop more as it sits, but the crackers will soften more with time. If you want to make it ahead of time, assembling it a day early is perfect. Avoid freezing as the texture of the cream and berries changes unfavorably.
Reheat is not recommended, but letting it sit at room temperature for 10 minutes before serving softens it slightly for the best mouthfeel.
Nutritional Information & Benefits
Per serving (based on 8 servings), this red white and blue icebox cake offers approximately:
| Calories | 280 |
|---|---|
| Fat | 18 g |
| Carbohydrates | 24 g |
| Protein | 3 g |
| Fiber | 2 g |
The fresh berries provide antioxidants and vitamin C, while the cream cheese adds a bit of protein and calcium. Using real whipped cream keeps this dessert light compared to heavy frosting alternatives. For those watching carbs, consider reducing the graham crackers or swapping them for a low-carb cookie.
As someone mindful of balance, I appreciate how this cake satisfies a sweet tooth without being overly processed or dense. It’s a treat that feels celebratory yet not indulgent to the point of regret.
Conclusion
This Perfect No-Bake Red White and Blue Icebox Cake is honestly one of those recipes that feels like a summer hug—cool, sweet, a bit nostalgic, and totally fuss-free. Whether you’re hosting a big 4th of July bash or just craving a little festive indulgence, this cake fits the bill perfectly. Customize the layers, swap out berries, or add your own twist to make it truly yours.
I keep coming back to this recipe because it’s fast, reliable, and always impresses without making me sweat in the kitchen. If you give it a try, I’d love to hear how you made it your own or what memories it brought back. Drop a comment below or share your photos—I’m serious about swapping stories and tips!
Here’s to sweet moments, simple pleasures, and celebrating with red, white, and blue.
FAQs
Can I make this icebox cake ahead of time?
Yes! In fact, making it the day before helps the layers meld together perfectly. Just cover tightly and keep refrigerated.
What can I substitute if I don’t have graham crackers?
Digestive biscuits, vanilla wafers, or gluten-free cookies work well as alternatives. Just pick something that will absorb moisture without turning soggy too fast.
How long can I store leftovers?
Store the cake covered in the refrigerator for up to 3 days. The texture will soften over time but it remains delicious.
Can I use frozen berries?
Yes, but thaw and drain them first to avoid excess moisture that can make the cake soggy.
Is this recipe suitable for vegans?
With substitutions like coconut cream and dairy-free cream cheese, you can make this recipe vegan-friendly. Just ensure your crackers are vegan too.
For more light and festive no-bake desserts, you might enjoy my no-bake strawberry cheesecake or the refreshing lemon blueberry parfait perfect for summer entertaining.
PrintPerfect No-Bake Red White and Blue Icebox Cake

A quick and easy no-bake icebox cake featuring layers of whipped cream, cream cheese, graham crackers, and fresh strawberries and blueberries, perfect for 4th of July celebrations.
- Prep Time: 20 minutes
- Cook Time: 0 minutes
- Total Time: 4 hours 20 minutes
- Yield: 8 servings 1x
- Category: Dessert
- Cuisine: American
Ingredients
- 2 sleeves (about 9 oz / 255 g) graham crackers (Honey Maid recommended)
- 2 cups (480 ml) cold heavy whipping cream
- 8 oz (225 g) softened cream cheese (can substitute mascarpone)
- 3/4 cup (90 g) powdered sugar, sifted
- 1 1/2 teaspoons pure vanilla extract
- 1 1/2 cups fresh strawberries, hulled and sliced
- 1 1/2 cups fresh blueberries, washed and dried
- Optional: 1 tablespoon lemon juice to brighten berry layers
Instructions
- Prepare the cream cheese mixture: Beat softened cream cheese with powdered sugar and vanilla extract until smooth and creamy (about 10 minutes).
- Whip the heavy cream in a large chilled bowl until soft peaks form (5-7 minutes).
- Gently fold the whipped cream into the cream cheese mixture using a spatula, maintaining volume (2 minutes).
- Rinse, dry, and slice the strawberries; toss berries with lemon juice if using (5 minutes).
- In a 9×9-inch square baking dish, spread a thin layer of cream mixture on the bottom.
- Add a single layer of graham crackers, breaking to fit snugly.
- Spread a generous layer of cream over the crackers, then scatter a mix of strawberries and blueberries on top.
- Repeat layering graham crackers, cream, and berries until all ingredients are used, finishing with a cream layer on top (10 minutes).
- Cover tightly with plastic wrap and refrigerate for at least 4 hours or overnight to allow crackers to soften and flavors to meld.
- Before serving, optionally garnish with extra fresh berries or crushed graham crackers. Cut into squares and serve cold.
Notes
Keep ingredients cold for best whipping results. Do not over-whip cream. Fold whipped cream gently into cream cheese mixture to maintain fluffiness. Chill at least 4 hours or overnight for best texture. Use fresh berries and avoid overripe ones to prevent sogginess. For dairy-free, use coconut cream and dairy-free cream cheese. For gluten-free, substitute graham crackers with gluten-free cookies or almond flour crackers. Let cake sit at room temperature for 10 minutes before serving for best mouthfeel.
Nutrition
- Serving Size: 1 slice (1/8 of cake
- Calories: 280
- Fat: 18
- Carbohydrates: 24
- Fiber: 2
- Protein: 3
Keywords: no-bake, icebox cake, 4th of July, red white and blue, patriotic dessert, summer dessert, easy dessert, whipped cream, berries