There used to be this tiny bakery tucked down a cobblestone street in Salem, Massachusetts, that made the softest Halloween sugar cookies crowned with a glossy royal icing so shiny it looked like glass. When they closed unexpectedly one crisp October, it felt like a little piece of the spooky season vanished with them. Honestly, I was heartbroken—those cookies weren’t just treats; they were memories wrapped in sweetness, a ritual that kicked off every Halloween for me and my friends. After about a dozen messy, crumbly attempts (and one batch that got eaten by a curious neighborhood cat), I finally got it right.
I mean, let me tell you, replicating that perfect balance of soft, tender cookie and that gleaming, smooth royal icing took patience and a few late nights. Maybe you’ve been there, chasing a taste that lingers in your mind long after the plate is gone. These Soft Halloween Sugar Cookies with Glossy Royal Icing aren’t just about the spooky shapes or the festive colors—they’re about capturing a moment, a feeling of autumn magic that you can bite into. And now, I’m sharing the exact recipe so you can bring that magic to your kitchen this Halloween.
Why You’ll Love This Recipe
Having tested this recipe over several seasons (and multiple sugar highs), I can say it truly stands out for a few reasons:
- Quick & Easy: You’ll have these cookies ready to bake in under 30 minutes, perfect for last-minute Halloween parties or a fun weekend project with the kids.
- Simple Ingredients: No obscure spooky spices here, just pantry staples you likely already have — sugar, butter, flour, and a few more basics.
- Perfect for Halloween: These sugar cookies are a festive canvas for all your favorite Halloween decorations—ghosts, pumpkins, bats—you name it.
- Crowd-Pleaser: Soft, buttery, and not too sweet, these cookies get rave reviews from picky kids and sophisticated adults alike.
- Unbelievably Delicious: The royal icing dries with a shiny, glass-like finish, making each cookie look professionally decorated without the fuss.
What makes this recipe different? The secret is in the dough’s texture—soft but sturdy enough to hold its shape—and the royal icing that’s perfectly glossy without cracking. I’ve tested different mixing techniques and icing consistencies to nail that texture, which means you’re not just baking cookies; you’re creating little edible works of art that hold up for days. Honestly, the first bite often makes me close my eyes because it’s just that good. Whether you’re aiming to wow at a Halloween bake sale or just want a cozy afternoon treat, this recipe is for you.
What Ingredients You Will Need
This recipe uses simple, wholesome ingredients to deliver bold flavor and that perfect soft texture without fuss. Most are pantry staples, with a few easy-to-find extras for the royal icing.
- For the Sugar Cookies:
- Unsalted butter, softened (1 cup / 226g) – I prefer Kerrygold for creaminess
- Granulated sugar (3/4 cup / 150g)
- Large egg, room temperature (1)
- Pure vanilla extract (1 tsp)
- Almond extract (optional, 1/2 tsp) – adds a subtle depth
- All-purpose flour (2 1/2 cups / 315g)
- Baking powder (1 tsp)
- Salt (1/2 tsp)
- For the Glossy Royal Icing:
- Powdered sugar, sifted (3 cups / 360g)
- Pasteurized egg whites or meringue powder (3 tbsp) – meringue powder is more convenient and safer
- Fresh lemon juice or water (4-6 tbsp) – adjust to get the right consistency
- Food coloring gels (orange, black, purple, green) – gels keep the icing glossy
If you want a gluten-free option, swap the all-purpose flour with a 1-to-1 gluten-free baking flour blend. For dairy-free, use vegan butter sticks like Earth Balance. I also recommend using AmeriColor gels for vibrant, consistent colors that won’t dull your icing’s shine. Seasonal tip: try adding a pinch of pumpkin spice to the cookie dough for an extra autumn twist.
Equipment Needed
- Large mixing bowl and hand or stand mixer – I find the paddle attachment best for cookie dough
- Measuring cups and spoons – accuracy here makes a big difference for royal icing
- Rolling pin – a smooth, medium-weight one works best for even thickness
- Cookie cutters in Halloween shapes (pumpkins, ghosts, bats)
- Baking sheets lined with parchment paper or silicone mats – silicone mats help prevent burning
- Cooling racks – essential to cool cookies fully before icing
- Squeeze bottles or piping bags with small round tips for precise icing application
- Small bowls for mixing different icing colors
If you don’t have cookie cutters, a sharp knife or a clean pizza cutter can be used to shape cookies freehand. For royal icing, meringue powder tends to keep longer and is easier to work with than raw egg whites. I’ve tried both, and meringue powder wins for convenience without sacrificing texture. Also, keeping your tools clean and dry while working with royal icing helps keep the finish shiny and smooth.
Preparation Method

- Make the Dough (15 minutes): In a large bowl, cream together the softened butter (1 cup / 226g) and granulated sugar (3/4 cup / 150g) until light and fluffy, about 3-4 minutes with a hand mixer on medium speed. This step is key for soft cookies. Beat in the egg (1 large) and vanilla extract (1 tsp) along with almond extract if using (1/2 tsp).
- Mix Dry Ingredients (2 minutes): In a separate bowl, whisk together the all-purpose flour (2 1/2 cups / 315g), baking powder (1 tsp), and salt (1/2 tsp). Gradually add the dry ingredients to the wet ingredients, mixing on low speed until just combined. Avoid overmixing, or cookies may turn tough.
- Chill the Dough (30 minutes): Wrap the dough in plastic wrap and refrigerate for at least 30 minutes. This firms up the dough, making it easier to roll and helping the cookies hold their shape during baking.
- Preheat Oven & Prep Pans (5 minutes): Preheat your oven to 350°F (175°C). Line baking sheets with parchment paper or silicone mats.
- Roll & Cut Cookies (15 minutes): On a lightly floured surface, roll out the dough to about 1/4 inch (6 mm) thickness. Use your Halloween cookie cutters to cut shapes, then transfer them gently to the baking sheets. For best results, chill cut cookies on the baking sheet for 10 minutes before baking to prevent spreading.
- Bake (10-12 minutes): Bake cookies for 10-12 minutes until the edges just begin to turn golden. The center should remain pale and soft. Remove from oven and cool on the baking sheet for 5 minutes before transferring to cooling racks to cool completely.
- Prepare Royal Icing (10 minutes): While cookies cool, mix powdered sugar (3 cups / 360g) with meringue powder (3 tbsp) in a bowl. Slowly add lemon juice or water (4-6 tbsp), mixing until the icing forms stiff peaks but is still pliable. Divide into small bowls and tint with your desired food coloring gels.
- Decorate (30+ minutes): Using squeeze bottles or piping bags fitted with small round tips, outline each cookie’s shape with icing and flood the center with a thinner consistency. Let the icing set uncovered at room temperature for at least 1 hour until glossy and firm.
Pro tip: If your royal icing is too thick to flood, add a few drops of water; too thin, add more powdered sugar. Also, don’t rush the drying process—patience here pays off in that beautiful glossy finish. I learned the hard way when I tried piling on layers too fast, and everything cracked!
Cooking Tips & Techniques
- Soft Cookie Texture: Creaming butter and sugar well traps air, giving that tender crumb. Don’t skip chilling the dough—it’s crucial to prevent spreading during baking.
- Rolling Dough Evenly: Use rolling pin guides or thick wooden spoons on either side of your dough to keep thickness consistent, so all cookies bake evenly.
- Preventing Icing Cracks: Make sure the royal icing isn’t too dry before piping, and allow each layer to dry fully before adding details.
- Color Mixing: Use gel food colors sparingly; a little goes a long way and keeps icing shiny rather than matte.
- Storage: Store cookies in an airtight container at room temperature—avoid the fridge, or icing may sweat.
- Multitasking: While the cookies bake and cool, prepare your icing colors to save time—just cover the bowls with damp towels to keep the icing from drying out.
One time, I didn’t chill the dough long enough and ended up with cookies spreading into unrecognizable blobs. Lesson learned: patience is a baker’s best friend!
Variations & Adaptations
- Flavor Twists: Add 1/2 tsp pumpkin pie spice or cinnamon to the dough for a warm fall aroma.
- Gluten-Free Option: Replace all-purpose flour with a gluten-free baking blend. Expect a slightly different texture but still delicious.
- Vegan Adaptation: Use vegan butter and a flax egg (1 tbsp ground flaxseed + 3 tbsp water, chilled) instead of butter and egg.
- Alternative Decorations: Swap royal icing for colored sugar sprinkles or edible markers for a less fussy decorating method.
- Shape Variations: Try spooky shapes like witches’ hats or black cats for variety. I once made a haunted house cookie that was a hit with the neighborhood kids!
Serving & Storage Suggestions
Serve these Soft Halloween Sugar Cookies at room temperature to enjoy their full softness and that glossy icing sheen. They pair delightfully with a warm cup of spiced apple cider or a creamy hot chocolate for the perfect autumn treat. For a festive party, arrange them on a platter with some fresh fruit and nuts for contrast.
Store cookies in an airtight container at room temperature to keep them soft for up to 5 days. Avoid stacking them before the icing fully dries to prevent smudging. For longer storage, freeze undecorated cookies in a sealed bag for up to 3 months, then decorate after thawing.
Reheating isn’t necessary and can soften the icing too much, but if you prefer warm cookies, a 5-second zap in the microwave works wonders—but don’t overdo it!
Over time, the flavors meld and the cookies get even more tender, so they taste fantastic the day after baking (if they last that long).
Nutritional Information & Benefits
Each cookie contains approximately 150-170 calories, with 7g fat, 22g carbohydrates, and 2g protein, depending on size and icing amount. The recipe uses real butter and egg, providing some protein and healthy fats, though it’s definitely a treat to enjoy in moderation.
The use of natural extracts and fresh lemon juice in the royal icing adds flavor without artificial additives. For those watching gluten intake, swapping to gluten-free flour makes these cookies accessible without compromising texture too much.
While sugary, these cookies are perfect for festive occasions when balanced with a wholesome diet. I always try to pair them with fresh fruit or nuts to round out the snack.
Conclusion
These Soft Halloween Sugar Cookies with Glossy Royal Icing are more than just a holiday treat—they’re a sweet tradition I’ve been lucky to recreate after losing that magical Salem bakery. The tender crumb and shiny icing make them stand out from any cookie you’ll find in a box. I encourage you to try the recipe as is, then customize shapes, flavors, or colors to match your Halloween vibe.
I love this recipe because it’s approachable yet impressive, and it brings a little bit of that lost bakery magic right into my kitchen every October. If you bake them, I’d love to hear how your decorating went or any spooky twists you added—leave a comment below and share your cookie stories!
Happy baking, and may your Halloween be full of sweet memories and even sweeter treats!
FAQs
How do I keep my sugar cookies soft?
Make sure to cream the butter and sugar well, chill the dough before baking, and don’t overbake. Store cookies in an airtight container at room temperature for best softness.
Can I make the dough ahead of time?
Yes! You can refrigerate the dough for up to 48 hours or freeze it for up to 3 months. Just thaw in the fridge before rolling out.
What can I use instead of royal icing?
Buttercream frosting, glaze made from powdered sugar and milk, or edible markers can be used for decorating, but royal icing gives that signature glossy, firm finish.
Why is my royal icing not glossy?
Use gel food coloring instead of liquid, avoid overmixing, and ensure your icing has the right consistency—not too thick or thin. Let it dry uncovered to maintain the shine.
Can I freeze decorated cookies?
It’s best to freeze cookies undecorated, then decorate after thawing. Freezing decorated cookies can cause icing to crack or lose shine.
Pin This Recipe!
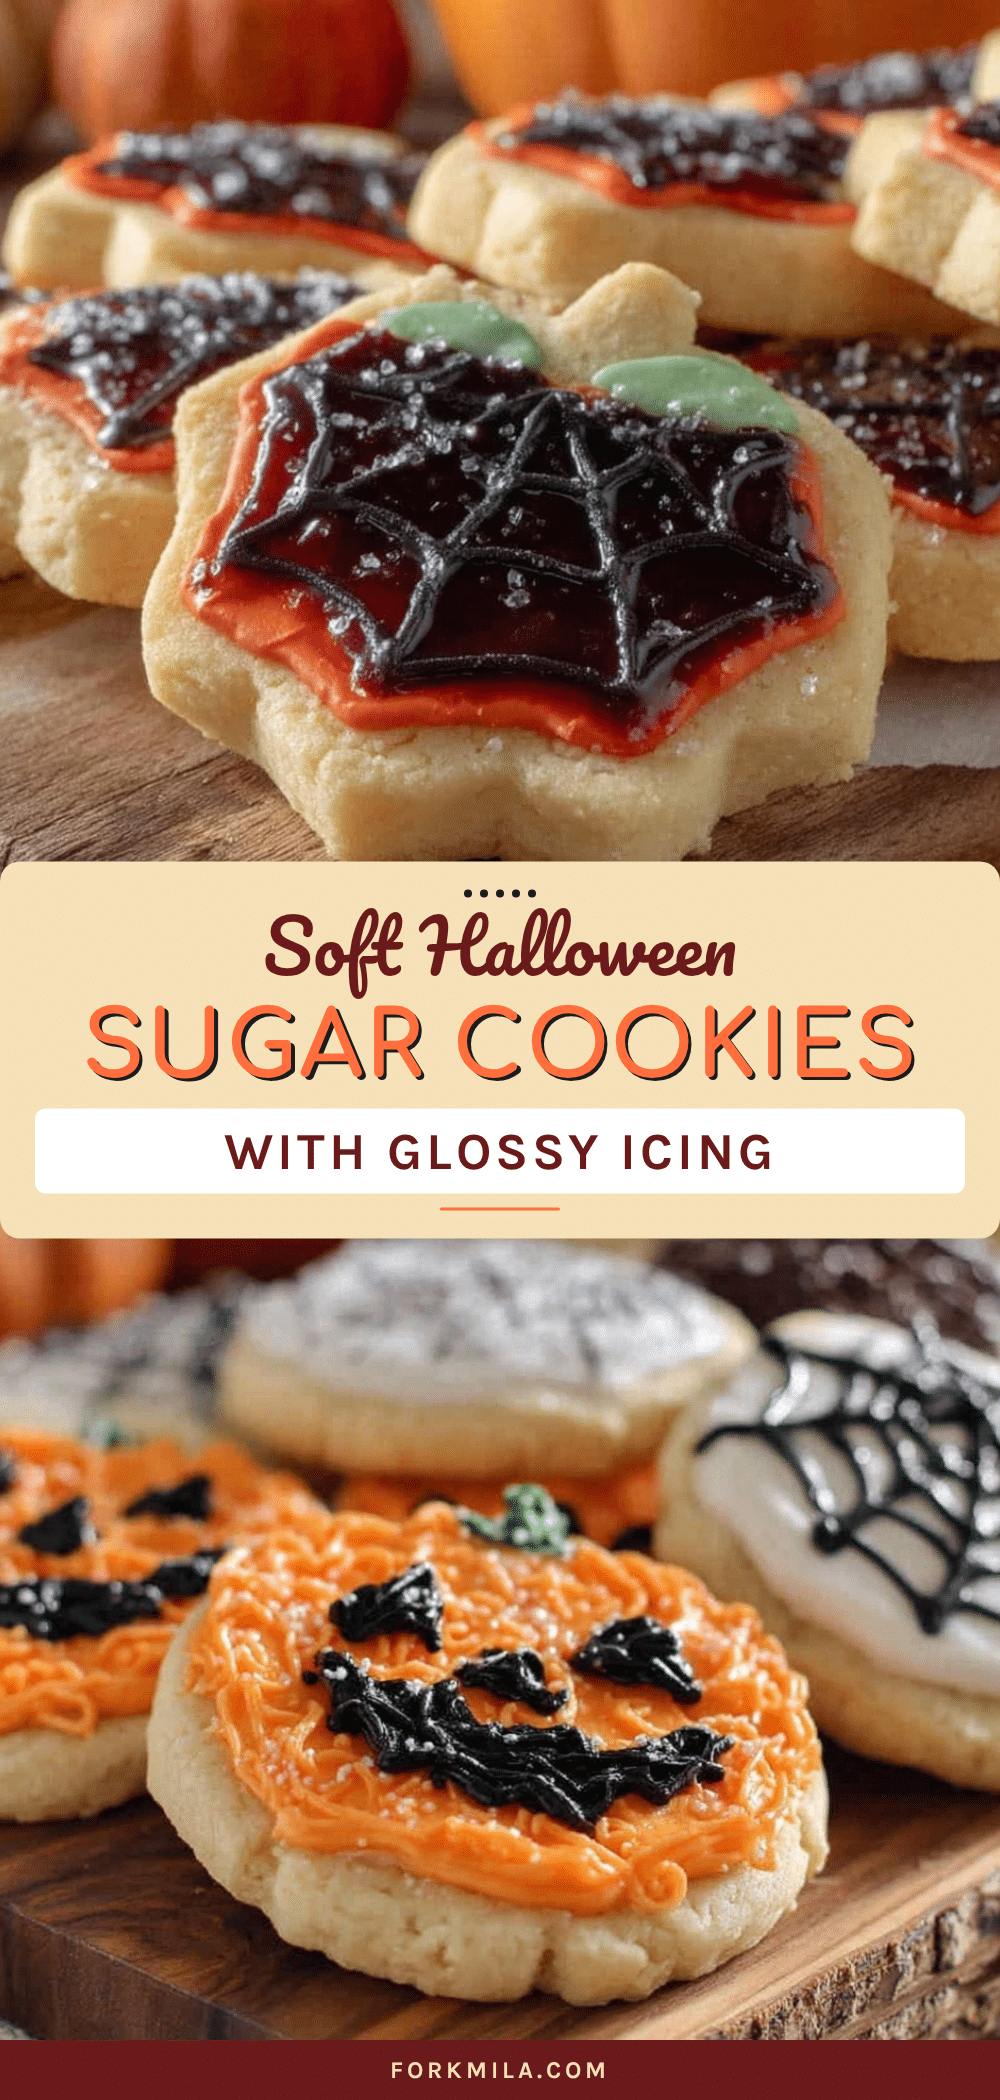
Soft Halloween Sugar Cookies with Glossy Royal Icing

These soft, tender sugar cookies are perfect for Halloween, topped with a glossy royal icing that dries with a shiny, glass-like finish. Easy to make and decorate, they capture the magic of autumn in every bite.
- Prep Time: 32 minutes
- Cook Time: 12 minutes
- Total Time: 1 hour 44 minutes
- Yield: 24 servings 1x
- Category: Dessert
- Cuisine: American
Ingredients
- 1 cup (226g) unsalted butter, softened
- 3/4 cup (150g) granulated sugar
- 1 large egg, room temperature
- 1 tsp pure vanilla extract
- 1/2 tsp almond extract (optional)
- 2 1/2 cups (315g) all-purpose flour
- 1 tsp baking powder
- 1/2 tsp salt
- 3 cups (360g) powdered sugar, sifted
- 3 tbsp pasteurized egg whites or meringue powder
- 4–6 tbsp fresh lemon juice or water
- Food coloring gels (orange, black, purple, green)
Instructions
- Make the Dough (15 minutes): In a large bowl, cream together the softened butter and granulated sugar until light and fluffy, about 3-4 minutes with a hand mixer on medium speed. Beat in the egg, vanilla extract, and almond extract if using.
- Mix Dry Ingredients (2 minutes): In a separate bowl, whisk together the all-purpose flour, baking powder, and salt. Gradually add the dry ingredients to the wet ingredients, mixing on low speed until just combined. Avoid overmixing.
- Chill the Dough (30 minutes): Wrap the dough in plastic wrap and refrigerate for at least 30 minutes to firm up.
- Preheat Oven & Prep Pans (5 minutes): Preheat oven to 350°F (175°C). Line baking sheets with parchment paper or silicone mats.
- Roll & Cut Cookies (15 minutes): Roll out dough on a lightly floured surface to about 1/4 inch (6 mm) thickness. Cut shapes with Halloween cookie cutters and transfer to baking sheets. Chill cut cookies on the baking sheet for 10 minutes before baking.
- Bake (10-12 minutes): Bake cookies until edges just begin to turn golden and centers remain pale and soft. Cool on baking sheet for 5 minutes, then transfer to cooling racks to cool completely.
- Prepare Royal Icing (10 minutes): Mix powdered sugar with meringue powder in a bowl. Slowly add lemon juice or water until icing forms stiff peaks but is still pliable. Divide into small bowls and tint with food coloring gels.
- Decorate (30+ minutes): Outline each cookie with icing using squeeze bottles or piping bags, then flood the center with thinner consistency. Let icing set uncovered at room temperature for at least 1 hour until glossy and firm.
Notes
Use meringue powder for safer and more convenient royal icing. Chill dough and cut cookies before baking to prevent spreading. Add a pinch of pumpkin spice for a seasonal twist. Use gel food coloring to keep icing glossy. Store cookies in an airtight container at room temperature for up to 5 days. Freeze undecorated cookies for up to 3 months.
Nutrition
- Serving Size: 1 cookie
- Calories: 160
- Sugar: 14
- Sodium: 90
- Fat: 7
- Saturated Fat: 4
- Carbohydrates: 22
- Protein: 2
Keywords: Halloween sugar cookies, royal icing, soft cookies, Halloween treats, glossy icing, sugar cookie recipe, festive cookies


