My neighbor, Sarah, watched me hauling a massive bag of bell peppers out of my car trunk and didn’t say anything at first. Then she just shook her head with this knowing smile and said, “You’re going to try to carve those, aren’t you?” I had just moved into the neighborhood three weeks prior, and she had already figured out my particular brand of kitchen chaos. Honestly, I’d spent the whole morning at three different grocery stores searching for the biggest, roundest bell peppers I could find, and I was determined to turn them into something that looked halfway festive.
The idea came to me during a particularly chaotic Tuesday night. I was staring at a half-eaten bowl of buffalo chicken dip, feeling guilty about the leftovers, when I noticed the sad little jack-o’-lantern I’d carved from a bell pepper for my kid’s lunch. That’s when it hit me, you know? What if I combined the two?
The first attempt was a disaster, let me tell you. The pepper collapsed, the dip leaked everywhere, and I ended up eating the whole thing straight from the pan with tortilla chips while standing over the sink. But the second time, the third time, and the fourth time, I started figuring things out. I learned which peppers hold their shape best. I figured out the perfect baking time so the pepper gets tender but doesn’t fall apart. I discovered that a little cream cheese goes a long way in keeping the dip stable inside its pepper shell.
This recipe is the result of all those messy, cheesy experiments. It’s the kind of thing you make when you want to impress people at a Halloween party but also want to eat something genuinely delicious. Maybe you’ve been there, staring at a party platter of sad veggie trays and wondering why Halloween food can’t actually taste good. Well, this is your answer.
Why You’ll Love This Recipe
I’ve tested this recipe more times than I care to admit, and here’s why it keeps ending up on my table every October:
- Show-Stopping Presentation: These little pepper jack-o’-lanterns look incredible on a party platter. They’re cute without being childish, and guests always do a double-take when they realize the “pumpkins” are actually peppers filled with hot, cheesy dip.
- Perfect for Parties: This recipe makes individual servings, so there’s no double-dipping drama. Everyone gets their own little pepper pumpkin to scoop into.
- Simple Ingredients: You probably have most of these in your kitchen already. No fancy gourmet stores required.
- Customizable Heat: The buffalo sauce level is totally up to you. I like mine with a serious kick, but you can dial it back for milder palates.
- Make-Ahead Friendly: You can prep these peppers the day before and just pop them in the oven when guests arrive. Less stress, more party time.
- Naturally Gluten-Free: As long as you check your buffalo sauce label, this recipe works beautifully for gluten-free guests.
What makes this recipe different from other stuffed pepper recipes is the technique. Instead of boiling or pre-cooking the peppers, we roast them directly with the filling. This keeps the pepper walls sturdy enough to hold the dip while getting tender enough to eat with a chip. The cream cheese in the filling acts as a stabilizer, so you don’t end up with a soupy mess inside your pepper pumpkin.
This is the kind of recipe that makes you feel like a kitchen genius without actually having to do anything complicated. It’s comfort food that looks like you spent hours on it, when really, it all comes together in under an hour.
What Ingredients You Will Need
This recipe uses simple, pantry-friendly ingredients to create something that tastes way more impressive than it should. Here’s what you’ll need:
For The Peppers
- 4 large orange bell peppers (look for ones that are as round and squat as possible, they carve better and hold their shape during baking)
- 1 tablespoon olive oil (for brushing the peppers before baking)
For The Buffalo Chicken Dip Filling
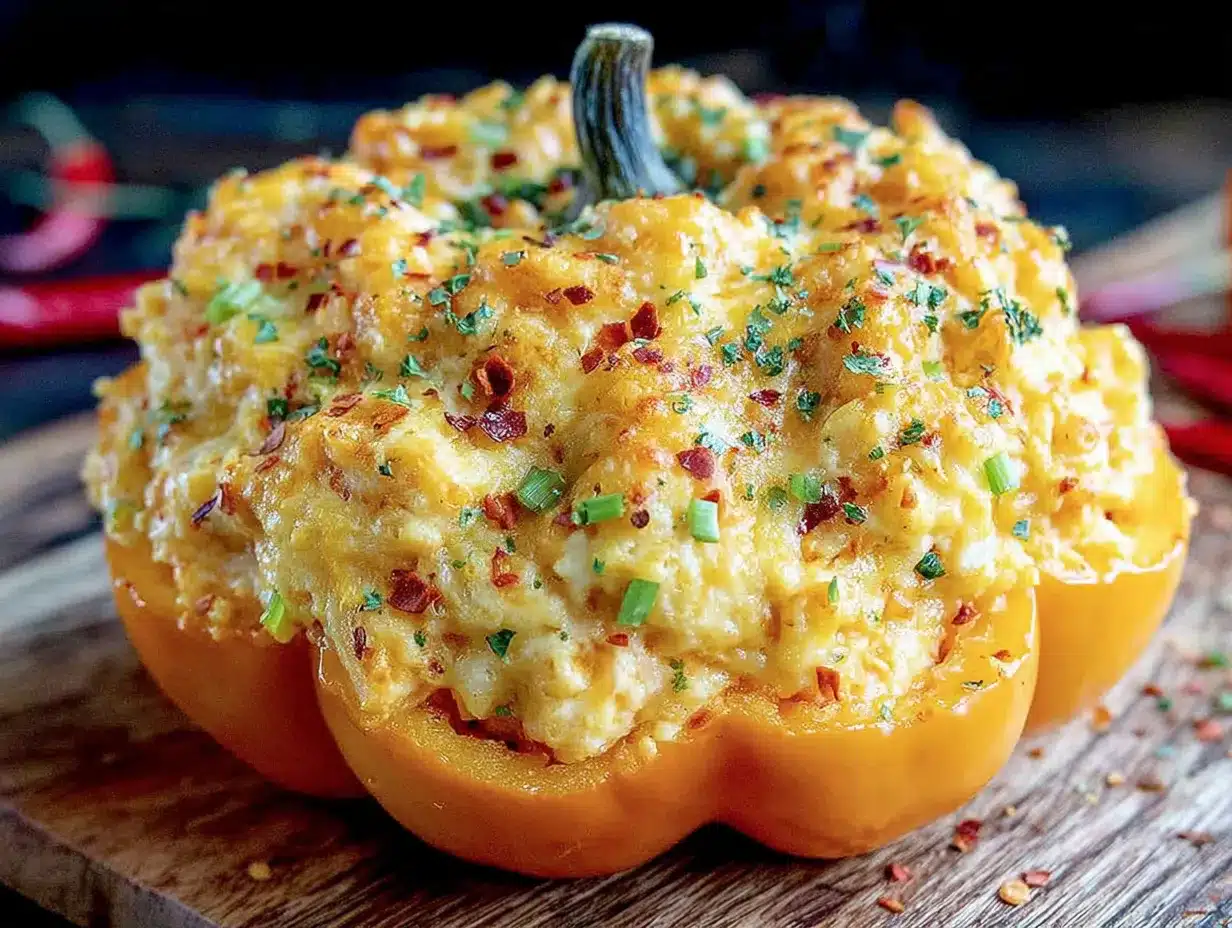
- 2 cups cooked shredded chicken (rotisserie chicken works perfectly here, and it saves you a step)
- 8 ounces cream cheese, softened (full-fat works best for texture, but reduced-fat will also work)
- 1/2 cup buffalo wing sauce (I prefer Frank’s RedHot Original, but use your favorite brand)
- 1/2 cup ranch dressing (or blue cheese dressing if you prefer a stronger flavor)
- 1 cup shredded cheddar cheese, divided (sharp cheddar gives the best flavor)
- 1/2 cup shredded mozzarella cheese (adds that perfect stretchy texture)
- 1/4 cup crumbled blue cheese (optional, but highly recommended for authenticity)
- 2 green onions, thinly sliced (for color and freshness)
- 1/4 teaspoon garlic powder
- 1/4 teaspoon onion powder
For Garnish
- Additional green onions, sliced
- Celery sticks (for dipping, because buffalo dip needs celery)
- Tortilla chips or crostini (for serving)
Ingredient Tips and Substitutions:
For the peppers, try to find ones that sit flat on their own. I’ve learned this the hard way after chasing rolling peppers around my baking sheet. If your peppers are wobbly, you can slice a tiny bit off the bottom to create a flat surface, just be careful not to cut through.
The cream cheese really does need to be softened. I know, I know, we’re all impatient, but cold cream cheese creates lumps that never quite smooth out. Leave it on the counter for about 30 minutes, or microwave it in 10-second bursts until it’s soft.
If you’re feeding a crowd with different heat tolerances, you can make a milder version by mixing the buffalo sauce with an equal amount of melted butter. This tones down the heat while keeping that signature buffalo flavor.
Equipment Needed
You don’t need anything fancy for this recipe, which is part of what makes it so great:
- Baking sheet or shallow baking dish (large enough to hold all four peppers without crowding)
- Paring knife (for carving the jack-o’-lantern faces, a small sharp knife works best)
- Small spoon or melon baller (for scooping out the pepper seeds and membranes)
- Mixing bowl (for combining the filling ingredients)
- Sharpie or food-safe marker (optional, but helpful for sketching the face before you cut)
- Aluminum foil (for tenting the peppers if they brown too quickly)
- Pastry brush (for brushing the peppers with oil)
If you don’t have a paring knife, a small serrated knife works fine for carving. I’ve even used a steak knife in a pinch. The key is having something with a pointed tip that gives you control over your cuts.
For the baking dish, I prefer using a 9×13 inch baking dish because the sides help keep the peppers upright. A rimmed baking sheet works too, just be careful when moving the pan so the peppers don’t tip over.
Preparation Method
Let me walk you through this step by step. I’ve made this recipe enough times that I’ve got the process down to a science.
Step 1: Prep The Peppers
Preheat your oven to 375°F (190°C). Wash your bell peppers and pat them completely dry. Using your paring knife, cut a small circle around the stem of each pepper, just like you would with a pumpkin. Remove the top and set it aside. Scoop out all the seeds and white membranes from inside the peppers. Be thorough here, those membranes can be bitter and they also prevent the pepper from cooking evenly.
Now comes the fun part. Using your paring knife, carefully carve small jack-o’-lantern faces into one side of each pepper. Keep it simple, triangle eyes and a jagged smile work best. I learned the hard way that overly complicated faces just collapse during baking. If you want, you can sketch the face on with a Sharpie first, just make sure it’s food-safe or washable.
Step 2: Make The Filling
In a large mixing bowl, combine the softened cream cheese, buffalo wing sauce, ranch dressing, garlic powder, and onion powder. Mix until everything is smooth and well combined. It should look creamy and slightly orange from the buffalo sauce.
Add the shredded chicken, 3/4 cup of the cheddar cheese, the mozzarella cheese, the crumbled blue cheese if using, and the sliced green onions. Fold everything together until the chicken is evenly coated in the creamy mixture. Taste it, seriously, just grab a little spoonful. This is the moment to adjust your seasoning. Need more heat? Add another splash of buffalo sauce. Want it creamier? A little more ranch dressing.
Step 3: Stuff The Peppers
Spoon the buffalo chicken mixture into each carved pepper, packing it in gently. Don’t smash it, but make sure there aren’t any air pockets. Fill the peppers all the way to the top, mounding the filling slightly if needed. Place the stem tops back on the peppers at a jaunty angle, like little pumpkin hats.
Brush the outside of each pepper lightly with olive oil. This helps them roast evenly and gives them a nice sheen. Place the stuffed peppers upright in your baking dish. If they wobble, you can nestle them together or use crumpled foil to keep them steady.
Step 4: Bake
Bake the peppers for 25 to 30 minutes. At the 20-minute mark, sprinkle the remaining 1/4 cup of cheddar cheese over the top of each pepper. Return them to the oven for the final 5 to 10 minutes, until the cheese is melted and bubbly and the peppers are tender but still holding their shape.
The peppers should be fork-tender but not mushy. You want them to have a little bit of structure so they don’t collapse when you pick them up. If the peppers start browning too much on top before they’re tender, tent the dish loosely with aluminum foil for the last 10 minutes of baking.
Step 5: Serve
Let the peppers cool for about 5 minutes before serving. This resting time is crucial, the filling sets up a bit and won’t be molten hot. Garnish with additional sliced green onions and serve with celery sticks and tortilla chips for dipping.
Pro tip: Place the peppers on a platter with the jack-o’-lantern faces facing outward so everyone can see them. I promise you, people will take photos before they dig in.
Cooking Tips & Techniques
After making these peppers more times than I care to count, I’ve collected a few tricks that make the process smoother:
Choose the right peppers. This is the most important tip I can give you. Look for peppers that are as round as possible, with four distinct “lobes” at the bottom. These sit flat and carve beautifully. Avoid peppers that are tall and skinny or have weird bumps, they’re impossible to carve and tend to tip over.
Don’t overbake. I made this mistake the first few times. The peppers will continue to soften slightly after they come out of the oven, so pull them when they’re just tender. If you wait until they’re as soft as you want them in the oven, they’ll be mushy by the time you serve them.
Keep the faces simple. I know it’s tempting to get creative with intricate designs, but simple triangle eyes and a zigzag mouth look the best after baking. Complicated cuts tend to close up or distort as the pepper softens. Trust me, I’ve tried carving bat wings and spider webs, and they never look right.
Make extra filling. This is one of those recipes where having extra filling is never a bad thing. You can serve it alongside the peppers as a dip, or save it for nachos later in the week. The filling also freezes beautifully for up to three months.
Use room temperature ingredients. Cold cream cheese and cold chicken will make your filling lumpy and uneven. Let everything sit out for about 20 minutes before you start mixing. Your future self will thank you.
Variations & Adaptations
This recipe is surprisingly flexible, and I’ve tried several variations over the years:
Milder Version: If you’re feeding kids or spice-averse guests, mix the buffalo sauce with an equal amount of melted butter. This cuts the heat significantly while keeping that tangy buffalo flavor. You can also use a mild buffalo sauce or even substitute with barbecue sauce for a completely different vibe.
Vegetarian Option: Swap the chicken for two cans of drained and rinsed chickpeas or a bag of frozen thawed cauliflower florets. The texture is different, but the creamy buffalo coating makes it work. I actually prefer the cauliflower version sometimes, it gets wonderfully tender in the oven.
Extra Spicy: For those of us who like things hot, add a tablespoon of hot sauce to the cream cheese mixture and use extra-sharp cheddar. A pinch of cayenne pepper in the filling also kicks things up a notch. Just be warned, this version is not for the faint of heart.
Dairy-Free Adaptation: Use dairy-free cream cheese and vegan shredded cheese. The texture will be slightly different, but the flavor is still fantastic. Just make sure your buffalo sauce and ranch dressing are also dairy-free.
Air Fryer Method: If you want a quicker version, cook the stuffed peppers in an air fryer at 350°F (175°C) for 12 to 15 minutes. Check them at the 10-minute mark to make sure the peppers aren’t burning. The air fryer gives the peppers a slightly crispier exterior, which is actually really nice.
I once made a version with smoked gouda instead of cheddar, and it was incredible. The smoky flavor paired beautifully with the buffalo sauce. If you’re feeling adventurous, give it a try.
Serving & Storage Suggestions
These peppers are best served warm, right out of the oven. The cheese should be melty and the peppers tender but not falling apart. I like to arrange them on a large platter with the jack-o’-lantern faces facing out, surrounded by celery sticks, carrot sticks, and a big bowl of tortilla chips.
For a full Halloween spread, serve these alongside a batch of crispy buffalo chicken wings and a platter of deviled eggs decorated like little spiders. The combination is always a hit.
If you have leftovers, store them in an airtight container in the refrigerator for up to four days. The peppers will soften further as they sit, but the flavor actually gets better. To reheat, place them in a 350°F (175°C) oven for about 10 minutes, or microwave them for 60 to 90 seconds. The microwave is faster, but the oven keeps the peppers from getting too soft.
These peppers also freeze surprisingly well. Wrap each cooled pepper individually in plastic wrap, then place them in a freezer bag. They’ll keep for up to three months. To reheat from frozen, bake at 350°F (175°C) for 20 to 25 minutes, removing the plastic wrap first, of course.
One thing I’ve noticed is that the flavors meld together even more after a day in the fridge. The buffalo sauce seeps into the pepper walls, and everything becomes more cohesive. So if you’re making these for a party, feel free to prep them a day ahead and just bake them before guests arrive.
Nutritional Information & Benefits
Here’s the approximate nutritional breakdown for one stuffed pepper (based on using full-fat ingredients and one serving):
- Calories: 420
- Protein: 28g
- Fat: 28g
- Carbohydrates: 12g
- Fiber: 3g
- Sugar: 6g
- Sodium: 980mg
These numbers will vary based on your specific ingredients and portion sizes. The blue cheese and extra cheddar on top add a few extra calories, but they’re worth it.
Bell peppers are packed with vitamin C, actually more than oranges gram for gram. They also contain vitamin A, vitamin B6, and antioxidants that support eye health and immune function. So while this is definitely a treat, you’re getting some genuine nutritional benefits too.
The chicken provides lean protein that keeps you full and satisfied. And the cream cheese, while not exactly a health food, does add calcium and a little bit of protein. Everything in moderation, right?
This recipe is naturally gluten-free, but always check your buffalo sauce and ranch dressing labels to be sure. Some brands add wheat-based thickeners.
Conclusion
Look, I know Halloween recipes can be hit or miss. Some of them are all show and no substance, looking cute but tasting like cardboard. These Spooky Buffalo Chicken Dip Stuffed Jack-o’-Lantern Peppers are the opposite. They’re genuinely delicious, the kind of thing you’ll find yourself making even when it’s not October.
The best part is how customizable they are. Want them spicier? Add more hot sauce. Want them milder? Use barbecue sauce instead. Want to make them vegetarian? Swap in cauliflower. This recipe is a starting point, not a rulebook. I’ve made it a dozen different ways, and every single version has been a hit.
I’d love to hear how yours turn out. Did you carve elaborate faces or keep it simple? Did you add extra cheese or dial back the heat? Drop a comment below and let me know. And if you’re looking for more Halloween party inspiration, check out my spooky spider web dip and mummy jalapeno poppers for a full themed spread.
Happy Halloween, and happy eating! Remember, the best recipes are the ones you share with people you love. Even if those people are just you and your cat on a Tuesday night, no judgment here.
Frequently Asked Questions
Can I make these peppers ahead of time?
Absolutely! You can assemble the peppers up to 24 hours in advance. Just stuff them, cover them with plastic wrap, and keep them in the refrigerator. When you’re ready to bake, add about 5 to 10 minutes to the baking time since you’re starting from cold.
What if I can’t find orange bell peppers?
No problem! Red bell peppers work great, they just won’t look as pumpkin-like. You can also use yellow or even green peppers, though green peppers have a slightly more bitter flavor that might compete with the buffalo sauce.
Can I use pre-shredded cheese?
You can, but freshly shredded cheese melts much smoother. Pre-shredded cheese contains anti-caking agents that prevent it from melting as beautifully. If you’re short on time, pre-shredded works fine, just expect a slightly different texture.
How do I keep the peppers from tipping over in the oven?
If your peppers are wobbly, you can slice a tiny sliver off the bottom to create a flat surface. Just be careful not to cut all the way through. You can also nestle them together in the baking dish or use crumpled aluminum foil as supports.
Can I double this recipe for a party?
Definitely! This recipe scales beautifully. Just make sure you have a large enough baking dish to hold all the peppers without crowding. You might need to use two dishes or bake them in batches. The filling recipe doubles and triples easily with no adjustments needed.
Pin This Recipe!
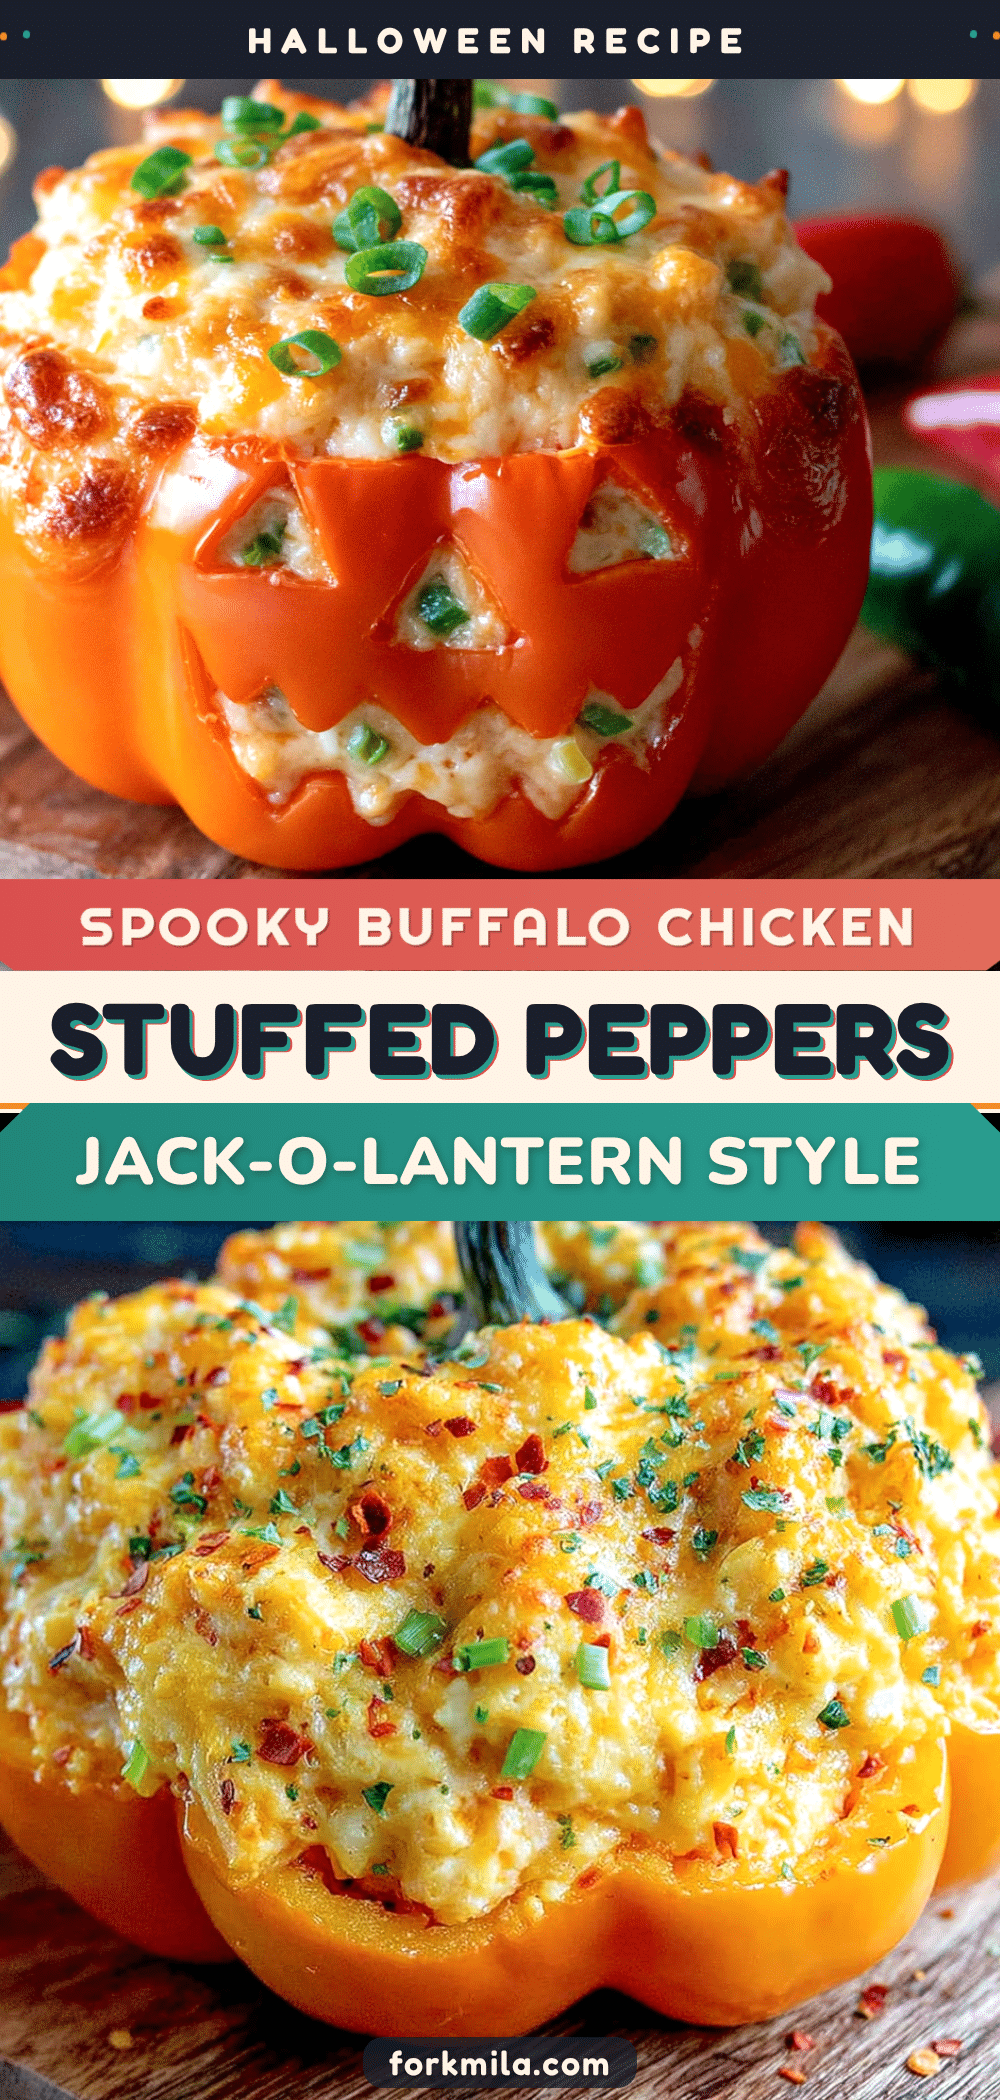
Spooky Buffalo Chicken Dip Stuffed Jack-o’-Lantern Peppers
These adorable jack-o’-lantern peppers are stuffed with a creamy, spicy buffalo chicken dip and baked until tender. They’re the perfect Halloween party appetizer that tastes as good as it looks.
- Prep Time: 20 minutes
- Cook Time: 30 minutes
- Total Time: 50 minutes
- Yield: 4 servings 1x
- Category: Appetizer
- Cuisine: American
Ingredients
- 4 large orange bell peppers
- 1 tablespoon olive oil
- 2 cups cooked shredded chicken (rotisserie chicken works well)
- 8 ounces cream cheese, softened
- 1/2 cup buffalo wing sauce (e.g., Frank’s RedHot Original)
- 1/2 cup ranch dressing (or blue cheese dressing)
- 1 cup shredded cheddar cheese, divided
- 1/2 cup shredded mozzarella cheese
- 1/4 cup crumbled blue cheese (optional)
- 2 green onions, thinly sliced
- 1/4 teaspoon garlic powder
- 1/4 teaspoon onion powder
- Additional green onions for garnish
- Celery sticks for serving
- Tortilla chips or crostini for serving
Instructions
- Preheat oven to 375°F (190°C). Wash bell peppers and pat dry. Cut a small circle around the stem of each pepper, remove the top, and set aside. Scoop out all seeds and white membranes.
- Using a paring knife, carve small jack-o’-lantern faces into one side of each pepper. Keep designs simple (triangle eyes and jagged smile).
- In a large mixing bowl, combine softened cream cheese, buffalo wing sauce, ranch dressing, garlic powder, and onion powder. Mix until smooth and well combined.
- Add shredded chicken, 3/4 cup cheddar cheese, mozzarella cheese, crumbled blue cheese (if using), and sliced green onions. Fold until chicken is evenly coated.
- Spoon the buffalo chicken mixture into each carved pepper, packing gently. Fill to the top, mounding slightly if needed. Place stem tops back on peppers at an angle.
- Brush outside of each pepper lightly with olive oil. Place stuffed peppers upright in a baking dish. If wobbly, nestle together or use crumpled foil for support.
- Bake for 25 to 30 minutes. At the 20-minute mark, sprinkle remaining 1/4 cup cheddar cheese over the top of each pepper. Return to oven for final 5 to 10 minutes, until cheese is melted and bubbly and peppers are tender but still holding shape.
- Let peppers cool for about 5 minutes before serving. Garnish with additional sliced green onions and serve with celery sticks and tortilla chips for dipping.
Notes
Choose round, squat orange bell peppers for best carving and stability. Soften cream cheese to room temperature for smooth filling. Keep carved faces simple to avoid collapse during baking. Peppers can be assembled up to 24 hours in advance and refrigerated; add 5-10 minutes to baking time if starting cold. Leftovers keep in the refrigerator for up to 4 days or freeze for up to 3 months.
Nutrition
- Serving Size: 1 stuffed pepper
- Calories: 420
- Sugar: 6
- Sodium: 980
- Fat: 28
- Saturated Fat: 12
- Carbohydrates: 12
- Fiber: 3
- Protein: 28
Keywords: Halloween, buffalo chicken dip, stuffed peppers, jack-o-lantern, party appetizer, gluten-free


