It was 11:47 PM on a rainy Tuesday, and I was scrolling through a gardening forum—of all places—when I saw someone mention they’d been keeping the same sourdough starter alive for eighteen years. Eighteen years. That’s older than my car, older than my last relationship, and honestly, older than some of my houseplants that are currently on life support. I didn’t have a sourdough starter (obviously), but I had a bag of whole wheat flour, a jar of filtered water, and the sudden, slightly unhinged idea that maybe—just maybe—I could start one right then and there, in my pajamas, at nearly midnight.
The thing is, I’d been intimidated by sourdough for years. All those stories about finicky starters that die if you look at them wrong, the complicated feeding schedules, the mysterious bubbling—it felt like a science experiment I wasn’t qualified for. But that night, something clicked. I mixed flour and water in a mason jar, set it on the counter, and figured I’d either have a starter in a week or a science project I’d have to explain to my roommate. The next morning, there was a single tiny bubble on the surface. I almost cried. Okay, I did cry a little. Maybe you’ve been there—that moment when something actually works and you feel like a kitchen wizard?
This easy beginner sourdough starter from scratch isn’t about perfection. It’s about patience, a little bit of faith, and the joy of watching flour and water transform into something alive. It’s the recipe that made me fall in love with baking all over again. And honestly? If I can do it at 11:47 PM on a Tuesday, you can absolutely do it too.
Why You’ll Love This Recipe
Let’s be real for a second. There are about a million sourdough starter guides out there, and most of them make it sound like you need a chemistry degree and a clean room. This one is different. I’ve tested this method at least seven times (and killed two starters along the way, so you get to learn from my mistakes). Here’s why this easy beginner sourdough starter from scratch is the one you’ve been looking for:
- Foolproof Process: No complicated ratios or fancy equipment. Just flour, water, and a little patience. I’ve streamlined the feeding schedule so you don’t have to think about it constantly.
- Minimal Ingredients: Seriously—you probably already have everything you need in your pantry right now. No special “sourdough flour” or imported spring water required.
- Perfect for Beginners: This guide holds your hand through every single step, including what to do when things go wrong (because they will, and that’s okay).
- Incredibly Rewarding: There’s nothing quite like baking your first loaf of bread with a starter you grew yourself. It’s the kind of accomplishment that makes you want to text everyone you know.
- Cost-Effective: One bag of flour costs about $4 and will keep your starter alive for months. Compare that to buying expensive sourdough bread at the bakery!
What makes this recipe different from the rest is the “set it and forget it” approach. Instead of feeding your starter twice a day like some demanding pet, we use a slightly higher ratio of flour to water that slows things down. This means you can actually have a life while your starter does its thing. It’s comfort food science—simpler, more forgiving, but with the same incredible results that make you close your eyes after that first bite of homemade bread.
What Ingredients You Will Need
This easy beginner sourdough starter from scratch uses the simplest ingredients imaginable—just two things, actually. But the quality and type of those two things matter more than you’d think. Here’s what you’ll need and why each ingredient plays a role in creating a happy, bubbly starter.
For the Starter Itself
- Whole Wheat Flour: 1 cup (120g) — I recommend King Arthur or Bob’s Red Mill for consistent results. Whole wheat flour is packed with nutrients and natural yeasts that kickstart fermentation faster than all-purpose flour. Look for freshly milled if you can find it; the wild yeast population is higher.
- All-Purpose Flour: 1 cup (125g) — For feedings after day 3. I use unbleached all-purpose flour because it has more natural yeast than bleached flour. Gold Medal works great, but any unbleached brand will do.
- Filtered Water: 1 cup (240ml) — This is important! Tap water contains chlorine and other chemicals that can kill the natural yeasts you’re trying to cultivate. Let tap water sit out overnight to dechlorinate, or just use filtered water from your fridge. Room temperature is best—around 70°F (21°C).
Optional But Helpful
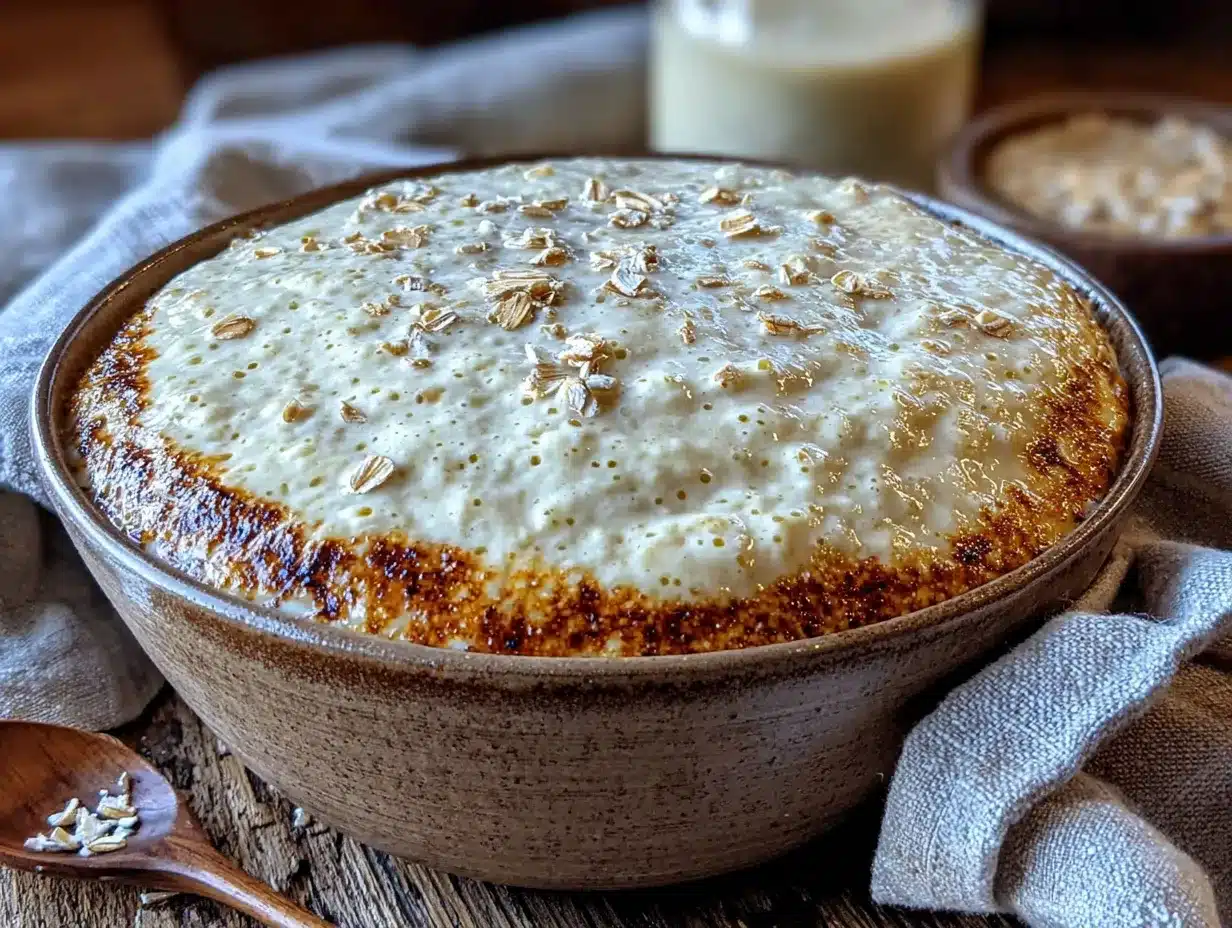
- Rye Flour: ¼ cup (30g) — Rye flour is a cheat code for sourdough starters. It ferments faster and creates a more robust starter. If you have some on hand, use it for the first feeding to give your starter a head start.
- Digital Kitchen Scale: Not an ingredient, but measuring by weight is way more accurate than cups. A $15 scale from Amazon will save you so much frustration.
- Glass Jar: A 32-ounce (1-liter) wide-mouth mason jar is perfect. You need room for the starter to double or triple in size without exploding everywhere. Trust me on this one—I’ve cleaned starter off my ceiling.
The beauty of this recipe is that you don’t need any special ingredients. No yeast packets, no sugar, no potato flakes, none of that nonsense. Just flour and water, plus a little patience. If you want to experiment later, you can try different flour combinations, but for your first time, keep it simple. Your starter doesn’t care about fancy ingredients—it just wants to eat and grow.
Equipment Needed
You don’t need a professional bakery setup to make an easy beginner sourdough starter from scratch. In fact, you probably have most of this stuff already. Here’s the shortlist:
- A Clean Glass Jar: A 32-ounce wide-mouth mason jar is ideal. You want to see through the sides to monitor bubbles and growth. Avoid metal containers—they can react with the acidic starter.
- A Kitchen Scale: Seriously, get one. Measuring by weight is more accurate and makes feeding your starter so much easier. I use a simple OXO scale that cost about $20.
- A Wooden or Silicone Spoon: Metal spoons can theoretically react with the starter (though honestly, I’ve used metal in a pinch and it was fine). A chopstick works great too.
- A Clean Cloth or Coffee Filter: You need something to cover your jar that allows air to flow but keeps out dust and fruit flies. A paper towel secured with a rubber band works perfectly.
- A Rubber Band: Mark the starting level of your starter on the jar so you can easily see how much it rises.
If you don’t have a wide-mouth jar, any clean glass container will work—just make sure it’s big enough for your starter to triple in size. I once used an old pickle jar, and honestly, it worked fine. The key is consistency, not fancy equipment.
Preparation Method
Making an easy beginner sourdough starter from scratch is a week-long journey, but don’t let that scare you. Each day only takes about 5 minutes of active work. The rest is just waiting and watching. Here’s your day-by-day roadmap:
Day 1: The Beginning
- Combine ½ cup (60g) whole wheat flour and ½ cup (120ml) room-temperature filtered water in your clean jar.
- Stir vigorously until no dry flour remains. The mixture should look like thick pancake batter.
- Cover loosely with a cloth or coffee filter and secure with a rubber band.
- Place in a warm spot (70-75°F / 21-24°C is ideal). The top of your fridge or near the stove works great.
- Mark the starting level with a rubber band so you can track rising later.
- Leave it alone for 24 hours. Seriously—don’t peek every hour. Let it do its thing.
Day 2: Patience
- Check your starter. You might see a few tiny bubbles or nothing at all—both are normal. It might also smell a little funky, like cheese or yogurt. That’s good!
- Discard half of the starter (about ½ cup / 120g). Don’t skip this step—if you don’t discard, your starter will get too acidic and unhappy.
- Feed it with ½ cup (60g) all-purpose flour and ½ cup (120ml) water. Stir well.
- Cover and return to its warm spot. Mark the new level with your rubber band.
- Wait another 24 hours. You might not see much action today, and that’s totally fine.
Day 3: The “Dead” Phase
- Your starter might look completely dead today—no bubbles, no rise, maybe even a layer of liquid (called “hooch”) on top. This is normal! It’s not dead; it’s just going through a bacterial phase before the yeast takes over.
- If there’s hooch, just stir it back in. Discard half, then feed with ½ cup (60g) all-purpose flour and ½ cup (120ml) water.
- Stir well, cover, and wait. This is when most people give up, but don’t! You’re so close.
Day 4: Signs of Life
- You should start seeing more bubbles today—maybe even some activity. The smell will shift from funky to more pleasantly sour, like bread dough.
- Discard half, feed with ½ cup (60g) all-purpose flour and ½ cup (120ml) water. Stir well.
- Your starter might double in size within 12 hours. If it does, you’re on the right track. If not, just keep going.
Day 5-7: The Test
- By day 5 or 6, your starter should be reliably doubling in size within 4-8 hours after feeding. It should smell pleasantly sour and yeasty—like a bakery.
- Do the “float test”: Drop a small spoonful of your starter into a glass of water. If it floats, it’s ready to bake with! If it sinks, give it another day or two of feedings.
- Once it consistently passes the float test, you’re ready to bake. Congratulations—you’ve made an easy beginner sourdough starter from scratch!
Cooking Tips & Techniques
After accidentally killing my first starter (rest in peace, Herbert), I learned a few things that make the process way smoother. Here are my best tips for success:
Temperature Matters More Than You Think. Your starter is basically a tiny ecosystem, and it likes consistency. If your kitchen is cold (below 68°F / 20°C), fermentation will slow way down. Try placing your jar on top of the fridge, near a warm appliance, or even in the oven with the light on (but the oven off!). In summer, your starter might be ready in 5 days; in winter, it might take 10. That’s normal.
Don’t Overthink the Discard. Throwing away starter feels wasteful, I know. But you have to discard to keep the ratio balanced. Save your discard in a separate container in the fridge—you can use it to make sourdough discard pancakes, crackers, or even pizza dough. It’s not wasted; it’s just waiting for a different purpose.
The “Bubbles Lie” Rule. Just because you see bubbles doesn’t mean your starter is ready. I once got excited on day 3 and tried to bake bread—it turned out like a hockey puck. Wait until your starter reliably doubles in size within 4-6 hours after feeding. That’s the real test.
My Biggest Failure: I once forgot to feed my starter for three days and came back to a jar of grayish liquid that smelled like nail polish remover. I thought it was dead. But I stirred it, fed it, and within two feedings, it was back to normal. These things are resilient! Don’t throw yours away at the first sign of trouble.
Variations & Adaptations
Once you’ve mastered the basic easy beginner sourdough starter from scratch, you can start experimenting. Here are some variations I’ve tried and loved:
Gluten-Free Sourdough Starter: Substitute the all-purpose and whole wheat flours with a blend of brown rice flour and buckwheat flour. The process is the same, but it might take a few extra days to get going. I’ve made this for a gluten-sensitive friend, and it worked beautifully—just expect a slightly different flavor profile.
100% Whole Wheat Starter: Use only whole wheat flour for feedings instead of switching to all-purpose. This creates a more robust, tangy starter that ferments faster. The downside? You’ll need to feed it more frequently (every 12 hours instead of 24) because whole wheat flour is more nutrient-dense and the yeast eats through it quicker.
Rye Flour Booster: If your starter seems sluggish, do one feeding with rye flour instead of all-purpose. Rye is packed with nutrients and natural yeasts—it’s like a protein shake for your starter. I keep a bag of rye flour in my pantry just for emergency feedings.
Stiff Starter Variation: For a more traditional approach, feed your starter with a 2:1 ratio of flour to water (by weight). This creates a stiffer, more stable starter that’s popular in professional bakeries. It takes longer to ferment but produces a milder sour flavor.
Serving & Storage Suggestions
Once your easy beginner sourdough starter from scratch is active and bubbly, you need to know how to keep it happy. Here’s the deal:
Room Temperature Storage: If you’re baking regularly (once or twice a week), keep your starter on the counter and feed it once a day. Use the same 1:1:1 ratio (equal parts starter, flour, and water by weight). It’ll stay active and ready to go whenever inspiration strikes.
Refrigerator Storage: If you bake less often, store your starter in the fridge. Feed it, let it sit at room temperature for an hour, then cover and refrigerate. Feed it once a week to keep it alive. When you want to bake, take it out, feed it, and let it warm up and become active again—this usually takes about 12-24 hours.
Freezing Backup: You can freeze a small amount of starter (about ¼ cup) in a ziplock bag as a backup. When you’re ready to revive it, thaw it at room temperature, feed it, and within a few days, it’ll be back to full strength. I do this with every new starter I make—just in case of disaster.
Reheating Note: You don’t “reheat” a starter, but if it’s been in the fridge for weeks, it might need 2-3 feedings before it’s vigorous enough to bake with. Don’t rush this step. Cold, sluggish starter makes dense bread.
Nutritional Information & Benefits
While your sourdough starter itself isn’t something you eat directly (unless you’re making discard recipes), the bread you bake with it has some surprising benefits. Here’s what you should know:
Estimated Nutritional Profile (per 1 cup of active starter):
- Calories: ~200
- Carbohydrates: 42g
- Protein: 6g
- Fiber: 2g
- Fat: 1g
Health Benefits: Sourdough fermentation breaks down phytic acid, a compound in grains that can block mineral absorption. This means your body can actually absorb more of the nutrients in the bread—like iron, zinc, and magnesium. The fermentation process also creates beneficial bacteria that support gut health. Plus, the natural acids in sourdough slow down how quickly your body absorbs carbohydrates, leading to a lower glycemic response compared to regular bread.
Dietary Considerations: This starter is naturally vegan and dairy-free. It’s not gluten-free (unless you use the gluten-free variation above), but some people with mild gluten sensitivities find sourdough easier to digest due to the fermentation process breaking down some of the gluten proteins. Always listen to your body and consult with a healthcare provider if you have concerns.
Conclusion
Making an easy beginner sourdough starter from scratch is one of those kitchen projects that feels almost magical. You start with flour and water—two of the most humble ingredients imaginable—and end up with something alive, bubbling, and ready to transform into beautiful, crusty loaves of bread. It’s not about perfection; it’s about patience, curiosity, and the willingness to try something new even when you’re not sure it’ll work.
I’ve made this starter in a tiny apartment kitchen, in a cold winter house, and even in a borrowed kitchen while traveling. Every time, it works—because the process is forgiving if you let it be. So go ahead, mix that flour and water, set it on your counter, and give yourself permission to be a beginner. You might surprise yourself with what you can create.
I’d love to hear how your starter journey goes! Drop a comment below and let me know what you plan to bake first—or if you have questions, ask away. And if you found this guide helpful, share it with a friend who’s been thinking about trying sourdough. Happy baking!
Frequently Asked Questions
Why isn’t my starter bubbling after 3 days?
Don’t panic—this is completely normal! The first few days are dominated by bacteria, not yeast. The bacteria create an acidic environment that yeast needs to thrive. Keep feeding it daily, and you’ll likely see bubbles around day 4 or 5. If your kitchen is cold, it might take even longer. Patience is the secret ingredient here.
Can I use tap water instead of filtered water?
You can, but tap water often contains chlorine and chloramines that can inhibit yeast growth. If you must use tap water, let it sit out uncovered for 24 hours to allow the chlorine to evaporate. Better yet, use filtered or bottled water for the first week to give your starter the best possible start.
What should I do with the discard?
Don’t throw it away! Sourdough discard is perfect for pancakes, waffles, crackers, pizza dough, and even brownies. Store your discard in a covered container in the fridge and use it within a week. There are hundreds of discard recipes online—it’s a whole other world of baking to explore.
How do I know when my starter is ready to bake with?
The float test is your best friend. Drop a small spoonful of your starter into a glass of room-temperature water. If it floats, it’s ready to bake with. If it sinks, give it another feeding and wait. Your starter should also reliably double in size within 4-6 hours after feeding before you attempt your first loaf.
My starter smells like nail polish remover. Is it ruined?
Nope! That acetone smell means your starter is hungry and has produced too much acid. It’s a sign that you need to feed it more frequently or use a higher ratio of flour to water. Pour off any liquid (hooch) on top, discard half, and feed it as usual. The smell should mellow out within a couple of feedings. Your starter is tougher than you think!
Pin This Recipe!
The Ultimate Guide to Easy Beginner Sourdough Starter

Learn how to make a simple, foolproof sourdough starter from scratch with just flour and water. This beginner-friendly guide walks you through each day with patience and practical tips for success.
- Prep Time: 5 minutes per day
- Cook Time: 0 minutes
- Total Time: 7 days (active time ~5 minutes per day)
- Yield: 1 active sourdough starter (about 2 cups) 1x
- Category: Starter / Baking
- Cuisine: American
Ingredients
- 1 cup (120g) whole wheat flour (e.g., King Arthur or Bob’s Red Mill)
- 1 cup (125g) unbleached all-purpose flour
- 1 cup (240ml) filtered water, room temperature
- ¼ cup (30g) rye flour (optional, for faster fermentation)
Instructions
- Day 1: Combine ½ cup (60g) whole wheat flour and ½ cup (120ml) room-temperature filtered water in a clean glass jar. Stir vigorously until no dry flour remains. Cover loosely with a cloth or coffee filter and secure with a rubber band. Place in a warm spot (70-75°F / 21-24°C). Mark the starting level with a rubber band. Leave for 24 hours.
- Day 2: Check for bubbles (a few or none is normal). Discard half of the starter (about ½ cup / 120g). Feed with ½ cup (60g) all-purpose flour and ½ cup (120ml) water. Stir well, cover, and return to warm spot. Mark new level. Wait 24 hours.
- Day 3: Starter may look dead with no bubbles or liquid (hooch) on top. Stir hooch back in if present. Discard half, then feed with ½ cup (60g) all-purpose flour and ½ cup (120ml) water. Stir, cover, and wait 24 hours.
- Day 4: Look for more bubbles and a pleasantly sour smell. Discard half, feed with ½ cup (60g) all-purpose flour and ½ cup (120ml) water. Stir well. Starter may double in size within 12 hours.
- Day 5-7: Starter should reliably double in size within 4-8 hours after feeding and smell sour and yeasty. Perform the float test: drop a small spoonful into a glass of water. If it floats, it’s ready to bake with. If not, continue daily feedings until it passes.
Notes
Temperature matters: keep starter at 70-75°F (21-24°C) for best results. If kitchen is cold, place on top of fridge or near a warm appliance. Don’t skip discarding—it keeps the starter balanced. Save discard for pancakes, crackers, or pizza dough. If starter smells like nail polish remover, it’s hungry—feed more frequently or use a higher flour-to-water ratio. The float test is the best indicator of readiness.
Nutrition
- Serving Size: 1 cup active starter
- Calories: 200
- Sodium: 5
- Fat: 1
- Carbohydrates: 42
- Fiber: 2
- Protein: 6
Keywords: sourdough starter, beginner sourdough, easy sourdough starter, homemade starter, sourdough for beginners, natural yeast starter


