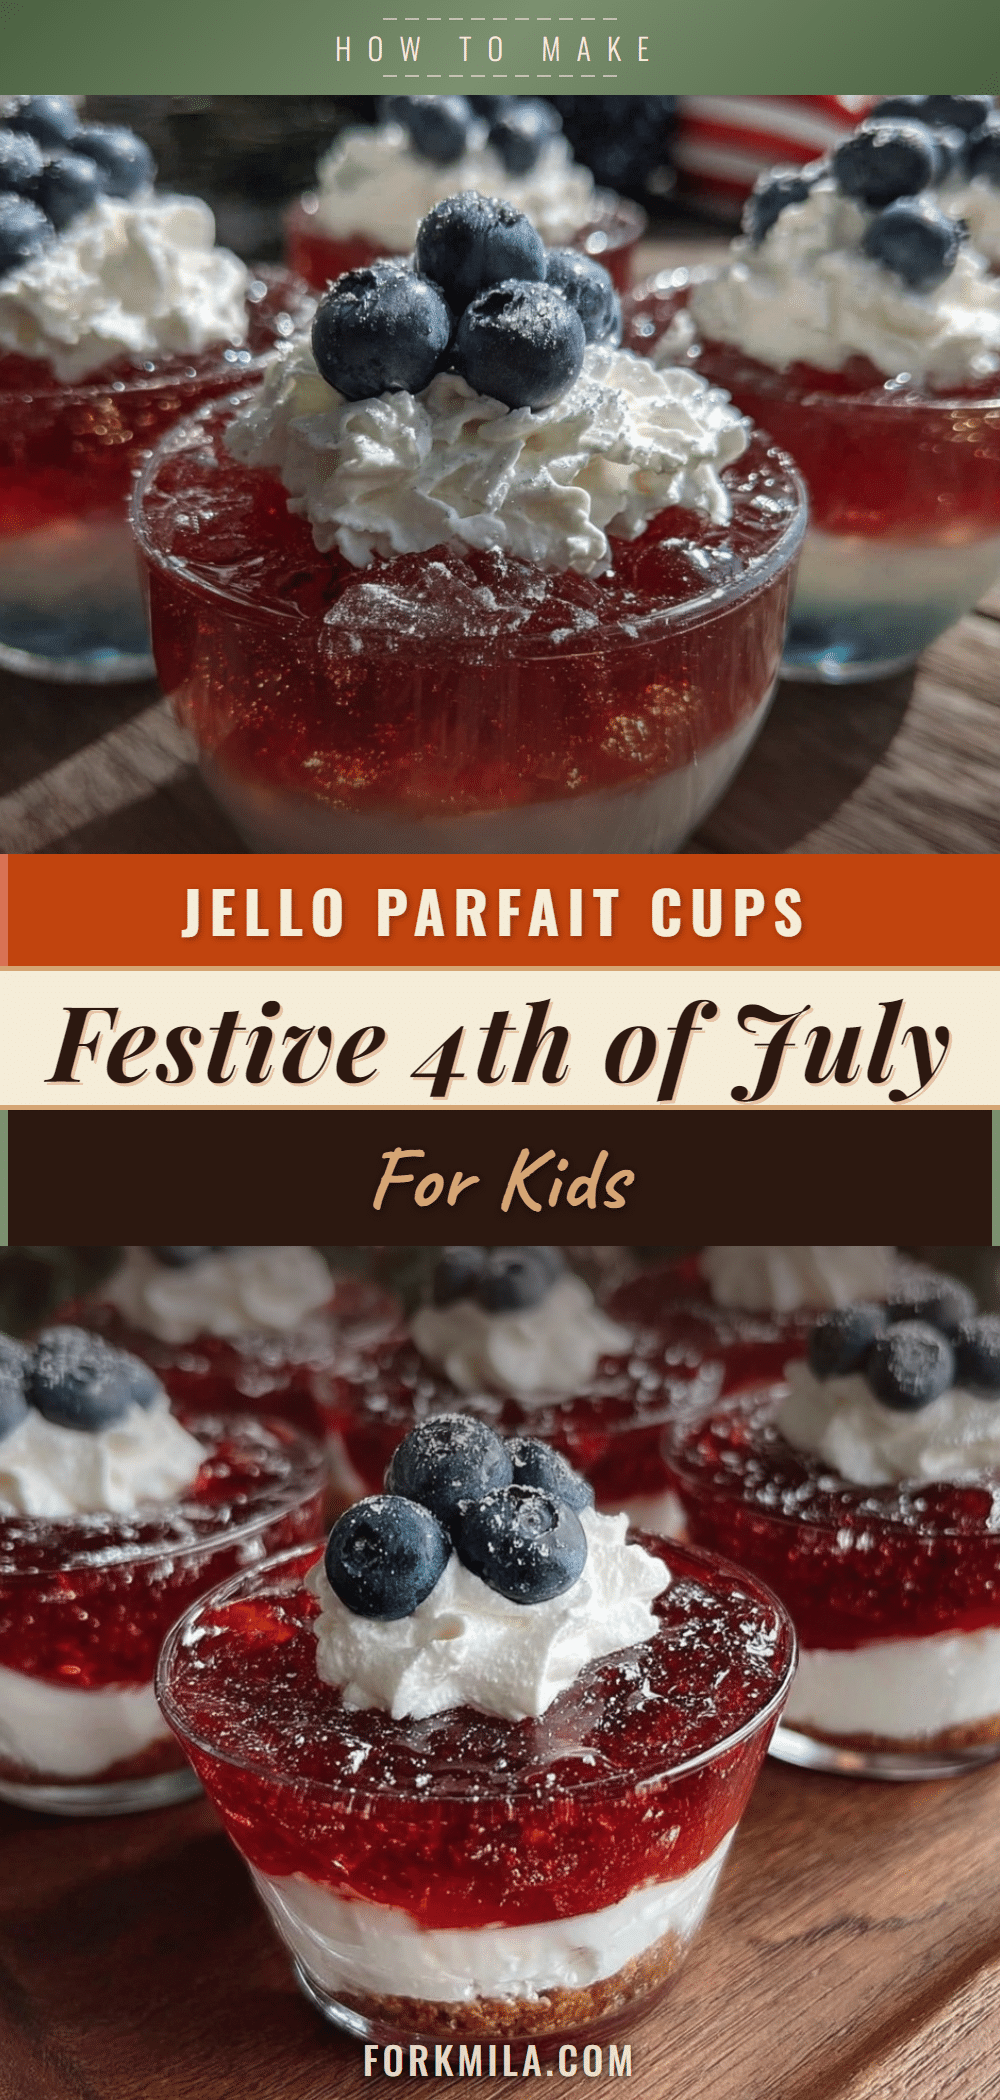
The summer sun was blazing last Independence Day when the scent of freshly cut grass mingled with the faint fizz of soda — and suddenly I was eight years old, sitting cross-legged on the picnic blanket at Mrs. Jensen’s block party. Her backyard was a patchwork of red, white, and blue decorations, but what caught my attention wasn’t the fireworks or the flags. It was those jiggly, jewel-toned parfait cups she handed out, layered with bright red strawberry jello, fluffy white whipped cream, and sparkly blue blueberries. I remember the way the cool sweetness contrasted with the hot July air, and how the clear plastic cups felt cold in my small hands. Honestly, I had no idea then that recreating that simple joy would be such a challenge years later — the exact balance of flavors, the perfect wobble of the jello, that little bit of sparkle.
Last week, I found myself in the grocery store aisle staring at the racks of gelatin mixes, and that memory came rushing back. I fumbled with a cracked measuring cup, almost dropping the berries, while trying to recreate those festive 4th of July jello parfait cups for kids like the ones Mrs. Jensen made. Maybe you’ve been there — chasing after a fleeting childhood taste or feeling, trying to catch something just out of reach. This recipe isn’t just about the colorful layers; it’s about capturing that moment of pure, uncomplicated summer fun. It’s become a tradition in my kitchen now, a little celebration in a cup that’s as easy to make as it is to enjoy.
Why You’ll Love This Recipe
After testing this festive 4th of July jello parfait cups recipe countless times with my own crew of taste testers (a.k.a. my kids and their friends), I can say it’s a total crowd-pleaser. Here’s why you’ll want to keep this one in your summer arsenal:
- Quick & Easy: Whips up in under 30 minutes, including chill time — perfect for busy parents juggling fireworks and grill outs.
- Simple Ingredients: You likely have most of these pantry staples already (and no complicated splits or fussy prep).
- Perfect for Kid-Friendly Celebrations: Safe, fun, and colorful — a guaranteed hit at any 4th of July picnic or party.
- Crowd-Pleaser: Kids love the colorful layers and adults appreciate the nostalgic feel.
- Unbelievably Delicious: The sweet, tart jello combined with cool whipped cream and fresh berries delivers that classic summer flavor combo.
What sets this recipe apart? It’s the layering technique — I’ve found that letting each jello layer set just right before adding the next keeps the parfait cups looking neat and vibrant. Plus, swapping out store-bought whipped cream for homemade lightly sweetened whipped cream makes a noticeable difference in taste and texture. Honestly, it’s the kind of treat that makes you pause and savor the moment, whether you’re eight or thirty-eight.
What Ingredients You Will Need
This recipe uses straightforward, wholesome ingredients that come together to create those bold red, white, and blue layers you want, with minimal fuss.
- For the Red Jelly Layer:
- 1 package (3 oz / 85 g) strawberry or cherry flavored gelatin mix
- 1 cup (240 ml) boiling water
- 1 cup (240 ml) cold water
- For the White Cream Layer:
- 1 cup (240 ml) heavy whipping cream, cold
- 2 tablespoons powdered sugar (adjust to taste)
- 1 teaspoon vanilla extract
- For the Blue Jelly Layer:
- 1 package (3 oz / 85 g) blue raspberry flavored gelatin mix
- 1 cup (240 ml) boiling water
- 1 cup (240 ml) cold water
- Toppings:
- Fresh blueberries (for garnish)
- Optional: small star-shaped sprinkles for extra festive flair
Feel free to swap out the gelatin flavors for sugar-free options or natural fruit gelatin if you prefer. I’ve used both store brands like Jell-O and some local organic gelatin mixes, and honestly, the key is to pick something bright and bold in color. For the whipped cream, make sure it’s cold for better whipping results — I like using heavy cream from a trusted dairy brand for the best texture.
Equipment Needed
- Mixing bowls (at least two, medium size)
- Whisk or electric hand mixer (helps whip cream faster and fluffier)
- Measuring cups and spoons (for precise liquid and sugar amounts)
- Clear plastic or glass cups (small sized, about 6 oz / 180 ml capacity)
- Refrigerator space (for chilling layers between steps)
- Optional: piping bag or zip-top bag with corner snipped for neat whipped cream layering
I once tried stirring the gelatin directly in the cups, and let me tell you — the layers got messy real quick. Using separate bowls for each color and letting them set before layering makes the whole process way smoother. If you don’t have a hand mixer, a sturdy whisk and some elbow grease will work, but it takes longer to get that fluffy whipped cream texture. And about those cups — clear ones are best so you can see the beautiful layers, but if you only have opaque ones, no worries; the taste is what counts!
Preparation Method

- Make the Red Jelly Layer: In a medium bowl, dissolve the strawberry or cherry gelatin powder in 1 cup (240 ml) boiling water. Stir gently until completely dissolved, about 2 minutes. Add 1 cup (240 ml) cold water and mix. Pour evenly into your cups, filling each about one-third full. Chill in the refrigerator for 45 minutes to 1 hour, or until set but still slightly tacky — this helps the next layer stick.
- Prepare the Whipped Cream Layer: While the red layer chills, whip the cold heavy cream with powdered sugar and vanilla extract using an electric mixer or whisk. Beat until soft peaks form (the cream should hold its shape but still be smooth). Once the red jelly is set, spoon or pipe a generous layer of whipped cream on top, filling another third of the cup.
- Make the Blue Jelly Layer: Repeat the gelatin process with the blue raspberry powder: dissolve in 1 cup (240 ml) boiling water, add 1 cup (240 ml) cold water, and stir well. Allow it to cool to room temperature but not set — this is crucial to avoid melting the whipped cream layer. Slowly pour the blue gelatin over the whipped cream layer. Chill for another 1 hour or until fully set.
- Add Toppings and Serve: Just before serving, garnish each parfait cup with fresh blueberries and optional star sprinkles for that festive 4th of July look.
Pro tip: When pouring the blue jelly over the whipped cream, pour gently over the back of a spoon held just above the cream layer to prevent breaking through. I’ve learned this the hard way after a few messy attempts! Also, timing matters — letting each layer set properly makes all the difference between a neat presentation and a jumbled mess. If you’re short on time, the red and blue layers can be made the day before, just don’t add the whipped cream until the day of serving for best freshness.
Cooking Tips & Techniques
Getting those perfect layers isn’t rocket science, but a few tricks help keep things looking sharp and tasting great.
- Chill Time Is Key: Don’t rush the setting of each gelatin layer. If the first layer isn’t firm enough, the next will mix in and ruin the distinct layers.
- Temperature Matters: Make sure the blue gelatin is cooled to room temp before adding it over the whipped cream. Hot gelatin will melt the cream and blur the layers.
- Whip Cream Properly: Cold cream whips best and holds its shape longer. If you overbeat, it can turn grainy, so watch it closely.
- Pour Carefully: Use a spoon to soften the fall of the blue gelatin over the cream layer, preventing it from breaking through.
- Use Clear Cups: This isn’t just for looks — it helps you check the firmness of each layer visually, so you know when to move on.
Once, I got distracted by a phone call and forgot the red jelly in the fridge — it turned rock hard! It still tasted fine but was tough to eat, so keep an eye on those chill times. Also, when whipping cream, I sometimes added a splash of cold milk to lighten it up for a less rich but still tasty layer. Experimenting with small tweaks like that is half the fun!
Variations & Adaptations
Feel like switching things up? This recipe is flexible enough to handle a few fun twists.
- Dairy-Free Option: Use coconut cream whipped with a bit of powdered sugar and vanilla in place of heavy cream for a tropical twist that’s safe for dairy allergies.
- Fruit Variations: Swap the strawberry and blue raspberry flavors with fresh fruit purees mixed into unflavored gelatin for a more natural taste. Raspberry and blueberry combos work wonderfully.
- Layering with Yogurt: Replace the whipped cream with thick Greek yogurt sweetened lightly with honey for a tangier, protein-packed version.
- Mini Parfaits: Use smaller cups or even mini mason jars for bite-sized servings at parties or potlucks.
One time, I tried adding a layer of crumbled graham crackers between the whipped cream and blue jelly for a little crunch surprise — it was a hit with the kids but made the parfaits less stable, so serve those right away. Feel free to get creative but keep in mind the setting time and weight balance!
Serving & Storage Suggestions
These parfait cups are best served chilled, right from the fridge. The cold layers and fresh berries make for a refreshing summer treat that’s easy to hold at any backyard party.
- Serve individually in clear cups for easy grab-and-go snacking during outdoor celebrations.
- Pair with light finger foods like crispy garlic chicken or fresh fruit salad for a balanced spread.
- Store covered in the refrigerator for up to 2 days; the jello holds up well but the whipped cream might start to soften.
- Avoid freezing, as the gelatin texture will change and become watery upon thawing.
- If you need to prep in advance, assembling the whipped cream and jelly layers separately and combining just before serving helps keep things fresh.
The flavors tend to meld nicely after a few hours, making the parfaits even more harmonious. Just don’t wait too long or the whipped cream starts to weep a bit, which is a bummer but still tastes good!
Nutritional Information & Benefits
These festive 4th of July jello parfait cups offer a light, fun treat with modest calories — roughly 150-180 calories per serving depending on cream sweetness and portion size.
- Key Benefits: The gelatin provides a source of protein and may support joint health, while fresh blueberries add antioxidants and vitamin C.
- Dairy Content: Traditional recipe includes dairy, but can be adapted for lactose intolerance or vegan diets with coconut cream.
- Low Fat & Sugar Options: Use sugar-free gelatin and reduced sugar whipped cream alternatives to lighten the dessert further.
- Allergens: Contains dairy unless substituted; gelatin is derived from animal collagen—vegetarian alternatives require agar or plant-based gelatin.
From a wellness perspective, this recipe lets you enjoy a festive dessert without feeling weighed down, making it a great choice for summer celebrations where balance is key.
Conclusion
If you’re looking for a kid-friendly, colorful dessert that brings a little sparkle to your 4th of July festivities, these festive 4th of July jello parfait cups are a no-brainer. They’re simple enough to make with kids, impressive enough for guests, and packed with that nostalgic charm I can’t seem to shake since that summer day at Mrs. Jensen’s.
Feel free to tweak the flavors or layers to match your family’s favorite tastes — this recipe is yours to make your own. Honestly, I love how it turns a basic grocery store aisle find into a party-worthy treat that delivers smiles with every spoonful.
Give it a try, and let me know how your parfaits turned out — I’d love to hear your variations and celebrations! Sometimes, the best recipes are the ones that bring a little joy and a lot of memories to the table.
FAQs
Can I make these parfait cups ahead of time?
Yes! You can prepare the red and blue gelatin layers up to a day in advance. Add the whipped cream layer and toppings just before serving for the freshest taste and best texture.
What if I don’t have flavored gelatin mix?
You can use unflavored gelatin combined with fresh fruit juice or puree to create your own flavors, though the color might be less vibrant.
How do I prevent the whipped cream from melting when adding the blue jelly layer?
Let the blue gelatin cool to room temperature before gently pouring it over the whipped cream using the back of a spoon to slow the pour and protect the cream layer.
Can I use a dairy-free alternative for the whipped cream?
Absolutely! Coconut cream whipped with a bit of sugar and vanilla makes a delicious dairy-free substitute that whips up nicely.
What size cups work best for these parfaits?
Small clear plastic or glass cups around 6 oz (180 ml) are ideal for layering and serving individual portions.
Pin This Recipe!
Festive 4th of July Jello Parfait Cups Easy Kid-Friendly Recipe
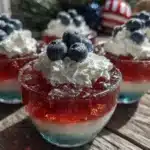
A colorful, layered jello parfait cup recipe perfect for 4th of July celebrations, combining red strawberry jello, fluffy white whipped cream, and blue raspberry jello with fresh blueberries for garnish. Easy to make and kid-friendly, this dessert captures nostalgic summer fun.
- Prep Time: 15 minutes
- Cook Time: 1 hour 45 minutes
- Total Time: 2 hours
- Yield: 6 servings 1x
- Category: Dessert
- Cuisine: American
Ingredients
- 1 package (3 oz / 85 g) strawberry or cherry flavored gelatin mix
- 1 cup (240 ml) boiling water
- 1 cup (240 ml) cold water
- 1 cup (240 ml) heavy whipping cream, cold
- 2 tablespoons powdered sugar (adjust to taste)
- 1 teaspoon vanilla extract
- 1 package (3 oz / 85 g) blue raspberry flavored gelatin mix
- 1 cup (240 ml) boiling water
- 1 cup (240 ml) cold water
- Fresh blueberries (for garnish)
- Optional: small star-shaped sprinkles for extra festive flair
Instructions
- Make the Red Jelly Layer: In a medium bowl, dissolve the strawberry or cherry gelatin powder in 1 cup boiling water. Stir gently until completely dissolved, about 2 minutes. Add 1 cup cold water and mix. Pour evenly into your cups, filling each about one-third full. Chill in the refrigerator for 45 minutes to 1 hour, or until set but still slightly tacky.
- Prepare the Whipped Cream Layer: While the red layer chills, whip the cold heavy cream with powdered sugar and vanilla extract using an electric mixer or whisk. Beat until soft peaks form. Once the red jelly is set, spoon or pipe a generous layer of whipped cream on top, filling another third of the cup.
- Make the Blue Jelly Layer: Repeat the gelatin process with the blue raspberry powder: dissolve in 1 cup boiling water, add 1 cup cold water, and stir well. Allow it to cool to room temperature but not set. Slowly pour the blue gelatin over the whipped cream layer using the back of a spoon to prevent breaking through. Chill for another 1 hour or until fully set.
- Add Toppings and Serve: Just before serving, garnish each parfait cup with fresh blueberries and optional star sprinkles.
Notes
Let each gelatin layer set properly before adding the next to maintain neat layers. Cool the blue gelatin to room temperature before pouring over whipped cream to prevent melting. Use cold heavy cream for best whipping results. Clear cups are recommended to see the layers. The red and blue layers can be made a day ahead; add whipped cream and toppings just before serving. Avoid freezing as gelatin texture will be affected.
Nutrition
- Serving Size: 1 parfait cup (about
- Calories: 150180
- Sugar: 13
- Sodium: 90
- Fat: 10
- Saturated Fat: 6
- Carbohydrates: 15
- Fiber: 1
- Protein: 2
Keywords: 4th of July, jello parfait, kid-friendly dessert, patriotic dessert, layered jello, whipped cream, blueberry, strawberry, easy summer dessert